Table of Contents
Advertisement
Quick Links
Introducing the USB 2.0 Switch
The USB 2.0 Switch is designed to share USB devices
between multiple systems.
Features and Benefits
•
Compliant with USB Specifications, Revision 2.0.
Hot-swapping feature allows you to attach/detach
USB devices without powering down your
computer
•
Use keyboard Hotkey control (PC only) or Power
LED/Manual Switching Button to switch between
computers
•
Designed for USB devices including printers,
scanners, external hard drive enclosures, cameras,
CD-ROMS and more. Note: Not designed to work
with keyboard or mouse.
System Requirements
•
PC or Mac
(USB 2.0 recommended)
•
Windows
(32-/64-bit) / Server 2003 & 2008 (32-/64-bit) /
2000/ ME / 98SE
•
Mac OS
04-0399C
USB 2.0 Switch
Quick Installation Guide
computer with an available USB port
®
7 (32-/64-bit) / Vista (32-/64-bit) / XP
®
X v10.0 or later
®
1
Advertisement
Table of Contents

Subscribe to Our Youtube Channel
Related Manuals for SIIG JU-SW2212-S1


Summary of Contents for SIIG JU-SW2212-S1
- Page 1 USB 2.0 Switch Quick Installation Guide Introducing the USB 2.0 Switch The USB 2.0 Switch is designed to share USB devices between multiple systems. Features and Benefits • Compliant with USB Specifications, Revision 2.0. Hot-swapping feature allows you to attach/detach...
-
Page 2: Package Contents
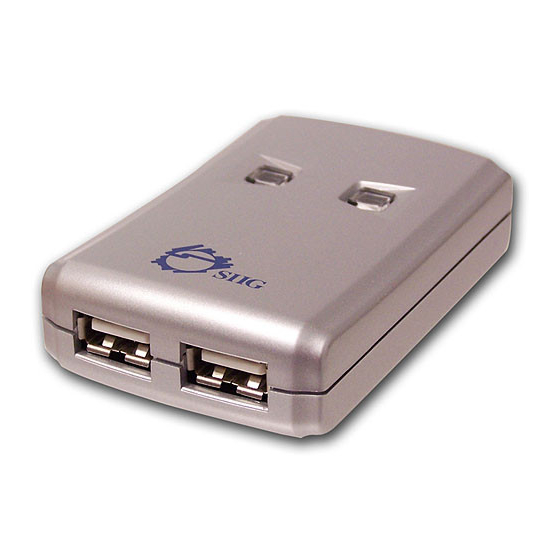
• Driver CD and Quick Installation Guide Layout Do Not plug the USB 2.0 Switch into your system until after the driver has been installed. Please refer to the Installation section starting on page 4 to install its driver. USB 2.0 Switch 2-to-2 •... - Page 3 • Two Type A connectors for device connection • Convenient Manual Switching Buttons To System (Type B connector) Figure 2. USB 2.0 Switch 4-to-2 Layout Power LED/Manual Switching Button To USB device (Type A connector) To System (Type B connector)
-
Page 4: Windows Installation
Windows Installation Important: Do not connect the USB 2.0 Switch to your system until after the driver has been installed. Windows 7 (32-/64-bit) / Windows Vista Insert the driver CD after Windows boots. At the AutoPlay box: Click Run Setup.exe If AutoPlay doesn't start: Click Start, in Start Search type D:\Setup.exe, press Enter. - Page 5 Plug the USB 2.0 Switch into an available USB port (USB 2.0 recommended) with the supplied USB cables and the driver will install automatically. Press the Power LED/Manual Switching Button that matches the system to complete the installation. Windows Server 2008 (32-/64-bit) Insert the driver CD after Windows boots.
-
Page 6: Windows 98Se
Click Next, Next, then Finish. Restart Windows. When Windows resumes, plug the USB 2.0 Switch into an available USB port (USB 2.0 recommended) with the supplied USB cables and the driver will install automatically. Press the Power LED/Manual Switching Button that matches the system to complete the installation. - Page 7 To Verify Windows Installation Go to Device Manager to verify installation. For Windows 7: Right click Computer, click Manage, then click Device Manager. For Windows Vista: Right click Computer, click Manage, click Continue, then click Device Manager. For Windows XP / Server 2003 / 2000: Right click My Computer, click Manage, then click Device Manager.
-
Page 8: Hotkey Control
Windows' Safely Remove Hardware feature, located in the taskbar, to Stop the USB device. Hotkey Control Press Ctrl+F11 to switch the USB device to the current system. Status Indicator The Status Indicator is located in the taskbar by the system clock. -
Page 9: Manual Switching
Mac OS Installation No driver installation is necessary. Simply plug the USB 2.0 Switch into an available USB port with the supplied USB cables (USB 2.0 recommended). Mac OS Device Switching Device switching is controlled by the Power LED/Manual Switching Button. -
Page 10: Other Devices
For other devices just press the switching button to change to another system. Connecting USB Devices Every USB device has it's own unique installation procedure. Therefore, it is recommended to read the device's installation manual before connecting it to the USB 2.0 Switch. -
Page 11: Technical Support And Warranty
Step 1: Submit your RMA request. Go to www.siig.com, click Support, then RMA to submit a request to SIIG RMA. If the product is determined to be defective, an RMA number will be issued. Step 2: After obtaining an RMA number, ship the product. - Page 12 Fremont, CA 94538-3152, USA Phone: 510-657-8688 USB 2.0 Switch is a trademark of SIIG, Inc. SIIG and the SIIG logo are registered trademarks of SIIG, Inc. Microsoft, Windows and Windows Vista are either registered trademarks or trademarks of Microsoft Corporation in the United States and/or other countries. Mac and Mac OS are registered trademarks of Apple Inc.
Need help?
Do you have a question about the JU-SW2212-S1 and is the answer not in the manual?
Questions and answers