Table of Contents
Advertisement
Quick Links
Model ATR360 Quick Start Setup
For complete instructions please reference the ATR360 User Manual,
website:
Initial Setup:
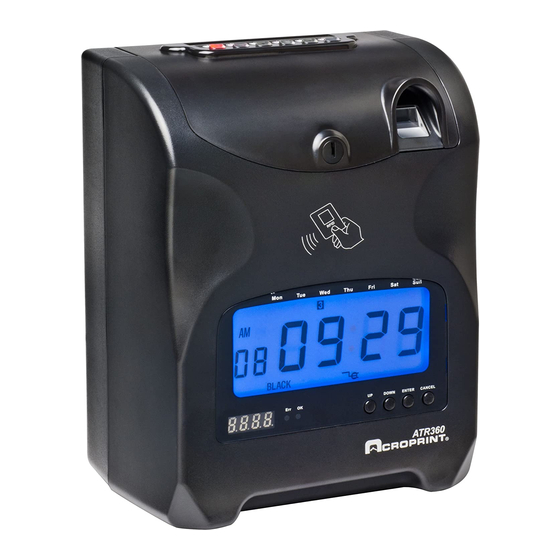
Remove top cover by turning clock key and pulling up, locate buttons at the top of the clock labeled P4, P5
and P6 and program switch to the left of the fingerprint reader. Move the switch to the down position, now
you are in setup mode.
•
P4 changes values down
•
P5 changes values up
•
P6 is used to save and select modes
Setting Year
•
The mode indicator "01" will be flashing, press P6 to select
•
Press P4 or P5 to select the current year and Press P6 to Save
Setting Month/Date
•
The mode indicator "02" will be flashing, press P6 to select
•
Press P4 or P5 to select the current month and Press P6 to Save
•
Press P4 or P5 to select the current date and Press P6 to Save
Setting Time
•
The mode indicator "03" will be flashing, press P6 to select
•
Press P4 or P5 to select the current hour and Press P6 to Save
•
Press P4 or P5 to select the current minute and Press P6 to Save
Setting Day Advance Time
•
The mode indicator "04" will be flashing, press P6 to select
•
Press P4 or P5 to select the current hour and Press P6 to Save
•
Press P4 or P5 to select the current minute and Press P6 to Save
Setting Card Format
•
The mode indicator "05" will be flashing, press P6 to select the format by pressing P4 or P5
Set 00 for first row blank - for weekly and bi-weekly pay periods
o
Set 01 prints on first row – for monthly and bi-monthly pay periods
o
•
Press P6 to save
Setting Pay Period
•
The mode indicator "06" will be flashing, press P6 to select the pay period type by pressing P4 or P5
If the pay period is monthly or bi-monthly select 00
o
If the pay period is weekly or bi-weekly select 01
o
•
Press P6 to save
Setting Clock Display Format
•
The mode indicator "07" will be flashing, Press P6 to select
•
Press P4 or P5 to select the clock display format (12-hour or 24-hour/military)
•
Press P6 to save
Setting Printing Position
•
The mode indicator "08" will be flashing, Press P6 to select (NOTE: OK to skip this step unless the printed
registration is not positioned well in the box.)
•
Press P4 or P5 to select
Set 00-15 for vertical axis
o
Set 00-30 for horizontal axis
o
•
Press P6 to save
www.acroprint.com
or call Service at 919-872-5800 Option 1.
Page 1 of 6
06‐0421‐000 Rev. B
Advertisement
Table of Contents

Related Manuals for Acroprint ATR360


Summary of Contents for Acroprint ATR360
-
Page 1: Initial Setup
Model ATR360 Quick Start Setup For complete instructions please reference the ATR360 User Manual, website: www.acroprint.com or call Service at 919-872-5800 Option 1. Initial Setup: Remove top cover by turning clock key and pulling up, locate buttons at the top of the clock labeled P4, P5 and P6 and program switch to the left of the fingerprint reader. - Page 2 Setting Start and End of DST • Set the Start Date of DST: The mode indicator “09” will be flashing, press P6 to select Press P4 or P5 to select the correct month (US-March) and Press P6 to save Press P4 or P5 to select the correct date and Press P6 to save (2 Sunday) Press P4 or p5 TO select the correct start time (US-2am) and Press P6 to save •...
- Page 3 • If you do not require a second or third fingerprint to be registered, press cancel and the next user will appear in the small display. To register a second and third fingerprint, see below. • The LED display will read F.P.2.1 – to register a second fingerprint follow the above steps, remember to use a different finger •...
- Page 4 Badge (Card) Setup • The user may also be issued a badge in place of using the fingerprint reader, set up follows the same procedure as entering a fingerprint (see above) • When ADD.U appears on the display press the enter button one time U001 will appear the first time - this is where you will enter the user number (001-150) 001 first 0 is blinking to change press up or down button press enter 001 second 0 is blinking to change press the up or down button press enter...
- Page 5 See diagram: In Out Shift Intervals Company Date ...
- Page 6 Using the Time Clock Using the Time Card to Clock In or Out • When clocking IN: P1, P3 or P5 must be selected • When clocking OUT: P2, P4 or P6 must be selected • Insert the time card with the current week facing you and the card in the upright position •...
Need help?
Do you have a question about the ATR360 and is the answer not in the manual?
Questions and answers