Table of Contents
Advertisement
Advertisement
Table of Contents

Related Manuals for Acroprint ATR240


Summary of Contents for Acroprint ATR240
-
Page 1: User Manual
ATR240 Top Loading Time Card Recorder User Manual... - Page 2 Lithium Battery Caution: The circuit board on this terminal is populated with a lithium battery to protect data or programs stored in the Random Access Memory (RAM). Do not, under any circumstances, attempt to replace the lithium battery in the terminal. Failure to comply may void your warranty.
-
Page 3: Table Of Contents
Maintenance ................11 Replacing the Ribbon Cassette ..........11 Replacing the Circuit Board Batteries........12 Installing the Operational Battery Pack.........13 Cleaning the ATR240............13 Appendix ................14 Connecting External Signal Devices (Bells & Horns) ...14 Wall Mounting Instructions............15 Supplies, Parts & Accessories ..........15 Acroprint®... -
Page 4: Before You Start
If this happens contact Acroprint Customer Service at (800) 334-7190. 3) Connect the ATR240 power adapter and plug it into a wall outlet to turn the clock on. Do not attempt to service the ATR240 yourself. Disassembling the clock will void the warranty. - Page 5 Time Recorder Mode Settings Mode Setting Values Default Value Year 2000 – 2099 Year of Mfg Date 1-12 Mo, 1-31 Date 01, 01 Time 1-23 Hr, 0-59 Min 12 : 00 End of Day Change Time 1-23 Hr, 0-59 Min 00 : 00 Set Card Format 00: first row blank...
-
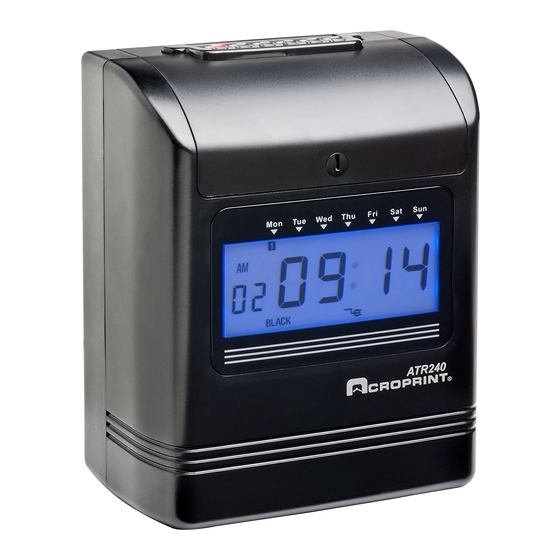
Page 6: Clock Overview
Clock Overview Top View Front View • Battery Status Indicator: A fully charged Battery will have (5) bars. • DST Icon: displays when exiting programming mode when DST is turned on. • Each blink of the colon is one sec. Page 3... -
Page 7: Rear View
Rear View Page 4... -
Page 8: Initial Setup
Initial Setup Setting Year 1. Remove top cover a. Locate buttons at the top of the clock labeled P4, P5 and P6 P4 changes values down P5 changes values up iii. P6 is used to save and select modes 2. Locate the Setup (programming) switch. Move the switch to the left position, you are now in setup mode 3. - Page 9 Setting Clock Display Format 24. The mode indicator “07” will be flashing, Press P6 to select 25. Press P4 or P5 to select the clock display format a. You can choose between the 12 hour or 24 hour (military time) format 26.
-
Page 10: Features And Specifications
Features and Specifications Clock Features Display Language English Operation Mode Stand-alone (No PC Interface) Operational Battery Backup Optional Auto Card Feeder Printing Method 9-Pin Dot Matrix Two Color Printing Perpetual Calendar Auto Fix Positioning Power Failure Printing Power Failure Memory Retention Display Format 12 or 24 hour Print Format... -
Page 11: Ribbon Life
The optional operational battery pack (58-0114-000) is a 12 cell NiMH (Nickel Metal Hydride) battery pack that recharges when the ATR240 is plugged in. In the event of a power failure the clock will instantly switch to battery power without any interruption in service. -
Page 12: Re-Setting Time Recorder To Factory Defaults
The clock motherboard needs to be replaced. keeps losing time Display Off, Defective Motherboard Clock has Contact Local Dealer or Acroprint for repair Power Defective LCD display The date is The date was not set correctly Set correct date incorrect... -
Page 13: Frequently Asked Questions
Correction: Contact your local dealer or Acroprint for repair. Q: Can my clock calculate the pay period total? A: No. The ATR240 does not offer time total calculation. Q: Why does the clock keep rejecting the time card? A: Check to see if the correct side of the Time Card is inserted. If Time Card Recognition is turned on your Monthly Time Card must be inserted with the current date on the front side. -
Page 14: Maintenance
A: Make sure the display time is synchronized to the RTC time. For more info on troubleshooting or general “how to” info go to: http://support.acroprint.com Maintenance Replacing the Ribbon Cassette 1. Open clock cover. Press [P3] to move the print head to the center of the clock so that the ribbon cassette can be more easily accessed. -
Page 15: Replacing The Circuit Board Batteries
Replacing the Circuit Board Batteries The ATR240 is equipped with (1) CR2032 3v Lithium Coin Cell battery on the Main board. The battery should last approximately 1.5 to 2 years under normal operating conditions. Do not attempt to replace the battery as it will void your warranty. If your clock is already out of warranty you can attempt to replace the batteries yourself but note that you could damage the board if you short out any components on the circuit board. -
Page 16: Installing The Operational Battery Pack
If the door won’t close check to make sure the wires aren’t under the battery. Plug in the power supply once the battery door is secure. The ATR240 should be plugged in for 12 hours to fully charge the battery pack. -
Page 17: Appendix
Gently pull on the wires to make sure they are firmly secured in the terminal block. In order to use a bell or horn a relay is required. Please call Acroprint or your Dealer to order the relay (PN 01-0230-000). -
Page 18: Wall Mounting Instructions
Wall Mounting Instructions The ATR240 can be placed on a table or desk and it can also be mounted to a wall. A mounting template is included with the documents for the ATR240. If you misplace the template you can download it at: http://support.acroprint.com... -
Page 19: Acroprint® Limited Warranty
Please return the warranty card on the following page to Acroprint to register your product. Or, if you would like to register online go to www.acroprint.com. -
Page 20: Product Registration Card
Product Registration Card Model No._______________________ Serial No._______________________ First Name______________________ Last Name______________________ Title____________________________________________________________ Company Name _________________________________________________ Address________________________________________________________ City_______________________ State________ Zip___________________ Daytime Phone with Area Code______________________________________ Purchased From___________________ Purchase Date________________ Email Address____________________________________________________ So that we may serve you better, please indicate your primary business activity. (01) Manufacturing (04) Government (02) Wholesale... - Page 21 06-0400-001 Rev. C...
Need help?
Do you have a question about the ATR240 and is the answer not in the manual?
Questions and answers