
Related Manuals for Audiovox HR7012


Summary of Contents for Audiovox HR7012
- Page 1 HR7012 ReaR Seat Video HeadReSt SyStem HR7012S HR7012 vAilAble in three configurAtions • Dual DVD Player DD7012 • Single DVD Player and Monitor DM7012 • Dual Monitor MM7012 owner’s manual...
-
Page 3: Table Of Contents
Playback of Media ������������������������������������������������������������������������������������������������������������������������������������������������33 DVD Region Codes � ����������������������������������������������������������������������������������������������������������������������������������������������37 Game Controller Operation � �����������������������������������������������������������������������������������������������������������������������������38 Troubleshooting ���������������������������������������������������������������������������������������������������������������������������������������������������39 Specifications � �������������������������������������������������������������������������������������������������������������������������������������������������������40 Compliance Information � �����������������������������������������������������������������������������������������������������������������������������������41 User Notes � �������������������������������������������������������������������������������������������������������������������������������������������������������������42 © 2012 Audiovox� All rights reserved� This manual, or any portion thereof, may not be reproduced without the express written permission of Audiovox�... - Page 4 HR7012 ReaR Seat Video HeadReSt SyStem owner’s manual...
-
Page 5: Welcome
HR7012 ReaR Seat Video HeadReSt SyStem owner’s manual WelCome Thank you for purchasing the HR7012 Rear Seat Video Headrest System� Before operating this system read this manual thoroughly and retain it for future reference� The HR7012 is a versatile Rear Seat Video The HR7012 Rear Seat Video Headrest Headrest System and is available in three System is set-up and adjusted with easy The different configurations (please refer to HR 7012 Rear Seat Video Headrest System is page 2 for a detailed description of each set-up and adjusted with easy to use menus of the configurations)� Each of the three... -
Page 6: Hr7012 Rear Seat Video Headrest System Configurations
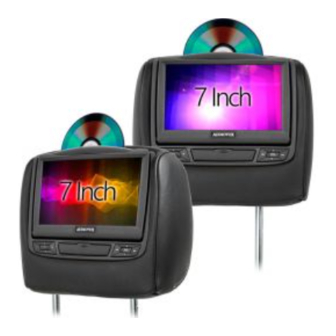
HR7012 ReaR Seat Video HeadReSt SyStem owner’s manual HR7012 ReaR Seat Video HeadReSt SyStem ConfiguRationS Available in three configurations as follows: Configuration 1: Model DD7012 Two 7” LCD monitors with a built-in DVD player (HR7012M) (Figure 1.) HR7012m HR7012m (m1) (m2) figure 1 Configuration 2: Model DM7012 One 7” LCD monitor with a built-in DVD player (HR7012M) and One 7” LCD monitor (screen only) (HR7012S) (Figure 2.) NOTE: When the M2 Monitor is set to the M1 source and to “AUTO ON”, M2 will turn ON automatically when M1 is in playback mode. -
Page 7: Product Features
HR7012 ReaR Seat Video HeadReSt SyStem owner’s manual PRoduCt featuReS The HR7012 Rear Seat Video Headrest System consists of: 5� T wo sets Audio/Video (AUX) 1� T wo factory matched Headrests with Signal Input Jacks (yellow, white 7-inch Color TFT-LCD Display Screen and red) used to connect items (800x480) 16:9 aspect ratio� (See... -
Page 8: Cautions
HR7012 ReaR Seat Video HeadReSt SyStem owner’s manual CautionS Important Notice Safety Precaution An LCD Panel and/or Video Monitor may be For safety reasons, when changing a video installed in a motor vehicle and visible to the disc it is recommended that the vehicle driver if the LCD Panel or Video Monitor is... -
Page 9: Quick Start Guide
HR7012 ReaR Seat Video HeadReSt SyStem owner’s manual QuiCk StaRt guide Turn ON the Monitors (M1 and M2)� 1� Press the Power ON/OFF button� The 5� When the DVD menu appears, select power indicator will light up red� the menu item using the UP/DOWN buttons and press Enter or Play button� 2� Insert a DVD, CD, MP3 disc into the disc slot located on top of the M1 monitor 6�... -
Page 10: General Operating Instructions
HR7012 ReaR Seat Video HeadReSt SyStem owner’s manual geneRal oPeRating inStRuCtionS For best disc operation , it is important that • If disc is not clean, use a commercially you read this section completely� available cleaning cloth to gently wipe the disc from the center out� (Figure 4) dVd Region Coding Note: Do not use solvents such as benzene,... -
Page 11: Front Panel Controls
HR7012 ReaR Seat Video HeadReSt SyStem owner’s manual fRont Panel ContRolS HR7012m AUDIO VEDIO AUDIO figure 5 1. DVD disc insertion slot 8. AUX jacks (RCA Type) (Figures 5 and 6). T he Jacks are intended for temporary connection of an additional AV source 2. - Page 12 HR7012 ReaR Seat Video HeadReSt SyStem owner’s manual fRont Panel ContRolS (continued) HR7012S AUDIO VEDIO AUDIO figure 6 11. 1/8”Wired Headset/earbud Output jacks 17. PIX Button (HR7012S) This button is used to control levels of These jacks are used to connect two...
-
Page 13: Remote Control And Headphone Battery Installation
HR7012 ReaR Seat Video HeadReSt SyStem owner’s manual Remote ContRol and HeadPHone batteRy inStallation installation of the Remote Control battery The remote control comes with a battery already installed with a Pull Tab to prevent battery discharge� Remove the Pull Tab before attempting to use the remote� (Figure 7)� Note: The remote control will only operate this device. It is not a universal remote control and will not control other equipment. -
Page 14: Headphone Battery Installation
HR7012 ReaR Seat Video HeadReSt SyStem owner’s manual HeadPHone batteRy inStallation installation of the Headphone batteries The wireless IR headphone unit requires two AAA batteries� 1� Locate the battery compartment cover on the left earphone� 2� While holding the left earphone in one hand, press down on the battery compartment cover and slide it UP and OFF in the direction shown� (Figure 10) 3� Insert two AAA batteries (included), carefully following the markings inside to ensure the ” ends in the correct positions�) batteries are inserted properly ( “+”and “ 4� Replace the battery compartment cover� (Figure 10) figure 10... -
Page 15: Battery Cautions And Warnings
HR7012 ReaR Seat Video HeadReSt SyStem owner’s manual batteRy CautionS and WaRningS Cautions and Warnings • Always keep the monitors, remote control • Use two AAA(1�5v) Alkaline batteries and headphones clean and dry� each the headphones� Do not use different types. • Always seek qualified personnel to perform repairs to the system or individual • Do not use old batteries in the remote components of the system� Never attempt... -
Page 16: Remote Control Operation
HR7012 ReaR Seat Video HeadReSt SyStem owner’s manual Remote ContRol oPeRation figure 11... -
Page 17: System Menu
HR7012 ReaR Seat Video HeadReSt SyStem owner’s manual Remote ContRol oPeRation (continued) 1. (m1) monitor Select 9. uP/doWn/left/RigHt arrows Press this button to select and control P ress these buttons to navigate the HR7012M (M1) Monitor� (Figure 11) menu selection on the screen� (Figure 11) 2. PoWeR 10. diSPlay Press this button to turn the system ON�... - Page 18 HR7012 ReaR Seat Video HeadReSt SyStem owner’s manual Remote ContRol oPeRation (continued) figure 12...
- Page 19 HR7012 ReaR Seat Video HeadReSt SyStem owner’s manual Remote ContRol oPeRation (continued) 18. StoP 24. RePeat P ress this button stop P ress this button to switch the repeat playback of disc� (Figure 12) mode by CHAPTER, TITLE, ALL and cancel while playing DVD-video� Other 19.
-
Page 20: System Setup Menu
HR7012 ReaR Seat Video HeadReSt SyStem owner’s manual SyStem menu The System Menu allows the user to personalize the HR7012 settings� It is used in the initial setup to adjust the picture quality and customize an adjustable functions� Once the initial settings are customized, they will remain the same until modified or reset to the factory default settings� NOTE: System Menu changes are best made without a DVD inserted into the unit. This section describes how to adjust and set settings using the six setup screens (Figure 13): 1� VOLUME CONTROL 4� OSD LANGUAGE 2� PICTURE CONTROL 5� IRT ON/OFF 3� FM MODULATOR (M1 Only) 6�... - Page 21 HR7012 ReaR Seat Video HeadReSt SyStem owner’s manual SyStem SetuP menu (continued) SyStem Sub-menuS 1� P ress the SySTEM MENU button on the remote control (Figure 14) or Press and hold the MENU/SELECT button on the front panel of the system for 3 to 5 seconds (Figure 15) to show the SySTEM MENU�...
-
Page 22: System Setup Sub-Menus
HR7012 ReaR Seat Video HeadReSt SyStem owner’s manual SyStem SetuP Sub-menuS Volume ContRol (Wired Headphones only) (HR7012m) (HR7012S) figure 16 Volume ContRol from the front Panel (m1 and m2) (figure 16): 1� P ress and hold the MENU/SELECT button on the front panel of the system (Figure 15) for 3 to 5 seconds to show the System Menu� (Figure 13) Use the UP/DOWN direction buttons to select Volume Control and press the 2�... -
Page 23: Picture Control
HR7012 ReaR Seat Video HeadReSt SyStem owner’s manual SyStem SetuP Sub-menuS (continued) PiCtuRe ContRol Note: Picture control settings for DVD (HR7012m) mode are separate from the other A/V sources� After adjusting the DVD picture controls, the user can make separate settings for the other A/V sources� (HR7012S) figure 18 PiCtuRe ContRol from the front Panel (m1 and m2) (figure 18): 1� P ress and hold the MENU/SELECT button on the front panel of the system (Figure 15) for 3 to 5 seconds to show the System Menu� (Figure 13) 2� U se the UP/DOWN direction buttons to select Picture Control and press the... - Page 24 HR7012 ReaR Seat Video HeadReSt SyStem owner’s manual SyStem SetuP Sub-menuS (continued) fm modulatoR (HR7012m) figure 19 fm modulatoR on/off from the front Panel (figure 19): 1� P ress and hold the MENU/SELECT button on the front panel of the system for 3 to 5 seconds to show the System Menu� (Figure 13)
- Page 25 HR7012 ReaR Seat Video HeadReSt SyStem owner’s manual SyStem SetuP Sub-menuS (continued) fm CHannel HR7012m (m1 only) HR7012S (m1 only) SYSTEM MENU SYSTEM MENU VOLUME CONTROL VOLUME CONTROL PICTURE CONTROL PICTURE CONTROL FM MODULATOR FM MODULATOR OSD LANGUAGE OSD LANGUAGE...
- Page 26 HR7012 ReaR Seat Video HeadReSt SyStem owner’s manual SyStem SetuP Sub-menuS (continued) fm Channel from the Remote Control (figure 21): 1� Select “M1” on the Remote Control� Press the System Menu button then use the UP/DOWN direction buttons to select 2� FM Modulator and press the Enter button to enter the FM Modulator sub-menu� U se the UP/DOWN/LEFT and RIGHT direction buttons to select the best channel/ 3�...
-
Page 27: Osd Language
HR7012 ReaR Seat Video HeadReSt SyStem owner’s manual SyStem SetuP Sub-menuS (continued) oSd language HR7012m (m1) HR7012S (m2) figure 22 oSd language from the front Panel (m1 and m2) (figure 22): 1� P ress and hold the MENU/SELECT button on the front panel of the system (Figure 15) for to 5 seconds to show the System Menu� U se the UP/DOWN direction buttons to select OSD Language and press the MENU/ 2�... - Page 28 HR7012 ReaR Seat Video HeadReSt SyStem owner’s manual SyStem SetuP Sub-menuS (continued) iRt on/off HR7012m (m1) HR7012S (m2) figure 23 iRiRt on/off (m1 and m2) from the front Panel(figure 23): 1� P ress and hold the MENU/SELECT button on the front panel (Figure 15) of the system for 3 to 5 seconds to show the System Menu� 2� U se the UP/DOWN direction buttons to select IRT ON/OFF and press the MENU/SELECT button to enter the sub-menu�...
- Page 29 HR7012 ReaR Seat Video HeadReSt SyStem owner’s manual SyStem SetuP Sub-menuS (continued) default dVd on/off (model dd7012) HR7012m (m1) HR7012m (m2) figure 24 With the “Default DVD ON” feature selected, the unit will default to DVD Mode each time the system is turned ON� For example, if the user is playing a game and the system is turned OFF, the next time the system is turned ON, it will power-up in DVD Mode.
- Page 30 HR7012 ReaR Seat Video HeadReSt SyStem owner’s manual SyStem SetuP Sub-menuS (continued) default auto on/off (model mm7012) HR7012S (m1) SYSTEM MENU SYSTEM MENU VOLUME CONTROL VOLUME CONTROL PICTURE CONTROL PICTURE CONTROL FM MODULATOR FM MODULATOR OSD LANGUAGE OSD LANGUAGE IRT ON/OFF...
-
Page 31: Dvd Playback Settings And Adjustments
HR7012 ReaR Seat Video HeadReSt SyStem owner’s manual dVd PlaybaCk SettingS and adJuStmentS The DVD Playback Setup Menu contains features and options that allows the user to customize the DVD player� For example, the user can set a language for the on-screen display or prevent DVD playback for children� uSing tHe SetuP button on tHe Remote ContRol 1� Press the SETUP button on the remote� The DVD Setup Menu appears on the screen with four major setup option pages� (Figure 25) figure 26 2� Use the UP/DOWN direction buttons to highlight the desired setup option page� figure 27 3� Use the RIGHT direction button to enter the desired setup option page� 4� Use the UP/DOWN direction buttons to select the desired options and press Enter to confirm the selection�... -
Page 32: Language Setup
HR7012 ReaR Seat Video HeadReSt SyStem owner’s manual SettingS and adJuStmentS (continued) language SetuP Language (for On-Screen Display (OSD): The Language setup option page allows the user to select the language for the OSD� The user can either select English, French, Spanish, German or Italian for the OSD language� (Figure 28) figure 28 Subtitle: The Subtitle setup option page allows the user to select the language for the OSD� The user can either select English, French, Spanish, German, Italian, Chinese, Japanese, Thai or OFF to be displayed on the screen during playback of a disc�(Figure 26) -
Page 33: Video Setup
HR7012 ReaR Seat Video HeadReSt SyStem owner’s manual dVd PlaybaCk SettingS and adJuStmentS (continued) Video SetuP TV Display: The TV Display setup option page allows the user to adjust screen aspect ratio to either 4:3 or 16:9� (Figure 31) 4 :3) D isplays a wide picture with black bands on the upper and lower portions of the screen� 1 6:9) D isplays a wide picture with black bands on the upper and lower portion of the screen� The bandwidth will vary, depending on the aspect ratio of the disc�... -
Page 34: Rating Setup
HR7012 ReaR Seat Video HeadReSt SyStem owner’s manual SettingS and adJuStmentS (continued) Rating SetuP Rating: The Rating setup option page allows the user to limit the content of movie playback (G, PG, PG–13, R, NC– 7 and Adult)� The lower the value, the more strict the control� The rating level can only be changed using a parental control password� For first time use the default parental control password is 3308 using UP directional button to enter parental mode, key in the default password (3308) and press ENTER� Press ENTER again to select the parental level, select the level and press ENTER (Figure 33)� To change the password to your own password press “Change Password” mode and enter the default password (3308) and press ENTER� Press ENTER and again and key in a new four digit password� After complete press ENTER to end the process� (Figure 34) Note: The Default Password is 3308. This password is always effective even after you have selected your own password and changed it. - Page 35 HR7012 ReaR Seat Video HeadReSt SyStem owner’s manual SettingS and adJuStmentS (continued) misc SetuP misc Setup: Select “MISC” using the UP/DOWN direction buttons, then press the RIGHT direction button to enter the Misc menu� Select the subtitle you desire using the UP/DOWN direction buttons, then press “ENTER” to confirm the setting� Press the LEFT direction button to return� (Figure 35) figure 35 load factory: Load Factory allows you to reset all options to factory settings� * This function will not affect the Rating control settings� (Figure 36) figure 36 Screen Saver...
-
Page 36: Disc Basics
HR7012 ReaR Seat Video HeadReSt SyStem owner’s manual diSC baSiCS To get the optimum use out of the DVD player, make sure you read this section completely� types of discs your dVd Player will play • DVD* disc - DVD discs that contain video� • Audio disc - Audio CDs that contain musical or sound content only� • MP3 disc - A disc that contains audio files (for example, a CD-R with downloaded MP3 files)� *This system is capable of playing most recordable DVD formats� However, due to the variety of disc manufacturers and software, playback cannot be guaranteed�... -
Page 37: Playback Of Media
HR7012 ReaR Seat Video HeadReSt SyStem owner’s manual PlaybaCk of media Playing dVd’s 1� Press the DISPLAy button on the remote control to display the status banner� The banner include Title, Chapter, Angle, Audio, Subtitle, Audio, Subtitle, Title selection & Chapter selection�... - Page 38 HR7012 ReaR Seat Video HeadReSt SyStem owner’s manual PlaybaCk of media (continued) Skipping Songs Use the NEXT button on the remote control to move to the next song� Use the Previous button to move to the previous song� Selecting a Play mode filter (for mP3 & JPeg only) Filter Mode enables or disables the display of files contained on the media based on their file extension� (Figure 38) The filter function applies to the following formats: audio - Audio data format (MP3, WMA) Photo - Photo data format (JPEG) Video - Video data format (MPEG , ) figure 38 flat mode: play the entire disc This mode is always on (default)� During the Flat Mode, all the data folder with MP3, JPEG &...
- Page 39 HR7012 ReaR Seat Video HeadReSt SyStem owner’s manual PlaybaCk of media (continued) Repeat: Play Repetitively Repeat function has 4 options : Off, Single, Folder and All� Move cursor to Repeat Function and press ENTER, each time ENTER is pressed the unit will cycle through the available options (Off/Single/Folder and All are displayed in that order)� Repeat default is OFF; (Figure 40) off Turn off repeat function Single Repeat the song being played until STOP is pressed� folder Play all songs in a folder repetitively all Play all songs on the disc repetitively figure 40 mode: Play mode The Mode function has 4 options: Normal, Shuffle, Random and Music Intro� Move cursor...
- Page 40 HR7012 ReaR Seat Video HeadReSt SyStem owner’s manual PlaybaCk of media (continued) add to program method: To add the selected songs into Browser view, make sure disc playback is OFF� Move cursor to “Edit Mode” function and press ENTER� After “Edit Mode” is selected, move cursor to songs list and select the songs which will be compiled and press ENTER� A check mark appears to the left of the selected song; to add the selected songs to the program, move cursor to the “Add to Program” function and press ENTER� The selected songs is added into a new program list and the check mark will disappear on play list, move cursor to “Program View” function and press ENTER to browse the songs in the program� Press PLAy button to play the selected songs� (Figure 42) Note: Edit Mode, Program View or Add to Program functions are relationship related when selecting the preferred song add to the songs list.
-
Page 41: Dvd Region Codes
HR7012 ReaR Seat Video HeadReSt SyStem owner’s manual dVd Region CodeS The DVD player is preset to a region code at the factory depending on where the DVD player is sold� DVDs from a different region cannot be played in this unit and the unit will display “WRONG REGION”� (Figure 44) figure 44 Region 1- USA, Canada Region 2- Japan, Europe, South Africa, Middle East, Greenland Region 3- S� Korea, Taiwan, Hong Kong, Parts of South East Asia Region 4- Australia, New Zealand, Latin America (including Mexico) Region 5- Eastern Europe, Russia, India, Africa Region 6- China... -
Page 42: Game Controller Operation
HR7012 ReaR Seat Video HeadReSt SyStem owner’s manual game ContRolleR oPeRation battery installation (figure 45) Bottom Side of Game Controller Before attempting to operate your game Battery Case controller, install the batteries as described below: 1� T urn the game controller face down� Using a finger, slide battery cover off in 1.5V AAA 1.5V AAA the direction of the arrow� 2� I nstall three “AAA” batteries� Make sure that the proper polarity (+ or -) is observed� 3� A lign the cover tabs with the game controller and slide the cover until it locks�... -
Page 43: Troubleshooting
HR7012 ReaR Seat Video HeadReSt SyStem owner’s manual tRoubleSHooting Symptom Remedy Device does not power “ON” • Is the ignition turned “ON”? • Is the screen rotated to the operating position? • Are batteries installed in remote control? IR sensor inoperative • Verify that the batteries in the remote control are good� • Verify that the remote sensor eye is not obstructed� • Verify that M1 or M2 has been selected correctly� Disc won’t play • Insert a disc with label side facing toward user� • Check if the disc is defective by trying another disc� • Check the type of disc you put into DVD compartment slot� This DVD player only plays DVDs, audio CDs, and MP3s� It will not play a Blu-ray disc� • Both the device and the disc are coded by region� If the regional codes don’t match, the disc can’t be played� Disc plays, but then stops • The disc is dirty and needs cleaning�... -
Page 44: Specifications
HR7012 ReaR Seat Video HeadReSt SyStem owner’s manual SPeCifiCationS Monitor Specifications Type TFT Active Matrix LCD Resolution 2400 (W) x 480 (H) Pixels 1,152,000 Back Light Power Source +12 VDC Power Consumption Operating Temperature 32°F ~ 125°F (0°C ~ +55°C) Storage Temperature -22°F ~ 150°F (-20°C ~ +70°C) Video Display System NTSC/PAL Back Light Life 20,000 hours Headphone Audio Output 0�03W @ 32 ohm... -
Page 45: Compliance Information
HR7012 ReaR Seat Video HeadReSt SyStem owner’s manual ComPlianCe infoRmation FCC Notice Notice This device has been tested and found to Disposal of Old Electrical & Electronic comply with the limits for a Class B digital Equipment (Applicable in the European... -
Page 46: User Notes
HR7012 ReaR Seat Video HeadReSt SyStem owner’s manual uSeR noteS... - Page 47 HR7012 ReaR Seat Video HeadReSt SyStem owner’s manual...
- Page 48 If you have any questions regarding this product or require technical assistance, please call 1-800-225-6074 © 2012 audioVoX,150 marcus blvd. Hauppauge, ny 11788 128-9046...
Need help?
Do you have a question about the HR7012 and is the answer not in the manual?
Questions and answers