Table of Contents
Advertisement
Quick Links
Advertisement
Table of Contents

Related Manuals for Doro 520


Summary of Contents for Doro 520
- Page 1 ������ �� �������� ����� Manual doro 520...
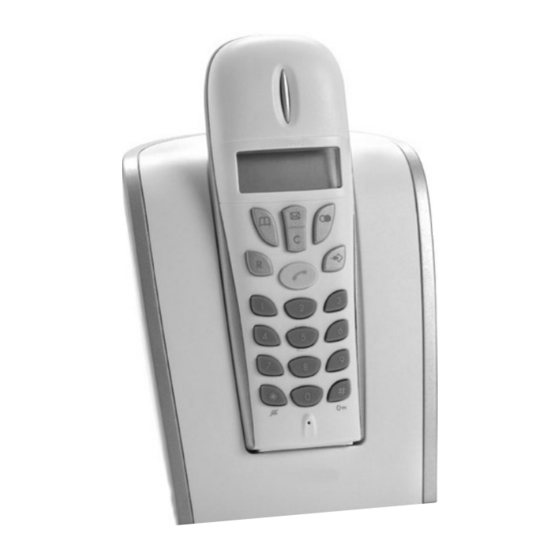
- Page 3 English (see p. 4-19) 1 Memory button 6 Erase/Mute button 7 Programming button 2 Recall/Intercom button 8 Redial button 3 Talk/Call end button 9 Caller Identifi cation (CID) button /Ringer signal (on/off) button /Key Lock button...
-
Page 4: Table Of Contents
English Index Installation Expanded system (520+1)16 Unpacking......5 Base Unit Placement ..16 Connection ......5 Intercom......16 Belt Clip ......6 Transferring Calls Between Wall Mounting ..... 6 Handsets ......16 Range ......... 6 Battery ........ 7 Troubleshooting ....17 Battery Charge Indicator .. -
Page 5: Installation
Do not place the base unit in areas of high humidity of where it will be exposed to direct sunlight or other major heat sources. Only use with the supplied power adapter/s. www.doro.com... -
Page 6: Belt Clip
To reduce the risk of possible interference please do not locate the base unit near any electrical equipment e.g. TV’s, computers, fridge’s, telecom equipment etc or close to radiators, metal pipes or window frames. Also ensure the base unit is not exposed to direct sunlight, excessive heat, damp or high humidity locations. www.doro.com www.doro.com... -
Page 7: Battery
When the telephone is installed for the fi rst time, the battery pack must be charged for 24 hours before using the telephone. Use DORO original batteries only. The guarantee does not cover any damage caused by installing incorrect batteries. The handset is charged with the keypad facing outwards. -
Page 8: The Display
The signal will stop automatically after a while or if the button on the button on the handset is pressed. The page can also be cancelled by pressing on the base again. www.doro.com www.doro.com... -
Page 9: Operation
2. Deactivate the key lock by pressing and holding N again until is no longer displayed. Calls can still be received, even if the key lock is active. When the call is fi nished, the handset returns to locked mode. www.doro.com... -
Page 10: Mute Button
3. Repeatedly press to delete the displayed number. 4. Enter the new telephone number. 5. Press to confi rm. º Erasing ALL Stored Telephone Numbers 1. Press º 2. Press 3. Press 4. Press º www.doro.com www.doro.com... -
Page 11: Caller Identifi Cation
The number is longer than the display size (>12 digits). End of list. Erasing Numbers 1. Repeatedly press until the required telephone number is displayed. 2. Press and hold until you hear a beep. Erasing All Numbers 1. Press º 2. Press 3. Press 5. 4. Press º www.doro.com... -
Page 12: Network Voice Mail
Press º º Please Note! In order for the network voice mail to operate, you must subscribe to this service and/or have it activated by your network operator. Contact your operator for more information. www.doro.com www.doro.com... -
Page 13: Settings
4. Select the required setting by pressing the corresponding keypad digit 5. Press to confi rm settings. º To turn the ringer off, in standby press and hold until is displayed. To turn the ringer on, again press and hold until is no longer displayed. www.doro.com... -
Page 14: Direct Dialling
2. Press 3. The current setting will be displayed (1 ┘ 2=100 ms, 2 ┘ 2=300 ms (600 ms for AU/NZ only). 4. Select the required setting by pressing the corresponding keypad digit 5. Press to confi rm settings. º www.doro.com... -
Page 15: Pin Number
º Reset Handset Defaults You can reset most of the functions and settings of the handset back to the factory default settings. 1. Press º 2. Press 3. Enter the telephones PIN number (0000 when supplied). Press º www.doro.com... -
Page 16: Expanded System (520+1)16
English Expanded system (520+1) Base Unit Placement The base unit should be centrally positioned so that the area covered is roughly equal for both handsets. It is NOT possible to add extra handsets at a later time. Intercom When using handsets with the same base unit, calls can be made internally between the handsets, referred to as internal calls, or intercom. -
Page 17: Troubleshooting
If that phone works, then it is likely that the equipment is faulty. Proof of purchase such as the receipt or a copy of the invoice will be required for service or assistance if the above does not resolve the problem. www.doro.com... -
Page 18: Other
9AM - 5PM Monday-Friday excluding Bank Holidays. Alterna- tively, E-mail on: tech@doro-uk.com You can contact us in writing: Consumer Support Group, Doro UK Ltd., 22 Walkers Road, North Moons Moat, Redditch, Worcestershire, B98 9HE, (regarding any Spares or Technical query), or Telephoning Spares: 01527 584377 Web site: www.doro-uk.com... -
Page 19: Australia And New Zealand
(As a matter of precaution, we recommend disconnecting the telephone during a thunderstorm). This guarantee does not affect your statutory rights. AUSTRALIA NEW ZEALAND DORO Australia Pty Ltd Atlas Gentech (NZ) Limited PO Box 6760 Private Bag 14927 Baulkham Hills BC NSW 2153... -
Page 20: Notes For Operation In New Zealand
If a charge for local calls is unacceptable, the “DIAL“ button should NOT be used for local calls. Only the 7 digits of the local number should be dialled from your telephone. DO NOT dial the area code digit or the “0“ prefi x. www.doro.com www.doro.com... - Page 24 English Version 1.4...
Need help?
Do you have a question about the 520 and is the answer not in the manual?
Questions and answers