Advertisement
Advertisement
Table of Contents

Related Manuals for Boyo VTL275HDL


Summary of Contents for Boyo VTL275HDL
-
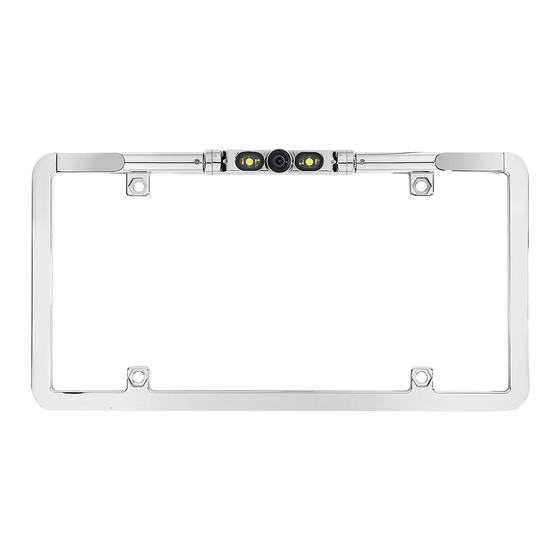
Page 1: Rear View Camera
Rear View Camera * Model... - Page 2 Before Use/ Installation Procedure NOTE WARNING CAUTION To prevent damage to the product, take the following precautions: Care and maintenance...
- Page 3 1. Package Table of contents Rear View Camera 1. Package ------------------------------------------------------------ 5 * Model 2. Recommended Installation Position --------------------- 6~7 3. Wring Connections ---------------------------------------------- 8 Camera x1 manual x1 M6 Hex bolt x4 4. Camera Setting -----------------------------------------------8~9 5. Viewing Modes ---------------------------------------------10~12 6.
-
Page 4: Camera Setting
2. Recommended Installation Position 2. Recommended Installation Position 2-1 Examples of correct camera installation 2-2 Installing the Switch Unit 1. Clean the switch unit installation surface. 2. Attach velcro tape on the bottom of the switch unit and then attach it in an easy-to-operate position, for example near the dashboard on the driver seat side. - Page 5 3. Wring Connections 4. Camera Setting 3-1. Basic Connections 4-2. Preparation Before Camera Setting 1. Stop the vehicle. 2. Advance the vehicle. Video cord 4. Camera Setting 4-1. Switch Unit Operation...
-
Page 6: Viewing Modes
5. Viewing Modes 5. Viewing Modes 5-1. Use the “SET” button to cycle through the different viewing modes. 5-2. Features on/off Turning on and off the mirror imaging While the camera is on any of the viewing modes 1 through 6, press the “LEFT” button to turn Viewing mode #1 (LDC) Viewing mode #2 on or off the mirror imaging. -
Page 7: Viewing Modes
5. Viewing Modes 6. Dimension(inch) Turning on and off the LED lights While the camera is on any of the viewing modes 1 through 6, press the “DOWN” button to turn on or off LED lights. (LED Off) (LED On) 5-3. -
Page 8: Dimension(Inch)
6. Dimension(inch) 7. Specification MODEL Model VTL275HDL,VTL375HDL,VTL405HDL,VTL425HDL DC12V(Tolerence : 10V~20V -> Inrush voltage 24V Max) Power source 70mA(LED Off), 580mA(LED On) Image sensor 1/3.7" progressive scan CMOS SENSOR Scanning system Progressive scan H.Resolution 720 x 480 S/N Ratio 50dB(AGC OFF)
Need help?
Do you have a question about the VTL275HDL and is the answer not in the manual?
Questions and answers