Table of Contents
Advertisement
Available languages
Available languages
Quick Links
Download this manual
See also:
User Manual
Owner's Operator and Maintenance Manual
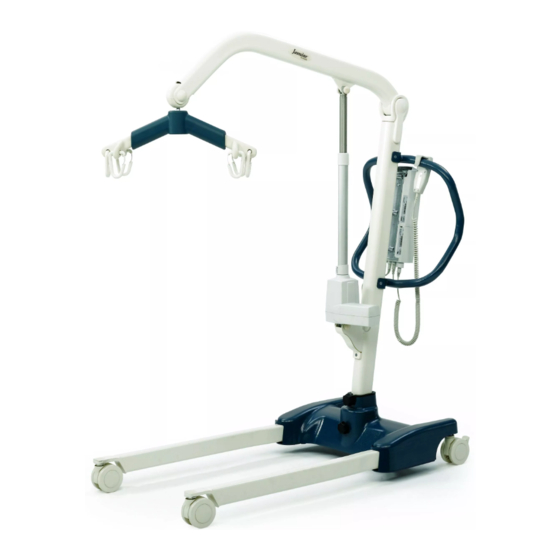
Jasmine™ Patient Lift
DEALER: This manual MUST be given to
the user of this product.
USER: BEFORE using this product, read this
manual and save for future reference.
For more information regarding
Invacare products, parts, and services,
please visit www.invacare.com
Advertisement
Chapters
Table of Contents
Troubleshooting

Related Manuals for Invacare JASMINE


Summary of Contents for Invacare JASMINE
- Page 1 Jasmine™ Patient Lift DEALER: This manual MUST be given to the user of this product. USER: BEFORE using this product, read this manual and save for future reference. For more information regarding Invacare products, parts, and services, please visit www.invacare.com...
-
Page 2: Symbol Legend
DAMAGE MAY RESULT. ACCESSORIES WARNING Invacare products are specifically designed and manufactured for use in conjunction with Invac- are accessories. Accessories designed by other manufacturers have not been tested by Invacare and are not recommended for use with Invacare products. -
Page 3: Table Of Contents
TABLE OF CONTENTS TABLE OF CONTENTS SYMBOL LEGEND ....................2 SPECIAL NOTES ....................5 LABEL LOCATION ..................... 6 PRODUCT PARAMETERS .................. 7 Jasmine Patient Lift.................................7 Jasmine Scale JLS5...................................7 SECTION 1—GENERAL GUIDELINES ..............8 Assembling the Lift.................................8 Weight Limitation ..................................8 Assembling the Lift.................................8 Using the Sling..................................8... - Page 4 Checking and Tightening Mast Pivot..........................26 SECTION 8—ACCESSORIES ................27 Jasmine Scale JLS5................................27 Removing the Swivel Bar/Cradle Attachment......................27 Installing the Jasmine Scale............................28 Operating the Scale ................................29 Keypad Functions................................29 Weighing the Patient ................................29 Replacing the Battery ................................. 30 Calibrating the Jasmine Scale............................
-
Page 5: Special Notes
If RFI causes erratic behavior, PUSH the RED Power Switch OFF IMMEDIATELY. DO NOT turn the Power Switch ON while transmission is in progress. MAINTENANCE Maintenance MUST be performed ONLY by qualified personnel. Part No 1150704 Jasmine™ Patient Lift... -
Page 6: Label Location
MUST be checked at SLINGS and LIFT ACCESSORIES. least every six (6) months 1154553 REV. A Small Medium Large in conjunction with periodic Navy Purple Green Blue Black maintenance. See Owner's Manual. P/N 1130200 Rev. B Jasmine™ Patient Lift Part No 1150704... -
Page 7: Product Parameters
PRODUCT PARAMETERS PRODUCT PARAMETERS Jasmine Patient Lift Height at Sling Hook-up - MAX.: 74.6 inches Height at Sling Hook-up - MIN.: 16.4 inches Base Width OPEN: 46.7 inches Base Width CLOSED: 25.8 inches Base Height (Clearance): 4.8 inches Base Length:... -
Page 8: Section 1-General Guidelines
Assembling the Lift DO NOT overtighten mounting hardware. This will damage mounting brackets. Weight Limitation DO NOT exceed the maximum weight limitation of the patient lift. The weight limitation for the Jasmine Patient Lift is 500 lbs. Using the Sling The Jasmine Patient Lift can be used with the standard swivel bar or an optional cradle attachment. The tilting cradle attachment enables a single caregiver to more easily position a patient in an upright and seated position. Use an Invacare approved sling that is recommended by the individual’s doctor, nurse or medical assistant for the comfort and safety of the individual being lifted. After each laundering (in accordance with instructions on the sling), inspect sling(s) for wear, tears, and loose stitching. Bleached, torn, cut, frayed, or broken slings are unsafe and could result in injury. Discard IMMEDIATELY. DO NOT alter slings. Be sure to check the sling attachments each time the sling is removed and replaced, to ensure that it is properly attached before the patient is removed from a stationary object (bed, chair or commode). If the patient is in a wheelchair, secure the wheel locks in place to prevent the chair from moving forwards or backwards. When connecting slings equipped with color coded straps to the patient lift, the shortest of the straps MUST be at the back of patient for support. Using long section will leave little or no support for patientʹs back. The loops of the sling are color coded and can be used to place patient in various positions. The colors make it easy to connect both sides of the sling equally. Make sure that there is sufficient head support when lifting a patient. Operating the Lift Although Invacare recommends that two assistants be used for all lifting preparation, transferring from and transferring to procedures, our equipment will permit proper operation by one assistant. The use of one assistant is based on the evaluation of the health care professional for each individual case. Make sure there is an audible click when mounting battery on the battery charger to confirm proper mounting. Otherwise, injury or damage may occur. ALWAYS keep hands and fingers clear of moving parts to avoid injury. Jasmine™ Patient Lift Part No 1150704... -
Page 9: Lifting The Patient
SECTION 1—GENERAL GUIDELINES Lifting the Patient Adjustments for safety and comfort should be made before moving the patient. Patientʹs arms should be inside of the straps. Before transferring a patient from a stationary object (wheelchair, commode or bed), slightly raise the patient off the stationary object and check that all sling attachments are secure. If any attachment is not correct, lower the patient and correct the problem, then raise the patient and check again. During transfer, with patient suspended in a sling attached to the lift, DO NOT roll caster base over uneven surfaces that would create an imbalance of the patient lift and could cause the patient lift to tip over. Use steering handle on the mast at ALL times to push or pull the patient lift. Transferring the Patient Before transferring, check that the product’s weight capacity can withstand the patient’s weight. Before transferring a patient from a stationary object (wheelchair, commode or bed), slightly raise the patient off the stationary object and check that all sling attachments are secure. If any attachment is not correct, lower the patient and correct the problem, then raise the patient and check again. Before transferring, check that the product that you are transferring the patient to can withstand the patient’s weight. Wheelchair wheel locks MUST be in a locked position before lowering the patient into the wheelchair for transport. Be sure to check the sling attachments each time the sling is removed and replaced, to ensure that it is properly attached before the patient is removed from the bed or chair. The mast pivot bolt MUST be tight to ensure safe use of the patient lift. The bolt MUST be checked at least every six months in conjunction with periodic maintenance. Performing Maintenance Regular maintenance of patient lifts and accessories is necessary to assure proper operation. After the first twelve months of operation, inspect all pivot points and fasteners for wear. If the metal is worn, the parts MUST be replaced. Perform this inspection every six months thereafter. Casters and axle bolts require inspections every six months to check for tightness and wear. Part No 1150704 Jasmine™ Patient Lift... -
Page 10: Section 2-Assembly
Push tab up to unlock Lock the rear casters. Refer to Detail “A”. Unscrew the top knob and remove it from the base. Loosen the bottom knob, but leave it screwed into the Mast base. Assembly Put the tube of the mast assembly into the hole in the base. While supporting the mast assembly, tighten the bottom plastic knob. Screw the top plastic knob into the hole in the base. Base Caster Top Plastic Knob Bottom Plastic Knob FIGURE 2.1 Assembling the Mast Assembly to the Base Jasmine™ Patient Lift Part No 1150704... -
Page 11: Attaching The Battery Charger Mounting Bracket To The Wall
NOTE: For this procedure, refer to FIGURE 2.3. Lock the rear casters to secure the lift in place while Battery and Battery Charger performing this procedure. shown in place Remove the two mylar pieces covering the battery charger mounting holes on the back of the mast assembly. Insert the hook screws into mounting holes. Tighten the hook screws. Mount the battery charger mounting bracket on the hook screws. Charge the battery. Refer to Charging the Battery on page 13. FIGURE 2.3 Attaching the Battery Charger to the Mast Assembly Part No 1150704 Jasmine™ Patient Lift... -
Page 12: Section 3-Operation
Closing/Opening the Legs NOTE: For this procedure, refer to DETAIL B. DETAIL “C” - EMERGENCY STOP • To close the legs, press the close button on the hand control. • To open the legs, press the open button on the hand Emergency Button control. Using the Emergency Stop NOTE: For this procedure, refer to DETAIL C. • Push the RED emergency button in to stop the lift arms from raising or lowering. • To reset, turn the emergency button clockwise. FIGURE 3.1 Operating the Patient Lift Jasmine™ Patient Lift Part No 1150704... -
Page 13: Activating A Mechanical Emergency Release
An audible “click” mounting. Otherwise, injury or damage may will be heard when occur. properly installed (STEPS 3 and 6) Place the battery on the control box. Push the top of the FIGURE 3.4 Charging the Battery battery against the mounting bracket until there is an audible click. Part No 1150704 Jasmine™ Patient Lift... -
Page 14: Section 4-Lifting The Patient
Attaching a Sling to the Swivel Bar WARNING The maximum weight capacity of the Jasmine Patient Lift is 500 lbs. DO NOT exceed the maximum weight capacity of the patient lift otherwise, injury or damage may occur. Before using the sling, read and understand all operating instructions provided in the sling owner’s manual. -
Page 15: Attaching A Sling To The Optional Cradle Attachment
Attaching a Sling to the Optional Cradle Attachment WARNING The maximum weight capacity of the Jasmine Patient Lift is 500 lbs. DO NOT exceed the maximum weight capacity of the patient lift otherwise, injury or damage may occur. Before using the sling, read and understand all operating instructions provided in the sling owner’s manual. -
Page 16: Lifting/Moving The Patient
Adjustments for safety and comfort should be made before moving the patient. Patient's arms should be inside of the straps. DO NOT use slings and patient lifts of different manufacturers. Invacare slings are made specifically for use with Invacare patient lifts. Injury or damage may occur. - Page 17 SECTION 4—LIFTING THE PATIENT DETAIL “A” - LIFTING THE PATIENT DETAIL “B” - MOVING THE PATIENT DETAIL “C” - MOVING THE PATIENT LIFT AWAY FROM THE BED FIGURE 4.4 Lifting/Moving the Patient Part No 1150704 Jasmine™ Patient Lift...
-
Page 18: Section 5-Transferring The Patient
Adjustments for safety and comfort should be made before moving the patient. The patient's arms should be inside the straps. DO NOT use slings and patient lifts of different manufacturers. Invacare slings are made specifically for use with Invacare patient lifts. Otherwise, injury or damage may occur. -
Page 19: Transferring To A Standard Commode
The wheel locks MUST be engaged before lowering the patient into the wheelchair. Otherwise, injury may result. Use the straps or handles on the side and the back of the sling to guide the patient’s hips as far back as possible into the seat for proper positioning. Position the patient over the seat with their back against the back of the chair. Begin to lower the patient pressing the DOWN button on the hand control. Use two assistants ‐ One assistant stands behind the chair and the other operates the patient lift. The assistant behind the chair pulls back on the grab handle (on select models) or sides of the sling to seat the patient well into the back of the chair. NOTE: This will maintain a good center of balance and prevent the chair from tipping forward. Leave the sling in place unless a divided leg sling was used. Remove a divided leg sling. 10. Reverse Lifting the Patient on page 14 to return the patient to the seating surface of the wheelchair. FIGURE 5.2 Transferring to a Wheelchair Part No 1150704 Jasmine™ Patient Lift... -
Page 20: Section 6-Troubleshooting
Lift arms will not lower during a power Shoulder bolt at the junction of the boom Refer to Replacing the Swivel Bar or retraction. and mast may not be properly installed. Optional Cradle Attachment on page 25. NOTE: If problems are not remedied by the suggested means, please contact your dealer or Invacare. Jasmine™ Patient Lift Part No 1150704... -
Page 21: Section 7-Maintenance
CHECK ALL SLING ATTACHMENTS each time it is used to ensure proper connection and patient safety. Inspect sling material for wear. Inspect straps for wear. *NOTE: For individual home use, a full inspection is required prior to each new user. **NOTE: Regular cleaning will reveal loose or worn parts, enhance smooth operation and extend the life expectancy of the lift. NOTE: Follow the maintenance procedures described in this manual to keep your patient lift in continuous service. The Invacare Patient Lift is designed to provide a maximum of safe, efficient and satisfactory service with minimum care and maintenance. All parts of the Invacare Lift are made of the best grades of steel, but metal to metal contact will wear after considerable use. There is no adjustment or maintenance of the casters, other than cleaning, lubrication and checking axle and swivel bolts for tightness. Remove all debris, etc. from the wheel and swivel bearings. If any parts are worn, replace these parts IMMEDIATELY. If you question the safety of any part of the lift, contact your Dealer IMMEDIATELY and advise him/her of your problem. Part No 1150704 Jasmine™ Patient Lift... -
Page 22: Lubricating The Lift
Detecting Wear and Damage It is important to inspect all stressed parts, such as slings, swivel bar, cradle attachment and any pivot for slings for signs of cracking, fraying, deformation or deterioration. Replace any defective parts IMMEDIATELY and ensure that the lift is not used until repairs are made. Cleaning the Sling and the Lift The sling should be washed regularly. Refer to the sling owner’s manual for instructions. A soft cloth, dampened with water and a small amount of mild detergent, is all that is needed to clean the patient lift. The lift can be cleaned with non‐abrasive cleaners. Replacing the Boom Actuator NOTE: For this procedure, refer to FIGURE 7.2 on page 23. NOTE: If possible, use an assistant while removing and replacing the boom actuator. Unplug the boom actuator from the control box on the mast assembly. Thread the actuator lead through the actuator lead routing hole in the mast assembly. Remove the hardware that secures the top of the boom actuator to the boom actuator mounting bracket. A. Remove the rubber caps from the locknut and socket head screw. B. Remove the socket head screw, washer, bearing, nylon washers, bushing, bearing, washer, flat washer and locknut. NOTE: Lower the boom carefully to a resting position after the top of the boom actuator is removed from the boom actuator mounting bracket. Remove the hardware the secures the bottom of the boom actuator to the boom actuator mast mounting bracket. A. Remove the rubber caps from the locknut and socket head screw. B. Remove the socket head screw, washer, bearing, nylon washers, bushing, bearing, washer, flat washer and locknut. Jasmine™ Patient Lift Part No 1150704... - Page 23 Mast Actuator Rubber Cap Boom Actuator Nylon Washer Mast Mounting Bracket Rubber Cap Nylon Washer Locknut Flat Washer Bearing Washer Washer Bearing Socket Head Screw Bushing Rubber Cap FIGURE 7.2 Replacing the Boom Actuator Part No 1150704 Jasmine™ Patient Lift...
-
Page 24: Replacing The Leg Actuators
PATIENT LIFT Caster Large Base Cover Screw (eight screws attach each Pan head screw small base cover) (eight screws attach the large base cover) Small Base Cover Mast Handles FIGURE 7.3 Replacing the Leg Actuators Jasmine™ Patient Lift Part No 1150704... -
Page 25: Replacing The Swivel Bar Or Optional Cradle Attachment
Washer Bushing Bushing Optional Cradle Attachment Washer Nylon Spacer Socket Head Screw Side Rubber Cap Nylon Spacer Swivel Bar O-ring Washer Bottom Rubber Cap FIGURE 7.4 Replacing the Swivel Bar or Optional Cradle Attachment Part No 1150704 Jasmine™ Patient Lift... -
Page 26: Checking And Tightening Mast Pivot
Check that the locknut is tight and secure on the screw. If needed, do one or more of the following: • Tighten locknut and back‐off the locknut 1/8 of a turn. • Replace the locknut. Boom Bushing Teflon Bearing Teflon Bearing Nylon Washer Nylon Washer Washer Washer Cover Screw Locknut Cover Mast Connector NOTE: Lock nuts this side of mast not shown. Screws Mast FIGURE 7.5 Checking and Tightening Mast Pivot Jasmine™ Patient Lift Part No 1150704... -
Page 27: Section 8-Accessories
SECTION 8—ACCESSORIES SECTION 8—ACCESSORIES Jasmine Scale JLS5 The Jasmine Scale is a compact precision scale system designed specifically for the Invacare Patient Lift System. Removing the Swivel Bar/Cradle Attachment NOTE: For this procedure, refer to FIGURE 8.1. Remove the side rubber caps. NOTE: Support the swivel bar or cradle attachment from underneath while removing the attaching hardware. Remove the socket head screw, washer, bushings, top rubber cap, nylon spacers, washer and nut that attach the swivel bar or cradle attachment to the boom. NOTE: When the attaching hardware is removed, the pin, washer and o‐ring will become loose. NOTE: Save the socket screw, small steel washer and locknut to secure the Jasmine Scale to the boom. NOTE: Save the remaining hardware for future use of the swivel bar or cradle attachment without the scale. Top Rubber Cap Side Rubber Cap Washer Optional Cradle Attachment Bushing Bushing Washer Nylon Spacer Socket Head Screw... -
Page 28: Installing The Jasmine Scale
SECTION 8—ACCESSORIES Installing the Jasmine Scale NOTE: For this procedure, refer to FIGURE 8.2, Detail “A”. WARNING The Jasmine Scale MUST be installed in the orientation shown in FIGURE 1. Otherwise, injury may occur. NOTE: If the scale is installed incorrectly, the swivel bar or cradle attachment will not rotate freely, limiting patient movement during transfer. Align the holes in the top rubber cap, the holes in the Jasmine scale mounting bracket and the nylon spacers with the holes in the boom mounting bracket. Refer to Detail “A” for hardware orientation. Attach the Jasmine scale to the boom mounting bracket with a screw, washer, bearings, flat washer and locknut. Refer to Detail “A” for hardware orientation. NOTE: Ensure the shaft of the screw passes through both sides of the boom mounting bracket. Installing the Swivel Bar or Cradle Attachment NOTE: For this procedure, refer to FIGURE 8.2, Detail “B”. -
Page 29: Operating The Scale
(e.g. Patient Lift, Sling or Scale). The patient's weight MUST NOT exceed the lowest rated capacity of any component. Attach sling straps to the swivel bar. For proper attachment instructions refer to Attaching a Sling to the Swivel Bar on page 14. NOTE: For improved accuracy on the patient lift, attach all sling straps to the center hooks on both sides of the swivel bar. However, patient comfort may require a different configuration of sling straps. Press the ON/OFF key. WARNING DO NOT operate key strokes with pointed objects (e.g. pencils, pens, fingernails, etc.) Otherwise damage to the key pad will result. Part No 1150704 Jasmine™ Patient Lift... -
Page 30: Replacing The Battery
NOTE: The patientʹs weight will continue to be seen in the display window. The display will turn off automatically after a two minute period of non‐use [no changes in weight exceeding five (5) pounds (2 kilograms)]. You can NOT adjust the time delay for automatic shut off. After the display has turned off, the weight may be recalled by pressing the ON/OFF button. The unit can be turned off by pressing the ON/OFF button a second time. Replacing the Battery NOTE: For this procedure, refer to FIGURE 8.4. NOTE: The scale is powered by a nine (9) volt alkaline battery that should provide approximately 1500 readings before needing replacement. When battery replacement is needed, LO BAT will appear on the display. Perform the following: Slide the battery door open in the direction of the arrow. Remove existing battery. Install the NEW battery. Reinstall the battery door. Jasmine scale 9V Battery Battery Door Swivel Bar pin Arrow (Swivel Bar not shown) FIGURE 8.4 Replacing the Battery Jasmine™ Patient Lift Part No 1150704... -
Page 31: Calibrating The Jasmine Scale
SECTION 8—ACCESSORIES Calibrating the Jasmine Scale NOTE: The Jasmine Scale will be pre‐calibrated at the factory with the load cell. Should it be necessary to re‐calibrate the scale, follow the instructions outlined below. The patient and the sling MUST be removed from the scale to properly calibrate the Jasmine Scale. For removing the patient instructions refer to Operation on page 12. For sling detachment instructions refer to Lifting the Patient on page 14. With the Jasmine Scale on, remove the four screws on the back of the enclosure and remove the front cover to expose the PC board. Press the CAL button located on the PC board. The CAL switch is not labeled but is the only button on the PC board located in the lower right corner. Once the CAL button is pushed ʺCAL1ʺ will be seen in the display window. NOTE: CAL1 selects the calibration mode using 50 pounds of calibrated weight. CAL2 selects the calibration mode for use with 200 pounds of calibrated weight. Pressing the UNITS key toggles between CAL1 and CAL2. When the desired calibration mode is displayed, press the LOCK/UNLOCK key. NOTE: The display window will now show UnLd. Ensure that there is no load on the scale and press the ZERO key. The display window will show a dashed line (‐‐‐‐‐‐) scrolling across and then the word LOAD will appear in the display window. Perform one (1) of the following: A. FOR CAL1 OPTION ‐ support 50 pounds of calibrated weight from the scale and press the ZERO key. B. FOR CAL2 OPTION ‐ support 200 pounds of calibrated weight from the scale and press the ZERO key. The display window will show a dashed line (‐‐‐‐‐‐) scrolling across and then the word DONE will appear in the display window. Remove the weight from the scale and press the LOCK/UNLOCK key. NOTE: The unit will now be in a temporary test mode and will not lock the weight display. This will allow weight to be loaded and unloaded to check the calibration. 10. Turn the unit off by pressing the ON/OFF key. 11. Turn the unit on by pressing the ON/OFF key. NOTE: Scale will now be in normal operation. Troubleshooting... - Page 32 SECTION 8—ACCESSORIES NOTES Jasmine™ Patient Lift Part No 1150704...
- Page 33 SECTION 8—ACCESSORIES NOTES Part No 1150704 Jasmine™ Patient Lift...
-
Page 34: Limited Warranty
If within such warranty period any such product shall be proven to be defective, such product shall be repaired or replaced, at Invacare’s option, with refurbished or new parts. - Page 35 DÉTAILLANT : Ce manuel DOIT être remis à l'utilisateur du lève-personne. UTILISATEUR : AVANT d'utiliser cet appareil, lisez ce manuel et gardez-le à titre de référence. Pour de plus amples renseignements sur les produits, les pièces et les services d’Invacare, consultez notre site à l'adresse suivante www.invacare.com...
-
Page 36: Légende De Symboles
POURRAIENT S'ENSUIVRE. MISE EN GARDE S'APPLIQUANT AUX ACCESSOIRES Les produits Invacare sont conçus et fabriqués expressément pour une utilisation avec les acces- soires Invacare. Les accessoires conçus par d’autres fabricants n’ont pas été testés par Invacare. Il n’est donc pas recommandé de les utiliser avec des produits Invacare. - Page 37 LÉGENDE DE SYMBOLES .................. 36 REMARQUES SPÉCIALES ................. 39 EMPLACEMENT DES ÉTIQUETTES ..............40 PARAMÈTRES DU PRODUIT ................41 Lève-personne Jasmine ..............................41 Pèse-personne Jasmine JLS5.............................. 41 SECTION 1—DIRECTIVES GÉNÉRALES .............. 42 Assemblage du lève-personne ............................42 Poids maximum..................................42 Assemblage du lève-personne ............................
- Page 38 L'emploi du pèse-personne ............................... 63 Les fonctions du clavier..............................63 La pesée du patient ................................64 Le remplacement de la batterie ............................65 Le calibrage du pèse-personne Jasmine ........................65 Dépannage .................................... 66 Les codes d'affichage ..............................66 GARANTIE LIMITÉE ..................68 Lève-personne Jasmine™...
-
Page 39: Remarques Spéciales
Si les IRF provoquent une instabilité, APPUYEZ sur l'interrupteur de pouvoir ROUGE en mode ARRÊT IMMÉDIATEMENT. N'APPUYEZ PAS sur l'interrupteur de pouvoir EN MARCHE lorsque la transmission est en cours. ENTRETIEN SEULE une personne qualifiée DOIT exécuter l''entretien. Part No 1150704 Lève-personne Jasmine™... -
Page 40: Emplacement Des Étiquettes
LIRE et COMPRENDRE le manuel de l’utilisateur. AVERTISSEMENT Limite de poids: 500 livres (227 Kg). Le lève-patient Invacare N’EST PAS un appareil de transport. NE PAS rouler par-dessus les rebords surface qui pourrait faire basculer le lève-patient. -
Page 41: Paramètres Du Produit
*100-200 cycles par chargement La garantie limitée de la pompe/l'électronique : 3 Ans/2 Ans Bouton d'arrêt d'urgence : *REMARQUE: Selon la charge et lʹutilisation. Pèse-personne Jasmine JLS5 Échelle de poids : Jusqu'à 500 lbs (226,7 kg) +/- 0,2 lbs (0,1 kg) Résolution : À cristaux liquides numériques... -
Page 42: Section 1-Directives Générales
Si lʹascenseur patient est utilisé dans le secteur dʹune douche ou dʹun bain, garantir que lʹascenseur patient est essuyé propre de nʹimporte quelle humidité après lʹusage. Ne PAS emmagasiner lʹascenseur dans un secteur humide ou dans une condition humide. Périodiquement inspecter tous composants de lʹascenseur patient pour les signes de corrosion. Remplacer toutes parties qui sont corrodées ou est endommagé. Assemblage du lève-personne NE serrez PAS excessivement lʹéquipement de montage. Vous risquez dʹabîmer les supports de fixation. Poids maximum NE dépassez PAS le poids maximum du lève‐personne. Le poids maximum du lève‐personne Jasmine est de 500 lb. Assemblage du lève-personne NE serrez PAS excessivement lʹéquipement de montage. Vous risquez dʹabîmer les supports de fixation. L'utilisation de la toile Le lève‐personne Jasmine peut être utilisé avec la barre pivotante standard ou lʹattache facultative du berceau. Lʹattache basculante du berceau permet à un seul préposé de placer plus facilement le patient bien assis en position verticale. Utilisez une toile approuvée par Invacare et recommandée par le médecin, lʹinfirmier ou le préposé du patient pour son propre confort et sa sécurité durant le soulèvement. Après chaque lessive (selon les instructions sur lʹétiquette de la toile), inspectez les toiles pour vous assurer quʹil nʹy ait pas dʹusure, de déchirures ou de décousures. Des toiles javélisées, déchirées, coupées, effilochées ou brisées ne sont pas sécuritaires et peuvent causer des blessures. Jetez‐les IMMÉDIATEMENT. NE modifiez PAS les toiles. Vérifiez les attaches des toiles chaque fois quʹune toile est retirée et remplacée pour vous assurer quʹelle soit bien en place avant que le patient soit déplacé dʹun objet fixe (lit, chaise, chaise dʹaisance). Si le patient est en fauteuil roulant, enclenchez le blocage des roues afin de prévenir le déplacement de la chaise. En fixant les toiles au lève‐personne à lʹaide des courroies à code‐couleur, la courroie la plus courte DOIT être située à lʹarrière du patient pour le soutenir. Lʹutilisation de la section longue procure peu ou pas de soutien au dos du patient. Les boucles de la toile à code‐couleur peuvent être utilisées pour installer le patient dans diverses positions. Les couleurs facilitent la fixation égale de la toile sur les deux côtés. Assurez‐vous que la tête du patient soit bien soutenue pendant le soulèvement. Lève-personne Jasmine™ Part No 1150704... -
Page 43: L'utilisation Du Lève-Personne
Assurez‐vous dʹentendre le déclic lors du montage de la pile sur le chargeur de pile pour vous assurer quʹelle est bien en place. Autrement, des blessures ou des dommages pourraient s’ensuivre. Éloignez TOUJOURS les mains et les doigts des pièces mobiles pour éviter les blessures. Le soulèvement du patient Tout ajustement visant à assurer la sécurité et le confort devraient être effectués avant de déplacer le patient. Les bras du patient devrait se trouver à lʹintérieur des courroies. Avant de transférer un patient à partir dʹun objet fixe (fauteuil roulant, chaise dʹaisance ou lit), soulevez légèrement le patient de cet espace et vérifiez que les attaches de la toile soient bien en place. Si une attache nʹest pas fixée correctement, abaissez le patient, rectifiez le problème et vérifiez de nouveau. Pendant le transfert, lorsque le patient est suspendu à une toile attachée au lève‐personne, NE passez PAS la base à roues sur surface inégale qui pourrait créer un déséquilibre et faire tomber lʹappareil. Utilisez les poignées de direction du mât EN TOUT TEMPS pour pousser et tirer le lève‐personne. Le transfert du patient Avant de transférer un patient, assurez‐vous que le poids du patient ne dépasse pas le poids maximum de lʹappareil. Avant de transférer un patient à partir dʹun objet fixe (fauteuil roulant, chaise dʹaisance ou lit), soulevez légèrement le patient de cet espace et vérifiez que les attaches de la toile soient bien en place. Si une attache nʹest pas fixée correctement, abaissez le patient, rectifiez le problème et vérifiez de nouveau. Avant de transférer un patient, assurez‐vous que le poids du patient ne dépasse pas le poids maximal de lʹappareil. Le blocage des roues du fauteuil roulant DOIT être enclenché avant dʹabaisser le patient dans le fauteuil roulant aux fins de déplacement. Vérifiez les attaches des toiles chaque fois quʹune toile est retirée et remplacée afin de vous assurer quʹelle soit bien en place avant que le patient soit déplacé dʹun lit ou dʹune chaise. Le boulon de pivot du mât DOIT être resserré afin dʹassurer lʹutilisation sécuritaire du lève‐personne. Le boulon DOIT être vérifié au moins une fois tous les six mois lors dʹun entretien périodique. L'entretien Lʹentretien régulier des lève‐personnes et des accessoires est nécessaire afin dʹassurer un bon fonctionnement. Après les douze premiers mois dʹutilisation, vérifiez que les pivots et les attaches ne soient pas usés. Si le métal est usé, la pièce DOIT être remplacée. Effectuez cette vérification tous les six mois par la suite. Les roues et les boulons dʹessieu requièrent une inspection tous les six mois contre le serrage et lʹusure. Part No 1150704 Lève-personne Jasmine™... -
Page 44: Section 2-Le Montage
Appuyez sur la languette pour débloquer toutes les roues touchent au sol. Bloquez les roues arrières. Se référer à la Détail « A ». Dévissez le bouton supérieur et retirez‐le de la base. Déserrez le bouton inférieur, mais laissez‐le vissé dans la base. Montage du mât Placez le tube de montage du mât dans le trou de la base. En soutenant le montage du mât, serrez le bouton inférieur de plastique. Vissez le bouton supérieur de plastique dans le trou de la base. Base Roue arrière Bouton de plastique supérieur Bouton de plastique inférieur FIGURE 2.1 Le montage du mât à la base Lève-personne Jasmine™ Part No 1150704... -
Page 45: La Fixation Du Support De Chargeur De Pile Au Mur
REMARQUE: Pour cette procédure, se référer à la FIGURE 2.3. Trous de montage du chargeur de pile Enclenchez le blocage des roues afin de fixer le lève‐personne en place pour effectuer cette procédure. Retirez les deux pièces de Mylar recouvrant les trous de montage du chargeur de pile derrière le montage du mât. Insérez les vis de fondation dans les trous de montage. Serrez les vis de fondation. Placez le support de chargeur de pile sur les vis de fondation. Chargez la pile. Se référer à Le chargement de la batterie de la page 47. FIGURE 2.3 La fixation du chargeur de pile au montage du mât Part No 1150704 Lève-personne Jasmine™... -
Page 46: Section 3-Fonctionnement
Commande Manuelle • Pour fermer les jambes, appuyez sur le bouton fermer (close) de la commande manuelle. DETAIL « C » - ARRÊT D'URGENCE • Pour ouvrir les jambes, appuyez sur le bouton ouvert (open) de la commande manuelle. L'utilisation de l'arrêt d'urgence Bouton D'urgence REMARQUE: Pour cette procédure, consultez la DÉTAIL C. • Appuyez sur le bouton dʹurgence ROUGE pour éviter que les bras du lève‐personne se lèvent ou sʹabaissent. • Pour réinitialiser, effectuez une rotation du bouton dʹurgence dans le sens horaire. FIGURE 3.1 Le fonctionnement du lève-personne Lève-personne Jasmine™ Part No 1150704... -
Page 47: L'activation Du Déverrouillage Mécanique D'urgence
Autrement, Un déclic se fait des blessures ou des dommages pourraient entendre si s’ensuivre. l'installation est correcte (ÉTAPES 3 et 6) Placez la batterie sur la boîte de commande. Enfoncez la partie supérieure de la batterie contre le support de fixation FIGURE 3.4 Le chargement de la batterie jusquʹà ce quʹun déclic se fasse entendre. Part No 1150704 Lève-personne Jasmine™... -
Page 48: Section 4-Le Soulèvement Du Patient
La fixation d'une toile à la barre pivotante MISE EN GARDE Le poids maximum du lève-personne Jasmine est de 500 lb. NE dépassez PAS le poids maximum du lève-personne, autrement des blessures ou des dommages pourraient s’ensuivre. Avant d'utiliser la toile, assurez-vous de lire et de bien comprendre toutes les instructions d'utilisation qui figurent dans le manuel du propriétaire de la toile. -
Page 49: La Fixation D'une Toile À L'attachement Facultatif Du Berceau
La fixation d'une toile à l'attachement facultatif du berceau MISE EN GARDE Le poids maximum du lève-personne Jasmine est de 500 lb. Ne dépassez PAS le poids maximum du lève-personne, autrement des blessures ou des dommages pourraient s’ensuivre. Avant d'utiliser la toile, assurez-vous de lire et de bien comprendre toutes les instructions d'utilisation qui figurent dans le manuel du propriétaire de la toile. -
Page 50: Le Soulèvement/Déplacement Du Patient
Les bras du patient devraient se trouver à l'intérieur des courroies. N'UTILISEZ PAS de toiles ou de lève-personnes provenant de différents fabricants. Les toiles d'Inva- care sont conçues spécifiquement pour être utilisées avec les lève-personnes d'Invacare. Des bles- sures ou des dommages pourraient s’ensuivre. - Page 51 DETAIL « A » - LE SOULÈVEMENT DU PATIENT DETAIL « B » - LE DÉPLACEMENT DU PATIENT DETAIL « C » - LE DÉPLACEMENT DU PATIENT HORS DU LIT FIGURE 4.4 Le soulèvement/déplacement du patient Part No 1150704 Lève-personne Jasmine™...
-
Page 52: Section 5-Le Transfert D'un Patient
Les ajustements qui assurent la sécurité et le confort devraient être effectués avant de déplacer le patient. Les bras du patient devraient se trouver à l'intérieur des courroies. N'UTILISEZ PAS de toiles ou de lève-personnes de différents fabricants. Les toiles Invacare sont conçues spécifiquement pour être utilisées avec les lève-personnes d'Invacare. Autrement, des blessures ou des dommages pourraient s’ensuivre. -
Page 53: Le Transfert Vers Une Chaise D'aisance Standard
Autrement, des blessures ou des dommages pourraient s’ensuivre. Utilisez les courroies et les poignées latérales et la partie arrière de la toile pour guider les hanches du patient le plus loin possible dans la chaise, assurant un bon positionnement. Positionnez le patient au‐dessus du siège avec le dos contre le dossier de la chaise. Abaissez le patient en appuyant sur le bouton DESCENDRE (DOWN) de la commande manuelle. Faites appel à deux préposés ‐ Un préposé se tient derrière la chaise et lʹautre fait fonctionner le lève‐personne. Le préposé qui se trouve derrière la chaise doit tirer sur la poignée de manoeuvre (sur certains modèles) ou sur les côtés de la toile pour bien asseoir le patient vers le dossier de la chaise. REMARQUE: Ceci assurera un bon équilibre et évitera que la chaise bascule vers lʹavant. Laissez la toile en place à moins quʹune toile à deux jambes ait été utilisée. Retirez une toile à deux jambes. 10. Si vous voulez retourner le patient au fauteuil roulant, inversez les étapes de la section Le soulèvement du patient FIGURE 5.2 Le transfert vers un fauteuil roulant de la page 48. Part No 1150704 Lève-personne Jasmine™... -
Page 54: Section 6-Dépannage
à pas installé correctement. la page 72. REMARQUE: Si les problèmes persistent à la suite des actions suggérées, communiquez avec votre détaillant ou Invacare. Lève-personne Jasmine™ Part No 1150704... -
Page 55: Section 7-Entretien
Assurez-vous que le tissu de la toile ne soit pas usé. Assurez-vous que les courroies ne soient pas usées. *REMARQUE: Lʹusage individuel à domicile exige une inspection complète avant chaque nouvel utilisateur. **REMARQUE: Un nettoyage en règle aidera à détecter les pièces desserrées ou usées, à favoriser un fonctionnement régulier et à augmenter la durée de vie du lève‐personne. REMARQUE: Respectez les procédures dʹentretien qui figurent dans ce manuel afin dʹassurer le fonctionnement continu de votre lève‐personne. Grâce à sa conception supérieure, le lève‐personne dʹInvacare vous offre un service sécuritaire et efficace à la hauteur de vos attentes avec peu dʹentretien. Bien que toutes les pièces du lève‐personne dʹInvacare soient faites à partir dʹacier de la meilleure qualité, un contact métal sur métal provoque une usure à la longue. Le seul ajustement ou entretien des roues qui soit nécessaire est le nettoyage, la lubrification et la vérification des essieux et des boulons. Retirez tous les débris, etc. de la roue et des tourillons pivotants. Si quelconque pièce est usée, remplacez‐la IMMÉDIATEMENT. Si vous doutez de la sécurité de quelconque pièce du lève‐personne, communiquez avec votre détaillant IMMÉDIATEMENT pour lui faire part du problème. Part No 1150704 Lève-personne Jasmine™... -
Page 56: La Lubrification Du Lève-Personne
Nettoyage de la toile et du lève-personne La toile devrait être lavée régulièrement. Consultez le manuel du propriétaire pour les instructions. Le nettoyage du lève‐personne nʹexige quʹun chiffon souple mouillé à lʹeau et une petite quantité de savon doux. Le lève‐personne peut être nettoyé à lʹaide de nettoyants non abrasifs. Le remplacement de l'actionneur de la ceinture REMARQUE: Pour cette procédure, se référer à la FIGURE 7.2 on page 57. REMARQUE: Dans la mesure du possible, ayez recours à un préposé pour remplacer lʹactionneur de la membrure. Débranchez lʹactionneur de la membrure de la boîte de commande du montage du mât. Passez le fil de lʹactionneur à travers le trou dʹacheminement pour le fil de lʹactionneur dans le montage du mât. Retirez lʹéquipement qui fixe la partie supérieure de lʹactionneur de la membrure au support de fixation de lʹactionneur de la membrure. A. Retirez les capuchons en caoutchouc des contre‐écrous et de la vis à pans creux. B. Retirez la vis à pans creux, la rondelle, la bague, la rondelle, la bague, la rondelle et le contre‐écrou. REMARQUE: Abaissez soigneusement la membrure en position dʹéquilibre après avoir retiré la partie supérieure de lʹactionneur de la membrure du support de fixation de lʹactionneur de la membrure. Retirez lʹéquipement qui fixe la partie inférieure de lʹactionneur de la membrure au support de fixation du mât de lʹactionnaur de la membrure. A. Retirez les capuchons en caoutchouc des contre‐écrous et de la vis à pans creux. B. Retirez la vis à pans creux, la rondelle, la bague, la rondelle, la bague, la rondelle et le contre‐écrou. Inversez les ÉTAPES 1‐3 pour remplacer lʹactionneur de la membrure. Lève-personne Jasmine™ Part No 1150704... - Page 57 Capuchon en caoutchouc Rondelle en nylon Ecrou auto-bloquant Rondelle plate Rapport Rondelle Rondelle Rapport Vis à pans creux Bagne Capuchon en caoutchouc FIGURE 7.2 Le remplacement de l'actionneur de la ceinture Part No 1150704 Lève-personne Jasmine™...
-
Page 58: Le Remplacement Des Actionneurs De Jambes
Vis à tête cylindrique (huit vis fixent le grand capuchon de la base) Petit capuchon de la base Poignées du mât FIGURE 7.3 Le remplacement des actionneurs de jambes Lève-personne Jasmine™ Part No 1150704... -
Page 59: Remplacement De La Barre Pivotante Ou De L'attache Facultative Du Berceau
Entretoise de nylon Vis à pans creux Capuchon latéral en caoutchouc Entretoise de nylon Barre pivotante Joint torique Rondelle Cheville Capuchon inférieur en caoutchouc FIGURE 7.4 Remplacement de la barre pivotante ou de l'attache facultative du berceau Part No 1150704 Lève-personne Jasmine™... -
Page 60: Vérification Et Serrage Du Pivot Du Mât
• Remplacez le contre‐écrou. Membrure Bague Rapport de téflon Rapport de téflon Rondelle en nylon Rondelle en nylon Rondelle Rondelle Capuchon Contre-écrou Capuchon Connecteur de mât REMARQUE: Verrouiller des écrous ce côté de mât pas montré. Mât FIGURE 7.5 Vérification et serrage du pivot du mât Lève-personne Jasmine™ Part No 1150704... -
Page 61: Section 8-Accessoires
SECTION 8—ACCESSOIRES SECTION 8—ACCESSOIRES Pèse-personne Jasmine JLS5 Le pèse‐personne Jasmine est un système compact de mesure précise conçu spécifiquement pour le système de lève‐personne dʹInvacare. Retrait de la barre pivotante/l'attache du berceau REMARQUE: Pour cette procédure, se référer à la FIGURE 8.1. Retirez les capuchons de caoutchouc latéraux. REMARQUE: Tenez la barre pivotante ou lʹattache du berceau par le bas en retirant lʹéquipement de fixation. Retirez la vis à pans creux, la rondelle, les bagues, le capuchon en caoutchouc supérieur, les entretoises de nylon, la rondelle et lʹécrou qui fixent la barre pivotante ou lʹattache du berceau à la membrure. REMARQUE: Lorsque lʹéquipement de fixation est retiré, la cheville, la rondelle et le joint torique se dessserent. REMARQUE: Conservez la vis à douille, la petite rondelle en acier et le contre‐écrou en vue de fixer solidement le pèse‐personne Jasmine à la membrure. REMARQUE: Mettez le reste de lʹéquipement de côté pour usage futur de la barre pivotante ou de lʹattache du berceau sans le pèse‐personne. Capuchon en caoutchouc supérieur Capuchon en caoutchouc latéral Rondelle Attache facultative du berceau Écrou... -
Page 62: L'installation Du Pèse-Personne Jasmine
Rapport Spacers en nylon Rondelle L'Echelle de Jasmine Monte Le Bouchon latéral de le Crochet Cheville de la barre Caoutchouc pivotante (2 total, 1 par le côté) Pèse-personne Jasmine FIGURE 8.2 L'installation du pèse-personne Jasmine Lève-personne Jasmine™ Part No 1150704... -
Page 63: L'emploi Du Pèse-Personne
Un indicateur apparait dans la fenêtre d'affichage lorsque la bat- terie est faible. Fenêtre d'affichage Touches fonctionnelles Jasmine Scale JLS5 CAPACITY 500 LB, 227 KG FIGURE 8.3 L'emploi du pèse-personne - Les fonctions du clavier Part No 1150704 Lève-personne Jasmine™... -
Page 64: La Pesée Du Patient
REMARQUE: Le dernier poids mesuré sera affiché. Le mot « VERROUILLER (LOCK) » apparait dans la fenêtre dʹaffichage. REMARQUE: Appuyez sur la touche ZÉRO pour ne pas capter le poids de la toile et de lʹéquipement. Si vous nʹappuyez pas sur la touche ZÉRO, le poids de la toile et de lʹéquipement seront compris dans le poids affiché. Si vous nʹappuyez pas sur cette touche, vous obtenez une mauvaise lecture du poids réel de lʹutilisateur. Appuyez sur la touche ZÉRO. Lorsque vous appuyez sur la touche ZÉRO, les fonctions suivantes se produisent : A. Le pèse‐personne se remet à zéro et le mot « ZÉRO » apparaît dans lʹaffichage. La fonction de verrouillage sʹarrête et le mot « VERROUILLER (LOCK) » disparaît de lʹécran. REMARQUE: Le pèse‐personne est maintenant actif et actualise le poids de façon continue. Placez le patient dans la toile. Pour des instructions relatives à la mise en position du patient, consultez la section Fonctionnement à la page 54. Activez le mécanisme du lève‐personne pour soulever le patient jusquʹà ce quʹil soit entièrement soutenu par le lève‐personne. Pour des instructions relatives au soulèvement du patient, consultez la section Le soulèvement du patient à la page 58. Notez lʹaffichage du poids. Lorsque lʹaffichage du poids est stable, appuyez sur le bouton VERROUILLER (LOCK) pour verrouiller lʹaffichage du poids. Ceci est indiqué par lʹaffichage du mot « VÉROUILLER (LOCK) » dans la fenêtre. REMARQUE: Si le poids doit être déverrouillé lorsque le patient est soutenu par le lève‐personne, vous pouvez appuyer sur le bouton DÉVERROUILLER (UNLOCK). Le poids est déverrouillé et le mot « VERROUILLER (LOCK) » disparait de la fenêtre dʹaffichage. La valeur du poids est ensuite actualisée. Dès que le poids est stable, il peut être verrrouillé de nouveau en appuyant sur le bouton « VERROUILLER (LOCK) ». REMARQUE: Le poids se définit par une variation de deux dixièmes (2/10) de livre. Par exemple, si un patient pèse cent (100) lb, le pèse‐personne varie de 99,8 à 100,2 jusquʹà ce quʹon appuie sur le bouton VERROUILLER (LOCK). Une telle variation est normale. Appuyez sur le bouton VERROUILLER (LOCK) pour verrouiller le poids. REMARQUE: Vous pouvez appuyer sur le bouton UNITÉS (UNITS) pour passer des livres aux kilogrammes. Les symboles lb ou kg sʹinscrivent dans la fenêtre dʹaffichage. Le lève‐personne peut être abaissé et la toile peut être retirée du patient. REMARQUE: Le poids du patient sera toujours affiché dans la fenêtre. Lʹaffichage sʹarrêtera automatiquement après une période de deux minutes de non utilisation [si le changement de poids ne dépasse pas les cinq (5) livres (2 kilogrammes)]. Vous NE pouvez PAS ajuster le délai dʹarrêt automatique. Quand lʹaffichage est en mode arrêt, le poids peut être affiché de nouveau en appuyant sur le bouton EN MARCHE/ARRÊT (ON/OFF). Vous pouvez arrêter lʹunité en appuyant une deuxième fois sur le bouton EN MARCHE/ARRÊT (ON/OFF). Lève-personne Jasmine™ Part No 1150704... -
Page 65: Le Remplacement De La Batterie
Lorsque la batterie doit être remplacée, lʹindicateur de BATTERIE FAIBLE (LO BAT) apparaitra sur la fenêtre dʹaffichage. Procédez comme suit : Faites glisser le clapet de la batterie dans la direction de la flèche. Retirez la batterie qui doit être remplacée. Installez la NOUVELLE batterie. Réinstallez le clapet de la batterie. Pèse-personne installé Batteire de 9 volts Clapet de batterie Flèche FIGURE 8.4 Le remplacement de la batterie Le calibrage du pèse-personne Jasmine REMARQUE: Le pèse‐personne Jasmine sera pré‐calibré à lʹusine à lʹaide de la cellule de pesage. Si vous devez calibrer de nouveau le pèse‐personne, suivez les instructions ci‐dessous. Le patient et la toile DOIVENT être retirés du pèse‐personne Jasmine afin que ce dernier puisse être calibré correctement. Pour des instructions relatives au retrait du patient, consultez la section Fonctionnement à la page 54. Pour des instructions relatives au retrait de la toile, consultez la section Le soulèvement du patient à la page 58. Mettez le pèse‐personne Jasmine en marche, retirez les quatre vis derrière lʹenveloppe et retirez le capuchon avant pour accéder à la carte de circuits imprimés. Appuyez sur le bouton CAL qui se trouve sur la carte de circuits imprimés. Lʹinterrupteur CAL nʹest pas étiqueté mais il sʹagit du seul bouton situé dans le coin inférieur droit sur la carte de circuits imprimés. Après avoir appuyé sur le bouton CAL, « CAL1 » sera affiché à la fenêtre. REMARQUE: CAL1 choisit le mode de calibrage avec 50 livres de poids calibré. CAL2 choisit le mode de calibrage avec 200 livres de poids calibré. Vous pouvez basculer entre CAL1 et CAL2 en appuyant sur le bouton UNITÉS. -
Page 66: Dépannage
Défaillance de la batterie. Vérifiez la batterie. Remplacez-la au besoin. La batterie a été remplacée et l'appareil NE Communiquez avec les services d'Inva- fonctionne toujours PAS correctement. care au 1-800-333-6900 Les codes d'affichage CALIBRAGE REQUIS ‐ Les données de calibrage mis en mémoire sont erronées; un calibrage est requis. SCAP SURCAPACITÉ ‐ Un poids dépassant la capacité pondérale a été chargé sur le pèse‐personne. Lève-personne Jasmine™ Part No 1150704... - Page 67 SECTION 8—ACCESSOIRES REMARQUES Part No 1150704 Lève-personne Jasmine™...
-
Page 68: Garantie Limitée
à une telle réparation et/ou un tel remplacement. Pour le service au titre de la garantie, communiquez avec le détaillant chez qui vous avez acheté le produit Invacare. En cas d’insatisfaction à l’égard du service au titre de la garantie, écrivez directement à Invacare à l’adresse qui figure sur la quatrième de couverture en indiquant le nom et l'adresse du détaillant, la date d'achat et la nature du défaut.
Need help?
Do you have a question about the JASMINE and is the answer not in the manual?
Questions and answers