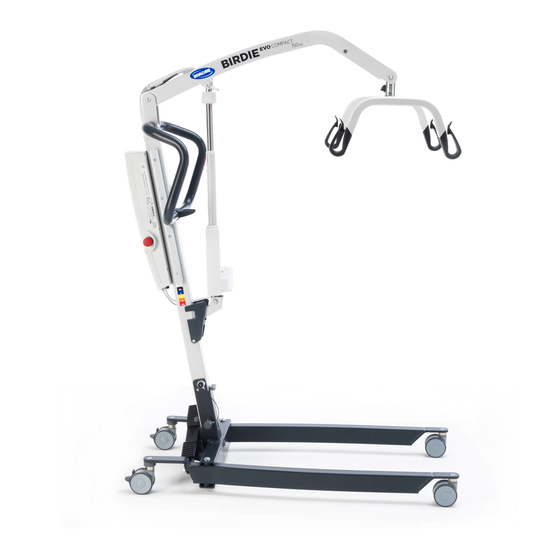
Invacare Birdie EVO COMPACT User Manual
Mobile patient lift
Hide thumbs
Also See for Birdie EVO COMPACT:
- User manual (228 pages) ,
- Service manual (172 pages) ,
- Mounting instruction (2 pages)
Advertisement
Available languages
Available languages
Quick Links
This manual MUST be given to the user of the product.
BEFORE using this product, read this manual and save for future
reference.
Invacare® Birdie® EVO
Birdie® EVO, Birdie® EVO COMPACT, Birdie® EVO PLUS
en Mobile Patient Lift
User Manual . . . . . . . . . . . . . . . . . . . . . . . . . . . . . . . . . . . 3
de Mobiler Patientenlifter
Gebrauchsanweisung . . . . . . . . . . . . . . . . . . . . . . . . . . . 31
es
Grúa de elevación
Manual del usuario. . . . . . . . . . . . . . . . . . . . . . . . . . . . . 59
fr
Lève-personne mobile
Manuel d'utilisation . . . . . . . . . . . . . . . . . . . . . . . . . . . . 87
it
Sollevatore mobile
Manuale d'uso . . . . . . . . . . . . . . . . . . . . . . . . . . . . . . . . .115
nl
Mobiele patiëntenlift
Gebruiksaanwijzing . . . . . . . . . . . . . . . . . . . . . . . . . . . . .143
pt
Elevador de transferência móvel
Manual de utilização . . . . . . . . . . . . . . . . . . . . . . . . . . .171
Advertisement
Chapters

Related Manuals for Invacare Birdie EVO COMPACT


Summary of Contents for Invacare Birdie EVO COMPACT
-
Page 1: Table Of Contents
Invacare® Birdie® EVO Birdie® EVO, Birdie® EVO COMPACT, Birdie® EVO PLUS en Mobile Patient Lift User Manual ........3 de Mobiler Patientenlifter Gebrauchsanweisung . - Page 2 All rights reserved. Republication, duplication or modification i n w hole o r i n p art i s p rohibited w ithout p rior written permission from Invacare. Trademarks are identified b y ™ a nd ® . A ll t rademarks a re o wned b y o r l icensed t o Invacare Corporation or its subsidiaries unless otherwise noted.
-
Page 3: User Manual
Contents 8.3 Cleaning and disinfection......22 8.4 Service interval ....... . 22 This manual MUST be given to the user of the product. -
Page 4: General
Note that there may be sections in this document, which are not relevant to your product, since this document applies Invacare accepts no liability for damage arising from: to all available models (on the date of printing). If not otherwise stated, each section in this document refers to all •... -
Page 5: Safety
– Due to regional differences, refer to your – Use common sense in all lifts. Special care local Invacare website or catalog for available must be taken with people with disabilities who accessories or contact your Invacare provider. -
Page 6: Safety Information On Electromagnetic Interference
CAUTION! Compatibility of slings with attachment system 2.4.1 Label location Invacare uses a common attachment system based on hooks and loops. Loops on the slings are attached to hooks on spreader bars (coat hanger style). Therefore, suitable slings of other manufacturers can be used on this lift as well. -
Page 7: Other Labels And Symbols
Safety 2.4.3 Other labels and symbols WEEE conform Refer to User Manual This product complies with Directive 93/42/EEC concerning medical devices. The launch date of this product is stated in the CE declaration Warranty void label on control unit of conformity. Do not remove Abbreviations for technical data: Warranty void if removed... -
Page 8: Product Overview
All position changes are possible without assistance of the patient. Due to regional differences, refer to your local Invacare website or catalog for details about available There are no known contraindications for this product. accessories or contact your Invacare provider. -
Page 9: Setup
Risk of Injury and washing instructions. Improper assembly may cause injury or damage. – Use only Invacare parts in the assembly of this patient lift. 4.3 Installing the mast – After each assembly, check that all fittings are properly tightened and all parts have the 4.3.1 Unfolding the mast... -
Page 10: Assembling The Mast To The Base
Invacare® Birdie® EVO 4.4 Unfolding the spreader bar 1. Lock both rear castors B. Remove the locking pin A. 2. Raise the mast assembly C to an upright position by stepping with one foot on the leg D and pulling the push bar E upwards until the safety catch F snaps in place. -
Page 11: Resetting The Service Light
If the service light is flashing yellow during daily usage or after a reassembly, the lift requires service. – Contact your Invacare provider for service. After the initial assembly of the lift, the service light is flashing yellow and needs to be reset before using the lift. -
Page 12: Usage
The lift could tip and endanger the patient and assistants. The hand control is used to open or close the legs of the – Invacare recommends that the rear castors base. be left unlocked during lifting procedures to allow the patient lift to stabilize itself when the 1. -
Page 13: Performing An Emergency Stop
Usage Removing the spreader bar 5.7.2 CBJ Care, CBJ1, CBJ2 control unit Emergency lowering If the hand control fails, the boom can be lowered by using 1. Push and hold the release button up. the circular switch for emergency release. Use a sharp 2. -
Page 14: Charging The Battery
Invacare® Birdie® EVO The manual emergency release system is located at the top 5.9.2 CBJ Care, CBJ1, CBJ2 control unit of the actuator piston. 1. Rotate the emergency release knob A counterclockwise. The control unit is equipped with a sound signal. A beep indicates that the battery has low capacity, but lowering the 5.9 Charging the battery... -
Page 15: Optional Battery Charger
Usage CBJ1 and CBJ2 with LCD Battery Battery Description Indicator State Type Full The battery is OK — no need Charge for charging (100%). (100%) Partial The battery is OK — no need Charge for charging (75%). (75%) Partial The battery needs to be 1. -
Page 16: Lifting The Patient
– Use the push bars on the mast at all times to performed by two (2) assistants whenever push or pull the lift. possible. – Avoid using the lift on an incline. Invacare recommends that the product only be used on a flat surface. 6.2 Preparing to lift –... -
Page 17: Attaching The Sling To The Lift
Usage of wrong or damaged slings can cause the 4-point spreader bar patient to fall or cause injury to assistants. – Use an Invacare approved sling that is recommended by the individual’s doctor, nurse or medical assistant for the comfort and safety of the individual being lifted. -
Page 18: Transferring A Patient To A Bed
Invacare® Birdie® EVO Move the patient lift with both hands firmly on the push bars. Before moving the patient, check again to make sure 11. Proceed with the transfer to another resting surface or that the sling is properly attached to the hooks of the stationary object. -
Page 19: Transferring A Patient To A Wheelchair
6.6 Transferring a patient to and from a the commode chair or standard commode. commode The Invacare patient lift is NOT intended as a transport device. If the bathroom facilities are NOT near the bed or if the patient lift cannot be easily... -
Page 20: Lifting A Patient From The Floor
Invacare® Birdie® EVO 4. Unlock the rear castors. See 5 Usage, page 12 5. Open the legs of the lift. See 5 Usage, page 12 When the patient is clear of the commode surface, use the push bars to move the lift away from the commode. -
Page 21: Transportation And Storage
Transportation and Storage 3. Activate the emergency stop button and apply castor 7 Transportation and Storage brakes. 4. Reverse the procedure described in 4.5 Installing the actuator to the boom, page 10 7.1 General information 5. Reverse the procedure described in 4.4 Unfolding the During transportation, or when the patient lift is not to be spreader bar, page 10 used for some time, the emergency stop button should be... -
Page 22: Maintenance
Drying: Allow the product to air-dry. – If the service light is flashing yellow the lift requires service. Do not use the lift and contact your Invacare 8.4 Service interval provider for service. – If the service light is not flashing the lift is ready for WARNING! use. -
Page 23: After Use
After Use Be environmentally responsible and recycle the different 9 After Use materials and components of this product separately through your recycling facility at its end of life. 9.1 Disposal The disposal and recycling of used products and packaging must comply with the laws and regulations for waste WARNING! handling in each country. -
Page 24: Troubleshooting
The control unit emits a beeping sound Max. load is exceeded Reduce the load (and the lift will during lifting, and the motor stops. function normally). Contact your Invacare provider if the above does not solve your problems. 1650023-A... -
Page 25: Technical Data
Technical Data 11 Technical Data 11.1 Maximum safe working load Birdie® EVO Birdie® EVO Birdie® EVO COMPACT PLUS Max. Safe Working Load (patient + spreader bar + sling) 180 kg 150 kg 180 kg 11.2 Dimensions and weights * Forward direction Dimensions [mm] Birdie®... -
Page 26: Electrical System
Invacare® Birdie® EVO Dimensions [mm] Birdie® EVO Birdie® EVO Birdie® EVO COMPACT PLUS Internal width at maximum reach (k) Turning diameter 1400 1400 1070 1070 1400 Height to upper edge of legs (m) Min. free height (p) Minimum distance from wall to CSP* at maximum reach (legs... -
Page 27: Environmental Conditions
Technical Data Birdie™ EVO Birdie™ EVO Birdie™ EVO COMPACT PLUS Battery type Lead acid (maintenance free, sealed) Optional (at bottom of (at bottom of Manual emergency lowering (at top of actuator) actuator) actuator) Yes / Yes (for CBJ1 and CBJ Care) Yes / No (for CBJ2 Yes / Yes (CBJ1 and Electric emergency lowering / lifting... -
Page 28: Electromagnetic Compatibility (Emc)
Invacare® Birdie® EVO 12 Electromagnetic compatibility (EMC) 12.1 General EMC information Medical Electrical Equipment needs to be installed and used according to the EMC information in this manual. This product has been tested and found to comply with EMC limits specified by IEC/EN 60601-1-2 for Class B equipment. - Page 29 Electromagnetic compatibility (EMC) Immunity test Electromagnetic environment – guidance Test / Compliance level < 0% U for 0,5 cycle at Voltage dips, short Mains power quality should be that of a typical commercial or hospital 45° steps interruptions and environment. If the user of this product requires continued operation during voltage variations 0% U for 1 cycles...
- Page 30 Notes...
-
Page 31: Gebrauchsanweisung
Inhaltsverzeichnis 7 Transport und Lagerung ......50 7.1 Allgemeine Informationen ......50 Diese Gebrauchsanweisung muss dem Benutzer des Produkts 7.2 Demontage des Masts von der Basis . -
Page 32: Allgemein
Modelle abdeckt. Sofern nicht anders angegeben, bezieht sich jeder Abschnitt in dieser Gebrauchsanweisung auf alle 1.3 Beschränkung der Haftung Modelle des Produkts. Invacare übernimmt keine Haftung für Schäden aufgrund von: Die für Ihr Land erhältlichen Modelle und Ausstattungsvarianten sind über die länderspezifischen •... -
Page 33: Sicherheit
Sicherheitshinweise und Anweisungen – Wenn der Patientenlifter in einer Umgebung unverständlich sind, wenden Sie sich an einen mit hoher Luftfeuchtigkeit verwendet wird, Arzt, Invacare-Anbieter oder qualifizierten muss der Patientenlifter nach jeder Verwendung Techniker, bevor Sie das Produkt verwenden. trocken gewischt werden. -
Page 34: Sicherheitsinformationen Zum Zubehör
Produkts (einschließlich Kabel). – Aufgrund regionaler Unterschiede ziehen – Verwenden Sie dieses Produkt nicht in der Nähe Sie die Invacare-Website für Ihr Land oder aktiver chirurgischer Hochfrequenzgeräte und den Invacare-Katalog zu Rate, um sich über eines von HF-Strahlungen abgeschirmten Raums erhältliches Zubehör zu informieren, oder... -
Page 35: Typenschild
Sicherheit 2.4.2 Typenschild WEEE-konform Invacare Portugal, Lda Rua Estrada V elha 949 ISO 10535 4465- 7 84 Leça do Balio, Port ugal Dieses Produkt entspricht der XXXXXX XXXXX_XX Xxxxxxx xxxxx xxx Xxxxxxx xxxxx xxx Richtlinie 93/42/EWG über Medizinprodukte. XXXXXXXXXXXXX Xxxxxxx xxxxx xxx Xxxxxxx xxxxx xxx Der Markteinführungszeitpunkt für dieses... -
Page 36: Produktübersicht
3.3 Zubehör Sämtliche Positionsänderungen erfolgen ohne Zutun des Aufgrund regionaler Unterschiede ziehen Sie Patienten. die Invacare-Website für Ihr Land oder den Für dieses Produkt existieren keine bekannten Invacare-Katalog zurate, um Informationen über Gegenindikationen. erhältliches Zubehör zu erhalten, oder wenden Sie sich an Ihren Invacare-Anbieter. -
Page 37: Inbetriebnahme
Verletzungen oder Schäden führen. – Für die Montage dieses Patientenlifters dürfen Wenn der Lifter mit einem Patientengurt geliefert Sie nur Originalteile von Invacare verwenden. wird, finden Sie in der Gebrauchsanweisung für den – Stellen Sie nach jeder Montage sicher, dass alle... -
Page 38: Montage Des Masts Auf Der Basis
Invacare® Birdie® EVO 1. Verriegeln Sie die beiden hinteren Rollen B. Entfernen 4.3.2 Montage des Masts auf der Basis Sie den Verriegelungsstift A. (nur fester Mast) 2. Bringen Sie die Masteinheit C in eine aufrechte Position, indem Sie mit einem Fuß auf die Fußschiene D treten und die Schiebestange E nach oben ziehen, bis der Sicherungsverschluss F einrastet. -
Page 39: Montage Des Verstellmotors Am Ausleger
Wiederzusammenbau gelb blinkt, muss der Lifter gewartet werden. – Wenden Sie sich bezüglich Instandhaltung an Ihren Invacare-Anbieter. Nach der ersten Montage des Lifters blinkt die Serviceanzeige Richten Sie die Löcher aneinander aus, setzen Sie den gelb und muss vor Verwendung des Lifters zurückgesetzt Schnelllösestift A wieder ein und sichern Sie ihn mit der... -
Page 40: Verwenden
Der Lifter könnte kippen und die Sicherheit des 5.4.1 Schließen und Öffnen der elektrischen Fußschienen Patienten und der Helfer gefährden. – Invacare empfiehlt, die hinteren Rollen während Die Handsteuerung dient zum Öffnen oder Schließen der des Hebevorgangs nicht zu verriegeln, damit Fußschienen an der Basis. -
Page 41: Durchführen Eines Nothalts
Verwenden 5.7 Aktivieren einer Notabsenkung über die WARNUNG! Steuerungseinheit Verletzungsgefahr – Verwenden Sie nur Spreizbügel, die für diesen Lifter vorgesehen sind. 5.7.1 CBJ Home-Steuerungseinheit – Vergewissern Sie sich, dass der Spreizbügel für Wenn das Handbedienteil nicht anspricht, kann der Ausleger den Patienten und den erforderlichen Lifter mit dem Schalter für die Notabsenkung abgesenkt werden. -
Page 42: Aufladen Des Akkus
Invacare® Birdie® EVO Birdie® EVO und Birdie® EVO PLUS 5.9.1 CBJ Home-Steuerungseinheit Die Steuerungseinheit ist mit einem akustischen Signal Das manuelle Notabsenkungssystem befindet sich unten am ausgestattet. Ein Signal gibt an, dass der Akku schwach Verstellmotorkolben. ist, der Patient jedoch noch abgesenkt werden kann. Es 1. -
Page 43: Optionales Akkuladegerät
Verwenden CBJ Care 5.9.3 Optionales Akkuladegerät Akkuanzeige Ladestand Beschreibung (nur für Steuerungseinheiten mit abnehmbarem Akku) des Akkus Die Vorgehensweise zum Entfernen bzw. Einsetzen Vollständig Der Ladestand des Akkus ist des Akkus ist für die Steuerungseinheit und das aufgeladen in Ordnung, der Akku muss Ladegerät identisch. -
Page 44: Patienten Anheben Und Transferieren
Vorrichtung. WARNUNG! – Verwenden Sie den Lifter nicht auf abschüssigen Einklemmgefahr Oberflächen. Invacare empfiehlt, das Produkt Es besteht die Gefahr des Einklemmens nur auf ebenen Böden zu verwenden. zwischen den Haken des Spreizbügels und dem – Beim Transfer eines Patienten, der in einem Patientengurt. -
Page 45: Anbringen Des Patientengurts Am Lifter
Hängen Sie den Patientengurt an beiden Seiten herunterfällt oder Helfer verletzt werden. mit Schlaufen gleicher Farben auf, um ein gleichmäßiges – Verwenden Sie einen von Invacare zugelassenen Anheben des Patienten zu ermöglichen. Patientengurt, der vom Arzt, der Schwester 2-Punkt-Spreizbügel... -
Page 46: Transfer Eines Patienten Von Einem Bett
Invacare® Birdie® EVO 4-Punkt-Spreizbügel Prüfen Sie vor dem Transfer des Patienten noch einmal, ob der Patientengurt ordnungsgemäß an den Haken des Spreizbügels befestigt ist. Siehe 6.2.1 Anbringen des Patientengurts am Lifter, Seite 45. Falls eine der Befestigungen nicht ordnungsgemäß angebracht ist, senken Sie den Patienten wieder auf das stehende 1. -
Page 47: Transfer Eines Patienten Auf Ein Bett
Stuhl noch vorne kippt. 6.6 Transfer eines Patienten auf einen und von einem Toilettensitz Der Patientenlifter von Invacare ist KEIN Transportfahrzeug. Wenn sich das Badezimmer NICHT in unmittelbarer Nähe des Betts befindet oder der Patientenlifter nicht leicht in Richtung Toilettensitz bewegt werden kann, MUSS der Patient in einem Lösen Sie den Patientengurt vom Spreizbügel. -
Page 48: Anheben Eines Patienten Vom Fußboden
Senken Sie den Patienten auf den Toilettensitz ab und belassen Sie dabei den Patientengurt an den Haken des Spreizbügels. Invacare empfiehlt, dass der Patientengurt Positionieren Sie den Patientengurt A unter dem an den Haken des Spreizbügels verbleibt, während der Patienten. - Page 49 Patienten anheben und transferieren Helfen Sie dem Patienten dabei, seine Knie aufzustellen Senken Sie den Ausleger ab, sodass sich der Spreizbügel und den Kopf vom Boden abzuheben. Unterstützen Sie direkt über der Brust des Patienten befindet. dabei den Kopf des Patienten mit einem Kissen B. 4.
-
Page 50: Transport Und Lagerung
Invacare® Birdie® EVO 3. Betätigen Sie die Notaus-Taste und stellen Sie die 7 Transport und Lagerung Bremsen der Rollen fest. 4. Befolgen Sie die in 4.5 Montage des Verstellmotors am Ausleger, Seite 39 aufgeführten Schritte in umgekehrter 7.1 Allgemeine Informationen Reihenfolge. -
Page 51: Instandhaltung
Sicherheit eines Teils haben, verwenden absolut trocken ist, bevor es wieder in Gebrauch Sie den Lifter nicht. Setzen Sie sich umgehend genommen wird. mit Ihrem zuständigen Invacare-Anbieter in Verbindung. Stellen Sie außerdem sicher, dass Reinigen des Patientengurts der Lifter erst dann wieder verwendet wird, Hinweise zur Reinigung entnehmen Sie der Waschanleitung wenn die Reparaturmaßnahmen abgeschlossen... -
Page 52: Nach Dem Gebrauch
Invacare® Birdie® EVO Produkt nach Ende seiner Lebensdauer über eine lokale 9 Nach dem Gebrauch Müllverwertungsanlage separat recyceln. Die Entsorgung und das Recycling von gebrauchten 9.1 Entsorgung Produkten und Verpackung muss in Übereinstimmung mit den einschlägigen Gesetzen und Vorschriften des jeweiligen WARNUNG! Landes erfolgen. -
Page 53: Problembehandlung
Max. Last ist überschritten Last reduzieren (der Lifter funktioniert kurzes akustisches Signal während normal). des Anhebens aus und der Motor unterbricht den Betrieb. Wenden Sie sich an Ihren Invacare-Anbieter, falls das Problem nicht durch die oben aufgeführten Schritte behoben werden kann. 1650023-A... -
Page 54: Technische Daten
Invacare® Birdie® EVO 11 Technische Daten 11.1 Maximale Tragfähigkeit Birdie® EVO Birdie® EVO Birdie® EVO COMPACT PLUS Max. Tragfähigkeit (Patient + Spreizbügel + Patientengurt) 180 kg 150 kg 180 kg 11.2 Abmessungen und Gewicht * Fahrtrichtung Abmessungen [mm] Birdie® EVO Birdie®... -
Page 55: Elektrisches System
Technische Daten Abmessungen [mm] Birdie® EVO Birdie® EVO Birdie® EVO COMPACT PLUS Min. Innenbreite (i) Innenbreite mit maximaler Reichweite (k) Wendekreis 1400 1400 1070 1070 1400 Höhe bis zur Oberkante der Fußschienen (m) Mindest-Bodenfreiheit (p) Mindestabstand zwischen Wand und ZAP* bei maximaler Ausladung (Fußschienen geöffnet) (q) Mindestabstand zwischen Wand und ZAP* bei maximaler Höhe (Fußschienen geöffnet) (r) -
Page 56: Umgebungsbedingungen
Invacare® Birdie® EVO Birdie™ EVO Birdie™ EVO Birdie™ EVO COMPACT PLUS 40 vollständige Hebevorgänge (mit Akku zwischen 100 % Arbeitsfähigkeit und 50 % der vollständigen Kapazität) Aussetzbetrieb (periodischer Betrieb der Motoren) 10 %, max. 2 Min./18 Min. Akku-Spezifikation 2 x 12 V/2,9 Ah Akkutyp Bleisäure (wartungsfrei, versiegelt) -
Page 57: Elektromagnetische Verträglichkeit (Emv)
Elektromagnetische Verträglichkeit (EMV) 12 Elektromagnetische Verträglichkeit (EMV) 12.1 Allgemeine Informationen zu Elektromagnetischer Verträglichkeit (EMV) Medizinische elektrische Geräte müssen gemäß den EMV-Informationen in diesem Handbuch installiert und verwendet werden. Dieses Produkt wurde getestet und erfüllt die in IEC/EN 60601-1-2 für Ausrüstung der Klasse B angegebenen EMV-Grenzwerte. Tragbare und mobile HF-Kommunikationsgeräte können den Betrieb dieses Produkts beeinträchtigen. - Page 58 Invacare® Birdie® EVO Störfestigkeitstest Elektromagnetische Umgebung – Anleitung Test-/ Konformitätswert ± 1 kV zwischen Stoßspannung Leitungen Die Netzstromqualität muss der einer typischen gewerblichen oder Krankenhausumgebung entsprechen. IEC 61000-4-5 ± 2 kV zwischen Leitung und Erdung Spannungsabfälle, < 0 % U für halben...
-
Page 59: Manual Del Usuario
Contenido 8 Mantenimiento ........79 8.1 Información sobre mantenimiento general ... . 79 Este manual DEBE ser entregado al usuario final. -
Page 60: Generalidades
1.3 Limitación de responsabilidad sección de este manual hace referencia a todos los modelos del producto. Invacare no se hace responsable de los daños surgidos por: Los modelos y las configuraciones disponibles en su país • Incumplimiento del manual del usuario pueden encontrarse en las listas de precios específicas del... -
Page 61: Seguridad
– No enchufe ni desenchufe el cable de sanitario, el proveedor de Invacare o un técnico alimentación en entornos húmedos ni con las cualificado antes de intentar utilizar este manos mojadas. -
Page 62: Información De Seguridad Sobre Los Accesorios
¡PRECAUCIÓN! Compatibilidad de las eslingas con el sistema de fijación Invacare utiliza un sistema de fijación de uso frecuente que emplea ganchos y anillas. Las anillas de las eslingas se conectan a los ganchos de las perchas (tipo perchero). Por tanto, pueden utilizarse eslingas de otros fabricantes con esta grúa siempre que cumplan los requisitos... -
Page 63: Otras Etiquetas Y Símbolos
Seguridad La etiqueta del producto contiene la principal información Abreviaciones de los datos técnicos: del producto, entre la que se incluyen los datos técnicos. • Iin: corriente de entrada • AC: corriente alterna • Uin: tensión de entrada • Max: máximo/a Símbolos •... -
Page 64: Descripción Del Producto
Dadas las diferencias regionales existentes, consulte Todos los cambios de posición son posibles sin la ayuda del en el sitio web o en el catálogo local de Invacare paciente. información sobre los accesorios disponibles o póngase en contacto con el proveedor de Invacare. -
Page 65: Instalación
4.3.1 Desplegado del mástil de elevación. (solo mástiles plegables) Si tiene algún problema o duda durante el montaje, póngase en contacto con el proveedor de Invacare. ¡ADVERTENCIA! – El mástil puede plegarse para guardarlo o transportarlo. Siempre que se vaya a plegar el 4.2 Contenido de la entrega... -
Page 66: Montaje Del Mástil En La Base
Invacare® Birdie® EVO 1. Bloquee las dos ruedas traseras B. Quite el pasador 4.3.2 Montaje del mástil en la base de bloqueo A. (sólo mástiles fijos) 2. Levante el conjunto del mástil C hasta dejarlo en posición vertical pisando con un pie la pata D y tirando de la barra de empuje E hacia arriba hasta que el tope de seguridad F encaje en su sitio. -
Page 67: Instalación Del Pistón En El Brazo
– Póngase en contacto con el proveedor de Invacare para obtener asistencia. Alinee los orificios, vuelva a instalar el pasador de liberación rápida A y fíjelo con la horquilla orientada Cuando se monta por primera vez la grúa, la luz de servicio... -
Page 68: Utilización
La grúa podría volcar y poner en peligro al 1. Para cerrar las patas, paciente y a los cuidadores. mantenga pulsado el botón – Invacare recomienda que las ruedas traseras de patas cerradas A. permanezcan desbloqueadas durante los 2. Para abrir las patas, procedimientos de elevación para que la grúa... -
Page 69: Realización De Una Parada De Emergencia
Utilización ¡ADVERTENCIA! Riesgo de lesiones – Utilice únicamente las perchas diseñadas para esta grúa. – Asegúrese de que la percha es adecuada para el paciente y la grúa o el traslado que se va a realizar. – Compruebe que la percha está bien fijada al conector del brazo y que no puede extraerse 1. -
Page 70: Carga De La Batería
Invacare® Birdie® EVO El sistema de liberación de emergencia manual solo 1. Enchufe el cable de alimentación C en una toma funcionará si hay un paciente en la grúa. Puede ajustarse eléctrica. en función del peso del paciente, tal y como se describe a La batería tardará... -
Page 71: Cargador De Batería Opcional
Utilización CBJ Care 5.9.3 Cargador de batería opcional Tipo de Estado Descripción (solo para unidades de control con baterías desmontables) indicador de de la la batería batería El procedimiento para extraer o instalar la batería es el mismo en la unidad de control y el cargador. Carga El estado de la batería es completa... -
Page 72: Elevación Del Paciente
Invacare recomienda utilizar el producto describen a continuación pueden realizarse con únicamente en superficies planas. un (1) único asistente. Sin embargo, Invacare – Durante el traslado, mientras el paciente esté recomienda que, siempre que sea posible, estos suspendido de una eslinga sujeta a la grúa, NO procedimientos los realicen dos (2) asistentes. -
Page 73: Acoplamiento De La Eslinga A La Grúa
Si las eslingas están deterioradas o se han instalado de forma incorrecta, el paciente podría caer y los cuidadores podrían sufrir daños. – Utilice una eslinga Invacare aprobada que cuente con la recomendación del médico, el auxiliar o el cuidador para ofrecer seguridad y comodidad al paciente. -
Page 74: Traslado De Un Paciente A La Cama
Invacare® Birdie® EVO Baje al paciente de forma que sus pies descansen sobre la base de la grúa, con una pierna a cada lado del mástil. Levante al paciente lo suficiente como para que quede Cuanto más bajo esté situado el centro de separado de la superficie de descanso y que la grúa... -
Page 75: Traslado Del Paciente A Una Silla De Ruedas
Elevación del paciente 6.6 Traslado de un paciente al inodoro La grúa de elevación de Invacare NO ha sido diseñada como dispositivo de transporte. Si el cuarto de baño NO se encuentra próximo a la cama o si la grúa no puede maniobrar fácilmente hasta el inodoro, el... -
Page 76: Elevación De Un Paciente Que Está En El Suelo
Baje al paciente hasta el inodoro y deje la eslinga fijada en los ganchos de la percha. Invacare recomienda que la eslinga se mantenga fijada en los ganchos de la percha mientras el paciente usa la silla de inodoro o el inodoro Coloque la eslinga A debajo del paciente. - Page 77 Elevación del paciente 9. Eleve el brazo de la grúa para levantar al paciente del suelo. 10. Realice el traslado a otra superficie de descanso u otro objeto fijo. Acople la eslinga. Consulte 6.2.1 Acoplamiento de la eslinga a la grúa, página 73. 1650023-A...
-
Page 78: Transporte Y Almacenamiento
Invacare® Birdie® EVO 3. Active el botón de parada de emergencia y accione los 7 Transporte y almacenamiento frenos de las ruedas. 4. Siga a la inversa el procedimiento que se describe en 4.5 Instalación del pistón en el brazo, página 67 7.1 Información general... -
Page 79: Mantenimiento
Consulte las instrucciones de lavado de la eslinga y el manual piezas. Póngase en contacto inmediatamente correspondiente para obtener información sobre cómo con el proveedor de Invacare y asegúrese de limpiarla. que la grúa no se utiliza hasta que se hayan realizado todas las reparaciones. -
Page 80: Después Del Uso
Invacare® Birdie® EVO Proteja el medioambiente y recicle por separado los distintos 9 Después del uso materiales y componentes de este producto al final de su vida útil en una planta de reciclaje. 9.1 Eliminación La eliminación o el reciclaje de los productos utilizados y del embalaje debe hacerse conforme a las normativas legales ¡ADVERTENCIA! -
Page 81: Solución De Problemas
La unidad de control emite un pitido La carga máxima es excesiva. Reduzca la carga (y la grúa funcionará durante la elevación y el motor se para. con normalidad). Póngase en contacto con el proveedor de Invacare si las instrucciones descritas no solucionan el problema. 1650023-A... -
Page 82: Datos Técnicos
Invacare® Birdie® EVO 11 Datos Técnicos 11.1 Carga máxima de utilización segura Birdie® EVO Birdie® EVO Birdie® EVO COMPACT PLUS Carga máxima de utilización segura (paciente + percha + eslinga) 180 kg 150 kg 180 kg 11.2 Dimensiones y pesos * Dirección de avance... -
Page 83: Sistema Eléctrico
Datos Técnicos Dimensiones [mm] Birdie® EVO Birdie® EVO Birdie® EVO COMPACT PLUS Anchura interna mín. (i) Anchura interna con la máxima extensión (k) Diámetro de giro 1400 1400 1070 1070 1400 Altura hasta el borde superior de las patas (m) Altura libre mín. -
Page 84: Condiciones Ambientales
Invacare® Birdie® EVO Birdie™ EVO Birdie™ EVO Birdie™ EVO COMPACT PLUS Intermitente (funcionamiento periódico del motor) 10 %, máx. 2 min/18 min Especificaciones de la batería 2 x 12 V / 2,9 Ah Tipo de batería Ácido de plomo (sin mantenimiento, sellada) Sí... -
Page 85: Compatibilidad Electromagnética (Emc)
Compatibilidad electromagnética (EMC) 12 Compatibilidad electromagnética (EMC) 12.1 Información general sobre EMC Los equipos eléctricos médicos deben instalarse y utilizarse de acuerdo con la información sobre EMC de este manual. Este equipo se ha probado y cumple con los límites de EMC establecidos por IEC/EN 60601-1-2 para equipos de Clase B. Los equipos de comunicaciones por radiofrecuencia portátiles y móviles pueden afectar al funcionamiento de este producto. - Page 86 Invacare® Birdie® EVO Prueba de Nivel de Entorno electromagnético: guía inmunidad prueba/cumplimiento < 0 % U durante 0,5 Caídas de tensión, La calidad de la red de suministro eléctrico debería ser la habitual de un ciclo en pasos de 45°...
- Page 87 Sommaire 7.3 Rabattage du mât ......106 8 Maintenance ........107 Ce manuel DOIT être remis à...
-
Page 88: Manuel D'utilisation
• des modifications techniques, Invacare se réserve le droit de modifier les caractéristiques • des modifications non autorisées et/ou l'utilisation de des produits sans préavis. pièces de rechange inadaptées. -
Page 89: Sécurité
– Si le lève-personne est utilisé dans un contactez un professionnel de santé, un environnement humide, veillez à ce qu'il soit fournisseur Invacare ou un technicien qualifié correctement nettoyé et séché après utilisation. avant d'essayer d'utiliser ce produit. – Vous ne devez pas brancher ou débrancher le câble d'alimentation dans un environnement... -
Page 90: Informations De Sécurité Relatives Aux Accessoires
ATTENTION ! Compatibilité des sangles avec le système de fixation Invacare utilise un système de fixation courant de type boucles et crochets. Les boucles situées sur les sangles se fixent sur les crochets situés sur le fléau (style cintre). De ce fait, des sangles d'autres marques qui sont adaptées à... -
Page 91: Étiquette Du Produit
Sécurité 2.4.2 Étiquette du produit Conforme DEEE Invacare Portugal, Lda Rua Estrada V elha 949 ISO 10535 4465- 7 84 Leça do Balio, Port ugal Ce produit est conforme à la Directive XXXXXX XXXXX_XX Xxxxxxx xxxxx xxx Xxxxxxx xxxxx xxx 93/42/CEE sur les dispositifs médicaux. -
Page 92: Présentation Du Produit
Toutes les modifications de position peuvent être effectuées sans l'aide du patient. Du fait de différences régionales, vous devez vous reporter au site Internet ou au catalogue Invacare de Ce produit ne présente aucune contre-indication connue. votre pays pour connaître les accessoires qui sont disponibles ;... -
Page 93: Réglages (Mise En Service)
– Seules des pièces Invacare doivent être utilisées pour le montage de ce lève-personne. 4.3 Installation du mât – Après chaque montage, vérifiez que tous les raccords sont bien serrés et que toutes les... -
Page 94: Fixation Du Mât À La Base
Invacare® Birdie® EVO 1. Verrouillez les deux roulettes arrière B. Retirez la 4.3.2 Fixation du mât à la base goupille de verrouillage A. (mât fixe uniquement) 2. Hissez le mât C à la verticale en posant un pieds sur le pied D et en tirant la barre de poussée E vers le haut... -
Page 95: Installation Du Vérin Sur La Flèche
– Contactez votre fournisseur Invacare pour Alignez les trous, remettez en place la goupille de effectuer un entretien. démontage rapide A et fixez-la avec le clip orienté vers l'avant. -
Page 96: Utilisation
La télécommande permet d'ouvrir ou de fermer les pieds le patient et les assistants en danger. de la base. – Invacare recommande que les roulettes arrière soient déverrouillées lors du soulèvement 1. Pour fermer les pieds, du patient pour permettre la stabilité du appuyez sur le bouton lève-personne lorsque le patient est soulevé... -
Page 97: Procédure D'arrêt D'urgence
Utilisation AVERTISSEMENT ! Risque de blessure – Utilisez exclusivement des fléaux spécialement conçus pour ce lève-personne. – Vérifiez que le fléau est adapté au patient et à l'élévation ou au transfert à effectuer. – Vérifiez que le fléau est fermement fixé au connecteur de la flèche et ne peut pas se libérer sans qu'on appuie sur le bouton de 1. -
Page 98: Recharge De La Batterie
Invacare® Birdie® EVO 1. Tirez la poignée d'urgence rouge A tout en appuyant simultanément sur la flèche. Le système manuel de déverrouillage d'urgence ne fonctionne que si un patient se trouve dans le lève-personne. Il peut 1. Branchez le cordon d'alimentation C sur une prise de être réglé... -
Page 99: Chargeur De Batterie En Option
Utilisation CBJ Care 5.9.3 Chargeur de batterie en option Type de Description État de la (pour les boîtiers de contrôle avec batterie amovible témoin de batterie uniquement) batterie La procédure de démontage ou d'installation de la Charge La batterie n'a pas besoin batterie est identique pour le boîtier de contrôle et complète d'être rechargée (charge... -
Page 100: Soulèvement Du Patient
Risque de coincement – Évitez d'utiliser le lève-personne sur une pente. Il existe un risque de coincement entre les Invacare recommande d'utiliser le produit sur crochets du fléau et la sangle. des surfaces planes exclusivement. – Prenez toutes les précautions nécessaires lors –... -
Page 101: Installation De La Sangle Sur Le Lève-Personne
Fléau à 2 points tierces-personnes. – Utilisez une sangle approuvée par Invacare et recommandée par le médecin, l'infirmier ou l'assistant médical afin d'assurer la sécurité et le confort du patient durant la levée. -
Page 102: Transfert Du Patient À Partir D'un Lit
Invacare® Birdie® EVO Fléau à 4 points Avant de déplacer le patient, assurez-vous à nouveau que la sangle est correctement fixée aux crochets du fléau. Reportez-vous à la section 6.2.1 Installation de la sangle sur le lève-personne, page 101 . Si l'une des attaches n'est pas correctement installée, redescendez le... -
Page 103: Transfert Du Patient Dans Un Lit
équilibre et évite que le fauteuil ne bascule vers l'avant. 6.6 Transfert d'un patient vers et depuis une chaise toilettes Le lève-personne Invacare n'est PAS un dispositif de transport. Si la salle de bains est loin du lit ou si le lève-personne ne peut être facilement manœuvré... -
Page 104: Toilettes
Si aucun soin médical n'est requis, procédez au transfert. Abaissez le patient vers la chaise toilettes en laissant la sangle accrochée aux crochets du fléau. Invacare recommande que la sangle reste fixée aux crochets du fléau pendant que le patient utilise la chaise toilettes ou le siège toilettes classique. - Page 105 Soulèvement du patient Pliez les genoux du patient et soulevez-lui la tête du sol Abaissez la flèche de manière à ce que le fléau se trouve en la plaçant sur un oreiller B. directement au-dessus de la poitrine du patient. 4.
-
Page 106: Transport Et Stockage
Invacare® Birdie® EVO 3. Activez le bouton d'arrêt d'urgence et actionnez les 7 Transport et stockage freins des roulettes. 4. Appliquez la procédure suivante en commençant par la fin :4.5 Installation du vérin sur la flèche, page 95 7.1 Généralités 5. -
Page 107: Maintenance
Reportez-vous aux instructions de lavage figurant sur la pas l'utiliser. Contactez votre fournisseur sangle et dans le manuel qui l'accompagne pour plus de Invacare immédiatement et veillez à ce que précisions sur le nettoyage. le lève-personne ne soit pas utilisé jusqu'à sa Nettoyage du lève-personne... -
Page 108: Après L'utilisation
Invacare® Birdie® EVO Préservez l'environnement en faisant recycler les différents 9 Après l’utilisation matériaux et composants de ce produit séparément dans une déchetterie lorsqu'il est arrivé en fin de vie. 9.1 Mise au rebut La mise au rebut et le recyclage des produits usagés et de l'emballage doivent respecter la législation et les règlements... -
Page 109: 10 Dépannage
Le boîtier de contrôle émet un bip La charge maximale a été dépassée. Réduisez la charge (le lève-personne sonore en cours de levage et le moteur devrait refonctionner normalement). s'arrête. Si les problèmes persistent après application des solutions suggérées, veuillez contacter votre fournisseur Invacare. 1650023-A... -
Page 110: Caractéristiques Techniques
Invacare® Birdie® EVO 11 Caractéristiques Techniques 11.1 Charge maximale d'utilisation Birdie® EVO Birdie® EVO Birdie® EVO COMPACT PLUS 180 kg 150 kg 180 kg Charge max. d'utilisation (patient + fléau + sangle) 11.2 Dimensions et poids * Vers l'avant Dimensions [mm] Birdie®... -
Page 111: Système Électrique
Caractéristiques Techniques Dimensions [mm] Birdie® EVO Birdie® EVO Birdie® EVO COMPACT PLUS Largeur interne min. (i) Largeur interne à la portée maximale (k) Diamètre de braquage 1400 1400 1070 1070 1400 Hauteur jusqu'à la partie supérieure des pieds (m) Hauteur libre min. (p) Distance minimum du mur au PSC* à... -
Page 112: Conditions Ambiantes
Invacare® Birdie® EVO Birdie™ EVO Birdie™ EVO Birdie™ EVO COMPACT PLUS 40 élévations complètes (avec une batterie chargée Capacité de travail à 100 % - 50 %) Intermittent (fonctionnement périodique des moteurs) 10 %, 2 min/18 min max. Caractéristiques de la batterie... -
Page 113: Compatibilité Électromagnétique (Cem)
Compatibilité électromagnétique (CEM) 12 Compatibilité électromagnétique (CEM) 12.1 Informations relatives aux interférences électromagnétiques L'équipement médical électrique doit être installé et utilisé conformément aux informations relatives aux interférences magnétiques présentes dans ce manuel. Ce produit a été testé et est certifié conforme aux limites CEM spécifiées dans la norme CEI/EN 60601-1-2 pour les équipements de classe B. - Page 114 Invacare® Birdie® EVO Test d’immunité Directives relatives à l'environnement électromagnétique Test/Niveau de conformité ± 1 kV de ligne à ligne Ondes de choc La qualité du réseau électrique doit être la même que celle du réseau ± 2 kV de la ligne à la électrique d’un hôpital ou d’un établissement commercial.
-
Page 115: Manuale D'uso
7.2 Smontaggio dell'albero dalla base ....134 Sommario 7.3 Ripiegamento dell'albero ......134 Il presente manuale deve essere fornito all'utilizzatore del prodotto. -
Page 116: Generale
I modelli e le configurazioni disponibili nel proprio paese derivanti da: sono riportati nei listini prezzi specifici per paese. • Non conformità con il manuale d'uso Invacare si riserva il diritto di modificare le specifiche del • Utilizzo non corretto prodotto senza ulteriore preavviso. •... -
Page 117: Sicurezza
– Se il sollevatore viene utilizzato in un ambiente difficile comprensione, contattare un operatore umido, assicurarsi che il sollevatore sia asciutto sanitario, il fornitore Invacare o un tecnico e pulito da qualsiasi traccia di umidità dopo qualificato prima di iniziare a utilizzare questo l'uso. -
Page 118: Informazioni Di Sicurezza Sugli Accessori
Invacare per gli accessori disponibili o – In presenza di disturbi, aumentare la distanza contattare il proprio fornitore Invacare. tra questo prodotto e le altre apparecchiature –... -
Page 119: Etichetta Del Prodotto
Sicurezza 2.4.2 Etichetta del prodotto Conforme alle direttive RAEE Invacare Portugal, Lda Rua Estrada V elha 949 ISO 10535 4465- 7 84 Leça do Balio, Port ugal Questo prodotto è conforme alla direttiva XXXXXX XXXXX_XX Xxxxxxx xxxxx xxx Xxxxxxx xxxxx xxx 93/42/CEE relativa ai dispositivi medici. -
Page 120: Panoramica Del Prodotto
Tutti i cambiamenti di posizione sono possibili senza In considerazione delle differenze regionali, fare collaborazione da parte del paziente. riferimento al sito web o al catalogo locale di Invacare per dettagli sugli accessori disponibili o contattare il Non si conoscono controindicazioni per questo prodotto. -
Page 121: Messa In Servizio
Un montaggio non corretto può causare lesioni applicazione, manutenzione e lavaggio. o danni. – Utilizzare solo pezzi di Invacare per il montaggio di questo sollevatore. 4.3 Montaggio dell'albero – Dopo ogni montaggio, controllare che tutti i raccordi siano ben serrati e che tutte le parti 4.3.1 Apertura dell'albero... -
Page 122: Montaggio Dell'albero Sulla Base
Invacare® Birdie® EVO 1. Bloccare entrambe le ruote posteriori orientabili B. 4.3.2 Montaggio dell'albero sulla base Rimuovere il perno di bloccaggio A. (solo albero fisso) 2. Sollevare il gruppo dell'albero C in posizione verticale poggiando un piede sulla gamba D e tirando verso l'alto la barra di spinta E fino a far scattare il fermo di sicurezza F. -
Page 123: Montaggio Dell'attuatore Sul Braccio
– Per la manutenzione, rivolgersi al proprio fornitore Invacare. Allineare i fori, reinserire il perno a sgancio rapido A e fissarlo con il fermo rivolto in avanti. Dopo il montaggio iniziale del sollevatore, la spia di manutenzione è... -
Page 124: Uso
Il sollevatore può ribaltarsi e mettere in pericolo il paziente e gli assistenti. La pulsantiera viene utilizzata per aprire o chiudere le gambe – Invacare raccomanda che le ruote posteriori della base. orientabili siano sbloccate durante le procedure 1. Per chiudere le gambe,... -
Page 125: Esecuzione Di Un Arresto Di Emergenza
ATTENZIONE! Pericolo di lesioni – Utilizzare esclusivamente bilancini realizzati per questo sollevatore. – Assicurarsi che il bilancino sia adatto per il paziente e per l'effettiva operazione di sollevamento o di trasferimento richiesta. – Controllare che il bilancino sia saldamente fissato al connettore del braccio e che non 1. -
Page 126: Ricarica Della Batteria
Invacare® Birdie® EVO 1. Tirare verso l'alto l'impugnatura di emergenza rossa A e contemporaneamente spingere il braccio verso il basso. Il sistema di rilascio di emergenza manuale funziona solo se un paziente si trova sul sollevatore. Può essere regolato in 1. -
Page 127: Caricabatteria Opzionale
CBJ Care 5.9.3 Caricabatteria opzionale Tipo di Stato di Descrizione (solo per centraline con batteria rimovibile) indicatore carica della batteria della La procedura di rimozione o installazione della batteria batteria è identica per la centralina e il caricabatteria. Completa- La batteria è OK, non deve Rimozione della batteria mente essere ricaricata (100–50%). -
Page 128: Sollevamento Del Paziente
Pericolo di lesioni o danni di seguito possono essere eseguite da un (1) Danni a parti del sollevatore (pulsantiera, ruote assistente: Invacare consiglia tuttavia, se possibile, orientabili, ecc.) provocate da un urto contro il l'utilizzo di due (2) assistenti per l'esecuzione suolo, muri o altri oggetti fissi possono causare delle procedure. -
Page 129: Attacco Dell'imbracatura Al Sollevatore
Invacare sono appositamente progettati per rimane in posizione più reclinata. Collegare le cinghie di l'uso in combinazione con i sollevatori Invacare. colore corrispondente su ciascun lato dell'imbracatura per – Dopo ogni lavaggio (nel rispetto delle istruzioni ottenere un sollevamento uniforme del paziente. -
Page 130: Trasferimento Del Paziente Da Un Letto
Invacare® Birdie® EVO Bilancino a 4 punti Prima di spostare il paziente, controllare nuovamente che l'imbracatura sia fissata correttamente ai ganci del bilancino. Consultare la sezione 6.2.1 Attacco dell'imbracatura al sollevatore, pagina 129 . Se gli attacchi non sono posizionati correttamente, abbassare nuovamente il paziente sull'oggetto fisso e correggere 1. -
Page 131: Trasferimento Del Paziente Su Un Letto
6.6 Trasferimento di un paziente da e verso una sedia WC Il sollevatore Invacare NON è inteso come un dispositivo di trasporto. Se le strutture del bagno NON sono vicine al letto o se il sollevatore non può... -
Page 132: Sollevamento Del Paziente Dal Pavimento
Se non è necessario l'intervento del medico, procedere al trasferimento. Abbassare il paziente sulla sedia WC lasciando l'imbracatura fissata ai ganci del bilancino. Invacare raccomanda che l'imbracatura rimanga collegata ai ganci del bilancino mentre il paziente sta utilizzando la sedia WC o la sedia WC standard. - Page 133 Sollevamento del paziente Piegare le ginocchia del paziente e sollevarne la testa dal Abbassare il braccio in modo che il bilancino si trovi pavimento sostenendola con un cuscino B. direttamente sopra il torace del paziente. 4. Sbloccare le ruote posteriori orientabili. Consultare la sezione 5 Uso, pagina 124 5.
-
Page 134: Trasporto E Immagazzinamento
Invacare® Birdie® EVO 3. Azionare il pulsante di arresto di emergenza e applicare 7 Trasporto e immagazzinamento i freni delle ruote orientabili. 4. Eseguire in ordine inverso la procedura descritta nella sezione 4.5 Montaggio dell'attuatore sul braccio, pagina 7.1 Informazioni generali Durante il trasporto, o quando il sollevatore non deve 5. -
Page 135: Manutenzione
– Se la spia di manutenzione è gialla lampeggiante, il esclusivamente da un tecnico qualificato. sollevatore necessita di manutenzione. Non utilizzare – Per la manutenzione, rivolgersi al proprio il prodotto e contattare il proprio fornitore Invacare fornitore Invacare. per assistenza. – Se la spia di manutenzione non lampeggia, il La manutenzione deve essere eseguita almeno ogni 12 mesi sollevatore è... -
Page 136: Dopo L'utilizzo
Invacare® Birdie® EVO Rispettare l'ambiente e riciclare separatamente i differenti 9 Dopo l'utilizzo materiali e componenti del presente prodotto presso un centro di riciclaggio locale al termine del suo utilizzo. 9.1 Smaltimento Lo smaltimento e il riciclaggio dei prodotti usati e degli... -
Page 137: Guida Alla Soluzione Dei Problemi
La centralina emette un segnale acustico Ridurre il carico (il sollevatore tornerà a È stato superato il carico massimo durante il sollevamento e il motore si funzionare normalmente). ammissibile arresta. Se quanto indicato in precedenza non risolve i problemi, contattare il proprio fornitore Invacare. 1650023-A... -
Page 138: Dati Tecnici
Invacare® Birdie® EVO 11 Dati Tecnici 11.1 Carico massimo per un utilizzo in sicurezza Birdie® EVO Birdie® EVO Birdie® EVO COMPACT PLUS 180 kg 150 kg 180 kg Carico massimo per un utilizzo in sicurezza (paziente + bilancino + imbracatura) 11.2 Dimensioni e pesi... -
Page 139: Impianto Elettrico
Dati Tecnici Dimensioni [mm] Birdie® EVO Birdie® EVO Birdie® EVO COMPACT PLUS Larghezza interna minima (i) Larghezza interna in corrispondenza dell'estensione massima (k) Diametro di sterzata 1400 1400 1070 1070 1400 Altezza del bordo superiore delle gambe (m) Altezza minima libera da terra (p) Distanza minima dalla parete al PSC* in corrispondenza dell'estensione massima (con gambe aperte) (q) Distanza minima dalla parete al PSC* in corrispondenza... -
Page 140: Condizioni Ambientali
Invacare® Birdie® EVO Birdie™ EVO Birdie™ EVO Birdie™ EVO COMPACT PLUS Specifiche della batteria 2 da 12 V / 2,9 Ah Tipo di batteria Piombo-acido (esente da manutenzione, sigillata) Sì Opzionale Sì Abbassamento di emergenza manuale (alla base (alla sommità... -
Page 141: Compatibilità Elettromagnetica (Emc)
Compatibilità elettromagnetica (EMC) 12 Compatibilità elettromagnetica (EMC) 12.1 Informazioni generali sulla compatibilità elettromagnetica (EMC) Le apparecchiature elettromedicali devono essere installate e utilizzate conformemente alle informazioni sulla compatibilità elettromagnetica contenute nel presente manuale. Questo prodotto è stato collaudato ed è risultato conforme ai limiti di compatibilità elettromagnetica specificati dalla norma IEC/EN 60601-1-2 per le apparecchiature di classe B. - Page 142 Invacare® Birdie® EVO Test di immunità Ambiente elettromagnetico - guida Test / Livello di conformità Sbalzi di tensione ± 1 kV da linea a linea La qualità della connessione elettrica deve essere quella di un tipico ambiente commerciale od ospedaliero.
- Page 143 Inhoudsopgave 8 Onderhoud ........163 8.1 Algemene informatie over onderhoud .
-
Page 144: Algemeen
Normale slijtage zijn te vinden op de prijslijst van het desbetreffende land. • Verkeerde montage of afstelling door de koper of een derde Invacare behoudt zicht het recht om productspecificaties te • Technische aanpassingen wijzigen zonder voorafgaand bericht. • Niet-geautoriseerde wijzigingen en/of gebruik van... -
Page 145: Veiligheid
Invacare-leverancier – Als de patiëntenlift wordt gebruikt in een of een technisch medewerker voordat u dit vochtige omgeving, moet deze na gebruik product gaat gebruiken. -
Page 146: Veiligheidsinformatie Over Accessoires
RF-straling afgeschermde MRI-ruimte, waar – Omdat er verschillen zijn per regio, kunt u elektromagnetische storingen in hoge mate het beste de Invacare-website of -catalogus aanwezig zijn. voor uw regio raadplegen voor de beschikbare – Als er sprake is van storingen, vergroot u accessoires. -
Page 147: Productlabel
Veiligheid 2.4.2 Productlabel Conform AEEA Invacare Portugal, Lda Rua Estrada V elha 949 ISO 10535 4465- 7 84 Leça do Balio, Port ugal Dit product voldoet aan richtlijn 93/42/EEG XXXXXX XXXXX_XX Xxxxxxx xxxxx xxx Xxxxxxx xxxxx xxx XXXXXXXXXXXXX Xxxxxxx xxxxx xxx betreffende medische hulpmiddelen. -
Page 148: Productoverzicht
Alle positiewijzigingen kunnen worden uitgevoerd zonder Omdat er verschillen zijn per regio, kunt u het beste hulp van de patiënt. de Invacare-website of -catalogus voor uw regio Voor dit product zijn geen contra-indicaties bekend. raadplegen voor informatie over de beschikbare accessoires. -
Page 149: Montage
(1 stuk)* Een onjuiste montage kan tot letsel of schade Draagband (1 stuk)* leiden. – Gebruik alleen onderdelen van Invacare voor de * Afhankelijk van model en/of uitvoering montage van deze patiëntenlift. – Controleer na elke montage of alle bevestigingen... -
Page 150: De Mast Op Het Onderstel Monteren
Invacare® Birdie® EVO 1. Vergrendel beide achterste zwenkwielen B. Verwijder de 4.3.2 De mast op het onderstel monteren vergrendelingspin A. (alleen voor de vaste mast) 2. Zet de mastconstructie C rechtop door met één voet op de poot D te gaan staan en de duwstang E omhoog te trekken totdat de veiligheidsvergrendeling F op zijn plaats vastklikt. -
Page 151: De Actuator Op De Hefboom Installeren
– Neem voor onderhoud contact op met Invacare. Nadat de lift de eerste keer in elkaar is gezet, knippert het Lijn de gaten met elkaar uit en plaats de servicelampje geel. -
Page 152: Gebruik
1. Klap de poten in door de – Invacare raadt aan de vergrendeling van de knop voor het inklappen achterste zwenkwielen niet in te schakelen van de poten A ingedrukt tijdens het tillen en verplaatsen, zodat de te houden. -
Page 153: Een Noodstop Uitvoeren
Gebruik WAARSCHUWING! Kans op lichamelijk letsel – Gebruik alleen tiljukken die zijn gemaakt voor deze lift. – Controleer of het tiljuk geschikt is voor de patiënt en voor de vereiste wijze van tillen of verplaatsen. – Controleer of het tiljuk stevig is bevestigd aan de hefboomconnector en niet kan worden 1. -
Page 154: De Accu Opladen
Invacare® Birdie® EVO Het handmatige noodstopsysteem werkt alleen als er een 1. Steek de stekker van het netsnoer C in het stopcontact. patiënt in de lift is geplaatst. Het kan worden aangepast De accu laadt op in ongeveer 4 uur. Het aan het gewicht van de patiënt zoals hieronder wordt... -
Page 155: Optionele Acculader
Gebruik De accu verwijderen Type Accustatus Omschrijving acculampje Nog niet De accu moet worden opgeladen opgeladen (minder dan 25%). Er klinkt een akoestisch signaal als er een knop wordt ingedrukt. Het onderste ledlampje is GEEL. Nog niet De accu moet worden opgeladen opgeladen. -
Page 156: De Patiënt Optillen
– Gebruik altijd de duwstangen op de mast om WAARSCHUWING! de lift te duwen of te trekken. Beknellingsgevaar – Gebruik de lift niet op een helling. Invacare Het risico bestaat dat u bekneld raakt tussen het adviseert het product alleen op een vlakke tiljuk en de draagband. -
Page 157: De Draagband Aan De Lift Bevestigen
– Gebruik een door Invacare goedgekeurde De lussen aan de draagband kunnen banden met draagband die wordt aanbevolen door de verschillende kleuren bevatten die verschillende lengtes arts, verpleegkundige of arts-assistent van de aangeven. -
Page 158: De Patiënt Vanaf Een Bed Verplaatsen
Invacare® Birdie® EVO 4-punts tiljuk Controleer voor het verplaatsen van de patiënt nogmaals of de draagband goed is bevestigd aan de haken van het tiljuk. Raadpleeg 6.2.1 De draagband aan de lift bevestigen, pagina 157 . Als u merkt dat bevestigingspunten niet goed vastzitten, laat u de patiënt... -
Page 159: Een Patiënt Naar Een Bed Verplaatsen
6.6 Een patiënt van en naar een toiletstoel verplaatsen De Invacare-patiëntenlift is GEEN vervoermiddel. Wanneer de badkamer zich NIET in de buurt van het bed bevindt of wanneer de patiënt niet gemakkelijk naar de toiletstoel kan worden verplaatst, MOET de patiënt in een rolstoel worden verplaatst en naar... -
Page 160: Een Patiënt Van De Vloer Omhoog Tillen
Laat de patiënt zakken op de toiletstoel waarbij de draagband aan de haken van het tiljuk bevestigd dienen te blijven. Invacare raadt aan de draagband aan de haken van het tiljuk te laten terwijl de patiënt een toiletrolstoel of een standaard toiletstoel gebruikt. - Page 161 De patiënt optillen Laat de patiënt zijn/haar knieën buigen en zijn/haar Breng de hefboom omlaag zodat het tiljuk zich precies hoofd van de vloer tillen terwijl u het hoofd van de boven de borstkas van de patiënt bevindt. patiënt ondersteunt met een kussen B. 4.
-
Page 162: Transport En Opslag
Invacare® Birdie® EVO 4. Voer de procedure die wordt beschreven in 4.5 De 7 Transport en opslag actuator op de hefboom installeren, pagina 151 , in omgekeerde volgorde uit. 5. Voer de procedure die wordt beschreven in 4.4 Het tiljuk 7.1 Algemene informatie... -
Page 163: Onderhoud
Risico op schade of lichamelijk letsel voor gebruik. Onderhoud mag alleen worden uitgevoerd door een bevoegd technicus. – Neem voor onderhoud contact op met Invacare. Er moet minimaal eens per 12 maanden onderhoud worden uitgevoerd, tenzij anders vermeld in lokale vereisten. 1650023-A... -
Page 164: Na Gebruik
Invacare® Birdie® EVO Wij hopen dat u voldoende milieubewust bent om de 9 Na gebruik verschillende materialen en onderdelen van dit product aan het einde van hun gebruiksduur afzonderlijk te recycleren via een afvalverwerkingsstation. 9.1 Afvoeren Het afvoeren en het recycleren van gebruikte producten en... -
Page 165: Problemen Oplossen
Tijdens het tillen klinkt er een pieptoon Max. belasting is overschreden. Verminder de belasting (zodat de lift vanuit de bedieningseenheid en de weer normaal functioneert). motor stopt. Neem contact op met uw Invacare-leverancier als de problemen hiermee niet kunnen worden opgelost. 1650023-A... -
Page 166: Technische Specificaties
Invacare® Birdie® EVO 11 Technische Specificaties 11.1 Maximale veilige belasting Birdie® EVO Birdie® EVO Birdie® EVO COMPACT PLUS 180 kg 150 kg 180 kg Maximale veilige belasting (patiënt + tiljuk + draagband) 11.2 Afmetingen en gewichten * Voorwaartse richting Afmetingen (mm) Birdie®... -
Page 167: Elektrisch Systeem
Technische Specificaties Afmetingen (mm) Birdie® EVO Birdie® EVO Birdie® EVO COMPACT PLUS Min. binnenbreedte (i) Binnenbreedte bij maximale reikwijdte (k) Draaidiameter 1400 1400 1070 1070 1400 Hoogte tot bovenrand van poten (m) Min. vrije hoogte (p) Minimale afstand van muur tot CSP* bij maximaal bereik (poten uitgeklapt) (q) Minimale afstand van muur tot CSP* bij maximale hoogte (poten uitgeklapt) (r) -
Page 168: Omgevingsvoorwaarden
Invacare® Birdie® EVO Birdie™ EVO Birdie™ EVO Birdie™ EVO COMPACT PLUS 40 keer volledig tillen (met de accu tussen 50% - Werkvermogen 100% van het volledige vermogen) Met onderbrekingen (periodieke motorfunctie) 10%, max. 2 min/18 min Specificaties accu 2 x 12 V/2,9 Ah... -
Page 169: Elektromagnetische Compatibiliteit (Emc)
Elektromagnetische compatibiliteit (EMC) 12 Elektromagnetische compatibiliteit (EMC) 12.1 Algemene informatie over EMC Elektrische medische apparatuur moet worden geïnstalleerd en gebruikt in overeenstemming met de EMC-informatie in deze handleiding. Tests hebben uitgewezen dat dit product voldoet aan de EMC-richtlijnen volgens IEC/EN 60601-1-2 voor apparatuur van klasse B. Draagbare en mobiele RF-communicatieapparatuur kan de werking van dit product beïnvloeden. - Page 170 Invacare® Birdie® EVO Immuniteitstest Elektromagnetische omgeving– richtlijn Testniveau/ mate van overeenkomst < 0% U gedurende 0,5 De kwaliteit van de netstroom moet overeenkomen met die cyclus in stappen van 45° Spanningsdips, van een commerciële omgeving of ziekenhuisomgeving. Als de korte...
- Page 171 8.2 Inspeções diárias....... 192 Índice 8.3 Limpeza e desinfeção ......192 8.4 Intervalo para manutenção .
-
Page 172: Geral
• Utilização incorreta • Desgaste natural devido ao uso A Invacare reserva-se o direito de alterar as especificações • Montagem ou preparação incorreta pelo comprador ou do produto sem aviso prévio. por terceiros Antes de ler este manual, certifique-se de que tem a versão... -
Page 173: Segurança
Invacare antes de tentar utilizar este produto. – Não ligue nem desligue o cabo de alimentação num ambiente de humidade ou com as mãos ADVERTÊNCIA! -
Page 174: Informações De Segurança Sobre Os Acessórios
RF, onde a intensidade das – Devido a diferenças regionais, consulte o perturbações eletromagnéticas é alta. catálogo ou o site local da Invacare para obter – Se ocorrerem perturbações, aumente a distância detalhes sobre os acessórios disponíveis ou entre este produto e o outro equipamento ou contacte o seu fornecedor Invacare. -
Page 175: Rótulo Do Produto
Segurança 2.4.2 Rótulo do produto Em conformidade com a diretiva REEE Invacare Portugal, Lda Rua Estrada V elha 949 ISO 10535 4465- 7 84 Leça do Balio, Port ugal Este produto está em conformidade com a XXXXXX XXXXX_XX Xxxxxxx xxxxx xxx... -
Page 176: Descrição Geral Do Produto
Unidade de controlo CBJ Care, CBJ1 ou CBJ2 com bateria removível 3.3 Acessórios Devido a diferenças regionais, consulte o catálogo ou o site local da Invacare para obter detalhes sobre os acessórios disponíveis ou contacte o seu fornecedor Invacare. 1650023-A... - Page 177 Descrição geral do produto • Barra de suporte de 4 pontos (estilo cabide), com 450 Os modelos de cesta com fixações de presilha, adequados ou 550 mm de largura para barras de suporte (estilo cabide) com ganchos: • Barra de suporte de 2 pontos (estilo cabide), com 350, •...
-
Page 178: Configuração
A montagem incorreta deste produto pode causar lesões ou danos. Cesta (1 unidade)* – Utilize apenas peças da Invacare na montagem deste elevador de transferência. * Depende do modelo e/ou da configuração – Após cada montagem, verifique se os encaixes estão devidamente apertados e se todas as... -
Page 179: Montar O Mastro Na Base
Configuração 1. Bloqueie ambos os rodízios traseiros B. Retire o pino 4.3.2 Montar o mastro na base de bloqueio A. (apenas mastro fixo) 2. Levante a unidade do mastro C para uma posição vertical pousando um pé na perna D e puxando a barra de empurrar E para cima até... -
Page 180: Instalar A Atuador No Braço
Se a luz de assistência estiver a piscar a amarelo durante a utilização diária ou após uma nova montagem, o elevador necessita de assistência. – Contacte o fornecedor Invacare para solicitar manutenção. Alinhe os orifícios, reinstale o pino de extração rápida A Depois da montagem inicial do elevador, a luz de assistência... -
Page 181: Utilização
O elevador pode tombar e colocar o paciente e 5.4.1 Fechar/Abrir as pernas eléctricas do elevador os assistentes em perigo. – A Invacare recomenda que os rodízios traseiros O comando é utilizado para abrir ou fechar as pernas da permaneçam desbloqueadas durante os base. -
Page 182: Realizar Uma Paragem De Emergência
Invacare® Birdie® EVO ADVERTÊNCIA! Risco de lesão – Utilize apenas barras de suporte concebidas para este elevador. – Certifique-se de que a barra de suporte é adequada para o paciente e o elevador ou a transferência propriamente ditos. – Verifique se a barra de suporte está bem 1. -
Page 183: Carregar A Bateria
Utilização O sistema de emergência manual só funciona com um 1. Ligue o cabo de alimentação C a uma tomada de paciente no elevador. Pode ser ajustado ao peso do paciente parede. conforme descrito abaixo. O peso está predefinido para 75 A bateria leva cerca de 4 horas a carregar. -
Page 184: Carregador Da Bateria Opcional
Invacare® Birdie® EVO CBJ Care 5.9.3 Carregador da bateria opcional Tipo de Estado Descrição (apenas para unidades de controlo com bateria removível) indicador da bateria bateria O procedimento de remoção ou instalação da bateria é o mesmo para a unidade de controlo e o Carga A bateria está... -
Page 185: Elevar O Paciente
Todos os procedimentos de transferências empurrar ou puxar o elevador. descritos no seguinte podem ser realizados – Evite utilizar o elevador num declive. A Invacare por um (1) assistência. No entanto, a Invacare recomenda que o produto seja apenas utilizado recomenda que, sempre que possível, os... -
Page 186: Fixar A Cesta Ao Elevador
A utilização de cestas incorretas ou danificadas pode fazer com que o paciente caia ou provocar lesões nos assistentes. – Utilize uma cesta aprovada pela Invacare que seja recomendada pelo médico responsável, enfermeiro ou médico assistente da pessoa a elevar, para o seu conforto e segurança. -
Page 187: Transferir Um Paciente Para Uma Cama
Elevar o paciente Baixe o paciente de modo a que os respetivos pés fiquem pousados na base do elevador, um de cada lado Eleve o paciente a uma altura suficiente para ficar do mastro. completamente fora do objeto estacionário, com todo o O centro de gravidade inferior oferece peso suportado pelo elevador. -
Page 188: Transferir O Paciente Para Uma Cadeira De Rodas
Invacare® Birdie® EVO 6.6 Transferir um paciente para e de uma sanita O elevador de transferência da Invacare NÃO se destina ser utilizado como dispositivo de transporte. Se as instalações sanitárias NÃO estiverem junto à cama ou se o elevador de transferência não puder ser manobrado na direção da sanita, o paciente... -
Page 189: Levantar Um Paciente A Partir Do Chão
Baixe o paciente até o colocar na sanita, deixando a cesta presa aos ganchos da barra de suporte. A Invacare recomenda que a cesta permaneça ligada aos ganchos da barra de suporte enquanto o paciente estiver a Coloque a cesta A por baixo do paciente. - Page 190 Invacare® Birdie® EVO 9. Suba o braço para levantar o paciente do chão. 10. Avance com a transferência para a outra superfície de repouso ou para outro objeto estacionário. Fixe a cesta. Consulte a secção 6.2.1 Fixar a cesta ao elevador, página 186 .
-
Page 191: Transporte E Armazenamento
Transporte e armazenamento 7 Transporte e armazenamento 3. Ative o botão de paragem de emergência e aplique os travões dos rodízios. 4. Execute o procedimento descrito na secção 4.5 Instalar 7.1 Informações gerais a atuador no braço, página180pela ordem inversa. 5. -
Page 192: Manutenção
– Contacte o fornecedor Invacare para solicitar o elevador necessita de assistência. Não utilize o manutenção. elevador e contacte o seu fornecedor Invacare para obter assistência. É necessário realizar as operações de manutenção pelo – Se a luz de assistência não estiver a piscar, o elevador menos a cada 12 meses, salvo indicação em contrário dos... -
Page 193: Após A Utilização
Após a utilização Seja amigo do ambiente e recicle os diferentes materiais 9 Após a utilização e componentes deste produto em separado através das instalações de reciclagem no fim da respetiva vida útil. 9.1 Eliminação A eliminação e a reciclagem de produtos utilizados e da embalagem devem cumprir as leis e os regulamentos ADVERTÊNCIA! relativos à... -
Page 194: Resolução De Problemas
A unidade de controlo emite um bip A carga máx. foi ultrapassada. Reduza a carga (e o elevador irá durante a elevação e o motor para. funcionar normalmente). Contacte o seu fornecedor Invacare, se as instruções acima não resolverem os seus problemas. 1650023-A... -
Page 195: Características Técnicas
Características Técnicas 11 Características Técnicas 11.1 Carga útil máx. Birdie® EVO Birdie® EVO Birdie® EVO COMPACT PLUS Carga útil máx. (paciente + barra de suporte + cesta) 180 kg 150 kg 180 kg 11.2 Dimensões e pesos * Direção em frente Dimensões [mm] Birdie®... -
Page 196: Sistema Elétrico
Invacare® Birdie® EVO Dimensões [mm] Birdie® EVO Birdie® EVO Birdie® EVO COMPACT PLUS Largura interna com o alcance máximo (k) Diâmetro de rotação 1400 1400 1070 1070 1400 Altura até à extremidade superior das pernas (m) Altura livre mín. (p) Distância mínima da parede ao CSP* no alcance máximo... -
Page 197: Condições Ambientais
Características Técnicas Birdie™ EVO Birdie™ EVO Birdie™ EVO COMPACT PLUS Intermitente (utilização periódica do motor) 10%, máx. 2 min./18 min. Especificações da bateria 2 x 12 V/2,9 Ah Tipo de bateria Chumbo-ácido (isenta de manutenção, selada) Opcional Abaixamento de emergência manual (na parte inferior (na parte superior (na parte inferior... -
Page 198: Compatibilidade Eletromagnética (Emc)
Invacare® Birdie® EVO 12 Compatibilidade eletromagnética (EMC) 12.1 Informações gerais sobre compatibilidade eletromagnética (EMC) O equipamento elétrico médico deve ser instalado e utilizado de acordo com as informações de EMC incluídas neste manual. Este produto foi testado e considerado em conformidade com os limites de EMC especificados pela norma IEC/EN 60601-1-2 para o equipamento de Classe B. - Page 199 Compatibilidade eletromagnética (EMC) Teste de imunidade Nível de Ambiente eletromagnético – diretrizes teste/conformidade < 0% U para 0,5 ciclo a Quedas de tensão, Mains power quality should be that of a typical commercial or hospital incrementos de 45° interrupções curtas environment.
- Page 200 Italia: Nederland: Belgium & Luxemburg: Norge: Invacare AS Invacare Mecc San s.r.l., Invacare BV Invacare nv Grensesvingen 9, Postboks 6230, Via dei Pini 62, Galvanistraat 14-3 Autobaan 22 Etterstad I-36016 Thiene (VI) NL-6716 AE Ede...
Need help?
Do you have a question about the Birdie EVO COMPACT and is the answer not in the manual?
Questions and answers