
Related Manuals for Goldair Contempo GBQCON6


Summary of Contents for Goldair Contempo GBQCON6
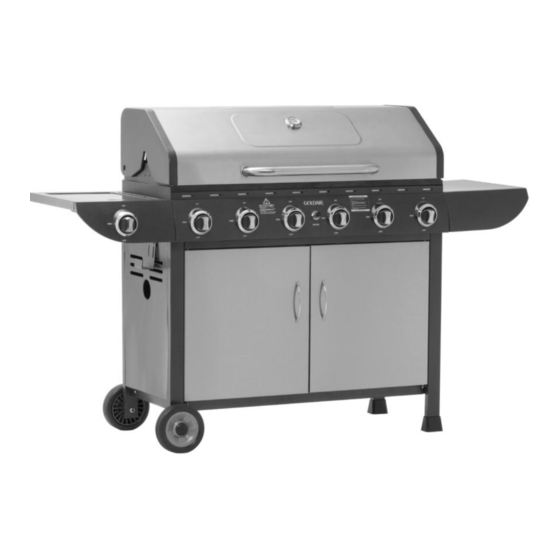
- Page 1 Operating Instructions Contempo 6 Burner BBQ With Side Burner & Cabinet Model: GBQCON6...
-
Page 2: Read Me First
Before attempting to assemble your Goldair BBQ, ensure all parts are correct and contained within the box as per the components list. o Goldair suggests laying out all components on a large flat surface and removing any plastic or protective material before assembling your BBQ. -
Page 3: Gas Leak Testing
Read Me First Page 2 GAS LEAK TESTING It is important that you leak test the BBQ before first use and every time the gas cylinder is refilled and reconnected to the BBQ. To complete a Leak Test: • Make sure all the control knobs are OFF. •... -
Page 4: Safety Guide
Safety Guide Page 3 • Do not operate this BBQ before reading the instruction booklet • Do not place articles on or against this BBQ • Do not use or store flammable or combustible materials, chemicals or spray aerosols near your BBQ •... - Page 5 Safety Guide Page 4 Always choose a safe location for the BBQ, keeping in mind the safety precautions outlined. Ensure all packaging has been removed from the unit before use. NOTE This BBQ shall only be used in an above ground open air situation with natural ventilation, without stagnant areas, where gas leakage and products of combustion are...
- Page 6 Safety Guide Page 5 A strong gas smell or hissing sound of escaping gas indicates a serious problem with the BBQ or ULPG cylinder. Failure to immediately follow the steps listed below could result in a fire or explosion that could cause serious injury, death or property damage. •...
-
Page 7: Gas Cylinder Information
Safety Guide Page 6 GAS CYLINDER INFORMATION 1. This BBQ is designed to be used with a gas cylinder not exceeding 9KG. 2. The gas cylinder supply valve must be turned off when the BBQ is not in use. 3. Gas cylinders must be stored outdoors, out of reach of children and must not be stored in a building, garage or any other enclosed area. -
Page 8: Regulator Connection
Safety Guide Page 7 REGULATOR CONNECTION 1. Check that all control knobs are in the ‘Off’ position. 2. Make sure the cylinder valve is off. 3. Remove the protective cap from the cylinder, if present. 4. Leak test the connection with a soapy water solution (Procedure located on Page 2 of this manual) NOTE 1. - Page 9 Safety Guide Page 8 • Do not leave food unattended on the BBQ. • In case of a fat fire turn gas off at cylinder immediately. • Particular care must be taken when removing the fat drip tray. Hot fat can cause serious burn injuries.
-
Page 10: Parts Diagram
Parts Diagram Page 9... -
Page 11: Assembly Procedure
Assembly Procedure Page 10 Note: Tools required for assembly - 2 x adjustable spanners, Medium Philips screwdriver Step 1. On the left leg panel assembly, (this one has the larger holes and no rubber feet) attach the wheels using axle bolt and nuts. Knock out the hub caps, attach the wheels using axle bolt and nuts, then put back the hub caps. - Page 12 Assembly Procedure Page 11 Step 3. Fit the rear panel using 4 M5 x 8mm long screws Step 4. Screw the top rail to the leg assemblies using 4pcs M5 x 8mm Fit front cabinet doors to trolley by locating the hinge pins of the doors into the holes of the bottom shelf.
- Page 13 Assembly Procedure Page 12 Step 5. Note: The side burner and associated table are supplied with the hose connected and are packed inside the hood. Leave the side burner inside the hood during assembly until you are ready to attach the side burner (step 6) Take the main body and place it on the leg assembly with 3 screws M6 x 12mm slotted hex head black.
- Page 14 Assembly Procedure Page 13 Step 6. Fit side tables by locating against side and securing with 4 M6 x 12mm slotted hex head screws. The front curved fascia panel is additionally secured by one M4 x 8mm self tapping screw. NOTE: This is a self tapping screw, ensure the screw is in tight until the fascia cannot move.
- Page 15 Assembly Procedure Page 14 Step 7. Place the flame tamer in position over the right hand burner. The ends of the flame tamer locate on brackets inside the main body. The flame tamers just sit on these brackets above the burners. Step 8.
- Page 16 Assembly Procedure Page 15 Step 9. Set the warming rack over the cooking surfaces at the rear with the legs of the rack locating into holes on either side. NOTE: The up-stand goes to the back. Step 10. Slide the Drip Tray into position from the rear of the Barbecue. The hole in the Drip Tray must be located away from the gas bottle position.
- Page 17 Assembly Procedure Page 16 Step 11. The BBQ is intended to be used with a standard 9kg ULPG cylinder. This is the type of cylinder that can be refilled at petrol station or swapped for similar cylinder. Place the cylinder in position on the gas bottle bracket of the BBQ, under the left hand side burner, so that the bracket sits through the neck of the cylinder, allowing it to hang.
- Page 18 Operating your BBQ Page 17 • Never leave burners on high for more than 10 minutes unless actually cooking. If the burner makes hissing sounds when lit, it may be burning inside. Turn burner off, allow it to cool and try again. •...
- Page 19 Operating your BBQ Page 18 Lighting the BBQ Lighting the BBQ is easy, but must be done with due care. Make sure that the gas is turned on at the cylinder, or that gas is available to the BBQ. Also, if your BBQ has a roasting hood, ensure that the hood is up. Spark Ignition Push the knob control in and turn anticlockwise to the high position.
- Page 20 Operating your BBQ Page 19 Before first use - Curing the cast iron During manufacturing, the cooking surfaces (plates and grills) were coated with a non- toxic paint. This paint will come off completely over time. Its purpose is to help protect your BBQ during transport and storage.
- Page 21 Cooking with your BBQ Page 20 Avoid burning or charring food as this has been Roasting shown to be unhealthy. Larger joint of meat achieve similar results as in a conventional oven, except in about 2/3 the usual Don’t leave cooked food standing for too long cooking time due to the natural convection effect before eating.
-
Page 22: Maintenance
BBQ. • Please note that the Goldair BBQ Cover (if supplied with this model) is not covered under your Warranty. The BBQ is for portable outdoor use and is not intended for permanent installation or installation in vehicles or boats. - Page 23 Maintenance Page 22 On-going Maintenance Your BBQ requires regular maintenance (interior and exterior). The use on a BBQ cover in conjunction with the instructions below will help to ensure it remains in proper working order and maintains its appearance. Exterior: Stainless Steel BBQ’s Overtime grease, fat and other cooking oils may build up on your BBQ.
- Page 24 Maintenance Page 23 On-going Maintenance Interior: Plates and Grills The best way to clean your BBQ plates/grills is to light-up the BBQ and leave it on with the hood down to warm-up for 10-15 minutes. After this time, remove excess fat, oils, cooking residue with paper towels or a cotton rag from plates/grills then take a long handled brush and a scraper and remove remaining oil and food scraps.
-
Page 25: Troubleshooting
Troubleshooting Page 24 Problem Possible Cause Prevention/Solution Burner(s) will not Wire and/or electrode covered Clean wire and/or electrode with rubbing light using ignition. with cooking residue. alcohol and clean swab. Replace electrode(s). Electrode cracked or broken "sparks at crack”. Reconnect wires or replace electrode/wire assembly. -
Page 26: Troubleshooting-Electronic Ignition
Troubleshooting-Electronic Ignition Page 25 Problem Possible Cause Check Procedure Prevention/Solution No sparks appear at Not installed properly. Check battery orientation Install battery (make sure that “+” and “-” any electrodes when ignition button is connectors are oriented correctly, with “+” end up pushed;... -
Page 27: One Year Warranty
Warranty period will be at your are expressly excluded. cost. If your Goldair product fails to operate Consumers Guarantee Act (1993). satisfactorily, please contact Goldair via phone In accordance with the above act, consumers in the first instance. - Page 28 TECHNICAL SPECIFICATION Model No: GBQCON6 Gas Type: ULPG Injector Size: 0.94mm for Main, 0.96mm for Side Total Gas Consumption: 75.7 MJ/h Side Burner Gas Consumption: 11.5 MJ/h Gas Pressure: 2.75 kPa SUPPORT AND TECHNICAL ADVICE PO Box 100707, NSMC, Auckland, New Zealand Monday –...
Need help?
Do you have a question about the Contempo GBQCON6 and is the answer not in the manual?
Questions and answers