Table of Contents
Advertisement
Advertisement
Table of Contents
Troubleshooting

Related Manuals for Goldair GBQ45


Summary of Contents for Goldair GBQ45
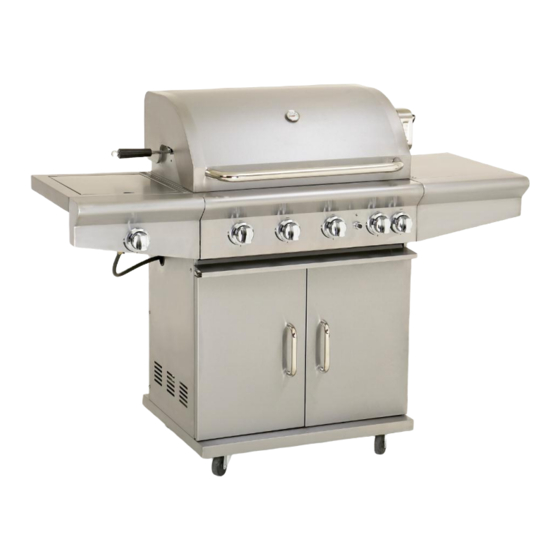
- Page 1 AVANTE-GARDE 4 BURNER BARBECUE OPERATING INSTRUCTIONS Model: GBQ45...
-
Page 2: Read Me First
Thank you for choosing a Goldair BBQ. This Goldair BBQ has been designed and manufactured to a high standard of engineering and with proper use and care, as described in this leaflet, will give you years of useful service. Please read these instructions carefully. -
Page 3: Ongoing Maintenance
CLEANING AND CARE OF YOUR BARBEQUE Ongoing Maintenance Your BBQ requires regular maintenance (interior and exterior) to ensure it remains in proper working order and to maintain its appearance. Exterior: Stainless Steel BBQ’s Overtime grease, fat and other cooking oils may build up on your BBQ. To clean, wash with warm/hot soapy water. - Page 4 Interior: Plates and Grills –The best way to clean your BBQ plates/grills is to light-up the BBQ and leave it on with the hood down to warm-up for 10-15 minutes. After this time, remove excess fat, oils, cooking residue with paper towels or a cotton rag from plates/grills. This can also be completed after each time you use your BBQ.
-
Page 5: Clearance To Combustibles
Battery operated multi shot ignition unit (1pc AAA battery) IGNITION: IMPORTANT: Read the following instructions carefully to ensure your Barbeque is properly installed, assembled and cared for. Failure to follow these instructions may result in serious bodily injury and/or property damage. -
Page 6: Use Outdoors Only
USE OUTDOORS ONLY This appliance should only be used in an above ground open-air situation with natural ventilation, without stagnant areas, where gas leakage and products of combustion are rapidly dispersed by wind and natural convection. Any outdoor enclosure in which the appliance is used shall comply with one of the following: An enclosure with walls on all sides, but at least one permanent opening at ground level and no overhead cover. -
Page 7: Tools Required
Tools Required: Assembly steps Attach the side burner and side table using the screws and washers provided. Ensure the BBQ hood and handle are firmly attached. Next fit the left and right doors using the screws and washers provided. Take care when attaching the doors to ensure the magnets at the top of each door align with the magnets on the door frame. - Page 8 Place the cooking grid in place. For best results, the cooking grid should be placed directly above the burners which you have covered with Flame Diffusers. Also place the cooking plate in position so 2/3 of the BBQ’s cooking surface is cooking grid and 1/3 is cooking plate.
- Page 9 6. Check the side burner igniter is connected. Verify a secure connection prior to use by conducting a Gas Leak Test see “Gas Test Leak Procedure”. Sideburner Electrode igniter lead Ignition line 7. Connect the gas hose and gas regulator. USE ONLY AUTHORISED GAS REGULATOR, HOSE AND HOSE CONNECTOR 1) Ensure the gas cylinder is set to the OFF position.
- Page 10 8. Fit the igniter battery Note: A match can be used if the electric ignition fails to spark. AAA Battery For Safe Use Of Your BBQ And To Avoid Serious Injury: ·DO NOT let children operate or play near grills. ·KEEP grill area clear and free from materials that may burn.
- Page 11 Should the burners extinguish for any reason, turn off all control knobs and the cylinder gas valve. Wait 5 minutes before attempting to re-light the appliance. If a grease or fat fire occurs, turn off at all control knobs and switch off the gas cylinder valve ...
- Page 12 NEVER ALWAYS “Burning off” the Barbeque after every use Lean over appliance when lighting (for approx 15 minutes) will keep Leave cooking food unattended excessive food residue to a minimum. Store combustible material, gasoline or flammable liquids or vapors Use spanner to tighten all gas fittings.
-
Page 13: Lighting Your Barbeque
LIGHTING YOUR BARBEQUE Lighting Instructions (Main Grill Burners): Ensure all packaging material has been removed from your BBQ. Turn all control knobs clockwise to “OFF” position. Connect the regulator to the gas bottle. Turn the gas supply “ON” at the cylinder. If you have not already done so, check with the use of soapy water for any gas leakage between the bottle and the regulator. -
Page 14: Before First Use
Lighting Instructions (Back burner): Ensure the rotisserie and motor are in position and the back burner control know is set to the “OFF” position. Connect the regulator to the gas bottle. Turn the gas supply “ON” at the cylinder. If you have not already done so, check with the use of soapy water for any gas leakage between the bottle and the regulator. - Page 15 Indirect Cooking Poultry and large cuts of meat cook slowly to perfection on the grill by indirect heat. The heat from selected burners circulates gently throughout the grill, cooking meat or poultry without the touch of a direct flame. This method greatly reduces flare-ups when cooking extra fatty cuts because there is no direct flame to ignite the fats and juices that drip during cooking.
-
Page 16: Troubleshooting-Electronic Ignition
Troubleshooting-Electronic Ignition Problem Possible Cause Check Procedure Prevention/Solution •Battery not installed •Check battery orientation •Install battery (make sure No sparks appear that “+” and “-” connectors on any electrodes properly. when ignition button are oriented correctly, with “+” end up and “-” end down. is pushed;... -
Page 17: Troubleshooting
Troubleshooting Problem Possible Cause Prevention/Solution •Wire and/or electrode covered with •Clean wire and/or electrode with rubbing Burner(s) will not light using ignition. cooking residue. alcohol and clean swab. •Electrode cracked or broken •Replace electrode(s). "sparks at crack”. •Electrode tip not in proper position. •Reconnect wires or replace electrode/wire •Wires are loose or disconnected. - Page 18 SERVICING & SPARE PARTS Your gas BBQ should be serviced annually by a certified gas service agent BBQ COVER Please note that the Goldair BBQ Cover “if supplied” is not covered under your warranty.
Need help?
Do you have a question about the GBQ45 and is the answer not in the manual?
Questions and answers