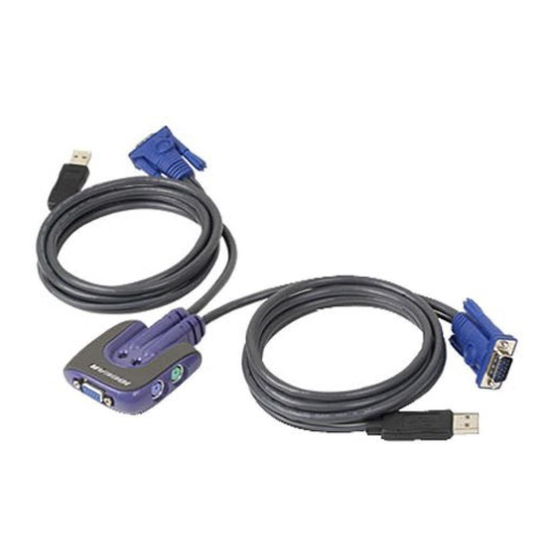
Summary of Contents for IOGear MiniView GCS52U
- Page 1 MiniView Micro USB ™ 2-Port KVM Switch with Built-in KVM Cables Installation Manual (GCS52U) ®...
- Page 2 International Business Machines, Inc. Macintosh, G3/G4 and iMac are registered trademarks of Apple Computer, Inc. IOGEAR makes no warranty of any kind with regards to the information presented in this document. All information furnished here is for informational purposes only and is subject to change without notice.
- Page 3 IOGEAR’s MiniView™ Micro switches are first-rate connectivity accessories designed to help reduce the frustration of managing multiple computer systems. With the MiniView™ Micro by IOGEAR, you can access two computers from a single console(keyboard, mouse and monitor). MiniView™ Micro allows you to change ports easily by entering Hot Key combinations from the keyboard.
-
Page 4: Table Of Contents
Table of Contents Package Contents Overview Features Requirements Introduction Installation Operation Appendix (HotKey) Specification Troubleshooting Tech Support Radio & TV Interference Statement Limited Warranty... -
Page 5: Package Contents
Package Contents This package contains: 1 MiniView Micro USB 2-port KVM switch 1 User Manual 1 Quick Start Guide 1 Warranty Registration Card If any items are damaged or missing, please contact your dealer. -
Page 6: Overview
Overview The MiniView™ Micro USB (GCS52U) KVM switch allows access to two USB computers from a single console (keyboard, monitor, and mouse). This cost-effective way to access two computers, without extra hardware, is highly efficient and easy to use. By allowing a single console to manage both computers, the MiniView™ Micro eliminates the expense of purchasing extra keyboards, monitors, mice, and the MiniView™... -
Page 7: Features
Features - Use one keyboard, monitor and mouse to control two computers - Very compact KVM switch with molded cables for computer connections - Supports Microsoft IntelliMouse and the scrolling wheel on most mice - Easy to install – No Software Required ! - Easy to operate –... -
Page 8: Requirements
Requirements Computers with a PS/2 mouse and keyboard connection, VGA connection, and an available USB port. PS/2 connection USB port VGA connection... -
Page 9: Introduction
Introduction 1. VGA port for the console monitor 2. PS/2 port for the console keyboard 3. PS/2 port for the console mouse 4. VGA connector to the computer 5. USB connector to the computer 6. Port selected LEDs... -
Page 10: Installation
PS/2 mouse and keyboard attached during the first boot-up after installing the GCS52U. After you have installed the KVM shutdown your computer and move the PS/2 mouse and keyboard to the GCS52U console port. You have now installed the unit. - Page 11 Installation Step. 2 4.Connect the VGA cable (item# 4) that is built into the KVM cable of your MiniView™ Micro to the VGA port on your computer. 5.Connect the USB cable (item# 5) that is built into the KVM cable of your MiniView™ Micro to the USB port on your computer.
- Page 12 Installation Step. 3 Repeat Step 2 for your second computer. Step. 4 Turn the power of your computers on. To switch between computers, tap the Scroll Lock key twice.
-
Page 13: Operation
Operation Operations MiniView™ Micro allows you to access the computers through Hot Key combinations from the keyboard. 1. Selecting computers You can toggle between the two computers by pressing and releasing the Scroll Lock key twice: [Scroll Lock]+[Scroll Lock]. 2. AutoScan Mode The MiniView™... - Page 14 Operation Operations con’d To initiate the AutoScan mode, press and release the left Shift key, then press and release the right Shift key: [Left Shift] + [Right Shift]. NOTE: The interval between these two keys should be no more than 0.5 seconds. Once the scanning begins, it continues until you press the [Space Bar] to exit AutoScan Mode.
- Page 15 Operation Operations con’d You can customize the scan interval time with the following Hot Key combination: [Left Shift] + [Right Shift] + [S] + [ n ]. [ n ] represents a number from 1 to 4 which sets the desired scan interval as shown in the table below: Scan Interval 3 seconds...
-
Page 16: Appendix (Hotkey)
Appendix LED Display i t c i t c... -
Page 17: Specification
Specification... - Page 18 Specification Con’d...
-
Page 19: Troubleshooting
Troubleshooting... - Page 20 Troubleshooting Con’d...
-
Page 21: Tech Support
Technical Support If you need technical support, please check out our IOGEAR Tech Info Library (T.I.L.) at www.iogear.com/support for the latest tips, tricks, and troubleshoot- ing. The IOGEAR T.I.L. was designed to provide you with the latest technical information about our products. Most of the answers to your questions can be found here, so please try it out before contacting technical support. -
Page 22: Radio & Tv Interference Statement
Radio & TV Interference Statement WARNING!!! This equipment generates, uses and can radiate radio frequency energy and, if not installed and used in accordance with the instruction manual, may cause interference to radio communications. This equipment has been tested and found to comply with the limits for a Class B computing device pursuant to Subpart J of Part 15 of FCC Rules, which are designed to provide reasonable protection against such interference when operated in a commercial environment. -
Page 23: Limited Warranty
Limited Warranty IN NO EVENT SHALL THE DIRECT VENDOR’S LIABILITY FOR DIRECT, INDIRECT, SPECIAL, INCIDENTAL OR CONSEQUENTIAL DAMAGES RESULTING FROM THE USE OF THE PRODUCT, DISK OR ITS DOCUMEN- TATION EXCEED THE PRICE PAID FOR THE PRODUCT. The direct vendor makes no warranty or representation, expressed, implied, or statutory with respect to the contents or use of this documentation, and especially disclaims its quality, performance, merchantability, or fitness for any particular purpose. - Page 24 ® Contact info. 23 Hubble • Irvine, CA 92618 • (P)949.453.8782 • (F)949.453.8785 • www.iogear.com...


Need help?
Do you have a question about the MiniView GCS52U and is the answer not in the manual?
Questions and answers