
Subscribe to Our Youtube Channel
Related Manuals for IOGear GCS1642


Summary of Contents for IOGear GCS1642
- Page 1 User Manual 2/4-Port Dual View Dual Link DVI KVMP Switch with Audio GCS1642/GCS1644/GCS1642X PART NO. M1087-g / M1088-g www.iogear.com...
- Page 2 IOGEAR, the IOGEAR logo, are trademarks or registered trademarks of IOGEAR. Microsoft and Windows are registered trademarks of Microsoft Corporation. All other brand and product names are trademarks or registered trademarks of their respective holders. IOGEAR makes no warranty of any kind with regards to the information presented in this document.
-
Page 3: Table Of Contents
Table of Contents Package Contents Sun Keyboard Emulation System Requirements Factory Default Hotkeys Settings GCS1642 Overview The Firmware Upgrade Utility GCS1644 Overview Before you Begin Single Stage Installation Starting the Upgrade Quad View (DDC Mode) Upgrade Succeeded LED Indication Upgrade Fail... -
Page 4: Package Contents
Package Contents 1 x 2/4-Port Dual View Dual Link DVI KVMP Switch with Audio 2/4 x Dual Link DVI KVM Cables (2 for GCS1642 / 4 for GCS1644) 2/4 x Dual Link DVI Cables (2 for GCS1642 / 4 for GCS1644) -
Page 5: System Requirements
System Requirements Console – Two displays with DVI inputs – A Keyboard and Mouse Computer – Computers with DVI outputs – An open USB port Optional Audio – Analog audio connections for speakers and mic. -
Page 6: Gcs1642 Overview
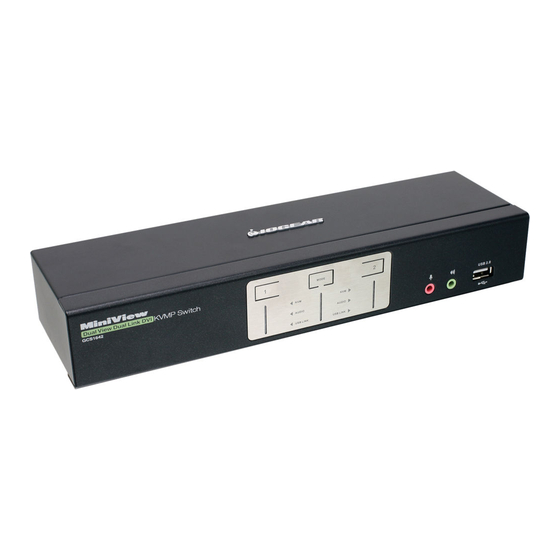
GCS1642 Overview Front View 1. Port 1 Pushbutton 5. Front Panel Console Audio connection 2. Mode Button 6. Front Panel USB 2.0 Peripheral Sharing Port 3. Port 2 Pushbutton 4. Front Panel Console Mic. Connection Dual Link Dual View DVI KVMP SWITCH... - Page 7 Rear View 1. DDC Port (Daisy Chain Port) 14. CPU2 Mic. Connection 8. USB 2.0 Peripheral Sharing Port 2. DC Power Jack 15. CPU2 Audio Connection 9. Console Mic. Connection 3. Console USB Mouse Port 16. CPU1 DVI Video Port 1B 10.
-
Page 8: Gcs1644 Overview
GCS1644 Overview Front View 1. Port 1 Pushbutton 5. Port 4 Pushbutton 2. Port 2 Pushbutton 6. Front Panel Console Mic. Connection 3. Mode Button 7. Front Panel Console Audio connection 4. Port 3 Pushbutton 8. Front Panel USB 2.0 Peripheral Sharing Port Dual Link Dual View DVI KVMP SWITCH GCS1644... - Page 9 Rear View 21. CPU2 DVI Video Port 2B 1. DDC Port (Daisy Chain Port) 11. CPU4 DVI Video Port 4B 22. CPU2 DVI Video Port 2A 2. DC Power Jack 12. CPU4 DVI Video Port 4A 23. CPU2 USB Connection 3.
-
Page 10: Single Stage Installation
Single Stage Installation Step 1 Please make sure your source devices and display are powered off before you start. Step 2 Plug the power adapter into the power outlet and connect it to the DC power jack from the KVM. - Page 11 Step 3 Connect the DVI cables from your monitors to the console DVI port A and B. Port A will be your main monitor and Port B will be your extended desktop monitor.
- Page 12 Step 4 Connect your USB keyboard and mouse to the console USB keyboard port and console USB mouse port.
- Page 13 Step 5 Connect a set of your Dual Link DVI KVM cable from the KVM switch to each of your computers – DVI connection from DVI Port A to the DVI output and USB connection to open USB port from your computer. Connect the audio and mic.
- Page 14 Step 6 Connect Dual Link DVI cables from DVI Port B of the KVM to your second DVI output of your computers. Final Step Turn on your source devices.
-
Page 15: Quad View (Ddc Mode)
To expand your installation from Dual View displays to Quad view displays, you can use the DDC Mode port to connect two GCS1642 / GCS1644 units together. After doing so, you will be able to configure the quad displays video settings on the computer in extended mode or Mirrored mode. -
Page 17: Led Indication
LED Indication Description Mode Orange Shows the pushbutton mode that the KVM is in Online / Selected Dim Green A device is connected to the KVMP switch but the port is not on focus Bright Green The specific port has focus on the KVM (Keyboard, video and mouse) Audio Green... -
Page 18: Port Switching
Port Switching Simply press the front panel Pushbutton from the multimedia KVMP switch or trigger hotkeys from your keyboard. Port Switching via Front Panel Pushbutton Function Description Switch all focus (KVM, audio and USB) Press the correspond push button once for the desire port to a specific port that you wish to switch focus to. -
Page 19: Port Switching Via Hotkeys
Port Switching via Hotkeys Port Switching via Hotkeys Hotkeys Description [Scroll Lock] [Scroll Lock] [Enter] Switch all focus (KVM, audio and USB) to the next port [Scroll Lock] [Scroll Lock] [n] [Enter] Switch all focus (KVM, audio and USB) to port n* [Scroll Lock] [Scroll Lock] [k] [Enter] Switch KVM focus to the next port [Scroll Lock] [Scroll Lock] [n] [k] [Enter]... - Page 20 Port Switching via Hotkeys [Scroll Lock] [Scroll Lock] [n] [k] [u] [Enter] Switch KVM and USB focus to port n* [Scroll Lock] [Scroll Lock] [n] [k] [s] [Enter] Switch KVM and audio focus to port n* [Scroll Lock] [Scroll Lock] [n] [u] [s] [Enter] Switch USB and audio focus to port n* *Note: n is an interval that stands for the Port number k stands for KVM focus...
-
Page 21: Auto Scanning
Auto Scanning You can either activate Autoscan Mode via front panel push button or hotkeys. Function Description Front panel Press and hold port 1 and port 2 Pushbutton simultaneously for 2 pushbutton seconds to activate Autoscan Mode* [Scroll Lock] [Scroll Lock] Activate Autoscan mode. -
Page 22: Hotkey Setting Mode (Hsm)
Hotkey Setting Mode (HSM) Hotkey Description 1. Press and hold [Num Lock] Invoking hotkey setting mode ([Clear] key on Mac keyboard) 2. Press and release [-] 3. Release [Num Lock] ([Clear] key on Mac keyboard) Invoke HSM, then press [h] Change the HSM invocation keys from [Num Lock] to [Ctrl] and from [-] to [F12] Invoke HSM, then press [t]... - Page 23 Invoke HSM, then press [F5] USB Reset Invoke HSM, then press [b] Toggle hotkey beepers on or off Invoke HSM, then press [x] [Enter] Disable or enable port switching hotkey Invoke HSM, then press [u] [p] [g] Activate Firmware Upgrade Mode – Front panel KVM LED will flash [r] [a] [d] [e] [Enter] indicating Firmware Upgrade Mode is activated.
-
Page 24: Mac Keyboard Emulation
Mac Keyboard Emulation The PC compatible (101/104 key) keyboard can emulate the functions of the Mac keyboard. The emulation mappings are listed in the table below. PC Keyboard Mac Keyboard PC Keyboard Mac Keyboard [Shift] Shift [Print Screen] [Crtl] Ctrl [Scroll Lock] [Ctrl] [1] [Enter]... -
Page 25: Sun Keyboard Emulation
Sun Keyboard Emulation The PC compatible (101/104 key) keyboard can emulate the functions of the Sun keyboard. The emulation mappings are listed in the table below PC Keyboard Sun Keyboard PC Keyboard Sun Keyboard [Crtl] [t] Stop [Crtl] [F10] [Crtl] [F2] Again [Crtl] [1] [Crtl] [F3]... -
Page 26: Factory Default Hotkeys Settings
Factory Default Hotkeys Settings Function Default Port Switching [Scroll Lock] [Scroll Lock] Invoking HSM [Num Lock] [-] Auto Scan Interval 5 Seconds Beeper Keyboard Operating Platform PC Compatible Port Switching Keys Enabled Mouse Emulation... -
Page 27: The Firmware Upgrade Utility
The Windows-based Firmware Upgrade Utility (FWUpgrade.exe) provides a smooth, automated process for upgrading the GCS1642 / GCS1644’s firmware. The Utility comes as part of a Firmware Upgrade Package that is specific for each device. New firmware upgrade packages are posted on our website as new firmware revisions become available. -
Page 28: Starting The Upgrade
Starting the Upgrade To upgrade your firmware: 1. Run the downloaded Firmware Upgrade Package file – either by double clicking the file icon, or by opening a command line and entering the full path to it. The Firmware Upgrade Utility Welcome screen appears: 2. - Page 29 4. As you select a device in the list, its description appears in the Device Description panel. GCS1644 [MAIN] . . GCS1644 [MAIN] . . The Utility inspects your installation. All the devices capable of being upgraded by the package are listed in the Device List panel.
- Page 30 5. After you have made your device selection(s), If you enabled Check Firmware Version, the Utility Click Next to perform the upgrade. compares the device’s firmware level with that of the upgrade files. If it finds that the device’s version is higher than the upgrade version, it brings up a dialog box informing you of the situation and gives you the The firmware [Ver 1.0.] is not newer than the current firmware...
-
Page 31: Upgrade Succeeded
Upgrade Succeeded After the upgrade has completed, a screen appears After a successful completion, the switches exit to inform you that the procedure was successful: Firmware Upgrade Mode, and reset themselves. After the upgrade has completed, a screen appears to inform you that the procedure was successful: If you have a DCC mode installation be sure to reconnect the cable connected to the DCC port, and set the DCC switch back to Client on the... -
Page 32: Upgrade Fail
2. Invoke Firmware Upgrade Mode by holding down the Mode button on the front panel (see Mode button, page 6 & 8) and power on the GCS1642 / GCS1644. The orange LEDs flash together. 3. Do the firmware upgrade procedure again. -
Page 33: Federal Communications Commission
Federal Communications Commission (FCC) Statement This equipment has been tested and found to comply with the limits for a Class B digital device, pursuant to Part 15 of the FCC Rules. These limits are designed to provide reasonable protection against harmful interference in a residential setting. -
Page 34: Limited Warranty
Limited Warranty Warranty Information This product carries a 3 Year Limited Warranty. For the terms and conditions of this warranty, please go http://www.iogear.com/support/warranty Register online at http://www.iogear.com/register Important Product Information Product Model Serial Number... -
Page 35: Contact
Contact WE’RE HERE TO HELP YOU! NEED ASSISTANCE SETTING UP THIS PRODUCT? Make sure you: 1. Visit www.iogear.com for more product information 2. Visit www.iogear.com/support for live help and product support IOGEAR www.iogear.com iogear.custhelp.com support@iogear.com... - Page 36 © 2018 IOGEAR ®...
Need help?
Do you have a question about the GCS1642 and is the answer not in the manual?
Questions and answers