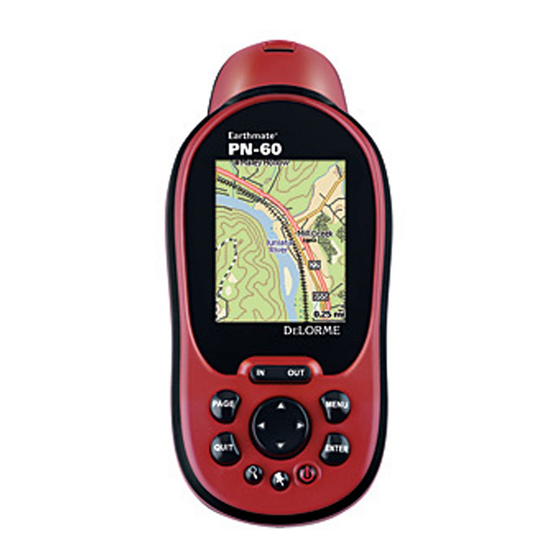
DeLorme Earthmate PN-60 GPS User Manual
Hide thumbs
Also See for Earthmate PN-60 GPS:
- User manual (109 pages) ,
- Quick start manual (50 pages) ,
- User manual (109 pages)
Table of Contents
Advertisement
Quick Links
Advertisement
Table of Contents

Related Manuals for DeLorme Earthmate PN-60 GPS


Summary of Contents for DeLorme Earthmate PN-60 GPS
- Page 1 LORME Earthmate ® PN-60 GPS User Manual January 2012...
-
Page 2: Table Of Contents
Contents Getting Started ..........................3 Home Page ............................ 9 Map Page ............................ 10 Satellites Page ..........................18 Compass Page ..........................20 Trip Info Page ..........................22 Find Page ............................. 24 Waypoints Page ........................... 29 Geocaches Page .......................... 33 Routes Page ..........................38 Tracks Page .......................... -
Page 4: Getting Started
Our desktop and web mapping applications include comprehensive help files. Batteries and SD Card • Use two AA batteries (Lithium is recommended; you can also use NiMH or alkaline) or a DeLorme rechargeable lithium-ion (li-ion) battery. • When the PN-60 is using battery power, the battery indicator on the Home Page displays the percentage of battery life remaining. - Page 5 To leave the device powered on while charging, power it on and connect the USB cable to the computer. On the Home Page, the battery indicator displays a plug. Charge DeLorme Li-ion battery in the PN-60 To put the device in charging mode, power it off and connect the USB cable to the computer.
-
Page 6: Demo Mode
Power The Power button is at the bottom right corner of the button area. • To turn on the PN-60, press and hold Power until you see the Welcome screen. • To turn off the PN-60, press Power and hold for 1.5 seconds until the “Shutting down the device message” displays. - Page 7 Page Press the PAGE button to move forward through the pages in the page order sequence. To add, remove, or reorder pages, go to Settings > Page Order. The default page sequence is determined by the current activity setting. Menu Press the MENU button to access functions for the page or screen you are using.
-
Page 8: Special Keys
• Delete individual points when measuring distance. • Move backwards through the page order sequence. On-screen Keyboard The on-screen keyboard is available when you need to enter text, such as when editing a waypoint label, adding text to a comment field, or entering search parameters. Use the arrow keypad to highlight the letter, number, symbol, or punctuation you want to use, and then press ENTER after each selection. -
Page 9: Info Fields
Info Fields The Map, Compass, Trip Info, and Profile Pages include fields of information that you can customize to suit your needs. You can even change which info fields display depending on your activity. For each activity, the info field types change for navigating or tracking (regular GPS use). -
Page 10: Home Page
Home Page The Home Page uses icons to give you a quick and easy way to locate the page on the device you want to view. Use the arrow keypad to select an icon and then press ENTER to open that page. The Home Page also displays the GPS status (top left) and accuracy (top center), and the battery indicator (top right). -
Page 11: Map Page
Map Page The Map Page centers the map on your current location when the PN-60 has a 2-D or 3-D fix. When it does not have a GPS fix, the map displays your last GPS position, or, if panning the map, the map cursor position. For more information, see GPS and WAAS Status on page 18. -
Page 12: Measure Distance
• Manual panning–To manually pan the map, use the arrow keypad to move the cursor in the direction you want to view. » Use single presses to move the cursor in increments. » Press and hold to quickly pan to a new location. »... -
Page 13: Map Setup
While you are measuring distance, the pan location information that displays in the top right corner of the screen changes to display the heading from the last measurement node to your current GPS location, the leg distance, and the total distance from the last measurement node to the first measurement node. Once you close a polygon, it displays the area. -
Page 14: Data Management
Data Management The PN-60 stores routes and the base map in its internal memory. You can save user maps—including the detailed DeLorme Topo North America maps, waypoints, geocaches, and tracks in the device’s internal memory or on a removable SD card. - Page 15 Navionics SD cards. For more information, see Navionics on page 16. Tip A map package is a dataset you create for an area of interest that you can layer with DeLorme map data and other map datasets available from the NetLink Map Library.
-
Page 16: Map Style
From the Map Page, go to MENU > Map Setup > Scale; from the drop-down list, select an option. Option What it does Represents a given length on the map compared to an actual length. The DeLorme term for map detail level. Each time the zoom level increases, the Zoom scale doubles. Ratio Shows a ratio of a unit on the device compared to the actual unit. -
Page 17: General Info
• You cannot save maps or data to a Navionics SD card—the memory on the card is unavailable. • The Navionics data overlays the DeLorme maps on device—the DeLorme maps are used for routing and Find. • Tracks, routes, waypoints, and geocaches display over the Navionics charts. - Page 18 Do this From the Hide Charts drop-down list, select the scale above which you want to Hide charts by map scale hide the charts. Set chart detail level From the Chart Details drop-down list, select High or Low. From the Hide Contours drop-down list, select Show All or select a level above Show or hide contours which to view contours.
-
Page 19: Satellites Page
Satellites Page The Satellites Page displays GPS and satellite information, time, and elevation. GPS Status Satellite Constellation GPS Accuracy Elevation Signal Graph Constellation and Signal Graph Both the satellite constellation and the satellite signal graph display visible satellites and their identifying numbers. The satellite constellation depicts each satellite’s position and the signal graph bars indicate the strength of each satellite signal. -
Page 20: Gps Accuracy
• 3-D–The GPS is receiving sufficient satellite data (horizontal position and elevation) to determine your location. • WAAS–When “WAAS” appears below 2-D or 3-D, the PN-60 has a WA AS connection (available only in North America) that provides up to five times greater positional accuracy than a regular 2-D or 3-D connection. To set the current location If it takes a long time for the PN-60 to obtain a 2-D or 3-D fix, verify it has a clear view of the sky. -
Page 21: Compass Page
Compass Page Use the Compass Page’s graphic compass to help you find your destination. The PN-60 uses GPS to determine compass readings when the device is moving. It also has an electronic compass for use when the device is stationary or moving below 1.5 mph. - Page 22 Info Fields The Compass Page includes fields of information that you can customize to suit your needs. You can even change which info fields display depending on your activity. For each activity, the info field types change for navigating or tracking (regular GPS use).
-
Page 23: Trip Info Page
Trip Info Page The Trip Info Page displays info fi elds that you can customize to manage your trips.. To reset the trip information Use the Reset Trip Info option to reset the trip values, speed information, elevation, and the device odometer. Track recording is not reset. - Page 24 Option What it does View Directions When navigating or simulating a route, open the Directions Page (see page 41). Route Simulation Options When simulating a route, stop route simulation or change the simulation speed. Earthmate PN-60 User Manual | Trip Info Page...
-
Page 25: Find Page
Find Page Use the Find Page to search for addresses, points of interest (POIs), waypoints, geocaches, coordinates, and more. To view the Find Page, press the Find button . There are two pages of Find icons—to switch pages, press the right or left arrow on the arrow keypad until the view changes. - Page 26 Find Categories The Find Page is divided into categories to help you narrow your search. Use the arrow keypad to select an icon and then press ENTER to open that page. Favorites The Favorites category shows a list of points you have saved as favorites. Adding a point that is in an opened GPX file or a in a GIS layer creates a copy of that point in the Favorites list so that you can still search for it when the file is closed.
- Page 27 Points of Interest (POIs) From the POIs drop-down list, select a category. • For the Businesses, DeLorme Atlas Pts, and Natural Features categories, narrow your criteria by making a selection from the Type drop-down list or select All. • Use the Near and Name drop-down lists to further narrow your search.
- Page 28 Draw Layer To search draw layers, you must make sure they are active on the device. From the Map Page, go to MENU > Map Setup > Data Layering and select the Draw Layers check box. • From the Layer drop-down list, select the layer to search or select All. •...
- Page 29 Send point with inReach or device user manual for more information (manuals.delorme.com). SPOT From the point details page, go to MENU > Send Point with inReach or Send Point with SPOT.
-
Page 30: Waypoints Page
Waypoints Page A waypoint is a location that you mark and store using the PN-60. You can also transfer waypoint files to the PN-60. Waypoints are identified by coordinates, and you can assign a symbol, name, and other information to them. The Waypoints Page lets you view a list of the active waypoints on your PN-60. -
Page 31: File Menu
Symbols The waypoint symbols available on the PN-60 match the PN-Series symbol set in your DeLorme mapping application. The symbol set includes geocaching symbols (these are at the end of the symbol list). To ensure a waypoint displays on the Waypoints Page, use a waypoint symbol. If you use a geocaching symbol, the waypoint will display only on the Geocaches Page. - Page 32 If you have a connected inReach or SPOT satellite communicator, you can send a waypoint as a reference point using that device; see the device user manual for Send waypoint with inReach more information (manuals.delorme.com). or SPOT From the waypoint details page, go to MENU > Send Waypoint with inReach or Send Waypoint with SPOT.
- Page 33 Location Options From a waypoint details page, you can move, average, or project a waypoint using the Location Options menu. Do this To project a waypoint at a new location, provide the bearing and distance from an existing waypoint. 1. From the waypoint details page, go to MENU > Location Options > Project Waypoint.
-
Page 34: Geocaches Page
Geocaches Page Geocaching is a treasure hunting game where you use a GPS device to search for geocaches—containers that include a log for you to record your visit. Some geocaches have trinkets you can take—just follow the “take one, leave one” rule. - Page 35 To use the Send to GPS plugin With the DeLorme Send to GPS plugin, you can send one geocache at a time to a PN-60. You must be logged in to geocaching.com to use this feature. Please note that geocache descriptions and hints are available only for premium members of geocaching.com.
- Page 36 2. On geocaching.com, use the Seek a Cache feature to find the geocaches in your area of interest. 3. From the results list, click the Send to GPS icon or view the geocache’s details and click the Send to GPS button. The DeLorme Send to GPS plugin opens and transfers the geocache to your device. Manage Geocaches From a geocache details page, you can edit, view, route to, or delete a geocache.
- Page 37 Send geocache with inReach device user manual for more information (manuals.delorme.com). or SPOT From the geocache details page, go to MENU > Send Geocache with inReach or Send Geocache with SPOT.
- Page 38 Go to MENU > View Field Notes to see a list of caches for which You can upload field notes from your device to Geocaching.com with the Earthmate GPS Sync dialog in Topo North America, Cache Register, the DeLorme Field Notes Upload field notes page on geocaching.com, or a SPOT Communicator paired with your PN-60w.
-
Page 39: Routes Page
The Routes Page displays a list of routes you have created on the device and routes you have sent to the device with a DeLorme mapping application. Using DeLorme Topo North America or XMap to plan routes on the desktop for transfer to the PN-60 ensures you take exactly the road route you want and is the best way to create long routes. -
Page 40: Create A Route
Select Off if you do not want to use Back Back on Track (Driving) on Track. Also, select Off for trail routes sent to your device from DeLorme Topo North America or XMap—if the route recalculates, it will be converted to a direct route to the finish. -
Page 41: Route Points
Tips » When you create a direct route from your current GPS location to a single point and navigate to it, the route is automatically deleted once you stop navigating. » To save the route without navigating or viewing it, press QUIT after you add the last point. The route is saved using the type selected in the Calculation Method drop-down list in the route settings. - Page 42 Do this When you simulate navigation, track recording is turned off. From the route details page, go to MENU > Simulate Navigation. When you see the Simulate Navigation message, select OK. The Map Page opens and simulates the route. You can access the following settings from the Map, Compass, Trip Info, and Routes pages.
-
Page 43: Tracks Page
Tracks Page A track is a recording of points along the path you travel—use it to keep a log of your travels. From the Tracks Page, you can turn track recording on and off, set the method for recording track points, manage track files, and view a track on the Profile Page. - Page 44 Option What it does Determines what the device does when the maximum number of points (20,000 per track) is reached. • Start Recording a New Track–The device saves the track and starts recording a new track. When track is full •...
- Page 45 Managing Track Files Saved tracks are managed using GPX files; the number of track files you can save depends on the memory available. For more information about GPX files, see File Management on page 58. Do this Go to MENU > File. The following options are available. •...
- Page 46 Calculating the Area of a Track You can use a track to calculate an area by returning to your starting position. If you do not return to your starting position, a straight line is used to close the gap. Do not cross your path as you record the track or it will not calculate correctly.
-
Page 47: Profile Page
Profile Page A track is a recording of points along the path you travel. Viewing a profile of a track gives you valuable information about the track’s elevation—you can view the profile over track distance or time recorded while traveling. When the profile changes while you are stationary and tracking by time, the profile indicates changes in pressure that you can use to monitor weather changes. -
Page 48: Gps Indicator
GPS Indicator The GPS location is indicated by a green dot on the graph when you are within 100 feet of the track. The dot is in the center of the crosshair (unless you are panning along the profile). A red dot indicates there is no GPS fix within 100 feet of the track you are profiling. -
Page 49: Sun/Moon Page
Sun/Moon Page Use the Sun/Moon Page to view the sunrise/sunset and moonrise/moonset information and the moon phase informa- tion for a specific time, date, and location. The Sun/Moon Page shows information for the current map center at the time and date indicated. For example, if you are in Maine and you pan the map to California, you see the position of the sun and moon in California for the time and date displayed. - Page 50 Do this Change the time and date to see different sun/moon information. 1. Highlight the field you want to edit (Time or Date). Change the time and date 2. Press ENTER and use the arrow keypad to make changes. When you are finished editing, press ENTER.
-
Page 51: Tides Page
Tides Page Use the Tides Page to view tide (for oceans) or current (for tidal rivers) information for a specific time, date, tide station, and location. The fields in the middle of the screen (above the graph) display the high/low tide (ocean) or maximum ebb/minimum flood current (tidal river) based on the current time, date, and location. -
Page 52: Hunt/Fish Page
Hunt/Fish Page Use the Hunt/Fish page to view a prediction of the hunting and fishing conditions for a specific day and location. The calculations are based on John Alden Knight’s Solunar Tables, which use the cycle of the sun and moon to predict activity and feeding schedules. -
Page 53: Activities Page
Activities Page Use the Activities Page to optimize the info fields and settings on your PN-60 for eight pre-defined activities and two custom activities. For each activity, the device will automatically change the page order, info fields, and other settings to give you information that is specific to what you are doing. -
Page 54: Settings Page
Battery Type (Rechargeable); See Batteries and SD Card on page 3. Note about Li-ion batteries Use only DeLorme Li-ion batteries. When you remove a Li-ion battery, the Battery Type will switch automatically to Lithium. From the drop-down list, select On to allow the device to be powered by a USB USB Power port on your computer. - Page 55 From the drop-down list, select the option to use when the PN-60 is connected to your computer. • Use GPS–Use this option if you are using a compatible DeLorme mapping program or Cache Register to sync your device—the program will automatically put the device in the correct transfer mode.
- Page 56 Compass and Altimeter Use the Compass & Altimeter options to activate or deactivate the electronic compass, the barometric altimeter, and the auto calibrate altimeter feature. You can also calibrate the electronic compass and the barometric altimeter. For more information, see Compass and Altimeter Calibration starting on page 59. From the Settings Page, select Compass &...
- Page 57 Option What it does From the drop-down list, select the sound to play to alert you to a turn or select Off Turn Alert for no sound. Restore Default Settings Restores the default sound settings. Time Use the Time options to modify the devices’s time format, time zone, and Daylight Saving Time preferences. From the Settings Page, select Time and then select the option.
-
Page 58: Owner Information
Page Order You can change which pages display when you press the PAGE button and the order in which they display. You cannot remove the Map Page from the PAGE button order. From the Settings Page, select Page Order. Do this Add or remove a page from Select or clear the check box next to page. -
Page 59: File Management
For more information, see Geocaches Page on page 33. • Manual Transfer—If you are not using DeLorme Topo North America, on the device go to Settings > Connect to Computer > When Connected > Open SD Card or Open Internal Drive. Then, connect the PN-60 to your computer with the USB cable and drag and drop GPX files into the Waypoints or Tracks folder. -
Page 60: Compass And Altimeter Calibration
Compass and Altimeter Calibration The PN-60 comes equipped with two sensors; an electronic compass and a barometric altimeter. • The electronic compass works when the PN-60 is moving at less than 1.5 miles per hour. The compass readings calculated from GPS information are accurate only when the device is moving. •... - Page 61 To calibrate the altimeter 1. From the Satellite Page or the Compass Page, go to MENU > Calibrate > Calibrate Altimeter. From the Home Page, go to Settings > Compass & Altimeter > Calibrate > Calibrate Altimeter. 2. Select a calibration method. •...
-
Page 62: Info Fields
Info Fields Info fields are used to provide information you need when using the PN-60. On the Map, Compass, Trip Info, and Pro- file Pages, you can customize the info fields. For more information, see Info Fields on page 8. Notes •... - Page 63 Info Field Description The altitude (height) above or below sea level based on the barometric altimeter read- Elevation: Barometer ing. If the altimeter is calibrating, a red exclamation point displays. (Units > Measure) Profile Page only. The cumulative elevation gained while climbing; expressed in dis- Elevation: Climbing tance.
- Page 64 Info Field Description The current rate of travel for the device; expressed in distance/time. Speed (Units > Measure and Time). An up arrow indicates you are going faster than the mov- ing average, and a down arrow indicates you are going slower than the moving average. The average speed of the device including stop time;...
-
Page 65: Specifications And Warranty
Specifications and Warranty Specifications • Case: IPX-7 waterproof, impact-resistant, and rugged • WAAS-enabled; position accuracy < 3 meters • Operating temperature range:-4ºF to +167ºF (-20ºC to +75ºC) • Storage temperature range:-49ºF to +167ºF (-45ºC to +75ºC) • 3-axis electronic compass with accelerometer •... -
Page 66: Limited Warranty
1 year from the date of purchase. If your Earthmate PN-60/60w GPS fails in normal use, DeLorme will, at its sole option, either repair or replace the unit. DeLorme reserves the right to either repair or replace the unit with a new or refurbished unit at its sole discretion. -
Page 67: Service Plan And Contact Info
Service Plan and Contact Info Service Plan Before a product can be returned, you must contact DeLorme Support at 207-846-8900 to determine if a return is necessary and request a Return Material Authorization (RMA) tracking number. You must provide the following information to obtain warranty service: •... -
Page 68: Index
Index About this Device 57 Elevation 19, 44, 46, 47, 59 Activities Page 52 Altimeter File management 58 Calibrate 19, 20, 59–60 Find Page 24–28 Elevation 19 Elevation Info Fields 61 Settings 55 Geocaches Average a geocache 36 Add to device 34–35 Average a waypoint 32 Average 36 Delete 35... - Page 69 Restore factory settings 57 Rotate screen 54 Imagery 12, 13, 14 Routes Info Fields Create 28, 31, 35, 39–40 Manage 8 Delete 41 Table 61–63 Directions page 41 Options 40 Reverse 40 Keyboard 7 Settings 38–39 Simulate 41 Map cursor 10–11 View 40 Map data layering 12–13 Routes Page 38–41...
- Page 70 Profile active track 43 Profile open track file 44 Record 43 Reverse 44 Save 43 Settings 42–43 View on map 44 Tracks Page 42–45 Transfer maps 14 Trip Info Page 22–23 WAAS 18–19, 53 Warranty 65 Waypoints Average 32 Comment 31 Delete 31 Details 31 Edit 31...
- Page 71 Earthmate PN-Series Symbols LORME ® Waypoint Symbols American Flag Deer Tracks Lighthouse Tent Anchor Deer Lodging Toll Booth Animal Tracks Dining Military Airport Tow Truck Arrow, Down-left Disabled** Military Base Traffic Light Arrow, Down-right Diver Down Mining Trailhead ** Arrow, Down Dog Sledding Money Truck...
- Page 72 Earthmate PN-Series Symbols LORME ® Geocache Symbols Cache In Trash Out Event Earth Cache Event Cache Found* Geocache Geocache Found* Letterbox Hybrid Mega-Event Cache Multi-Cache My Cache* Needs Maintenance* NGS Benchmark Not Found* Traditional Cache Unknown Cache Virtual Cache Waymark Webcam Cache Whereigo Cache...
Need help?
Do you have a question about the Earthmate PN-60 GPS and is the answer not in the manual?
Questions and answers