
Related Manuals for DeLorme Earthmate PN-30


Summary of Contents for DeLorme Earthmate PN-30
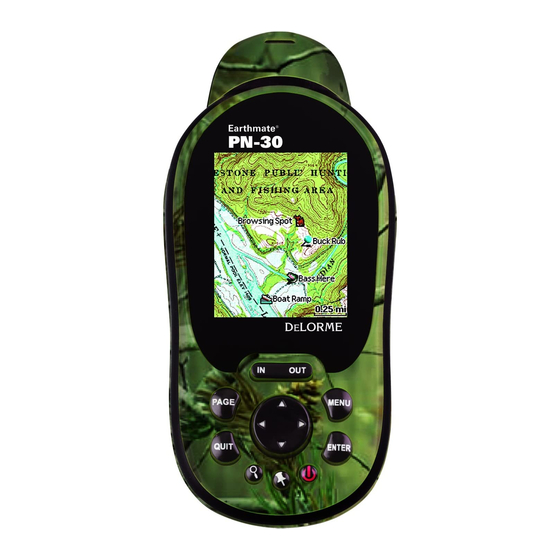
- Page 1 LORME Earthmate ® PN-Series User Manual Updated for 2.6 Firmware GPS for Serious Outdoor Adventures...
- Page 2 USGS 7.5-minute topographic quads, and NOAA nautical charts. Also Available from DeLorme DeLorme is a leading provider of mapping software for both consumer and professional markets. Our Street Atlas USA software titles deliver intelligent mapping, routing, and GPS navigation ®...
-
Page 3: Table Of Contents
Table of Contents Getting Started ... 2 General Information ... 6 The Satellites Page ... 12 The Map Page... 16 The Compass Page ... 26 The Trip Info Page ... 29 The Find Page ... 31 The Waypoints Page ... 35 The Geocaches Page ... -
Page 4: Getting Started
Getting Started PN-Series This manual is for use with DeLorme Earthmate® PN-30 and PN-40 GPS devices. How to Use this Manual For more information about the buttons on the PN-Series GPS, see Using the Buttons on page When the manual instructs you to do something, use... - Page 5 Note Do not lift the SD card latch as this could cause damage. Insert two AA batteries or a DeLorme Li-ion rechargeable battery according to the polarity symbols inside the battery compartment. Be sure to insert batteries correctly.
-
Page 6: Data Management
Connecting to a Computer on page 72. To reset the PN-Series GPS To reset the PN-Series GPS when it is on, press and hold Power for seven seconds. You can also remove the batteries and then reinstall them. - Page 7 Navionics SD cards. For more information, see Navionics on page 24. Tip A map package is a dataset you create for an area of interest that you can layer with DeLorme map data and other map datasets available from the NetLink Map Library. —...
-
Page 8: General Information
General Information Using the Buttons Power Use the Power button to turn the PN-Series GPS on and off, to change the backlight settings, or to reset the device. To turn on the device, press and hold the until the Welcome screen displays. - Page 9 Mark The Mark button is labeled with a pushpin. Use it to mark a waypoint at your current GPS location or, when panning, at the cursor location. Once you mark a waypoint, use its details page to manage it, view it on the map, or create a route to it.
-
Page 10: Using The Keyboard
Get information about a point on the map to see detailed information, if available. Quit The function of the QUIT button varies depending on the status of the PN-Series GPS; some of the things you can do are: Exit a page or screen. Cancel actions (for example, panning). -
Page 11: Info Fields
Accept the changes made to the text field and close the keyboard. Insert a line break and move the cursor to the next line. Keyboard Shortcuts These button presses on the PN-Series GPS are keyboard shortcuts. –Delete the last character –Add a space –Shift (for upper case) - Page 12 2 Wide Fields 2 Narrow Fields 1 Wide Field To change the size of the text On the Trip Info Page, you can change the size of the text that displays, which also changes the number of info fields. When the device is set to the small text option, it displays eight info fields (2 wide, 6 narrow)—when it is set to the large text option, it displays three wide info fields.
- Page 13 Navigating or Tracking Tracking is the normal state of the device when it has a GPS fix. You can turn off track recording, but the device is still in tracking mode. When you follow a route on the device, you are navigating.
-
Page 14: The Satellites Page
The Satellites Page The Satellites Page displays GPS and satellite information, time, elevation, and the battery indicator. It is the first page in the default PAGE button order. If you have removed the Satellites Page from the PAGE button order, go to MENU > Satellites to view it. - Page 15 2-D or 3-D connection. To set the current location If it takes a long time for the PN-Series GPS to obtain a 2-D or 3-D fix, verify it has a clear view of the sky. Be sure that trees, buildings, and other obstacles are not blocking the device.
-
Page 16: Battery Indicator
“Charging. ” Once the battery is fully charged, the battery indicator graphic displays four static green bars and “External” displays until you disconnect the USB cable. If you are not using the DeLorme Li-ion battery, "External" displays whenever you plug your device into your computer. - Page 17 Compass and Altimeter PN-40 only You can calibrate the PN-40's electronic compass and barometric altimeter with the Calibrate option on the Satel- lite Page menu, the Compass Page menu, and the Device Setup > Compass & Altimeter menu. The Device Setup > Compass &...
-
Page 18: The Map Page
The Map Page The Map Page centers the map on your current location when the PN-Series GPS has a 2-D or 3-D fix. When it does not have a GPS fix, the map displays your last GPS position. For more information, see GPS and WAAS Status on page 13. -
Page 19: Panning The Map
Getting Information About a Location For information about objects at your current GPS location, press ENTER. Pan the map to a new location. When you stop the cursor over an object, the object's name is displayed in the bottom left corner of the map. -
Page 20: Measure Distance
The Map Page screen changes to display the heading from the last measurement node to your current GPS location, the leg distance, and the total distance from the last measurement node to the first measurement node. - Page 21 To layer data Use the Data Layering option to select the types of data you want to view on your PN-Series GPS and the order in which you want data to display. From the Map Page, go to MENU > Map Setup > Data...
- Page 22 After you add a map—also called a map package or a map file—from a compatible DeLorme mapping program or the DeLorme Online Map Center to the PN-Series GPS, you can show or hide it on the device; view details about it, including where it is stored;...
-
Page 23: Map Style
> Data Detail > Delete. Turn Imagery On/Off When you have added map packages that include imagery to your PN-Series GPS, you can quickly turn the imagery off or on. From the Map Page, go to MENU > Turn Imagery On or Turn Imagery Off. - Page 24 Hybrid Map Select the Show Hybrid Map check box to show points, lines, and labels on top of imagery. Hybrid maps are visible at 640 feet and higher. From the Map Page, go to MENU > Map Setup > Map Style >...
-
Page 25: Route Options
–Represents a given length on the map compared to an actual length. Zoom –The DeLorme method of describing map detail level. Each time the zoom level increases, the scale doubles. –Shows a ratio of a unit on the device compared Ratio to the actual unit. - Page 26 Navionics SD card in your device. You cannot save maps or data to a Navionics SD card—the memory on the card is unavailable. The Navionics data overlays the DeLorme maps on device—the DeLorme maps are used for routing and Find.
- Page 27 To view a chart or map To view the chart or map selected in the Chart drop-down list on the device, click View Chart. To show charts or boundaries Control how you view charts and their boundaries on the map—view charts alone, boundaries alone, or both together.
-
Page 28: The Compass Page
Compass Page from the PAGE button order, go to MENU > Compass to view it. Both the PN-30 and the PN-40 use the GPS to determine compass readings when the device is moving; the PN- 40 also has an electronic compass (see p.25 for more information) for use when the device is stationary or moving below 1.5 mph. -
Page 29: Electronic Compass
When your speed is 1.5 mph or higher, the compass reading is based on your GPS location. When the electronic compass reading is not accurate, “Poor Accuracy” displays in the bottom right corner of the screen, and a red exclamation point appears in the Heading info field. - Page 30 Log Your Geocache Find When navigating to a geocache, use the Log Your Geocache Find option to quickly log geocaches, write field notes, and pick a route to your next cache. For more information about all of these features, see The Geocaches Page section starting on page 40.
-
Page 31: The Trip Info Page
The Trip Info Page The Trip Info Page displays info fields that occupy the entire screen. You can customize each field with one of the many available info field options. It is the fourth page in the default PAGE button order. If you have removed the Trip Info Page from the PAGE button order, go to MENU >... - Page 32 Other Menu Options When navigating, additional options are available on the Trip Info Page menu. View Comment Details When navigating to a waypoint or geocache, the View Comment Details option allows you to view the comment for the waypoint or geocache. If you view another waypoint or geocache, View Comment Details displays the most recent comment details viewed.
-
Page 33: The Find Page
Find Near Map Center–This is the default search method. The device searches from the current GPS location; if GPS is disabled or if you are panning the map or viewing another location, it searches from the current map center. For some search types, you can narrow your search with additional parameters, such as categories or symbols. -
Page 34: Searching For A Location
or symbols. When the City, State, or Country fields are available, the more information you enter, the more refined your search results are. If you do not enter anything or if those fields are unavailable, the search starts from the map center. - Page 35 Search results are displayed in a list. When you highlight an item in the list, the Bearing and Distance info fields display measurements as follows: From the GPS position when the device has a GPS fix. From the cursor location if you are manually panning or viewing another location.
- Page 36 To view the results list To view the results, use the arrow keypad to scroll through the list. The maximum number of results for each search is 100. To view search result details To view the details for an item on the list, select it. The search result details page displays.
-
Page 37: The Waypoints Page
The Waypoints Page The Waypoints Page is a list of the waypoints created on your PN-Series GPS or sent to it from a DeLorme map- ping application. A waypoint is a specific place on the map, identified by coordinates, to which you can assign a symbol, name, and other information. - Page 38 Symbols The waypoint symbols available on the PN-Series GPS are the same as the PN-Series symbol set in your DeLorme mapping application. This symbol set includes geocaching symbols (these are at the end of the symbol list). To ensure your waypoint displays on the Waypoints Page, make sure you select a waypoint symbol.
- Page 39 To mark a waypoint on the map From the Map Page, press Mark. The waypoint is placed at the GPS location or the map cursor panning the map or viewing another location. On the waypoint details page, you can do the following: »...
- Page 40 To average a waypoint when you create it 1. Mark a waypoint at your current GPS location but do not save it. 2. On the waypoint details page, select Average or go to MENU > Average Waypoint. 3. When the device has recorded the number of readings you want, press ENTER.
- Page 41 To delete a waypoint From the waypoint details page, go to MENU > Delete Waypoint. When you see the confirmation message, select Yes. To delete waypoints by symbol 1. From the Waypoints Page, go to MENU > Delete by Symbol. 2.
-
Page 42: The Geocaches Page
When you highlight an item on the Geocaches Page, the Bearing and Distance info fields display measurements as follows: From the GPS position when the device has a GPS fix. From the cursor location if you are manually panning the map. - Page 43 PN-Series symbol set in your DeLorme mapping applica- tion. Geocaching symbols appear at the end of the symbol list. For a complete list of symbols, see the DeLorme PN- Series Wiki (http://wiki.delorme.com). When you edit a geocache symbol, be aware that any changes may affect where the geocache is stored.
- Page 44 To add a geocache with the Send to GPS plugin With the DeLorme Send to GPS plugin, you can send one geocache at a time to a PN-Series GPS. You must be logged in to Geocaching.com to use this feature. Please note that geocache descriptions and hints are available only for premium members of Geocaching.com.
- Page 45 Send to GPS icon or view the geocache’s details and click the Send to GPS button. The DeLorme Send to GPS plugin opens and transfers the geocache to your device. Repeat step 4 to send each geocache you want to look for.
- Page 46 To navigate to a geocache Navigate from your current location to the first geocache on your list. Once you log your find, the PN-Series GPS finds the next geocache for you. Routes to geocaches are not saved on the device.
- Page 47 Notes to see a list of the caches for which you added a field note. To upload field notes For geocaches with a cache ID, you can use the Geocaching.com Field Notes option to upload field notes from your PN-Series GPS to your computer. The Geocaches Page...
- Page 48 Computer > USB Setting and select Data Exchange. 3. From the Geocaches Page, go to MENU > Upload Field Notes. 4. On Geocaching.com, locate the DeLorme Earthmate PN-Series GPS Field Notes page (Field Notes are under your profile). 5. Click the Browse button on the web page and go to your device's internal drive (EM_USERMAPS).
-
Page 49: The Routes Page
The Routes Page displays a list of routes on the PN-Series GPS—routes you have created on the device and routes you have sent to the device using a DeLorme mapping application. Using DeLorme Topo USA pre-planned routes in advance on the desktop for transfer... -
Page 50: Create A Route
Create a Route From the Routes Page, you can create a route to one point or to multiple points from your current GPS position or another location. At any time when viewing a geocache, waypoint, or a Find search result, you can create a route to it using the Route option on its details page. - Page 51 QUIT to return to the route details page and select Navigate. Tip When you create a direct route from your current GPS location to a single point and navigate to it, the route is automatically deleted once you stop navigating.
-
Page 52: Manage Routes
Remove –Removes the point from the list. For example, you can remove the Current Position field if you don't want to include it in your route. Manage Routes To view route details On the Routes Page, select a route to open its details page. - Page 53 Directions Page When you are navigating a route, the Directions page is available in the default PAGE button sequence (after the Trip Info Page). You can also view the Directions page for the active route from Routes Page by selecting Directions. Press MENU from the Directions Page to access Route Options and geocaching options (see the next section).
-
Page 54: The Tracks Page
The Tracks Page displays a log of tracks on the PN-Series GPS—tracks recorded by the device or tracks you have sent to the device using a DeLorme mapping application. When you are viewing a track on the map, it appears in bold text on the track log list. - Page 55 From the Tracks Page, go to MENU > Edit Track Settings. Select the track setting options. For logging points, a short time interval gives you the most detailed results but quickly adds many points; logging by distance gives you a longer recording time.
- Page 56 To save the active track Select Save. If the Reset Info page is enabled, edit the check boxes and select Reset Info, or press QUIT to exit the page. On the track details page, you can edit the (name), Color, and Comments fields. To edit a field, press ENTER and use the available option (drop-down list, arrow keypad, or keyboard) to make changes.
- Page 57 To delete a saved track On the track details page, select Delete. To delete all saved tracks This deletes all saved tracks; to delete a specific track, view the track details page. 1. From the Tracks Page, go to MENU > Delete All Tracks. 2.
-
Page 58: The Sun/Moon Page
The Sun/Moon Page Use the Sun/Moon Page to view the sunrise/sunset and moonrise/moonset information and the moon phase information for a specific date and location. To open the Sun/Moon Page, from any page go to MENU > Sun/Moon. If you have added the Sun/Moon Page to the PAGE button order, it is no longer available on menus. - Page 59 To change the location If you want to see sun/moon information for a location other than your current GPS location, pan the map or change the map center (for example, view a waypoint or a search result on the map).
-
Page 60: The Tide Page
To change the location If you want to see tide information for a location other than your current GPS location, pan the map or change the map center (for example, view a waypoint or a search result on the map). - Page 61 information. Changing the time and date on the Tide Page does not change the time and date on the device. Highlight the field you want to edit ( Press ENTER and use the arrow keypad to make changes. When you are finished editing, press ENTER. To reset the time and date If you change the time and date on the Tide Page, you can reset it to the device’s time and date.
-
Page 62: The Hunt/Fish Page
Changing the date on the Hunt/Fish Page does not change the date on the device. From any page (to use your GPS location), or from the Map Page (to use the map cursor location), go to MENU > Device Setup > Hunt/Fish. - Page 63 From the Hunt/Fish Page, go to MENU > Reset Date. Tip Navionics SD card lake and marine charts are compatible with your PN-Series GPS. For more information, visit our website at www.delorme.com. The Hunt/Fish Page...
-
Page 64: The Device Setup Page
Press the PAGE button until it appears. Use the Device Setup Page options to modify the default settings on the PN-Series GPS. You can also view and manage internal and SD card memory use and restore the device’s default system settings. - Page 65 The number of waypoints/geocaches, track, and routes stored on the internal memory. The device's total capacity for storing waypoints/ geocaches, tracks, and routes. To manage memory You can delete waypoints, geocaches, tracks, and routes from your device's internal memory. From any page, go to MENU >...
- Page 66 button; see Power on page 6. To modify the backlight timer Change how long the backlight remains on before it goes into power saving mode. Decrease the time interval to improve battery life. From any page, go to MENU > Device Setup > Display >...
- Page 67 –Select Local 12 hr or Local 24 hr. Zone –Select your actual time zone or select Automatic to allow the device to update the time based on your GPS location. To enable the Daylight Saving option, select the Daylight Saving check box. To restore the default settings To restore the default settings, from any page go to MENU >...
- Page 68 Units Use the Units option to set the various units of measure used on the device. To modify the units settings From any page, go to MENU > Device Setup > Units. Use the drop-down lists to select the various unit settings. Coordinates: Primary –Select Degrees;...
-
Page 69: Reset To Factory Defaults
to move, then use the arrows on the right side of the screen to move the item up or down in the list. To restore the default settings To restore the default settings for Page Order options, from any page go to MENU > Device Setup > Page Order >... -
Page 70: Info Fields Table
Info Fields Table Info fields are used to provide information you need when using the PN-Series GPS. On the Map, Compass, and Trip Info Pages, you can customize the info fields. For more information, see Info Fields on page 9. - Page 71 The Finish label as it appears in the route directions. The calculated accuracy of the GPS. Expressed in distance. The current status of your GPS device. No Fix, 2-D, or 3-D. A W below the status indicates a WAAS fix.
- Page 72 Can be reset when you clear Trip Info. The time of day at which the sun will rise and set, calculated for the specific geographic area where the GPS has a 3-D fix. Expressed as hours:minutes AM/PM.
- Page 73 Trip Info. Total time GPS device has been moving. Can be reset when clearing Trip Info. The total time the GPS has been tracking but not moving. Can be reset when you clear Trip Info. The total time the GPS has been tracking, both moving and stopped. Can be reset when you clear Trip Info.
-
Page 74: Additional Information
Additional Information Connecting to a Computer When you connect your PN-Series GPS to your computer with the USB cable, the device's USB setting should match the task you are performing. You can change the USB setting from the Connect to Computer page or from the Device Setup >... - Page 75 Tip For anything other than a map transfer or firmware transfer while it is connected to your computer, select Data Exchange. This includes using the PN-Series GPS as an external antenna with a laptop. To transfer maps Use this option to transfer maps to or from the device's internal memory or to an SD card in the device (the device automatically creates a "maps"...
- Page 76 SD card in your device. Updates are available through the NetLink tab and the Technical Support section of the DeLorme website; they may also be included with DeLorme mapping software upgrades. Follow the firmware update installation instructions.
-
Page 77: Compass Calibration
& Altimeter. Select the check box to enable the option. Enable Electronic Compass –If this is not selected, the device uses the GPS compass. Enable Barometric Altimeter –If this is not selected, the device uses the GPS elevation. –Allows auto-calibration Auto Calibrate Altimeter of the altimeter. -
Page 78: Altimeter Calibration
(typically in 2-3 minutes), "Calibrating" displays in the bot- tom right corner of the Satellites Page. If you are using the GPS: Altimeter info field on any page, it displays a red exclamation point. Note that the unit settings used in the Known Elevation and Known Pressure fields are from the units set on your device. - Page 79 » –The barometric pressure (adjusted Known Pressure for sea level) for your location. –The GPS elevation calculated by the » GPS Elevation device. 3. If you selected Known Elevation or Known Pressure; to edit the field, press ENTER and use the arrow keypad to make changes.
-
Page 80: Customer Service
Cache Register DeLorme Contact Information Technical Support and Firmware Updates Visit our Technical Support website at www.delorme.com/ support to access the DeLorme Technical Support Knowl- edge Base, get answers to frequently asked questions, download firmware updates, and for additional support information. -
Page 81: Fcc Certification
500 MB available internal flash memory (SE model: 7 GB available internal flash memory) Supports SD and SDHC memory cards; up to 32 GB Uses 2 AA batteries or a DeLorme Li-Ion rechargeable battery FCC Certification This equipment has been tested and found to comply with the limits for a class B digital device, pursuant to Part 15 of the FCC rules. -
Page 82: Limited Warranty
1 year from the date of purchase. If your Earthmate PN-Series GPS fails in normal use, DeLorme will, at its sole option, either repair or replace the unit. DeLorme reserves the right to either repair or replace the unit with a new or refurbished unit at its sole discretion. -
Page 83: Copyright Information
Service Plan Before a product can be returned, you must contact DeLorme Support at 207-846-8900 to determine if a return is necessary and request a Return Material Authorization (RMA) tracking number. The following information must be provided to obtain... -
Page 84: Index
Data Management ... 20-21 Demo Mode ... 4, 62, 72 Device Setup Page ... 62-67 Directions ... 7 , 50 Disable GPS ... 3, 13, 62 Display settings ... 63 Elevation ... 14, 69, 74, 76 Find Page ... 31-34... - Page 85 Geocaches Add to device ... 42-43 Comments/hints ... 41-42 Delete ... 43-44 Edit ... 43 Field notes ... 45-46 Log find ... 44-45 Move ... 43 Navigate to ... 44 Sort list ... 40-41 Symbols ... 41 View on map ... 43 Geocaches Page ...
- Page 86 Panning the map ... 17 POIs Find ... 33 Map ... 22 Reset device ... 4, 6 Reset factory defaults ... 67 Restore defaults Compass and altimeter... 65, 75 Connect to Computer ... 64 Demo Mode ... 4 Display ... 64 Factory ...
- Page 87 Symbols Geocache ... 41 Waypoint... 36 System settings ... 62 Tides Page ... 58-59 Time settings ... 65 Tracks Clear ... 53 Delete ... 55 Follow ... 53 Record ... 53 Save ... 54 Settings ... 52-53 View on map ... 54 Tracks Page ...
- Page 88 The Earthmate PN-40 can be powered by two AA batteries (NiMH, ® alkaline, or lithium), or a DeLorme-supplied Li-Ion rechargeable battery. You’ll find Earthmate PN-Series accessories at www.delorme.com. Rechargeable Lithium-Ion Battery Pack Caution Use only an Earthmate PN-Series Battery Type. Risk of explosion if battery is replaced by an incorrect type.
- Page 89 ™ Since its incorporation in 1976, DeLorme has developed an unprecedented reputation as a leader in the mapping industry. From early beginnings as a paper atlas publisher, the company quickly emerged as a pioneering technological innovator. DeLorme not only embraced new technologies, it developed them.
Need help?
Do you have a question about the Earthmate PN-30 and is the answer not in the manual?
Questions and answers