Oki OKIOFFICE 84 User Manual
Hide thumbs
Also See for OKIOFFICE 84:
- Service manual (481 pages) ,
- User handbook manual (99 pages) ,
- Quick reference (14 pages)
Table of Contents
Advertisement
Quick Links
Advertisement
Table of Contents

Subscribe to Our Youtube Channel
Related Manuals for Oki OKIOFFICE 84


Summary of Contents for Oki OKIOFFICE 84
- Page 1 OKIOFFICE User’s Guide...
-
Page 2: Symbols In This Book
Copyright 1998 by Oki. All rights reserved. Written and produced by Oki Europe Ltd. OKI and OKIOFFICE are registered trademarks of Oki Electric Industry Company, Ltd. Energy Star is a trademark of the United States Environmental Protection Agency. -
Page 3: Table Of Contents
Contents INSTALLATION ..............20 Getting Started ..............20 Symbols in this Book ............2 Where to Install Your Fax Machine ......20 Energy Star ................. 2 Unpacking ................ 20 Setting Up Your Fax Machine .......... 21 SAFETY ................... 6 Installing Paper Trays & Stackers ....... 21 General ................ - Page 4 Cancelling Polling Transmission ....... 58 Answering Voice Request ..........43 Printing Bulletin Messages ......... 59 Dual Access ..............59 While Sending Faxes ........... 59 While Receiving Faxes ..........60 While Making Copies ..........60 While Printing Reports ..........60 OKIOFFICE 84...
- Page 5 PROGRAMMING ..............61 Message Confirmation Report ........76 Customizing Features & Operations ........ 61 Confidential Reception Report ........76 Viewing Your Current Settings ........61 Broadcast Entry Report ..........76 User Function Settings ............. 61 Power Outage Report ........... 77 User Function Settings List .........
-
Page 6: Safety
The two TEL ports on the back of the machine are only • suitable for 2 wire devices. Not all standard telephones will respond to incoming ringing when connected to an extension socket. OKIOFFICE 84... -
Page 7: Operation & Maintenance
• To avoid damage to the image drum unit, always use by yourself. original Oki toner cartridges. • Disconnect the power cable before trying to remove any • Exercise care when removing the toner cartridge. Do not objects that may have fallen into the machine. -
Page 8: Emergency First Aid
IF TONER IS INHALED: Take the person to an open area for fresh air. Seek medical attention. • IF TONER GETS IN THE EYES: Flush eyes with large quantities of cool, NOT cold, water for a minimum of 15 minutes keeping eyelids open with fingers. Seek medical attention. OKIOFFICE 84... -
Page 9: Introduction
• Reports to help you keep track of the operations and settings Features of your machine. The OKIOFFICE 84 includes the following features: • Automatic power save mode. • 10 One Touch keys for automatic, single-key dialling of •... -
Page 10: Multi Function
Receive and store fax messages directly into your computer. • Scan pages from your machine into your computer. • Carry out Optical Character Recognition (OCR) on received faxes or scanned pages. • Easily program dial directories on your machine. OKIOFFICE 84... -
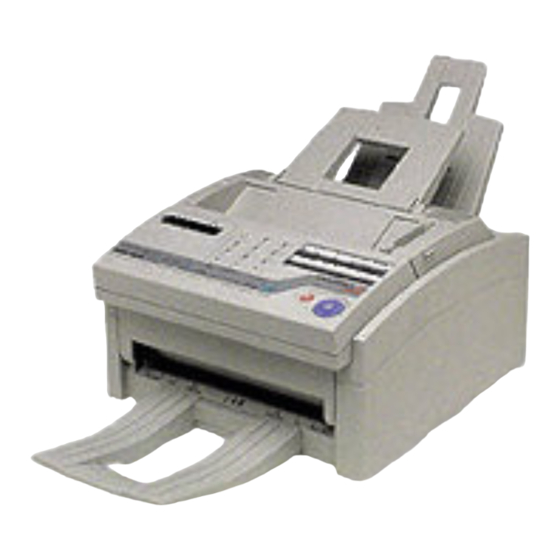
Page 11: Component Identification
COMPONENT IDENTIFICATION What You Should Receive Power Cable Document Tray Telephone Cable Paper Tray/ Copy Stacker Toner Cartridge Document Stacker MFP Software Facsimile Unit Image Drum Unit (Inside fax machine) User’s Guide... -
Page 12: Components
One Touch Keypad Control Panel Manual Paper Feeder Load paper into this slot when you want to use a type of paper different from the paper in the paper tray. Document Stacker Supports documents that have been faxed or copied. OKIOFFICE 84... -
Page 13: Components
Components LINE Terminal Terminal for connecting the unit to a telephone line. PC Connector Connect the computer cable into this connector. TEL Terminals Terminals for connecting the fax machine to an external telephone. Power Switch AC Power Inlet Connect the AC power cable, supplied with your fax machine, into this inlet. -
Page 14: Control Panel
Control Panel OKIOFFICE 84... -
Page 15: Control Panel Keys & Indicators
HYPHEN Key: When programming One Touch keys and Control Panel Keys & Indicators AUTO DIAL telephone numbers, use this key to tell your LCD Panel: Refer to this liquid crystal display (LCD) panel machine to wait for the dial tone of an outside or for instructions and information while your machine is international line before it continues dialling the rest of operating or while you are programming your machine. - Page 16 COPY key as a short-cut for programming One Touch is a chain dial number. keys and AUTO DIAL numbers. After you have loaded a document and manually dialled a telephone number, press OKIOFFICE 84...
-
Page 17: One Touch Keypad
21 0/UNIQUE Key: When dialling, use this key to enter a When programming TSI/CSI and call back numbers into your machine, this key is used to enter a “+” symbol. “0”. When programming your Sender ID or a Location ID, you can use this key to enter a variety of unique characters, 16 PAUSE Key (One Touch Key 10): Use this key on the e.g. -
Page 18: Using One Touch Keys For Selecting Functions & Programming
REPORT PRINT Key: Using this key manually prints Note: Changing the answering mode of your machine reports from your machine. automatically prints out any non-confidential faxes that COUNTER DISPLAY Key: Your machine keeps track of have been received into memory. OKIOFFICE 84... -
Page 19: Signal Tones
Press the STOP key to turn the error tone off, then print a the number of pages it has printed and scanned. Using this key checks the print counters of your machine and resets Message Confirmation Report to check the source of the the drum counter of your machine after replacing the image problem by pressing the COPY key twice with no documents drum unit. -
Page 20: Installation
32 °C. unit and toner cartridge installed. Refer to Shipping the Machine later in this user’s guide. Unpacking Before you begin, make sure that all items listed below are included in your package. Refer to the illustrations in OKIOFFICE 84... -
Page 21: Setting Up Your Fax Machine
Installing Toner Cartridge Setting Up Your Machine Carefully remove the protective sheet from the document feeder. Installing Paper Trays & Stackers Open the top cover. Slot the tabs of the paper tray/copy stacker into the rearmost slots in the top of the machine until the tabs lock into place. - Page 22 Place the image drum unit back into your machine. Ensure shake it from side to side to distribute the toner. Then that the tabs on both sides of the image drum are inserted carefully peel the white plastic tape from the bottom of the toner cartridge. OKIOFFICE 84...
-
Page 23: Connecting Telephone Line
Caution: Be careful not to insert the toner cartridge backwards into the image drum unit. With the ridged sides facing up and the coloured lever on your right, insert the toner cartridge into the image drum unit. Slide the left end of the cartridge in first, then lower the right end into place. -
Page 24: Connecting Power Cable
For best results, use paper specially made for laser printers or photocopiers. Your machine automatically reduces the vertical length of the page images it receives to fit on the paper loaded in your machine (down to 75% of the original length). For example, if a document OKIOFFICE 84... -
Page 25: Setting The Clock
created originally on legal-size paper is received, your machine Setting the Clock reduces the received pages to fit on A4 or letter-size paper. Follow these instructions to set the time and date on your Note: Your machine is set at the factory to use A4 paper. If machine. -
Page 26: Answering Mode Options
You can then use the Telephone/Fax Auto SW mode. In this mode, your machine PRINT OPERATION function to print out any messages that have been stored in the memory. OKIOFFICE 84... -
Page 27: Changing Answering Mode
To prevent any data received from being printed while your Machine Identification machine is in Memory Reception Mode, you can program a The machine uses the information you enter here to identify password into your machine. See Creating Memory Password itself during communications. -
Page 28: Setting Fax Machine Identification
Touch key is used to enter spaces in a number. 11. Press the SELECT FUNCTION key to finish. Press the START key to save your entry. Enter your Sender ID. This is a descriptive title up to 32 characters long. Refer to the instructions below. OKIOFFICE 84... -
Page 29: Setting Language
Setting Language Connecting to a PBX Your machine comes with two languages installed, which appear A PBX (Private Branch Exchange) is a private telephone system on the display and in reports. Follow the instructions below to used to route internal calls. If you have to dial a prefix (access) switch languages. -
Page 30: Mfp Function
Note: To later turn off the PBX LINE and DIAL PREFIX functions, follow Steps 1-7 above. At Step 8, press the 9/ SPACE key four times, then continue with Steps 10 - 11. OKIOFFICE 84... -
Page 31: Dial Directories
To Do This DIAL DIRECTORIES Enter numbers Numeric keypad. Enter spaces 9/SPACE One Touch key Enter hyphens (i.e. to HYPHEN key Programming One Touch Keys wait for dial tone) Enter pauses (i.e. to wait PAUSE key Your machine has ten One Touch keys for rapid dialling. You for outside line) Add a switch from pulse */Tone key can store up to two fax numbers with 32 digits for each One... -
Page 32: One Touch Parameters
( à à à à à ) ) ) ) ) (OT) (OT) (OT) (OT) (OT) Press the SELECT FUNCTION key. 10. Press the SELECT FUNCTION key to finish. Press the USER PROG One Touch key. The display shows: OKIOFFICE 84... -
Page 33: Chain Dialling
Note: Should you later change the location the One Touch Programming AUTO DIAL Numbers key is used for, then remember to switch Echo Protection Your machine has 70 AUTO DIAL numbers available for quick, off and reset the transmission fax speed/rate to 14.4K, if two-digit selection and dialling. -
Page 34: Programming Groups
( S T R / L O C . ) ( S T R / L O C . ) E X I T E X I T E X I T E X I T E X I T OKIOFFICE 84... - Page 35 You can now add a location to your group (or delete a To program another group, go back to Step 2. If you are finished, press the SELECT FUNCTION key. location from it). Refer to the instructions below. To Do This Note: After programming a group, you can check the Add a One Touch Press the One Touch key.
-
Page 36: Basic Operations
128 mm. Documents cannot be wider than the START key. Your document will be scanned into 216 mm or longer than 356 mm. memory and sent when the current communication ends. OKIOFFICE 84... -
Page 37: Sending Fax To Single Location
Document Type Contrast to Use Adjust the document guides to the width of the paper you Documents with normal contrast NORMAL are using. Documents which are too light LIGHT Documents which are too dark DARK Your documents are now ready for faxing or copying. Sending Fax to Single Location Neatly stack your documents, then insert them face down Load your documents. -
Page 38: Search Key Dialling
To print the report, press the COPY letter you want on the numeric keypad, and press that key key a second time. See Reports for more information. repeatedly to look through Location IDs beginning with that letter. OKIOFFICE 84... -
Page 39: Stopping A Transmission
Stopping a Transmission Note: You can also tell your machine to start fax reception by entering your 2 digit code for remote receive using To stop a transmission while it is in progress, follow the your telephone keypad. Refer to Remote Receive. instructions below. -
Page 40: No Paper Reception
LOW, REPLACE TONER CART. message. Rather than risk After you have followed the instructions to print out printing an unreadable message, your machine automatically receives faxes into memory if user setting 22:NO TONER MEM. RX has been set to on. OKIOFFICE 84... -
Page 41: Rejecting Unsolicited Fax Messages
messages stored in memory, the display shows: function, follow the instructions below. Press the SELECT FUNCTION key. M S G . M S G . M S G . M S G . M S G . M E M O R Y M E M O R Y M E M O R Y M E M O R Y... -
Page 42: Making Copies
Then press the COPY communication. Either the sender or receiver of the fax can key again. Your machine begins making the required initiate a voice request. number of copies. OKIOFFICE 84... -
Page 43: Initiating Voice Request
If you are sending a fax, you can answer a voice request only Note: A call back message is only sent if you have after all pages have been transmitted. If you are receiving a fax, programmed a call back number into your machine. Refer you can answer a voice request after reception of each page. -
Page 44: Advanced Operations
Note: If you want to send a fax to groups and individual 03 indicates One Touch key 03; *02 indicates Auto Dial locations, the groups must be selected first. 02; 4568 are the first four digits of a number entered using the numeric keypad. OKIOFFICE 84... - Page 45 ( à à à à à ) ) ) ) ) If you want to confirm your entries by printing a report, ( S T A R T ) ( S T A R T ) C L E A R C L E A R ( S T A R T ) ( S T A R T )
-
Page 46: Delayed Sending Of Faxes
D A T E D A T E After programming your delayed transmissions to single ( ß ß ß ß ß ) ( à à à à à ) ) ) ) ) [??/??] [??/??] [??/??] [??/??] [??/??] OKIOFFICE 84... -
Page 47: Sending Delayed Faxes To Groups And/Or Multiple Individual Locations
Note: [??/??] indicates the date you have entered using Note: If user function 17:MEM./FEEDER SW. has been the numeric keypad. set to FEED and you are sending a delayed fax to a single location, your document remains on the document feeder Press the ô... - Page 48 ( S T A R T ) ( S T A R T ) ( S T A R T ) C H E C K C H E C K C H E C K selected within three seconds. OKIOFFICE 84...
- Page 49 If your entries are OK, press the START key. Your machine E N T R Y E N T R Y O K ? O K ? E N T R Y E N T R Y E N T R Y O K ? O K ? O K ?
-
Page 50: Cancelling Delayed Transmission
( S T A R T ) ( S T A R T ) C H E C K C H E C K that is displayed. If more than one delayed transmission If your entries are OK, press the START key. Your machine OKIOFFICE 84... -
Page 51: Confidential Faxes
has been programmed into your machine, press the NO õ Sending Confidential Faxes key until the location of the delayed transmission you want Load your document. to cancel appears, then press the ô YES key to cancel. Press the SELECT FUNCTION key. If the delayed transmission was a feeder transmission, press Press the CONF. -
Page 52: Receiving Confidential Faxes
( à à à à à /1-7) ENTER ENTER ENTER /1-7) /1-7) /1-7) /1-7) ENTER ENTER Press the ô YES key and the display shows: Continue to create personal mailboxes or press the SELECT FUNCTION key to finish. OKIOFFICE 84... -
Page 53: Closing Confidential Mailbox
Press the ô YES key and the display shows: Closing Confidential Mailbox D E L E T E D E L E T E D E L E T E D E L E T E D E L E T E P E R S O N A L P E R S O N A L P E R S O N A L... -
Page 54: Printing Confidential Faxes
Press the ô YES key and the message is cleared from the Confidential RX Report telling you which personal box number personal mailbox. has received a confidential fax. Printing a confidential fax from a personal box is as follows: Press the SELECT FUNCTION key. OKIOFFICE 84... -
Page 55: Relay Broadcasting
Relay Broadcast Report Relay Broadcasting After a relay broadcast is completed, it is possible for the relay Relay broadcasting is where one fax machine, which is the key station to send a message back to your machine confirming relay initiating station, sends a document to another fax machine. -
Page 56: Polling
0 is automatically and collect the document. This is called setting your machine cleared. to be polled, or polling transmission. Calling another fax OKIOFFICE 84... - Page 57 For ITU bulletin polling, press the ô YES key and the Note: If you get the message ALREADY EXIST on the display, then mailbox 0 is already in use for standard display changes to: one-time polling or standard bulletin polling. Either PERSONAL PERSONAL PERSONAL...
-
Page 58: Polling Reception
Press the ô YES key and the display shows: A number dialled on Dial as you would on a normal the numeric keypad telephone. PERSONAL PERSONAL PERSONAL PERSONAL PERSONAL ENTER ENTER ENTER ENTER ENTER Press the START key. Your machine will begin polling the remote machine. OKIOFFICE 84... -
Page 59: Printing Bulletin Messages
Using the numeric keypad, enter the number of the personal Using the numeric keypad, enter the number of the personal mailbox you want to close and press the ô YES key. The box then press the ô YES key. Your machine then prints display shows: the message stored in the personal mailbox. -
Page 60: While Receiving Faxes
When the report has finished printing, your received fax message is then printed. • Continue to load documents as long as there is memory available on your machine. After the report is printed, your fax is automatically sent. OKIOFFICE 84... -
Page 61: Programming
PROGRAMMING User Function Settings User function settings allow you to customize the general operation of your machine. Refer to the list below to determine Customizing Features & Operations which settings you may need to change, then refer to Changing Many features and functions of your machine have settings User Function Settings to make the change. - Page 62 OFF, T/R and RX response to one ring. 09:TX MODE DEFAULT - This function allows you to 09:TX MODE DEFAULT 09:TX MODE DEFAULT 09:TX MODE DEFAULT 09:TX MODE DEFAULT change your machine’s default type of original, transmit and OKIOFFICE 84...
- Page 63 12:DISTINCTIVE RING 12:DISTINCTIVE RING 12:DISTINCTIVE RING - Distinctive ringing is a service 16:REMOTE RECEIVE 16:REMOTE RECEIVE 16:REMOTE RECEIVE - When you receive an incoming 12:DISTINCTIVE RING 12:DISTINCTIVE RING 16:REMOTE RECEIVE 16:REMOTE RECEIVE offered by some telephone services that allow you to have call, this function allows you to remotely tell your machine to different numbers on one line, each with its own distinctive switch from telephone to fax mode to receive an incoming fax.
- Page 64 PC. However, if you are experiencing a problem with your PC, the memory. you can tell your machine to receive and print faxes locally by setting this function to on. Available settings are on and off. OKIOFFICE 84...
-
Page 65: Changing User Function Settings
Press the ô YES key and all pages of your document that were 27:WIDTH REDUCTION 27:WIDTH REDUCTION 27:WIDTH REDUCTION - Turning this function on enables 27:WIDTH REDUCTION 27:WIDTH REDUCTION scanned into memory will be sent. After the scanned pages have you to print received data at a slightly reduced width. -
Page 66: Setting Distinctive Ring
Using a separate telephone line, immediately dial the your machine for bulletin polling or receiving confidential number assigned to the fax machine (you must do this faxes. within 90 seconds). When your machine begins to ring, the display changes to: OKIOFFICE 84... -
Page 67: Creating Personal Mailbox (Polling)
Press the ô YES key and a personal mailbox is created for Note: To use a personal mailbox for confidential messages, refer to Confidential Faxes in Advanced Operations. polling. 8. Press the SELECT FUNCTION key to finish. Creating Personal Mailbox (Polling) Closing Personal Mailbox (Polling) Press the SELECT FUNCTION key. -
Page 68: Memory Password
E N T E R 4 D I G I T S 4 D I G I T S 4 D I G I T S 4 D I G I T S 4 D I G I T S OKIOFFICE 84... -
Page 69: Deleting Memory Password
Press the ô YES key and the password is deleted. P R G . P R G . P A S S W O R D P A S S W O R D [ ? ? ? ? ] [ ? ? ? ? ] P R G . -
Page 70: Changing Restricted Id
7 : R E S T R I C T P R G . P R G . P R G . Press the SELECT FUNCTION key. ( ß ß ß ß ß ) ( à à à à à /1-7) /1-7) /1-7) /1-7) /1-7) OKIOFFICE 84... -
Page 71: Dial Parameter Settings
Press the USER PROG One Touch key. The display shows: Dial Parameter Settings 1 : F U N C . 1 : F U N C . 1 : F U N C . 1 : F U N C . 1 : F U N C . -
Page 72: Changing Dial Parameter Settings
( à à à à à /1-7) See Connecting to a PBX in the Installation chapter for /1-7) /1-7) /1-7) /1-7) instructions on changing this setting. Press the ô YES key until the display shows the dial parameter you want to change. OKIOFFICE 84... - Page 73 Repeatedly press the NO õ key until the setting you want appears in the display. Press the ô YES key to confirm your selection. The name of the next dial parameter setting will appear in the display. Press the SELECT FUNCTION key to finish. User’s Guide...
-
Page 74: Reports
Note: If there have been no transmissions to multiple receiving a fax, the Personal ID or telephone number of the locations (broadcast) then this report cannot be printed. remote fax machine that sent the document will be printed. OKIOFFICE 84... -
Page 75: Active Memory Files Report
Active Memory Files Report • The Location ID and main fax number (TEL NO) for each One Touch key. The active memory files report provides a list of all fax messages • The alternate number (OR) for each One Touch key. stored in the memory of your machine, either documents waiting for transmission or documents which have been received and •... -
Page 76: Message Confirmation Report
If the electrical power to your machine has been interupted and • The total amount of time your machine spent receiving the your machine had delayed transmissions or messages received message (S,R-TIME). into memory, your machine automatically prints a power outage OKIOFFICE 84... -
Page 77: Printing Reports
report to alert you that fax messages have been lost. Codes Used in Reports Printing Reports Result Codes The following codes indicate the results of communications. Printing Message Confirmation Report Code Description BUSY The other machine’s line was busy or there After transmission, press the COPY key once (with no was no answe documents loaded) to see a report confirming your last... - Page 78 A communication initiated by a remote fax machine POLLING Polling reception POLLED One-time polling transmission POLL=** Bulleting polling transmission (** is the box number) CONF=** Confidential reception (** is the box number) LOST Messages contained have been lost due to a power outage. OKIOFFICE 84...
-
Page 79: Problem Solving
PROBLEM SOLVING Clearing Document Jams When a document jam occurs, your machine beeps and an error message appears in the display. If the jammed document looks Clearing Printing Paper Jams like it is positioned straight in your feeder, press the STOP key to try to feed the document the rest of the way through the If your machine displays PAPER JAM or NO PAPER when the feeder. - Page 80 Lift the image drum unit out and set it aside. Keep it out of direct sunlight and DO NOT touch the green surface of the drum. Close the control panel. Press down until it snaps into place. Carefully pull out any paper you see jammed inside the machine. OKIOFFICE 84...
-
Page 81: Replacing Toner Cartridge
Pull the paper out of the paper tray. If any of the paper is of the LED array (see Step 6). If the print density does not damaged, remove and replace it. improve, replace the toner cartridge. When your machine’s display shows CHANGE DRUM, replace the image drum unit. - Page 82 With the ridged sides facing up and the coloured lever on your right, insert the toner cartridge into the image drum unit. Slide the left end of the cartridge in first, then lower the right end into place. OKIOFFICE 84...
-
Page 83: Replacing Image Drum Unit
Close the control panel. Press down until it snaps into place. should last about 10,000 pages for continuous printing, up to 8,000 pages at 3 pages per job, and about 4,500 pages at 1 page per job. Caution: Never expose the image drum unit to light for more than 5 minutes. -
Page 84: Okioffice
Refer to Replacing the Image Drum Unit above for more information. Press the SELECT FUNCTION key. OKIOFFICE 84... -
Page 85: Shipping The Fax Machine
Press the COUNTER DISPLAY One Touch key. The Problem Checklist display shows: Your machine is a complex machine with many features and D R U M D R U M D R U M D R U M D R U M C O U N T C O U N T C O U N T... - Page 86 (using the PAUSE fax again. If you still have a problem, try making a copy of a One Touch key) after the dial prefix or international dialling document on your machine to make sure it is working properly. OKIOFFICE 84...
- Page 87 You tried dialling with a One Touch key or an AUTO DIAL clock on your machine to the correct time. See Setting the Clock code but nothing happened. Make sure that something is in Installation. programmed into the One Touch key or AUTO DIAL code you Your machine disconnected before you could answer a voice are using.
-
Page 88: Display Panel Messages
S T O P S T O P S T O P S T O P S T O P ADF Error (Jam): A document to be faxed or scanned has jammed in the scanner. Follow Clearing Document Jam. OKIOFFICE 84... - Page 89 1 9 / 0 8 / 9 8 1 9 / 0 8 / 9 8 1 4 : 1 4 1 4 : 1 4 F A X F A X Printer Alarm: Open and close the cover. If this does not clear 1 9 / 0 8 / 9 8 1 9 / 0 8 / 9 8 1 9 / 0 8 / 9 8...
-
Page 90: Specifications
8 dots/mm or 300dpi (80gsm A4 size) Vertical resolution 3.85 line/mm (standard) Model number OKIOFFICE 84 7.7 line/mm (fine) 15.4 line/mm (ex. fine; TX and Note: Horizontal resolution of 300 dpi is used if the copy) remote machine also uses 300 dpi. Also, 300 dpi is used if... -
Page 91: Index
Index Chain Dialling ..........33 Change Drum Soon ........89 Delayed TX Key ........18 Cleaning Dial Parameters General ........... 7 Changing ..........72 LED Array ..........82 ADF Error (Jam) ........88 Settings ..........71 Clock Setting ..........25 Dial Prefix .......... - Page 92 MCF. (Multi-Loc.) ........61 Relay List Numbers ........55 Paper Jam ..........88 MCF. (Single-Loc.) ........61 Relay Password ......... 55 Paper Out/Jam ........... 88 Mem. Full Save ......... 64 Reload Document ........89 Paper Size ..........63 OKIOFFICE 84...
- Page 93 Remote Diagnosis ........64 Remote Receive ......... 63 T/F Timer Prg..........62 WAITING TO BE POLLED ..... 56, 57 Replace Toner Cart........89 TEL NO ............. 75 Width Reduction ........65 Report Print Key ........18 Telephone Answering Device Mode ..26 Wrong Paper Size ........
- Page 94 In order to prevent the misdirection of calls and network interference, systems specified in the instructions for use subject to the conditions set please ensure that all manually programmed telephone numbers are out in them. The BABT approval number for the OKIOFFICE 84 is: correctly entered. BABT 609072...
- Page 95 TEL/FAX Change Over (UK only) The model no. of your fax machine: OKIOFFICE 84 When the OKIOFFICE 84 is in changeover mode, care must be taken to The approval no. of your fax machine: BABT 609072. ensure that you only connect the apparatus to telephone lines not listed The number of extension sockets you require.
- Page 96 Tel: 44 1753 819819 Fax: 44 1753 819899 Tel: +81 3 5445 6111 Fax: +81 3 5445 6182 http://www.oki.co.uk Oki Electronics (Hong Kong) Limited Oki Systems (Ireland) Limited Suite 1901-9, Tower 3, The Square Industrial Complex China Hong Kong City, 33 Canton Road,...
Need help?
Do you have a question about the OKIOFFICE 84 and is the answer not in the manual?
Questions and answers