Table of Contents
Advertisement
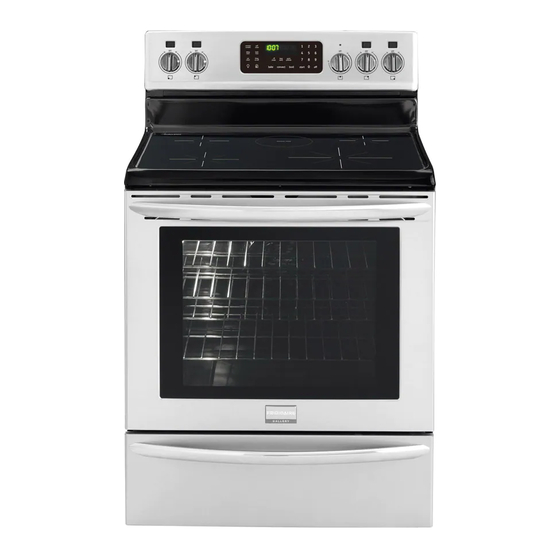
All about the
Use
of your
Electric Range with
Induction Cooktop
Important Safety Instructions ........................... 3-6
Before Setting Surface Controls ....................... 7-9
Induction Cooking Zones ...............................10-12
Setting Surface Controls ...............................13-15
Before Setting Oven Controls ........................ 16-17
Oven Control Functions (540) ............................ 18
www.frigidaire.com USA 1-800-944-9044
&
Care
TA B L E O F C O N T E N T S
Setting Oven Controls .................................. 19-33
Self-Cleaning .............................................. 34-35
Care & Cleaning .......................................... 36-39
Before You Call ............................................ 40-42
Notes ............................................................. 43
Major Appliance Warranty .................... back cover
www.frigidaire.ca Canada 1-800-265-8352
Advertisement
Table of Contents

Related Manuals for Frigidaire FGIF3061NF


Summary of Contents for Frigidaire FGIF3061NF
-
Page 1: Table Of Contents
Care & Cleaning .......... 36-39 Setting Surface Controls .......13-15 Before You Call ..........40-42 Before Setting Oven Controls ......16-17 Notes ............. 43 Oven Control Functions (540) ......18 Major Appliance Warranty ....back cover www.frigidaire.com USA 1-800-944-9044 www.frigidaire.ca Canada 1-800-265-8352... -
Page 2: Product Registration
Setting a silent control panel ........20 Setting lockout ............20 Product Registration Setting minute timer ..........20 Registering your product with Frigidaire enhances our ability Setting bake ............21 to serve you. You can register online at Setting bake time ............ 21 www.frigidaire.com or by dropping your Product... -
Page 3: Important Safety Instructions
IMPORTANT SAFETY INSTRUCTIONS Read all instructions before using this appliance. Important Safety Instructions This appliance has been tested and found to comply with the Do not attempt to install or operate your appliance until you limits for a class B digital device, pursuant to Part 18 of the FCC rules. - Page 4 IMPORTANT SAFETY INSTRUCTIONS • Never modify or alter the construction of a range by CAUTION removing the leveling legs, panels, wire covers, anti-tip brackets/screws, or any other part of the range. • Do not store items of interest to children in the •...
- Page 5 IMPORTANT SAFETY INSTRUCTIONS IMPORTANT INSTRUCTIONS FOR USING IMPORTANT INSTRUCTIONS FOR CLEANING YOUR OVEN YOUR RANGE • Use care when opening oven door , lower oven door or warmer drawer (if equipped)—Stand to the CAUTION side of the range when opening the door of a hot oven. Let hot air or steam escape before you remove or replace Before manually cleaning any part of the range, be sure all food in the oven.
-
Page 6: Important Safety Instructions
IMPORTANT SAFETY INSTRUCTIONS IMPORTANT INSTRUCTIONS FOR USING GROUNDING INSTRUCTIONS YOUR COOKTOP For models factory-equipped with a power cord: • Know which keypad controls each surface cooking zone. For personal safety, this appliance must be properly Place a pan with food on the cooking zone before turning grounded. -
Page 7: Before Setting Surface Controls
BEFORE SETTING SURFACE CONTROLS Benefits of induction surface cooking Induction cookware Fast and efficient - The induction cooking zones heat IMPORTANT faster while using less energy. Induction power levels are quick to boil and efficient when simmering. Before using the induction cooking zones, be sure to A cooler cooktop - A unique feature of the induction carefully read and follow these cookware cooking zones is whether turned on or off, the cooking... -
Page 8: When Using The Cooking Zones
BEFORE SETTING SURFACE CONTROLS When using the cooking zones Moving cookware on smoothtop It is recommended to always use heavier gauge high quality • Be sure to use cooktop cookware made with a magnetic cookware on the cooking zones. Even high quality cookware base material. -
Page 9: Home Canning
BEFORE SETTING SURFACE CONTROLS Hot cookware and residual heat Home Canning Be sure to read and observe all the following points when CAUTION home canning with your appliance. Check with the USDA (United States Department of Agriculture) website and be •... -
Page 10: Induction Cooking Zones
INDUCTION COOKING ZONES Pan sensing The cooking zone sensors located below the cooktop Correct Incorrect surface require that certain cookware conditions are met • Cookware base material has before the induction cooking zones can operate. • Cookware base material is good magnetic characteristics. - Page 11 INDUCTION COOKING ZONES Pan sensing-induction cooking zones (cont’d) Minimum pan size Maximum recommended pan size Induction cooking zones require a minimum pan size in The graphics on each cooking zone location are your guide order to activate. The graphics on each cooking zone to the correct maximum pan size for that zone.The longer location are your guide to the correct minimum pan size for lines guide the maximum pan size (see Figure 1).
-
Page 12: Cooktop Display Windows
INDUCTION COOKING ZONES Cooktop display windows The range backguard provides a digital window for each of the cooking zones located on the cooktop. Power levels and messages are easily monitored and controlled using the window displays in combination with the corresponding control knobs. -
Page 13: Setting Surface Controls
SETTING SURFACE CONTROLS Operating induction cooking zones Start most surface cooking on a higher setting and then Pan preheat recommendations adjust to a lower setting to finish cooking. Be aware that induction cooking may decrease the amount of time required to preheat a cooking utensil compared to The suggested settings (provided in Fig. -
Page 14: Cooktop Operational Noises
SETTING SURFACE CONTROLS Cooktop operational noises CAUTION The electronic processes involved with induction cooking may create some background noises. You may hear a slight • Unlike radiant surface elements, the induction “buzzing” sound when cooking on the cooktop. cooking zones will not glow red when they are hot. These noises are part of the induction cooking process are The glass surface may be hot from residual heat considered normal. -
Page 15: Warmer Zone
SETTING SURFACE CONTROLS Warmer zone The purpose of the warmer zone is to To operate warmer zone: keep foods at serving temperature, Step such as: vegetables, gravies, 1. Place cookware on the warmer zone. casseroles, soups, stews, breads, pastries and oven-safe dinner plates. 2. -
Page 16: Before Setting Oven Controls
BEFORE SETTING OVEN CONTROLS Types of oven racks Removing, replacing & arranging racks flat handle oven rack To remove - pull the rack forward until it stops. Lift up front of rack and slide out. To replace - fit the rack flat onto the guides on the oven oven rack... -
Page 17: Effortless™ Oven Rack System And Assembly
BEFORE SETTING OVEN CONTROLS Effortless™ Oven Rack system IMPORTANT Some models are equipped with a special oven rack system that automatically extends the oven rack to assist in access • Only the Effortless™ Oven Rack system should to your food items. This rack extends when the oven door is be used in oven rack position 2. -
Page 18: Oven Control Functions (540)
OVEN CONTROL FUNCTIONS READ THE INSTRUCTIONS CAREFULLY BEFORE USING THE OVEN. 1. convect convert — Use to convert a standard bake 10. probe — Use to set and monitor the meat probe. recipe to a convection bake recipe. 11. keep warm — Use to set the keep warm features. 2. -
Page 19: Setting Oven Controls
SETTING OVEN CONTROLS Setting the clock Setting 12 or 24 hour display mode When the range is first powered up, “12:00” will flash in the The clock display mode allows you to choose between 12 or display (See Fig. 1). 24 hr mode. -
Page 20: Setting A Silent Control Panel
SETTING OVEN CONTROLS Setting a silent control panel Silent mode allows the oven control to operate without NOTES sounds. The control may be programmed for silent operation and later returned to operating with all the normal sounds. DO NOT attempt to open the oven door while the “door Loc”... -
Page 21: Setting Bake
SETTING OVEN CONTROLS Setting bake Setting bake time Use the bake feature to cook most food items that require Use the timed bake feature to automatically turn the oven off normal cooking temperatures. A reminder tone will sound after a desired length of time. once the oven reaches the set temperature. -
Page 22: Setting Delayed Timed Bake
SETTING OVEN CONTROLS Setting delayed bake time and timed bake When the set bake time runs out: The delay start feature allows you to set a starting and 1. "END" will appear in the display window and the oven ending time to the baking process. Prior to setting a delay will shut-off automatically (See Fig. -
Page 23: Convection Cooking
SETTING OVEN CONTROLS Convection Cooking Convect uses a fan to circulate heat inside the oven. Improved heat distribution allows for fast, even cooking and browning. It gives better baking results when using two racks at the same time. Benefits of the convect feature —... -
Page 24: Convect Broil
SETTING OVEN CONTROLS Convect broil Setting convect convert The convect convert feature allows you to convert any Use the convect broil feature to cook thicker cuts of meats baking recipe using the convect (convection) feature. The that require direct exposure to radiant heat and the control uses the normal recipe settings and adjusts to a convection fan for optimum browing results. -
Page 25: Probe
SETTING OVEN CONTROLS Probe Use the probe for best results when cooking foods such as Proper probe placement in food: roasts, hams or poultry. The probe also works well with • Insert the probe so that the tip is centered in the thickest foods such as meat loaf and casseroles. - Page 26 SETTING OVEN CONTROLS Probe (cont’d) To set probe: USDA recommended minimum internal cooking temperatures: 1. Insert the probe into the food. 2. Place prepared food on the desired oven rack position Food type Internal temp. and slide into the oven. Ground meat &...
- Page 27 SETTING OVEN CONTROLS Probe (cont’d) Choosing a setting for how the oven will operate NOTES once the probe reaches the target temperature Your oven is factory preset to automatically stop cooking • During the cooking process, the internal food and start the keep warm feature once the probe sensor temperature will display by default.
-
Page 28: Probe
SETTING OVEN CONTROLS Probe (cont’d) Probe error message: "Probe Too Hot" message: If the message "Prob" ... "Too"... "Hot" ... flashes in the If the error message "Prob ERR" displays, check to be sure display, the probe sensor temperature has exceeded 250°F the probe connector is fully inserted into the receptacle. -
Page 29: Setting Broil
SETTING OVEN CONTROLS Broil Use the broil function to cook meats that require direct exposure to heat for best browning results. When broiling, always remember to arrange the oven racks while oven is still cool. Position the oven rack as suggested in the broil settings table (See Fig. -
Page 30: Setting Keep Warm
SETTING OVEN CONTROLS Setting keep warm Operating the oven light The interior oven light will automatically turn ON when the The keep warm feature will keep foods warm for serving up oven door is opened. to 3 hours. The keep warm feature may be used alone or after cooking has finished using bake time and or delay start. -
Page 31: Adjusting Oven Temperature
SETTING OVEN CONTROLS Adjusting the oven temperature Restoring factory default settings When new, your appliance left the factory with Your appliance has been factory calibrated and tested to predetermined oven control default settings. Over time, the ensure an accurate baking temperature. For the first few user may make changes to these settings. -
Page 32: Setting The Sabbath Modefeature
SETTING OVEN CONTROLS Setting the Sabbath ModeFeature (for use on the Jewish Sabbath & Holidays) To program the oven to bake at 350°F and then activate the Sabbath Day feature: For further assistance, guidelines for proper Step Press usage and a complete list of models with the Sabbath feature, please vist the web at 1. -
Page 33: Setting Oven Controls
SETTING OVEN CONTROLS To Set the Sabbath Feature (cont’d) To turn off the oven but keep the Sabbath feature NOTES active: • If a delay start time longer than 12 hours (maximum of Press cancel. 24 hours) in advance is desired, set the display mode for the 24 hour setting. -
Page 34: Self-Cleaning
SELF-CLEANING Self-cleaning A self-cleaning oven cleans itself with high temperatures (well above normal cooking temperatures) which eliminate CAUTION soils completely or reduces them to a fine powdered ash you can wipe away with a damp cloth. During the self-cleaning cycle, the outside of the range can become very hot to the touch. -
Page 35: Self-Cleaning
SELF-CLEANING Setting a self-clean cycle or a delayed When the self-clean cycle has completed: start self-clean cycle 1. The time of day and “Hot” will appear in the display Examples: To start an immediate self-cleaning cycle window (See Fig.3). and/or how to add a delay start time of 9:00 o’clock 2. -
Page 36: Care & Cleaning
CARE & CLEANING Cleaning recommendation table Surface type Recommendation For general cleaning , use hot, soapy water and a cloth. For more • Painted body parts difficult soils and built-up grease , apply a liquid detergent directly onto • Painted decorative trim the soil. -
Page 37: Cooktop Maintenance And Cleaning
CARE & CLEANING Cooktop maintenance Cooktop cleaning IMPORTANT CAUTION Consistent and proper cleaning is essential to Before cleaning the cooktop, be sure the controls are maintaining your ceramic glass cooktop. turned to OFF and the cooktop is COOL. For light to moderate soil: Prior to using your cooktop for the first time, apply some of Apply a few drops of glass-ceramic cooktop cleaner directly the glass-ceramic cooktop cleaner supplied with your new... -
Page 38: Replacing The Oven Interior Light
CARE & CLEANING Cooktop cleaning (cont’d) Caution for aluminum use on the cooktop • Aluminum Foil - Use of aluminum foil on a hot cooktop may damage the ceramic cooktop. Do not use thin WARNING aluminum cooking utensils or allow aluminum foil to touch the ceramic cooktop under ANY circumstances. -
Page 39: Removing And Replacing Oven Door
CARE & CLEANING Removing and replacing the oven door Oven door hinge locations CAUTION The door is heavy. For safe, temporary storage, lay the door flat with the inside of the door facing down. To remove oven door: 1. Open oven door completely (horizontal with floor - See Fig. -
Page 40: Before You Call
BEFORE YOU CALL • Solutions to common problems Problem Solution Poor baking results. • Many factors affect baking results. Make sure the proper oven rack position is used. Center food in the oven and space pans to allow air to circulate. Allow the oven to preheat to the set temperature before placing food in the oven. -
Page 41: Replacing The Oven Light
BEFORE YOU CALL Solutions to common problems • Problem Solution Oven light does not work. • Be sure the light is secure in the socket. Also see “Changing & replacing the oven light” in the Care & Cleaning section. • Incorrect setting. Follow broiling instructions in Setting Oven Controls. Oven smokes excessively during broiling. -
Page 42: Before You Call
BEFORE YOU CALL • Solutions to common problems Problem Solution Scratches or abrasions on cooktop • Coarse particles such as salt or sand between cooktop and utensils can surface. cause scratches. Be sure cooktop surface and bottoms of utensils are clean before usage. -
Page 43: Notes
NOTES... -
Page 44: Major Appliance Warranty
MAJOR APPLIANCE WARRANTY Your appliance is covered by a one year limited warranty. For one year from your original date of purchase, Electrolux will pay all costs for repairing or replacing any parts of this appliance that prove to be defective in materials or workmanship when such appliance is installed, used and maintained in accordance with the provided instructions.
Need help?
Do you have a question about the FGIF3061NF and is the answer not in the manual?
Questions and answers