Table of Contents
Advertisement
Quick Links
Download this manual
See also:
Service Manual
Advertisement
Table of Contents

Subscribe to Our Youtube Channel
Related Manuals for Oki OKIFAX 2350


Summary of Contents for Oki OKIFAX 2350
- Page 1 OKIFAX 1050/2350/2450 Handbook This document was created with FrameMaker 4.0.2...
- Page 2 This handbook is subject to change without notification. 1995 by Oki Data Corporation. All rights reserved. OKI and OKIFAX are registered trademarks of OKI Electric Industry Co., Ltd.
-
Page 3: Safety
Safety Installation Hints The TEL port on the back of the machine is suitable for 2- or 3-wire devices. Install your fax machine in a dust-free location away from direct sunlight. This equipment may not necessarily provide for the effective hand-over of a call from a telephone Do not plug your fax machine into a power source connected to the same line. -
Page 4: Toner Cartridge And Image Drum Unit
Pull out the AC plug before trying to remove any Exercise care when removing the toner cartridge. Do objects that may have fallen into the machine. not let it touch your clothing or porous materials. The toner powder causes permanent stains. Immediately disconnect the fax machine if it becomes physically damaged and arrange for its repair or Small amounts of toner spilled on skin or clothing can... -
Page 5: Table Of Contents
Getting Started 21 Features 8 Where to Install Your Fax Machine 21 OKIFAX 1050 Features 9 Unpacking 21 OKIFAX 2350 Features 9 Setting Up Your Fax Machine 22 OKIFAX 2450 Features 9 Install the Document Stacker 22 Product Options 10... - Page 6 Setting the Answering Mode 30 No Toner Reception 45 Answering Mode Options 30 Cancelling Messages Stored in Memory 45 Changing the Answering Mode 31 Rejecting Unsolicited Fax Messages 45 Setting the Fax Identification 31 Power Failures and Memory 46 Setting Language 33 Making Copies 46 Connecting to a PBX 33 Making Copies with the Manual Paper Feeder 47...
- Page 7 Polling Documents from Other Fax Machines 57 Printing Other Reports 69 Dual Access 58 Codes Used in Reports 69 What You Can Do While Sending a Fax 58 Result Codes 69 What You Can Do While Receiving a Fax 58 Communication Codes 69 Programming 60 Problem Solving 70...
-
Page 8: Introduction
Introduction Thank you for purchasing this OKIFAX fax machine. Automatic redial and page re-transmission when a This fax machine uses advanced Light Emitting Diode telephone number is busy or when problems occur in technology to transfer received and copied images to communication. -
Page 9: Okifax 1050 Features
30 One Touch keys. message. 99 Auto Dial numbers. 256 KB of built-in memory. 20 groups. OKIFAX 2350 Features 16 mail boxes for confidential reception. 15 One Touch keys. Halftone transmission in up to 64 shades of grey. 64 Auto Dial numbers. -
Page 10: Product Options
14,400 bits per second. expansion boards are available. An advanced dual access feature which allows you to If you have an OKIFAX 2350 or 2450, 512KB, 1MB and load and prepare multiple documents for transmission 2MB memory expansion boards are available. -
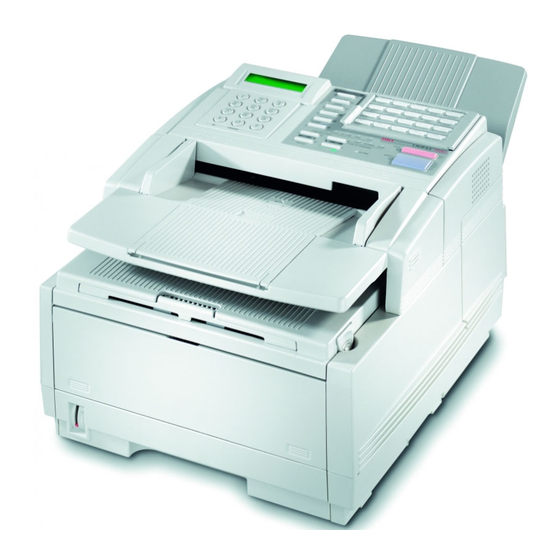
Page 11: Component Identification
Component Identification What You Should Receive Power Cord Telephone Cord Document Stacker Facsimile Unit Image Drum Unit (inside fax machine) Optional External Handset Toner Cartridge Component Identification This document was created with FrameMaker 4.0.2... -
Page 12: Components
Holds copies or received faxes. Control Panel Front Panel The panel on the front of your OKIFAX 2350 or 2450 gives you access to the Manual Paper Document Guides Feeder. This allows you to bypass Adjust these guides to the page... - Page 13 Expansion Slot Cover AC Power Inlet Open this cover to expose expansion slots for optional PC interface and Plug the AC power cord, supplied with memory expansion boards. your unit, into this inlet. LINE Terminal Terminal for connecting the unit to an outside telephone line.
-
Page 14: Control Panel
Control Panel SELECT FUNCTION AUTO REC SEARCH AUTO DIAL 9/SPACE 10/PAUSE HYPHEN REDIAL HOOK COPY V REQUEST ALARM PHOTO EX FINE FINE STOP START PQRS WXYZ LIGHT NORMAL DARK UNIQUE Component Identification... -
Page 15: Control Panel Keys And Indicators
Control Panel Keys and Indicators and receives faxes. Your fax machine’s display will always indicate your current selection. See Setting the LCD Display Panel: Refer to this display for Answering Mode in the Installation chapter for more instructions and information while your fax machine is information about the answering modes available in performing operations or while you are programming. - Page 16 dialling. You will be able to hear the dialling through If your fax machine is set to pulse 13 */Tone Key: your fax machine’s speaker. dialling, this key allows you to switch the dialling operation of your fax machine from pulse to tone If you have an optional telephone handset or external dialling during your current call.
-
Page 17: The One Touch Keypad
Pause Key Position takes you back step-by-step through the programming OKIFAX 1050 One Touch Key 10 functions you have already selected. OKIFAX 2350 One Touch Key 15 19 Start Key: Press the Start key to initiate the OKIFAX 2450 One Touch Keys 15 and 30... -
Page 18: Using The One Touch Keys For Dialling
One Touch Keys Available Using the One Touch Keys for Selecting Functions OKIFAX 1050 1–10 and Programming OKIFAX 2350 1–15 OKIFAX 2450 1–15 (on main One Touch panel) You will also use One Touch keys 1–10 for selecting and 16–30 (beneath main One... -
Page 19: Signal Tones
Use this key to send a Use this key to program 2/Broadcast Memory TX Key: 8/Location Program Key: fax to multiple locations. your fax machine’s One Touch keys, Auto Dial numbers and groups. 3/Confidential TX Key: Use this key to send a confidential document to a mail box (a memory Use this key to program your fax 9/User Program Key:... - Page 20 the Stop key to turn the error tone off, then print a Message Confirmation Report to check the source of the problem (to do this, press the Copy key twice with no documents loaded). During a fax session, either you Voice Request Tone: or the person at the remote fax machine may initiate a voice request (a message asking for a voice...
-
Page 21: Installation
Installation Getting Started Unpacking To install your new fax machine, follow the Before you begin, be sure that all the items listed instructions from Unpacking to Setting the Fax below are included in your package. Remove the Identification. You must complete these steps for your contents from the carton and place them on a sturdy fax machine to operate properly. -
Page 22: Setting Up Your Fax Machine
Setting Up Your Fax Machine Push in the cover release buttons on the side of the copy stacker until you hear a click. Lift the copy Install the Document Stacker stacker. Slip the document stacker indents over the tabs on the rear of the unit. - Page 23 Be careful when handling the toner cartridge. With the ridged side facing up and the blue lever on Warning: Do not let toner spill onto your clothing or other porous your right, insert the toner cartridge into the image materials. If you experience any problems with toner, drum unit.
-
Page 24: Connect To The Telephone Line
Close the copy stacker and push down until you hear Connect to the Telephone Line the copy stacker click into place. Be sure that the cover Insert one end of the telephone cord into the LINE is latched on both sides. terminal at the back of the machine. - Page 25 Using the supplied screw, connect the handset cradle Plug one end of the handset cord into the handset. to its base. Then plug the other end of the handset cord into the jack located on the front of the cradle. Place the handset in the cradle.
-
Page 26: Connecting An External Telephone Or Answering Machine
Insert the supplied telephone cord into the jack located Connecting an External Telephone or Answering on the back of the cradle. Machine Feed the telephone cord from the back of the cradle Insert one end of the telephone cord into the TEL 1 or through the cable run located on the back of the TEL 2 terminals on the back of the machine. -
Page 27: Connect Power
You will need to have the TAD mode feature turned Plug the power cord into the power inlet located on Tip: on for an answering machine to work with your fax the back of the unit. machine. See Setting the Answering Mode in this chapter. - Page 28 photocopiers. Available sizes are A4, letter size and Adjust the paper guides to the width of your paper. legal size. Your fax machine automatically reduces the vertical length of the page images it receives to fit on the paper in your cassette (down to 75% of the original length). For example, if you are sent a document created originally on legal-size paper, your fax machine can reduce the received pages to fit on A4 or letter-size...
-
Page 29: Setting The Clock
If you are using legal size paper, pull out the extension Be sure the paper is under the tabs at the left and Tip: at the back of the paper cassette. right edges of the cassette. Do not fill past the Paper Full marker. -
Page 30: Setting The Answering Mode
Using the numeric keypad, enter the new date and fax. If you do not answer the phone and someone tries time. to send you a fax message, your machine will not accept it. Press the Yes key to confirm your entry. If your fax machine is Auto Receive Mode [FAX]: Press the Select Function key to finish. -
Page 31: Changing The Answering Mode
The Memory Reception Mode is available on Changing the Answering Mode Tip: OKIFAX 2350 and 2450 fax machines. Follow these instructions to change your fax machine’s Telephone Answering Device Mode [TAD]: Use this answering mode. mode if you have connected an answering machine to Press the Auto Rec key. - Page 32 appear on the displays or reports of other fax machines After the display clears, enter the full telephone you are communicating with. number of your fax machine using the numeric keypad. TSI/CSI: This is the telephone number of your fax machine.
-
Page 33: Setting Language
Press the Start key to save your entry. The display will Using the numeric keypad, enter 12. This display will show NO=<CALL BACK NO.>. show SELECT LANGUAGE. After the display clears, use the numeric keypad to Press the No key to switch to the other installed enter the telephone number you want to use for call language. - Page 34 Press the Select Function key. To later turn off the PBX LINE and ACCESS DIGIT Tip: functions, follow Steps 1–7 above. At Step 8, press the Press the 9/User Program One Touch key. Space key four times. On the numeric keypad, press 2. The display will show 2:DIAL PARAMETER.
-
Page 35: Dial Directories
You can also enter a 16-character Location ID (name) for each One Touch key. Model One Touch Keys Available OKIFAX 1050 1–10 OKIFAX 2350 1–15 OKIFAX 2450 1–15 (on main One Touch panel) and 16–30 (beneath main One Touch panel) You can then select from One Touch keys 16–30. - Page 36 After the display clears, enter the main fax number. To Do This Refer to the instructions below. Enter a unique Press the 0/Unique key repeatedly character until the character you want To Do This appears. The following characters ! # & ‘ ( ) * + , – . are available: Enter numbers Numeric keypad...
-
Page 37: One Touch Parameters
One Touch Parameters Chain Dialling If you are experiencing problems communicating with Each fax number that you enter or program into your a remote location in a very noisy telephone area, set fax machine can be up to 32 digits long. In the case up a One Touch key for that location and try turning that you need to dial a number which is longer than 32 Echo Protection on for that One Touch key. - Page 38 To Do This Model Auto Dial Numbers Available Enter numbers Numeric keypad (press once) OKIFAX 1050 01–40 Enter spaces Space One Touch key OKIFAX 2350 01–64 Enter hyphens Hyphen key OKIFAX 2450 01–99 Enter alphabet Locate the character you want on characters the numeric keypad.
-
Page 39: Programming Groups
No ), the display will show SELECT LOC.(S) OKIFAX 1050 Enter 1 digit again. Continue to add or delete locations from your OKIFAX 2350 01–10 Enter 2 digits group. Each group can contain up to a maximum of all OKIFAX 2450 01–20... -
Page 40: Basic Operations
Basic Operations Preparing Documents Document Size Try to use good quality documents for your All documents must have a minimum width of 148 mm transmissions. Documents that are typed or created in and a minimum length of 128 mm. Documents cannot felt-tip black ink on white (or light) paper work best. -
Page 41: Loading Documents
Loading Documents Neatly stack your documents, then insert them face down into the document feeder. Readjust the To prevent paper jams and problems during scanning, document guides for a snug fit. neatly stack your documents, aligning their edges, before loading. Do not load documents of different sizes at the same time. -
Page 42: Sending A Fax To A Single Location
If necessary, use the Type of Original or No key to To Dial Using Do This set the level of contrast in your document. An external telephone Pick up the handset of your external telephone and dial the Document Type Contrast to Use number of the machine you wish to transmit to. -
Page 43: Search Key Dialling
Occasionally, it may be necessary to dial numbers in Message Explanation real time (one digit at a time). COMMUN. ERROR If you see this or another error message, a problem occurred If your fax machine is equipped with a handset, you during the communication. -
Page 44: Receiving Faxes Manually
Press the Stop key twice. The display will show Receiving Faxes in Memory STOPPED. Your fax machine will automatically receive messages If documents are stuck partway through the document into memory (and not immediately print them) in a few feeder, you may see a DOCUMENT JAM message on different situations. -
Page 45: No Toner Reception
Your fax machine will automatically print out any Cancelling Messages Stored in Memory messages received in memory when the paper is It is also possible to erase messages received in replaced. memory without printing them. No Toner Reception After you have followed the instructions to print out When your fax machine is running low on toner, it will messages stored in memory, the display will show display a TONER LOW, REPLACE TONER message,... -
Page 46: Power Failures And Memory
reception (T/R), and no limitation on transmission or Any messages your fax machine has scanned into reception (OFF). To use the closed network function, memory but not yet transmitted will be lost. follow the instructions below. Any messages your fax machine has received into Press the Select Function key. -
Page 47: Making Copies With The Manual Paper Feeder
To make multiple copies, enter the number of copies Pull the manual paper feeder down until it is you want to make on the numeric keypad. Then press horizontal. the Copy key again. Your fax machine will begin making copies. Making Copies with the Manual Paper Feeder Your fax machine’s manual paper feeder allows you to make copies on a different type of paper than what... -
Page 48: Using Voice Request
Insert a sheet of paper face up, adjusting the guides You will know if the person on the other fax machine again to ensure the paper is straight. has issued a voice request when you hear a warbling tone. If you do not respond in approximately six seconds, the voice request is automatically cancelled. -
Page 49: Advanced Operations
Advanced Operations Sending a Fax at a Later Date and Time Sending a Delayed Fax from the Document Feeder The delayed transmission feature allows you to send Load your documents. documents at a specified date and time, and frees you Press the Select Function key. -
Page 50: Sending A Delayed Fax From Memory
Press the Yes key. The display will show Press the No key. The display will show BROADCAST/MEMORY TX. PRG. START DATE. Press the No key. The display will show Using the numeric keypad, enter the date on which SELECT LOCATION. you wish the transmission to begin. -
Page 51: Cancelling A Delayed Transmission
15 When all of your selections are correct, press the Start To Select Using Do This key. Your fax machine will scan the documents into A group Using the numeric keypad, press memory and begin waiting until the time and date you the # key, then enter the number have set before sending the fax. -
Page 52: Sending A Fax To Multiple Locations
Repeat Steps 4 and 5 as often as necessary to continue selecting locations. You can add a maximum of all One To send a confidential fax to another OKI fax Tip: machine, you must know in advance the mail box the Touch and Auto Dial locations available plus five message should be sent to. -
Page 53: Receiving Confidential Faxes
An Auto Dial number Press the Auto Dial key, then enter the two digit Auto Dial number on OKIFAX 1050 the numeric keypad. OKIFAX 2350 A number dialed on Dial as you would on a normal OKIFAX 2450 the numeric keypad telephone. -
Page 54: Changing Your Password Or Closing A Mail Box
Press the 9/User Program One Touch key. The display OKIFAX 1050 1–8 Only one available. Enter 1 digit will show 1:FUNC. PROGRAMMING. OKIFAX 2350 1–8 All available. Using the numeric keypad, press 5. The display will Enter 1 digit show 5:MAIL PASSWORD PRG. -
Page 55: Printing A Confidential Message
To create a new password, enter a new 4-digit number Using the numeric keypad, enter the number of the on the numeric keypad. To close a mail box, press the mail box you want to print from. Space One Touch key. If no message is stored in that mail box, the display Tip: Press the Yes... -
Page 56: Relay Initiating Station
OKIFAX 1050 following information from the operator of the fax OKIFAX 2350 machine you intend to use as a relay key station: OKIFAX 2450 This is the 4-digit relay key word... -
Page 57: Polling
Press the Yes key. The display will show SELECT machine to receive documents someone else has LOCATION. loaded is called polling or polling reception. 10 Select the location of the relay key station. Refer to the Setting Your Fax Machine to be Polled instructions below. -
Page 58: Dual Access
Press the Start key. Your fax machine will begin polling You can load another OKIFAX 2350 and 2450: the remote fax machine. document and prepare it for transmission. The document will be scanned into memory while your first document is being transmitted. Your transmission... - Page 59 can continue to load and scan additional documents as long as additional memory is available. When your fax machine is finished receiving the fax message, it will automatically begin sending the documents you have loaded. Advanced Operations...
-
Page 60: Programming
Programming Customizing Features and Operations User Function Settings Many of your fax machine’s features and functions User function settings allow you to customize the have settings which can be changed to customize the general operation of your fax machine. Refer to User operations of your fax machine. - Page 61 your document. When turned off, your fax machine’s use the STD and NORMAL settings. If you are Sender ID will not be printed. constantly sending faxes which require some other combination of transmission modes, use this function 04 MONITOR VOLUME: This function sets the volume setting to change the default transmission modes to your fax machine uses for telephone line monitoring...
-
Page 62: Changing Your User Function Settings
(by the optional second paper tray (available for the scanning the document into memory first, or by OKIFAX 2350 and OKIFAX 2450). Available settings transmitting directly from the document feeder). are A4, letter, or legal. -
Page 63: Dial Parameter Settings
If you are changing your fax machine’s TX MODE The number of redial tries must be set to a Tip: Warning: DEFAULT settings, the new settings will appear on the value of less than 5. Failure to do so would invalidate LEDs above the Transmit Resolution/Yes and the Type the approval of the OKIFAX 1050, 2350, and 2450... -
Page 64: Changing Your Dial Parameter Settings
PBX line your fax machine if connected to. Available Press the Yes key to confirm your selection. The settings are normal, flash and earth. name of the next dial parameter setting will appear in the display. AUTO START: When this function is turned on, your fax machine will automatically begin dialling as soon Press the Select Function key to finish. - Page 65 you receive. Your fax machine can be set to not print your local time and date, to print it at the top the first page only, or to print it at the top of every page. When this function is on, the telephone TSI PRINT: number of the fax machine sending you a fax message is printed at the top of each page of the message.
-
Page 66: Reports
Reports Understanding Reports ID). If you were sending a fax to a single location, the telephone number or the Location ID will be printed. Your fax machine provides a variety of useful reports If you were receiving a fax, the remote fax machine’s which help you understand your fax machine’s current Personal ID or its telephone number will be printed. -
Page 67: Broadcast Entry Report
The total amount of time used to complete the The Location ID or telephone number of the fax broadcast. machine you were communicating with (DISTANT STATION ID). For each location, the Location ID or telephone number of the fax machine you are communcating The communication mode used. -
Page 68: Configuration Report
The number of the mail box into which the message power off report to alert you. Compare the information was received. in this report with the information in the activity report. Information missing from the power off report are The number of pages received in the mail box. communications which did not reach their destination. -
Page 69: Printing Other Reports
Printing Other Reports Code Description Press the Select Function key. PUNIT This error code indicates a problem with the printing unit. Contact your service person. Press the 6/Report Print One Touch key. The display R_JAM A paper jam occurred in the receiving fax will show 1:ACTIVITY REPORT. -
Page 70: Problem Solving
Problem Solving Clearing a Document Jam Pull out the jammed document. When a document jam occurs, your fax machine will beep and an error message will appear in the display. If the jammed document looks like it is positioned straight in your feeder, press the Stop key to try to feed the document the rest of the way through the feeder. - Page 71 If you are experiencing many paper jams, it may Check for paper jammed in the slot where received Tip: be due to the type of paper you are using. For best faxes or copies exit onto the document stacker. If you results, select a paper which has been developed see paper jammed in the exit slot, lift the blue bar out specifically for photocopying or laser printing.
- Page 72 Lift the image drum unit out and set it aside. Keep it Pull out the paper cassette. If any of the paper in the out of direct sunlight. Do not touch the green surface paper cassette is damaged, remove and replace it. of the drum.
- Page 73 Slide the paper cassette all the way back into your fax 10 Close the copy stacker and push down on it until you machine. hear a click. Be sure both slides are latched. Place the image drum unit back into your fax machine. 11 Close the document table.
-
Page 74: Replacing The Toner Cartridge
Replacing the Toner Cartridge Push in the cover release buttons on the side of the copy stacker until you hear a click. Lift the copy The number of pages you can print with one toner stacker. cartridge varies depending on the type of documents you usually receive or copy. - Page 75 Remove the new toner cartridge from its package and Once the toner cartridge is in place, push the blue gently shake it from side to side to distribute the toner. lever all the way forward to secure it and release the Then carefully peel the white plastic tape from the toner.
-
Page 76: Replacing The Image Drum Unit
Close the copy stacker and push down until you hear Replacing the Image Drum Unit the copy stacker click into place. Be sure that the cover If the faxes you receive are light or have vertical latches on both sides. streaks in them and you are not out of toner, or if your fax machine displays a CHANGE DRUM message, your fax machine needs a new image drum unit. - Page 77 Push in the cover release buttons on the side of the Take the new image drum unit out of its package and copy stacker until you hear a click. Lift the copy insert it into your fax machine. To ensure that the stacker.
-
Page 78: Reading Your Print Counters
11 Press the Select Function key to finish. a problem, read through the list of problems and solutions before calling your dealer. Reading Your Print Counters The display is blank. Check that the power switch is on. Check the power cord to make sure that it is firmly Your fax machine’s print counters count the number of plugged in. - Page 79 LINE outlet on the back of your fax machine. If you try programming the number into one of your One have an external telephone connected, lift the handset Touch keys and then changing the One Touch and check for a dial tone. If you do not hear one, there Parameters for that One Touch key (see the Dial may be a problem with your telephone line.
- Page 80 Original settings. Ask the person to make a copy of the good for at least 12,000 pages, depending on usage). document on their fax machine to ensure that it is Contact your dealer to get a replacement. working properly. Then ask them to send the fax You set your fax machine for delayed transmission again.
- Page 81 must be programmed for PBX operation before it will work. See Connecting to a PBX in the Installation chapter. You want to answer an external telephone but your If you are using an fax machine always answers first. external telephone, change your fax machine’s ring response user function setting.
-
Page 82: Specifications
OKIFAX 2450: Model FX-175D 7.7 line/mm (fine) 15.4 line/mm (ex. fine; TX only) Halftone transmission OKIFAX 1050: 16 shades of grey OKIFAX 2350: 32 shades of grey OKIFAX 2450: 64 shades of grey Document size A4, A5, letter or legal size Recording paper... -
Page 83: User Information
Storage of telephone numbers for retrieval by a pre- in them. The BABT approval number for the OKI determined code Electric Industry Co., LTD. OKIFAX 1050 is 605583. For... -
Page 84: Notes
Any other usage will invalidate the approval of the It can not be guaranteed that this apparatus will work apparatus if as a result it then ceases to conform to the correctly in all circumstances. Any difficulties should standards against which approval was granted. be referred to your supplier. -
Page 85: Storage Of Telephone Numbers
ii) external control software or external control Advice should be obtained from a competent engineer apparatus which causes the operation of this modem before such a connection is made. The exchange line or associated call set-up equipment to contravene the must provide facilities for either loop disconnect of requirements of the standard against which these multi-frequence dialling. -
Page 86: Notes
Interconnection of the port on the apparatus with other ports either directly or by way of other apparatus may produce hazardous conditions on the network and advice should be obtained from a competent engineer before such a connection is made. Notes It is advisable to check the telephone numbers stored in the apparatus immediately after programming, and... - Page 87 POSTCARD FOR REQUESTING SOCKET INSTALLATION A postcard is supplied below for requesting installation of sockets for connection. You must copy the model number and approval number of your modem onto the card before sending it to your local telephone sales office. It is not necessary to apply to British Telecom for installation of sockets where the wiring does not belong to British Telecom.
Need help?
Do you have a question about the OKIFAX 2350 and is the answer not in the manual?
Questions and answers