Table of Contents
Advertisement
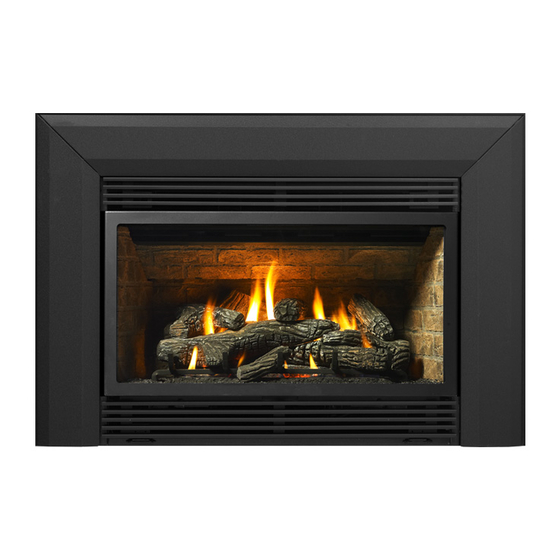
MODELS: U31-NG3 Natural Gas U31-LP3Propane
WARNING:
If the information in these instructions are not followed ex-
actly, a fi re or explosion may result causing property damage,
personal injury or loss of life.
FOR YOUR SAFETY
Do not store or use gasoline or other fl ammable vapors and
liquids in the vicinity of this or any other appliance.
Installation and service must be performed by a qualifi ed
installer, service agency or the gas supplier.
Tested by:
919-099
FPI FIREPLACE PRODUCTS INTERNATIONAL LTD. 6988 Venture St., Delta, BC Canada, V4G 1H4
U31 Gas Insert
Installer: Please complete the details on the back cover
and leave this manual with the homeowner.
Homeowner: Please keep these instructions for future reference.
Owners &
Installation Manual
www.regency-fi re.com
FOR YOUR SAFETY
What to do if you smell gas:
Do not try to light any appliance
Do not touch any electrical switch:
do not use any phone in your build-
ing.
Immediately call your gas supplier
from a neighbour's phone. Follow
the gas supplier's instructions.
If you
cannot reach your gas
supplier, call the fi re department.
10/17/12
Advertisement
Table of Contents

Subscribe to Our Youtube Channel
Related Manuals for Regency U31-NG3


Summary of Contents for Regency U31-NG3
- Page 1 Owners & U31 Gas Insert Installation Manual www.regency-fi re.com MODELS: U31-NG3 Natural Gas U31-LP3Propane FOR YOUR SAFETY WARNING: What to do if you smell gas: If the information in these instructions are not followed ex- Do not try to light any appliance actly, a fi...
- Page 2 The FPI Gas Insert Series of hand crafted appliances has been designed to provide you with all the warmth and charm of a fi replace, at the fl ick of a switch. The models U31-NG3 and U31-LP3 of this series have been approved by Warnock Hersey for both safety and ef- fi...
- Page 3 DIMENSIONS Note: Oversize faceplate is 44" x 28" (1118 mm x 711mm) 10-7/8” (276mm) 27-15/16 (710mm) 35-15/16 (912mm) 40-3/4 (1036mm) Low Profi le Faceplate Dimensions * Standard size shown, custom size also available. Regency U31-3 Gas Fireplace Insert...
-
Page 4: Table Of Contents
Standard Flush Door (1 panel) ......16 WARRANTY Flush Louvers ...........17 Wiring Diagram ............18 Warranty .............35 Full Screen Front .............19 Excalibur Surround ..........20 Low Profi le Faceplate Installation......22 Optional Wall Thermostat ........27 Optional Remote Control ........27 Final Check .............27 Regency U31-3 Gas Fireplace Insert... -
Page 5: Safety Label
The State of Massachusetts requires the installation of a carbon monoxide alarm in accordance with NFPA 720 and a CO alarm with battery back up in the same room where the gas appliance is installed. Regency U31-3 Gas Fireplace Insert... - Page 6 (e) A copy of all installation instructions for all Product Approved side wall horizontally vented gas fueled equipment, all venting instructions, all parts lists for venting instructions, and/or all venting design instructions shall remain with the appliance or equipment at the completion of the installation. Regency U31-3 Gas Fireplace Insert...
-
Page 7: Installation
YOUR WARRANTY AND MAY CAUSE A SERIOUS HOUSE FIRE. CHILDREN AND ADULTS SHOULD BE ALERTED TO THE HAZARDS OF HIGH SURFACE TEMPERATURES, ESPE- CIALLY THE FIREPLACE GLASS, AND SHOULD STAY AWAY TO AVOID BURNS OR CLOTHING IGNITION. Regency U31-3 Gas Fireplace Insert... -
Page 8: Specifi Cations
INSTRUCTIONS local codes or in the absence of local codes, BUILT with CAN/CGA B149 (in Canada) or the The Regency Gas Insert must be installed in FIREPLACES National Fuel Gas Code ANSI Z223.1. This accordance with these instructions. Carefully appliance should be installed by a qualifi ed read all the instructions in this manual fi... -
Page 9: Installation Checklist
DIMENSIONS From Unit Sides A 10" / 255 mm The Regency Gas Insert is installed as listed below. The minimum fi replace dimensions for the FPI Ceiling B 47.5" / 1205 mm gas fi replace insert are shown in the following... -
Page 10: Conversion Kit From Natural Gas To Propane
INSTALLATION Conversion Kit from Natural Gas to Propane Model #404-969 for: U31-NG3 Units THIS CONVERSION MUST BE DONE BY A QUALIFIED GAS FITTER IF IN DOUBT DO NOT DO THIS CONVERSION !! 14) Verify that if the conversion is from NG to LPG, 8) Turn control knob to the “OFF”... -
Page 11: Gas Connection
The manifold pressure is controlled by a regulator built into the gas control, and should be checked at The Regency Insert incorporates its own internal the pressure test point. The pressure check should draft hood, so no additional external draft hood is required. -
Page 12: Gas Insert Aeration System
The thermally actuated safety switch will auto- matically reset after it has cooled off. The switch will continue to cycle until the draft problem is Diagram 3 corrected. DO NOT BYPASS OR DISCONNECT THIS SWITCH. Regency U31-3 Gas Fireplace Insert... -
Page 13: Log Set Installation
The logs are fragile, handle with care - do not force into position. 2) Sprinkle the vermiculite around the fi rebox base. Take some of the embers (approx. 1/3 of the bag) and B)02-45 sprinkle over the vermiculite. Regency U31-3 Gas Fireplace Insert... - Page 14 C)02-56 and on top of the cutout on Log A)02-43. E)02-47 and push the bottom right edge against the bracket on the burner tray and the front edge of the rear burner. Notch D)02-46 F)02-48 A)02-43 C)02-56 Bracket B)02-45 Cutout Regency U31-3 Gas Fireplace Insert...
- Page 15 fl ame hesitation, check that area for any blockage of the burner port. G) 02-48 A) 02-43 D) 02-46 G)02-44 F) 02-47 E) 02-45 B) 02-56 C) 02-44 The "02" refer numbers (i.e. 02-43) are molded into the rear of each log. Regency U31-3 Gas Fireplace Insert...
-
Page 16: Faceplate & Trim
Diagram 5. 5) Connect the fan switch wires by taking the 11) Push the Regency logo plate into the two black and red wires with the male ends (in holes in the bottom left corner of the face- plate. -
Page 17: Log Installation
Secure glass clips with Hinge the screws provided. Do not over tighten as this could break the glass. Location 5) Slide in the top glass trim under the spring clips. Bottom Louver Regency U31-3 Gas Fireplace Insert... -
Page 18: Wiring Diagram
This appliance is equipped with a three pronged (grounding) plug for your protection against shock hazard and should be plugged directly into a properly grounded three-prong receptacle. Do not cut or remove the grounding prong from this plug. Regency U31-3 Gas Fireplace Insert... -
Page 19: Full Screen Front
Bracket and slide under unit. Unit should touch tabs on Bottom Trim Bracket. Inside fl ange of Side Trim goes over the inner side of the unit fl ange. Push in Corners Bottom Trim Bracket Regency U31-3 Gas Fireplace Insert... -
Page 20: Excalibur Surround
2 screws as shown in diagram 1. Repeat for right side. ON/OFF switch Fan Speed Switch wires to (Rear View) ON/OFF switch wires to Fan switch connectors for gas connection Self-adhesive wire clip Faceplate Trim Bracket Firebox Flange Regency U31-3 Gas Fireplace Insert... - Page 21 Faceplate. Push down to secure. Tug on the Sur- round to ensure it is securely locked in place. Faceplate Backside of Sur- round Shown Hooks Left Side Faceplate Bracket Trim Flange Faceplate Slots Faceplate Surround Regency U31-3 Gas Fireplace Insert...
-
Page 22: Low Profi Le Faceplate Installation
6) Feed wires through the left air chamber clip - then clip them it to lower left of fi rebox as show below. Diagram 3 3) Connect the female ends of the ON/OFF switch - to the ON/OFF switch in the control box. Wire feed Diagram 7 Diagram 4 Regency U31-3 Gas Fireplace Insert... - Page 23 Diagram 9 Bracket Outer face Inner faceplate Attach Regency logo to bottom louver. Install bottom louver by panel pins hanging louver on brackets installed in step 8. Diagram 12 Diagram 10...
-
Page 24: Optional Wall Thermostat
CAUTION Do not connect the millivolt IMPORTANT: Gas cock knob cannot be turned remote control wires to from "PILOT" to "OFF" unless it is partially the 120V wires. depressed. 1) Open the bottom louver assembly Regency U31-3 Gas Fireplace Insert... -
Page 25: Shutdown Procedure
It is not rates which can cause "ticking" and "cracking" unusual for the fan to make a "whirring" sound sounds. You should also be aware that as there Regency U31-3 Gas Fireplace Insert... -
Page 26: Maintenance
7/8" fl at glass gasket (Part # 936-243) for the should be removed from the burner tray and cleaned. Replace the embers but do Bay Front and for the Flush Front. not block the pilot. Top View of pilot fl ame Regency U31-3 Gas Fireplace Insert... -
Page 27: Door Glass Replacement
fi rebox. NOTE: the unit MUST REPLACEMENT NOT be operated without the fan access panel securely in place. Your Regency insert is supplied with high tem- perature, 5 mm Neoceram ceramic glass that CAUTION: Label all wires prior to... -
Page 28: Parts List
Flush Louvers (Set) - Gold/Black 402-920 Flush Louvers (Set) - Black 402-924 Flush Louvers (Set) - Steel/Black 33) 404-901 Brick Panel Set - Standard Brown 404-902 Brick Panel Set - Standard Red Brick Panel - Back Regency U31-3 Gas Fireplace Insert... - Page 29 75) * Firebox Baffl e 76) 400-090 Brick Clip 77) * Fan Access Plate 78) * Thermodisc Bracket 79) * Thermodisc cover plate 80) * Fan Shield *Not available as a replacement part. **Not Shown Regency U31-3 Gas Fireplace Insert...
-
Page 30: Flush Front Assembly
Flush Glass 155) 402-046 Glass Support Trim - Black 156) 936-238 Flush Glass Gasket 157) * Screw #10-24 x 1/2" 158) 402-033 Flush Glass Bracket 159) 936-233 3/4" Rope Gasket *Not available as a replacement part. Regency U31-3 Gas Fireplace Insert... -
Page 31: Faceplate Assembly
Burner ON/OFF Switch 188) 910-330 Fan Speed Control (120 V) 190) * Screw #8 x 1/2" Black self-tapping 191) * Screw #8 x 1/2" Brass self-tapping 199) 948-220 Hampton Logo Plate *Not available as a replacement part. Regency U31-3 Gas Fireplace Insert... - Page 32 PARTS LIST Regency U31-3 Gas Fireplace Insert...
-
Page 33: Low Profile Faceplate
PARTS LIST LOW PROFILE FACEPLATE Part # 403-954 Description Back plate Assembly Bottom Louver Right mounting bracket Left mounting bracket Front Frame Regency U31-3 Gas Fireplace Insert... - Page 34 NOTES Regency U31-3 Gas Fireplace Insert...
-
Page 35: Warranty
It is the general practice of FPI to charge for larger, higher priced replacement parts and issue credit once the replaced component has been returned to FPI and evaluated for manufacturer defect. The authorized selling dealer is responsible for all in-fi eld service work carried out on your Regency ®... - Page 36 ® Register your Regency warranty online www.regency-fi re.com Reasons to register your product online today! • View and modify a list of all your registered products. • Request automatic email notifi cation of new product updates. • Stay informed about the current promotions, events, and special offers on related products.
Need help?
Do you have a question about the U31-NG3 and is the answer not in the manual?
Questions and answers