Table of Contents
Advertisement
Energy
www.regency-fire.com
MODELS: U32-NG10 Natural Gas U32-LP10 Propane
WARNING
FIRE OR EXPLOSION HAZARD
Failure to follow safety warnings exactly could result in serious
injury, death, or property damage.
- Do not store or use gasoline or other flammable vapors and liquids in the vicinity of this or any other
appliance.
- WHAT TO DO IF YOU SMELL GAS
•
Do not try to light any appliance.
• Do not touch any electrical switch: do not use any phone in your building.
Leave the building immediately.
• Immediately call your gas supplier from a neighbour's phone. Follow the gas supplier's
instructions.
• If you cannot reach you gas supplier, call the fire department.
- Installation and service must be performed by a qualified installer, service agency or the gas supplier.
Tested by:
Installer: Please complete the details on the back cover
and leave this manual with the homeowner.
Homeowner: Please keep these instructions for future reference.
919-432
REGENCY FIREPLACE PRODUCTS INTERNATIONAL LTD. 6988 Venture St., Delta, BC Canada, V4G 1H4
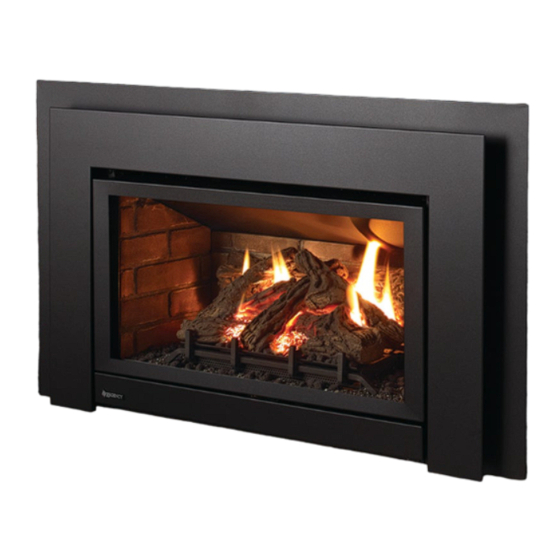
U32 Gas Insert
™
Owners &
Installation Manual
09.17.15
Advertisement
Table of Contents

Related Manuals for Regency Energy U32-NG10


Summary of Contents for Regency Energy U32-NG10
- Page 1 Tested by: Installer: Please complete the details on the back cover and leave this manual with the homeowner. Homeowner: Please keep these instructions for future reference. 919-432 REGENCY FIREPLACE PRODUCTS INTERNATIONAL LTD. 6988 Venture St., Delta, BC Canada, V4G 1H4 09.17.15...
- Page 2 Congratulations! You are the owner of a state-of-the-art Gas Insert by Regency. The Regency Gas Insert Series of hand crafted appliances has been designed to provide you with all the warmth and charm of a fireplace, at the flick of a switch. The models U32-NG10 and U32-LP10 of this series have been approved by Warnock Hersey for both safety and efficiency.
- Page 3 National Fuel Gas Code, ANSI Z223.1 and the current National Electrical Code ANSI/NFPA 70 in the U.S.A., and the current CAN/CGA B149 Gas Installation Code and the current Canadian Electrical Code CSA C22.1 in Canada. This Regency Mobile/Manufactured Home listed appliance comes his Regency Mobile/Manufactured Home Listed appliance equipped with a dedicated #8 ground lug to which an 18 gauge comes factory equipped with a means to secure the unit.
-
Page 4: Table Of Contents
General Vent Maintenance ..........24 Log Replacement ............24 Glass Gasket ...............24 Door Glass ..............24 Fan Maintenance ............25 Valve Replacement ............26 Main Assembly ............27 Burner Assembly & Log Set.........28 Low profile faceplate ...........29 Warranty ..............31 U32-10 Regency Direct Vent Gas Insert ®... - Page 5 This is a copy of the labels that accompany each U32-10 Gas Insert. NOTE: Regency units are constantly being improved. Check the label on the unit and if there is a difference, the label on the unit is We have printed a copy of the contents here for your review.
-
Page 6: Ma Code - Co Detector
(e) A copy of all installation instructions for all Product Approved side wall horizontally vented gas fueled equipm ent, all venting instructions, all parts lists for venting instructions, and/or all venting design instructions shall remain with the appliance or equipment at the completion of the installation. U32-10 Regency Direct Vent Gas Insert ®... -
Page 7: Important Message
YOUR WARRANTY AND MAY CAUSE A SERIOUS HOUSE FIRE. CHILDREN AND ADULTS SHOULD BE ALERTED TO THE HAZARDS OF HIGH SURFACE TEMPERATURES, ESPE- CIALLY THE FIREPLACE GLASS, AND SHOULD STAY AWAY TO AVOID BURNS OR CLOTHING IGNITION. U32-10 Regency Direct Vent Gas Insert ®... -
Page 8: Important Message
National Fuel Gas Code ANSI Z223.1 in supply piping system by closing its individual the U.S.A. This appliance should be installed The Regency Gas Insert must be installed in manual shut off valve during any pressure by a qualified gas fitter technician only. -
Page 9: Installation Checklist
DIMENSIONS (Refer to section "Gas Insert Aeration System"). The minimum fireplace clearances & dimensions for 9) Install standard and optional features. Refer the Regency gas insert are shown in the following Diagram 1 to the following sections: diagrams: a. Brick Panel b. -
Page 10: Gas Connection
Secure with gear recommend using the Simpson Dura-Vent clamp. System (46dva-GK adapter and 46dva-VCH high-wind cap). The Air Intake pipe must be attached to the inlet Inlet air collar of the termination cap. 10 | U32-10 Regency Direct Vent Gas Insert ®... -
Page 11: Gas Pipe Pressure Testing
Note: Aeration Adjustment should only be performed by an authorized Regency Note: To properly check gas pressure, both Installer at the time of installation or inlet and manifold pressures should service. -
Page 12: Log Set Installation
4) Fit log 27-32 into the pins on the middle left hand side of the burner. 1) Carefully remove the logs from the box and unwrap them. The logs are fragile, handle with care - do not force into position. 27-32 12 | U32-10 Regency Direct Vent Gas Insert ® 12/13/07 918-679a... - Page 13 7) Fit the bottom end of log 27-35 into the pin in log 27-33 and rest the top end of log 27-35 on the notch in log 27-31. 27-33 27-35 27-33 U32-10 Regency Direct Vent Gas Insert ® 918-679a 12/13/07...
- Page 14 8) Fit log 27-36 into the pins on logs 27-33 and 27-31. 10) Separate platinum embers and place on the burner just in front of the logs as shown. Avoid stacking platinum embers. 27-31 27-36 27-33 Platinum Embers 27-36 14 | U32-10 Regency Direct Vent Gas Insert ® 12/13/07 918-679a...
-
Page 15: Remote Receiver Installation
Attach to the floor of the unit with a velcro pad. 2) See Remote Control installation instructions for information on coding the handheld transmitter to the receiver. 918-679a U32-10 Regency Direct Vent Gas Insert 12/13/07 ®... -
Page 16: Safety Screen Installation
INSTALLATION Install the supplied battery into the DC Sparker Box by opening the battery compartment. Diagram 3 NOTE: The battery in the DC Sparker Box will need to be replaced annually. 16 | U32-10 Regency Direct Vent Gas Insert ®... -
Page 17: Conversion From Ng To Lp
WARNING! Remove the 2 screws, Also check that the pilot and main push Burner Tray to the left, and lift off. burner injectors are appropriate for the gas type. Burner Orifice U32-10 Regency Direct Vent Gas Insert ® 10.28.14 919-461... -
Page 18: Low Profile Faceplate Installation
Connect the male end black and red fan switch wires (in the NOTE: Diagram shown without faceplate backing installed to better illustrate location of holes. black casing) to the wire connectors from the fan speed control. Diagram 4 Diagram 7 18 | U32-10 Regency Direct Vent Gas Insert ® 09.30.14 919-460... - Page 19 Attach the bottom louver to the 2 hinges using 3 screws per hinge. Outer faceplate Back faceplate Slot brackets Diagram 11 Diagram 9 10. Hook screen door over glass frame. Final Install Diagram 12 Diagram 10 11.05.14 919-460 U32-10 Regency Direct Vent Gas Insert ®...
-
Page 20: Optional Backing Plate Installation
2. Proceed to faceplate installation–see faceplate instructions in manual or with faceplate. Assembled Faceplate Backer + spacer Backing Plate (backside) (backside) 3. Proceed to faceplate installation–see faceplate instructions in manual or with faceplate. 20 | U32-10 Regency Direct Vent Gas Insert ®... -
Page 21: Wiring Diagrams
250-750 millivolt rated non- anticipator type thermostat that is CSA, ULC or NOTE: When the wall thermostat is connected, the remote control transmitter UL approved may be used. and all of its features are now disabled. U32-10 Regency Direct Vent Gas Insert ®... -
Page 22: Lighting Procedure
"OFF". 2. Turn the gas control knob to the "OFF" position to turn off the pilot. Pilot may be shut off during prolonged non use periods to conserve fuel. 22 | U32-10 Regency Direct Vent Gas Insert ®... -
Page 23: Operating Instructions
Only the fan will not operate until NORMAL OPERATING resistant paint (not with wall paint). Regency power is restored. If the remote batteries in uses StoveBrite Paint - Metallic Black #6309. -
Page 24: General Vent Maintenance
Regency dealer only, and follow our step-by- step instructions for replacement. Never operate the appliance without the glass properly secured in place or with the door open. -
Page 25: Fan Maintenance
Hood to the rear firebox wall and lift out. 8) Remove the 10 screws holding the Access Panel in place. 9) Remove the Fan Air Duct by loosening the 3 screws, squeeze the sides together to remove. U32-10 Regency Direct Vent Gas Insert ®... -
Page 26: Valve Replacement
16) Fire up the unit again and check for proper 4) Reconnect the quick drop out thermocouple flame appearance and glow on logs. nut with a 9mm wrench. 5) Reconnect the pilot tube nut with a 7/16" 26 | U32-10 Regency Direct Vent Gas Insert ®... -
Page 27: Main Assembly
43) * Stove Top 44) 420-048 Thermal Insulation 45) * Adaptor Stop 46) * Adaptor Holding Brkt-Left 47) * Adaptor Holding Brkt-Right 48) 320-518 Flue Adaptor Assy 50) * Insulation Hold Down Brkt U32-10 Regency Direct Vent Gas Insert ®... -
Page 28: Burner Assembly & Log Set
70) 420-143 Valve Tray Gasket 71) 402-526 Grate/Diffuser Assy 72) 402-519 Burner Assembly (NG/LP) 73) * Log Tray Mount Bracket 74) * Log Tray Rear *Not available as a replacement part. 28 | U32-10 Regency Direct Vent Gas Insert ®... -
Page 29: Low Profile Faceplate
LOW PROFILE FACEPLATE Part # Description 426-924 Low Profile Faceplate 426-934 Oversize Low Profile Faceplate 426-958 Custom Backing Plate U32-10 Regency Direct Vent Gas Insert ®... - Page 30 30 | U32-10 Regency Direct Vent Gas Insert ®...
-
Page 31: Warranty
Conditions: Any part or parts of this unit which in our judgement show evidence of such defects will be repaired or replaced at Regency's option, through an accredited distributor or agent provid- ed that the defective part be returned to the distributor or agent Transportation Prepaid, if requested. - Page 32 Register your Regency warranty online ® www.regency-fire.com Reasons to register your product online today! • View and modify a list of all your registered products. • Request automatic email notification of new product updates. • Stay informed about the current promotions, events, and special offers on related products.
Need help?
Do you have a question about the Energy U32-NG10 and is the answer not in the manual?
Questions and answers