Table of Contents
Advertisement
Advertisement
Table of Contents

Subscribe to Our Youtube Channel
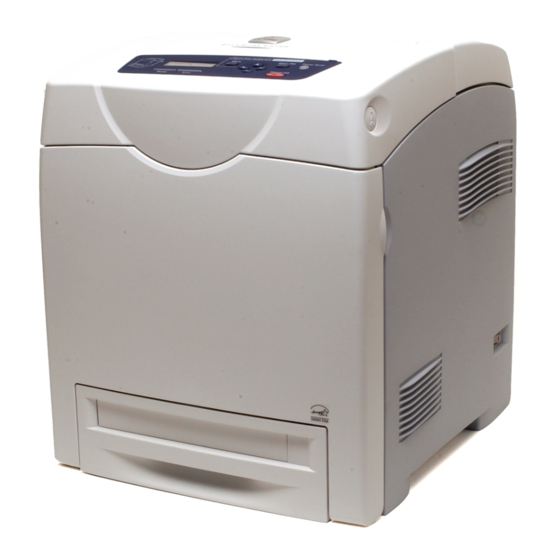
Related Manuals for Xerox DocuPrint C2100


Summary of Contents for Xerox DocuPrint C2100
- Page 1 DocuPrint C3210 DX/C2100 User Guide...
- Page 2 Important This manual may not be reproduced in any form, whole or part without the prior written consent of Fuji Xerox. Fuji Xerox reserves the right to change the contents of this manual at any time without notice.
-
Page 3: Preface
- Connect the equipment into an outlet on a circuit different from that to which the receiver is connected - Consult the dealer or an experienced radio/TV technician for help Changes and modifications to this equipment not specifically approved by Fuji Xerox may void the user’s authority to operate this equipment. -
Page 4: Types Of Manuals
Explains how to set up your printer as a PostScript printer and the features that can be configured on your printer driver. This PDF file is included in the PostScript Driver Library CD-ROM. The DocuPrint C2100 does not support PostScript. Documentation in the Driver CD... -
Page 5: Using This Guide
Using This Guide Organization The following is a summary of each chapter. 1 Basic Operations This chapter explains the parts’ names and their functions and basic operations. 2 Printing This chapter explains basic printing operations, how to cancel printing, and how to print on the special media or custom size paper. 3 About Paper This chapter explains compatible paper and how to load paper into the printer. -
Page 6: Table Of Contents
Contents Preface......................3 Types of Manuals....................4 Using This Guide ....................5 Contents......................6 Contents of the Quick Reference Guide (Reference) ........9 License......................10 Illegal Copies and Printouts ................11 Basic Operations ..................12 Main Components and Their Functions..............12 Main Body ......................12 Control Panel ......................14 Display ........................15... - Page 7 About Paper ..................... 54 About Paper......................54 Usable Paper ......................54 Unusable Paper .....................56 Storing and Handling Paper ..................57 Loading Paper ....................... 58 Loading Paper in the Paper Tray ................58 Loading Paper in the Bypass Tray ................59 Loading Envelopes in the Bypass Tray ..............61 Setting Paper Types and Sizes ................
- Page 8 Checking Total Printed Pages on Meter ..............124 Checking Total Printed Pages for Each Paper Size ..........124 Cleaning the Printer..................... 125 Adjusting the Transfer Voltage ................126 Adjusting the Fuser Temperature ................ 126 6.10 Adjusting the Altitude................... 127 6.11 When Moving the Printer ..................128 Appendix ....................
-
Page 9: Contents Of The Quick Reference Guide (Reference)
Contents of the Quick Reference Guide (Reference) Preface Features in Brief Types of Manuals Conventions Safety Notes Contents Contents of the User Guide (Reference) Adjusting Color Registration..............12 Printing the Color Registration Correction Chart Determining Values Entering Values Setting the Printer Environment ............... 14 Supported Environment Setting IP Address Setting Printer Configurations via CentreWare Internet Services... -
Page 10: License
License RSA BSAFE This product (network expansion card) includes RSA BSAFE software from RSA Security Inc. The network expansion card comes as standard with the DocuPrint C3210 DX and optional with the DocuPrint C2100. License... -
Page 11: Illegal Copies And Printouts
Illegal Copies and Printouts Copying or printing certain documents may be illegal in your country. Penalties of fines or imprisonment may be imposed on those found guilty. The following are examples of items that may be illegal to copy or print in your country. Currency Banknotes and checks Bank and government bonds and securities... -
Page 12: Basic Operations
Basic Operations Main Components and Their Functions Main Body Front View Name Description Front cover Open this when replacing the drum cartridge and removing jammed paper. Push up the button to open this cover. Output tray Print jobs are output with the printed side facing down. Control panel Consists of operation buttons, indicators, and the display. -
Page 13: Rear View
The toner affixed to the belt unit is transferred onto the paper. Button Press this button when opening the output tray cover. Duplex unit Enables 2-sided printing. This is optional for the DocuPrint C2100. 1.1 Main Components and Their Functions... -
Page 14: Control Panel
Control Panel Secure Print / Sample Print Press Menu to exit Menu Eject / Set Power Saver Cancel Job Ready Error Name Description LCD display Displays the setting items, machine status, and messages. Refer to • “Display” (P. 15) <Menu> button Press to move to the menu operation. -
Page 15: Display
Display There are two types of screens: Print screen (for displaying printer status) and Menu screen (for configuring settings). Note • The message displayed differs according to the optional accessories installed and setting status. Print Screen The Print screen appears when the printer is printing or waiting for data. The following contents are shown on the screen. -
Page 16: Switching On And Off The Printer
Switching On and Off the Printer Switching On the Power Press the power switch of the printer to the < > position. When the power is on, “Diagnosing...” is displayed on the control panel, then it changes to "Please wait...". Check that this display changes to “Ready to print”. -
Page 17: Low Power Mode/Sleep Mode
Low Power Mode/Sleep Mode The printer is equipped with a low power mode and a sleep mode to reduce power consumption when it is left idle. When no print data is received for 3 minutes, the printer will enter the low power mode. When no data is received for a further 2 minutes (a total of 5 minutes lapse (default) since the last receiving data), it will enter the sleep mode by default. -
Page 18: Canceling/Checking Printing
Canceling/Checking Printing Canceling Printing You can cancel print jobs either from the printer or on your computer. Canceling a Printing of Data Being Printed or Received at the Printer Press the <Cancel Job> button on the control panel. However, pages being printed at the moment will continue to be printed. -
Page 19: Checking Status Of Print Data
Checking Status of Print Data Checking in Windows Double-click the printer icon on the task bar at the bottom right of the screen. From the displayed window, check the column, [Status]. Checking in CentreWare Internet Services You can check the status of the print job sent to the printer at the [Jobs] tab of CentreWare Internet Services. -
Page 20: Displaying Optional Accessory Configuration And Paper Tray Settings
Displaying Optional Accessory Configuration and Paper Tray Settings For Windows When the printer is on a network and the SNMP protocol is enabled, you can display the optional accessory configurations or settings configured at the control panel, such as paper type or size, on the printer driver. -
Page 21: Printing
Printing This chapter describes various printing methods using the PCL printer driver. Printing From the Computer This section explains the basic flow when printing from application software in a Windows environment. (The procedure may differ according to the computer or system configuration used.) Important •... -
Page 22: Printing On Envelopes/Transparencies
Printing on Envelopes/Transparencies This section explains how to print on envelopes and transparencies. Loading Envelopes/Transparencies Envelopes and transparencies can be loaded in the bypass tray. Note • For details on the procedure to load paper in bypass tray, refer to “Loading Paper in the Bypass Tray” (P. -
Page 23: Loading Paper
Loading Transparencies Important • Transparencies with a white frame and full-color transparencies cannot be used. After carefully fanning a small stack of transparencies, load them into the bypass tray with the side to be printed facing down. Load transparencies a few at a time. Slide the paper guides to the size of the transparencies. - Page 24 Select the appropriate paper type from [Paper Type for Bypass Tray] and click [OK]. From [Paper Size], select the size of the original document. Click the [Layout] tab. From [Output Size], select the size of the transparency, and then click [OK]. If the envelopes are loaded in the bypass tray, click [Booklet/Poster/Mixed Document/ Rotation] to display the [Booklet/Poster/Mixed Document/Rotation] dialog box according to what you need.
-
Page 25: Printing On Custom Size Paper/Long Paper
Printing on Custom Size Paper/Long Paper This section explains how to print on custom size paper such as long paper using the PCL printer driver. Custom size paper can be loaded in each tray. The paper sizes that can be selected on this printer are as follows: For bypass tray For paper tray... - Page 26 From the [Start] menu, click [Printers and Faxes], and then display the properties of the printer to be used. Click the [Configuration] tab. Click [Custom Paper Size]. Use the [Details] list box to select the custom setup you want to define. Specify the length of the short edge and long edge under [Setting For].
-
Page 27: Printing On Custom Size Paper
Printing on Custom Size Paper The procedure to print on custom size paper using the PCL printer driver is as follows. This section explains the procedure using WordPad on Windows XP as an example. Note • The way to display the printer properties dialog box differs according to the application software. Refer to the manual of your respective application software. -
Page 28: Printing Confidential Document - Secure Print
Printing Confidential Document - Secure Print When at least 256 MB of memory are added, you can use the secure print feature. Note • The data stored in the RAM disk is erased when the printer is switched off. About Secure Print Secure Print is a feature that allows you to assign a password to a print job from the computer, send it to the printer for temporarily storing, and start printing the data from the control panel. - Page 29 From [Job Type] on the [Paper/Output] tab, select [Secure Print] and click [Setting]. Enter the user ID in [User ID]. You can enter up to 8 characters for the user ID. To enter a password, enter it in [Password]. Enter up to 12 numeric characters. From [Retrieve Document Name], select either [Enter Document Name] or [Auto Retrieve].
-
Page 30: At The Control Panel
At the Control Panel This section explains the procedure to print data stored in the printer by Secure Print. Note • You can also delete, without printing, secure print data stored in the printer. For details, refer to “RAM Disk” (P. 73). Press the <... -
Page 31: Print After Checking Printing Result - Sample Print
Print After Checking Printing Result - Sample Print When at least 256 MB of memory are added, you can use the sample print feature. Note • The data stored in the RAM disk is erased when the printer is switched off. About Sample Print Sample Print is a feature that allows you to store the print data of multiple copies in the memory, print out only the first set to check the print result and if satisfactory, print the... - Page 32 Select [Sample Print] from [Job Type] and click [Setting]. Note • You must specify at least 2 for [Copies] before [Sample Print] can be selected. Enter the user ID in [User ID]. You can enter up to 8 characters for the user ID. From [Retrieve Document Name], select either [Enter Document Name] or [Auto Retrieve].
-
Page 33: Printing Pdf Files Directly
PDF Bridge is a feature that comes standard with the printer. There are two methods of printing PDF files using the PDF Bridge feature: • Using ContentsBridge Utility (software by Fuji Xerox Co., Ltd.) • Using commands such as lpr and ftp Note •... -
Page 34: Printing Pdf Files Without Using Contentsbridge Utility
Supported PDF Files PDF files created on Adobe Acrobat 4, Adobe Acrobat 5 (excluding some of the features added to PDF1.4), or Adobe Acrobat 6 (excluding some of the features added to PDF1.5) can be printed on the printer. Note •... -
Page 35: Printing Using E-Mail
In a command prompt, enter a command as follows. Example: A command for printing “event.pdf” when the printer’s IP address is 192.168.1.100. C:\>ftp 192.168.1.100 <Enter> key Connected to 192.168.1.100. 220 FUJI XEROX DocuPrint C2100 User (192.168.1.100:(none)): <Enter> key 331 Password required Password: <Enter> key 230 Logged in ftp>bin <Enter>... -
Page 36: Setting The E-Mail Print Feature
Setting the E-mail Print Feature To use the E-mail Print feature, you must configure the servers on your network (such as SMTP server and PO3 servers). Note • Please have your network administrator configure the e-mail settings. Defining wrong e-mail settings can cause problems in the network. - Page 37 Item Setting Item Description Port Status E-mail Print Select [Enabled]. Protocol Settings Machine’s E-mail Set the printer’s e-mail address. This address will appear > E-mail Address as “From:” on e-mails sent from the printer. SMTP Server Set the IP address of the outgoing e-mail server to be Address connected via SMTP protocol or the FQDN (Fully Qualified Domain Name).
-
Page 38: Sending E-Mails
Sending E-mails Supported E-mail Attachments Files of the following format can be attached to e-mails: • PDF files To Send E-mails To perform E-mail Print, enter the printer’s address in the “To:” field on your e-mail application. Then, enter the following commands in the subject field or in the body message and write the text or attach the PDF file you want to print. - Page 39 The following explains how to write commands in e-mail, using Outlook Express as an example. Here, we suppose that the printer’s e-mail address is "printer1@example.com" and [Password for Print Job] is “prtuser". 1. To print the text in the body message: To print the document attached to the e-mail: Note •...
- Page 40 To Specify Commands in the Subject Field The following commands can be specified in the subject field. Command Description #Print xxx When [Password for Print Job] is set, make sure to enter a space (xxx: password) and then the password after the "#Print". When the password is not set, enter "#Print"...
-
Page 41: Precautions When Using The E-Mail Print Feature
Precautions When Using the E-mail Print Feature Security Precautions E-mail uses the Internet, a network connecting computers around the world, as its transmission medium. So, exchanging e-mails involves security risks, such as information leakage and tampering. When exchanging important or confidential information, we recommend you to use a method other than e-mail that guarantees security. -
Page 42: Auditron Function
Auditron Function The Auditron function contains an authentication function that can set limits on what processes can be used, as well as an account management function that can be used to control usage based on authentication. This section explains important information about the function and about settings that are required to use the function. -
Page 43: About Auditron Function
About Auditron Function The Auditron function can be used to limit the users (departments) that have access to the printer, to limit the functions that can be used by each user, and to total the number of printed sheets. Authentication for Print Jobs The following limits can be set on the printer for each type of print job. -
Page 44: Using The Auditron Function
Using the Auditron Function Settings must be adjusted on both the printer and the computer to use the Auditron function. Setting the Printer The following settings are required. • Auditron Mode settings • Authentication information registration Setting Auditron Mode Access CentreWare Internet Services from the web browser. Note •... - Page 45 Click [Reboot Machine] to restart the printer. The printer is restarted. Registering Authentication Information Access CentreWare Internet Services from the web browser. This step is not required if the browser is still connected to CentreWare Internet Services after setting Auditron Mode. Click on the [Print] tab.
- Page 46 After setting the following authentication information, click on [Save]. Note • When using a user account that is already registered, the following screen does not appear and the procedure skips to step 6. Setting Range User Name 1 to 32 characters (ASCII characters) Password 4 to 12 alphanumeric characters •...
- Page 47 Note • The user name and password set here can also be used as the setting on the printer driver. Verify the registered information and click the appropriate buttons. The following descriptions explain the operations when the button or menu option is clicked. •...
-
Page 48: Setting The Computer
Click [Reboot Machine] to restart the printer. The authentication information is registered to the printer. Setting the Computer In the Properties menu for the printer driver, set the authentication information such as user name and password. Documents can be printed only if the user name and password set on the computer match the authentication information set on the printer. - Page 49 • If the user name is not the same as the Windows login name Select [Enter Owner Name] under [Specify Job Owner Name], and enter the values in [Job Owner Name] and [Password]. Note The following setting ranges can be specified. •...
-
Page 50: Printer Driver Settings And Printer Authentication
Printer Driver Settings and Printer Authentication This section explains the relationship with the printer driver settings when a print job is checked against the authentication information registered on the printer. • User name and password The user name and password set in Properties for the printer driver are checked against the authentication information registered in the printer. - Page 51 Click on [Print] tab. Click on [Edit User Account]. The [Edit User Account] page appears. Enter the account number into [User Account Number] and click [Edit]. Note • When not logged in as a system administrator, an authentication screen appears at this point, and the user name and password must be entered.
- Page 52 Verify the registered information and the accounting meter. After making necessary changes to the registered information, click the appropriate buttons. The following descriptions explain the operations when the button or menu option is clicked. • [Delete User] button: Deletes the user and returns to step 4. •...
-
Page 53: Resetting The Counter
Click [Reboot Machine] to restart the printer. The registered information is updated on the printer. Checking from a printout Select the [Print Meter] menu from on the printer control panel and output an Auditron Report to check a list of the following information. User Account Limit Total Impressions... -
Page 54: About Paper
Folio (8.5 × 13") 59.4 mm or below Heavyweight 2 (164 - 216 g/m Letter (8.5 × 11") Coated 1 (60 -105 g/m DocuPrint C2100 Coated 2 (106 - 163 g/m Executive (7.25 × 10.5") 250 sheets Coated 3 (164 - 216 g/m Custom (148.0 x 210.0 mm to 215.9 x... -
Page 55: Standard Paper
Standard Paper The following table shows the standard paper for this printer. Paper name Weight Paper type Paper characteristics and caution on usage XC-4200MP Letter 20 lb Plain Medium weight papers for internal distribution (standard paper for and general office use black/white printing) X-pressions + 24 lb 24 lb... -
Page 56: Unusable Paper
Unusable Paper Avoid using the following paper types as they can cause paper jams or damage to the printer. • Transparency sheets other than those recommended. (Fuji Xerox Full Color Transparencies or other similar types) • Paper that is too thick or too thin •... -
Page 57: Storing And Handling Paper
• Carbon paper • Paper with staples, paper clips, tape or ribbons attached • Paper with a rough surface such as textured or fiber form paper • Using acidic paper can cause the characters to fade over time. Use neutral paper to prevent this problem. -
Page 58: Loading Paper
Loading Paper Loading Paper in the Paper Tray This section describes how to load paper in the standard and optional paper trays. All trays are loaded the same way. Important • Do not remove the tray during printing. It may cause a paper jam. Pull the tray out of the printer until it stops. -
Page 59: Loading Paper In The Bypass Tray
Important • Do not exceed the maximum fill line in the tray. Overfilling the tray may cause paper jams. Slide the width guides until they rest lightly against the edge of the print media stack. Insert the tray into the printer, and push until it stops. - Page 60 Gently pull open the bypass tray cover, and pull out the extension tray. Slide the width guides to the edge of the tray. The width guides should be fully extended. Insert all media face down and top edge first into the bypass tray. Important •...
-
Page 61: Loading Envelopes In The Bypass Tray
Loading Envelopes in the Bypass Tray To load envelopes in the bypass tray, insert the envelopes with the flaps closed. The print side must be facing down. You can load envelopes up to the maximum fill line in the tray at one time. -
Page 62: Setting Paper Types
Setting Paper Types Important • Paper type settings must match those of the actual paper loaded in the trays. Otherwise, image quality cannot be processed accurately. Toner may not fuse properly on the paper, resulting in dirty and poor quality printouts. Refer to •... -
Page 63: Setting On The Control Panel
Setting on the Control Panel Overview of the Menu Menu Configuration The menus that can be accessed from the control panel are as follows: Menu Content Report / List Use the [Report / List] menu to print various types of reports and lists. Meter Readings Use the [Meter Readings] menu to display the printed paper counts on the control panel. -
Page 64: Changing Menu Settings
Changing Menu Settings Basic Operations (Example: Changing the Low Power Timer) Press one of the following buttons to display the menu screen or to set the printer by browsing though each menu structure. In this example, you set the transitional time to the Low Power Mode to 30 mins. -
Page 65: Initializing Configured Values
Continued from previous page Low Power Timer 30 Minutes Press the <Eject/Set> button to confirm your settings. The settings that have been confirmed are displayed with the affix “ * ”. Low Power Timer 30 Minutes * Press the < > or the <Cancel Job> button to move one level up. -
Page 66: Description Of Menu Items
Description of Menu Items This section describes the items that can be configured on each menu. Tray Settings There are three submenus under the Tray Settings menu: Tray 1, Tray 2, and Bypass Tray. You can set Paper size and Paper type for each tray under these menus. (Display Screen and Bypass Mode can only be set for Bypass Tray.) Note •... -
Page 67: Report / List
You can print a sample of the document to check the printer’s performance. 2-Sided Sample You can print a sample document to verify the printer operations for 2-sided printing. On the DocuPrint C2100, this is displayed when the optional duplex unit is installed. Stored Documents Prints a list of documents stored in the printer when using the secure print or sample print feature. -
Page 68: Meter Readings
Meter Readings Displays the number of processed print jobs on the control panel. The meter is divided according to the color modes. Note • For the procedures about checking the number of printed pages, refer to “Checking Total Printed Pages on Meter”... - Page 69 • [Ethernet 802.3] • [Ethernet 802.2] • [Ethernet SNAP] Note • On the DocuPrint C2100, IPX/SPX Frame Type is displayed only when the optional network expansion card is installed. IP Filter Specifies blocking the reception of data from certain IP addresses.
- Page 70 • [Binary] Select this when no special processing is required for data. Note • The DocuPrint C2100 does not support [Adobe Protocol]. • Select an appropriate option according to the data format specified on your printer driver. • [Adobe Protocol] is valid only when printing in PostScript.
-
Page 71: Usb Settings
• [BCP] Select this when the communication protocol is in binary format. Note • The DocuPrint C2100 does not support [Adobe Protocol]. • Select an appropriate option according to the data format specified on your printer driver. • [Adobe Protocol] is valid only when printing in PostScript. - Page 72 Item Description Audio Tones Specifies whether to turn on the alarm when an error occurs in the printer. You cannot adjust the sound volume. • [Control Panel] (default: [On]) • [Invalid Key] (default: [On]) • [Machine Ready] (default: [On]) • [Job Complete] (default: [On]) •...
-
Page 73: Maintenance Mode
Item Description RAM Disk Allocates memory to the RAM Disk file system for the secure print and Sample print features. • [On] Allocates memory for using the secure print and proof print features. • [Off] (default) Does not allocate memory for using the secure print and proof print features. Note •... - Page 74 Item Description Adjust BTR Specifies the value of the reference voltage for the transfer roller. You can specify the value between -3 to 3 for each paper type. • [Plain Paper] (default: [0]) • [Recycled Paper] (default: [0]) • [Bond Paper] (default: [0]) •...
- Page 75 • [Short Edge Flip] Prints on both sides of paper so that the finished document opens like a calender. Note • On the DocuPrint C2100, [2 Sided Print] appears only when the optional duplex unit is installed. Print Mode Sets the print mode to one of the followings: •...
- Page 76 Prints four pages onto one sheet of paper. When this is selected, the output size will be the size set under [Default Paper Size]. Note • To use [Booklet] on the DocuPrint C2100, the optional duplex unit must be installed. If the duplex unit is not installed, the printer only performs 1-sided printing. Output Color Sets the output color.
-
Page 77: Postscript Settings
Prints is the color mode. PostScript Settings Specifies the settings related to PostScript. Note • The DocuPrint C2100 does not support PostScript. Item Description PS Error Report Sets whether to print an error report in case of a PostScript error. -
Page 78: Panel Settings
Item Description PS Job Time-Out Sets the amount of time the printer waits for a print job. If a time-out occurs during data reception, the printer stops the reception and starts printing the received data. Specify the time-out value in 1 minute increments. •... -
Page 79: Menu List
Print - A4 Sample, * Demo Print - 2-Sided Sample, * Stored Documents [PS Font List] and [PDF Font List] are not displayed on the DocuPrint C2100. [Demo Print - 2-Sided Sample] is displayed when the duplex unit (optional) is installed. - Page 80 Continued from previous page Range: 3 - 60 Unit: 1 Low Power Timer 3 Minutes System Settings Sleep Mode Enable , Disable Range: 2 - 120 Unit: 1 Sleep Mode Timer 2 Minutes Control Panel, Invalid Key, Audio Tones Machine Ready, Job Complete, , Off Fault Tone, Alert Tone,Out of Paper, Low Toner Alert, Base Tone...
- Page 81 Continued from previous page Paper Tray Auto , Tray 1, Tray 2, Bypass Tray A4 , A5, B5, 8.5 x 11, 8.5 x 13, 8.5 x 14, Output Size 7.25 x 10.5, Env 3.9 x 7.5, Env 110 x 220 mm, Env 162 x 229 mm, Env 4.1 x 9.5 Length Y Custom Size...
-
Page 82: Troubleshooting
If a paper jam occurs, refer to the illustration below to select the appropriate corrective action and clear the paper jam immediately. Note • The illustration below shows the DocuPrint C2100 with the optional 550 sheet feeder and duplex unit are installed. CAUTION •... - Page 83 Close the bypass tray once. Remove the tray from the printer. Carefully pull out any jammed paper remaining inside the printer. Push up the button and open the front cover. Confirm that there are no scraps of paper remaining inside the printer. Carefully remove any jammed paper in the printer.
-
Page 84: Paper Jams In The Paper Tray
Paper Jams in the Paper Tray Follow the procedure below to remove paper jammed in the paper tray. Slowly, completely remove the tray from the printer. Remove all the jammed and/or creased paper from the tray. If there is jammed paper remaining inside the printer, pull it out carefully to avoid tearing it. -
Page 85: Paper Jams At The Fuser Unit
Insert the tray into the printer, and push until it stops. Important • Do not use excessive force on the tray. Doing so could damage the tray or the inside the printer. Paper Jams at the Fuser Unit Press the button and open the front cover. Lift the levers at both ends of the fuser unit, and remove the jammed paper. -
Page 86: Paper Jams At The Duplex Unit
Close the front cover. Important • Do not use excessive force on the tray. Doing so could damage the tray or the inside the printer. Paper Jams at the Duplex Unit Push up the button and open the front cover . Carefully pull out the jammed paper from the duplex unit. -
Page 87: Paper Jams In The Optional Sheet Feeder
Close the transfer belt unit. Close the front cover. Paper Jams in the Optional Sheet Feeder Open the trays until you find the jammed paper. Note • Paper in the sheet feeder feeds to the printer from the front of the trays, therefore paper jammed in the lower tray can block the upper tray of the feeder or the paper tray in the printer, preventing you from opening them. - Page 88 Close the front cover . Insert the trays into the printer. Push the trays in until they stop. Important • Do not use excessive force on the tray. Doing so could damage the tray or the inside the printer. 5 Troubleshooting...
-
Page 89: Problems With The Printer
Problems With the Printer Before treating the problem as a machine breakdown, refer to the following table and check the printer condition again. WARNING • Never open or remove machine covers that are secured with screws unless specifically instructed in the manual. A high voltage component can cause electric shock. •... - Page 90 Symptom Reason/Action Light of <Error> indicator is An error that you cannot rectify by yourself has occurred. Record the displayed error blinking. message or error code, switch off the power, pull out the power plug from the outlet, and then contact our Customer Support Center or your dealers. The light of the <Ready>...
-
Page 91: Problems With The Print Quality
Symptom Reason/Action Unusual noises The printer is not level. Reposition the printer on a flat, stable surface. Refer to • Quick Reference Guide Safety Notes The paper tray is not inserted properly. Push the paper tray completely into the printer. There is a foreign object inside the printer. - Page 92 Symptom Reason/Action Recurring smudges Dirt in the paper path. Print several blank sheets. The transfer feed roller, or fuser unit is old or damaged. Check the condition of the transfer feed roller and fuser unit, and replace as necessary. Refer to •...
- Page 93 Symptom Reason/Action Partial blanks, creased paper The paper is damp. Replace the paper. or blotted printing Refer to • “3.1 About Paper” (P. 54) The paper is outside the recommended specification range. Replace the paper with a recommend size and type. Refer to •...
-
Page 94: Error Messages
Error Messages This section describes the messages displayed on the control panel. Messages About Consumables Message Condition/Reason/Action Reboot Printer The fuser unit is not installed. Install the fuser unit. (010-317) Refer to • “Replacing the Fuser” (P. 103) 093-NNN Sealing tape is still attached to the X print cartridge. Remove the sealing tape from the displayed print cartridge. -
Page 95: Messages About The Printer And Other Items (In Alphabetical Order)
Message Condition/Reason/Action Ready to print It is nearly time to replace the fuser unit. Purchase a new fuser unit. Fuser Unit Refer to • “Replacing the Fuser” (P. 103) Ready to print Replace Soon Ready to print It is nearly time to replace the belt unit. Purchase a new belt unit. Belt Unit Refer to Ready to print... - Page 96 Message Condition/Reason/Action Login Error The user is not registered to print on the printer when using an authentification Press SET function. Contact the administrator. Open Cover A Paper is jammed inside the printer. Press the button to open the front cover and &...
- Page 97 (072-215) due to damage or malfunction. Reinstall the sheet feeder. Reboot printer The duplex unit (optional for the DocuPrint C2100) is not installed correctly or is not (077-215) working correctly due to damage or malfunction. Reinstall the duplex unit. Rboot printer...
-
Page 98: Network Related Troubles
Network Related Troubles Regarding troubles such as being unable to print in a network environment, refer to the CD-ROM Documentation (HTML) on the driver CD Kit CD-ROM. This section describes how to identify the cause and fix an error when a problem occurs by using the CentreWare Internet Services and the StatusMessenger function. -
Page 99: When Using The Statusmessenger Function
Symptom Reason/Action Connection to CentreWare This symptom occurs when the web browser display is refreshed Internet Services has been frequently. Do not refresh the web browser display frequently. Also, refused, or “Data not included do not continuously display the [Status] screen or the [Jobs] screen in page”... -
Page 100: Daily Care
Optional Accessories and Consumables” (P. 134). Recycling Used Consumables The used print cartridges are recycled for environmental conservation and effective utilization of materials. Dispose of the used print cartridges properly. Return them to Fuji Xerox or your dealer. Replacing the Print Cartridge This section describes procedures for replacing the print cartridges. - Page 101 Replacing the Print Cartridge Remove any paper in the output tray. Push the button and open the front cover. Hold the knobs at the ends of the print cartridge that you want to replace and pull it out. Select the new print cartridge whose color matches the cartridge holder and remove it from its packaging.
- Page 102 Repeat steps 4, 5, and 6 to install the other print cartridges. Remove the cap of the installed print cartridge. Close the front cover. About the Custom Mode When the print in a print cartridge runs out, “Replace XX Print Cartridge” is displayed on the printer.
-
Page 103: Replacing The Fuser
Replacing the Fuser This section describes procedures for replacing the fuser. Caution on Handling the Fuser When handling the fuser, take note of the following points: WARNING • Do not replace the fuser immediately after printing. The fuser gets very hot during this process and you can get burnt. - Page 104 Hold both sides of the installed fuser, and pull it inward slightly and then upward to remove. Unpack a new fuser and remove the tag with the letter E on it from the new fuser. With the connector of the fuser toward the slot, lower the fuser and then push the connector into the slot firmly.
-
Page 105: Replacing The Feed Roller
11. Close the front cover. Replacing the Feed Roller This section describes procedures for replacing the feed roller. Caution on Handling the Feed Roller When handling the feed roller, take note of the following points: WARNING • Always turn off the printer and disconnect the power cable from the grounded outlet before cleaning the printer or performing maintenance. - Page 106 Turn the feed roller until the roller hook can be seen. Pull the feed roller hook out of the notch in the axle, and then slide the feed roller to the right. Align the hole of the new feed roller with the axle.
- Page 107 Replace the tray into the printer. Replacing the Feed Roller in the Printer Pull the tray out of the printer until it stops. Hold the tray with both hands, lift the front slightly, and remove it from the printer. Remove any paper in the tray Turn the feed roller until the roller hook can be seen.
- Page 108 Align the hole of the new feed roller with the axle. Slide the feed roller along the axle so that the protrusions fit completely into the slots on the axle. Replace the tray into the printer. Replacing the Feed Roller in the 550 Sheet Feeder Pull the tray out of the printer until it stops.
-
Page 109: Replacing The Belt Unit
Replacing the Belt Unit This section describes procedures for replacing the Belt Unit. Caution on Handling the Belt Unit When handling the Belt Unit, take note of the following points: • Avoid bright light and try to finish the replacement within 5 minutes. •... - Page 110 Remove the tag with the letter H on it from the Belt Unit. Insert the left knob of the Belt Unit into the hole, and then align the other knob with the groove and push down on the right side of the Belt Unit.
-
Page 111: Printing Reports/Lists
2-Sided Sample You can print a sample document to verify the printer operations for 2-sided printing. On the DocuPrint C2100, this is displayed when the optional duplex unit is installed. Stored Documents Prints a list of documents stored in the printer when using the secure print and sample print feature. -
Page 112: Printing Reports/Lists
Printing Reports/Lists Print the report/list by operating the control panel. Important • When optional sheet feeders are installed, load A4 size paper into Tray 1. Press the <Menu> button to display the Menu screen. Press the < > or < > button until [Report / List] is displayed, then press the < > or <Eject/Set>... -
Page 113: Checking / Managing The Printer Status On A Web Browser
Checking / Managing the Printer Status on a web browser When the printer is installed in a TCP/IP environment, you can check printer status and configure settings using a web browser on a network computer. This feature is known as CentreWare Internet Services. You can also check the remaining volume of consumables and the paper loaded in this printer via CentreWare Internet Services. -
Page 114: Procedure
Web Browser Settings for CentreWare Internet Services You are recommended to bypass the proxy server and specify the printer’s address directly when using CentreWare Internet Services. Note • Specifying the printer’s address via the proxy server may slow down the response or disable the display of the screen. -
Page 115: Using Online Help
The CentreWare Internet Services screen appears. Changing the Network Settings You can set this printer to be used as a network printer in the [Properties] tab. The administrator mode is set in CentreWare Internet Services as a default. To specify the settings, you need the administrator’s name and a password. -
Page 116: Ssl Encryption For Http Communication
• This function cannot be used on the models that are sold in China (TL300416/TL300419). Note • To enable this feature on the DocuPrint C2100, the network expansion card (optional) must be installed. Setting Encryption This section explains the procedure for creating a certificate with CentreWare Internet Services and making settings for encrypted communication. - Page 117 10. Check [Enable] under [SSL/TLS Server Communication]. 11. Set [SSL/TLS Server Communication Port Number]. Note • Do not use the same port number used for the HTTP port. 12. Click the [Apply] button and use the above procedure to restart the machine. Accessing CenterWare Internet Services with Encrypted Communication Enter an address beginning with "https"...
-
Page 118: Ip Filter Feature Via Centreware Internet Services
IP Filter Feature via CentreWare Internet Services When using LPD protocol or Port9100 protocol to print, this feature allows you to register the IP addresses of computers that can be used in this printer. This will limit IP address used for receiving print data. - Page 119 • To reject printing from a specific user: Example: Reject printing from "192.168.100.50". In the IP Address field 1, enter "192.168.100.50". In the Address Mask field 1, enter "255.255.255.255". Select [Reject]. In the IP Address field 2, enter "0.0.0.0". In the Address Mask field 2, enter "0.0.0.0". Select [Permit].
-
Page 120: Checking Printer Status Via Simplemonitor
Checking Printer Status via SimpleMonitor SimpleMonitor is a tool to check the status of print jobs and the printer from your computer when using the printer as a local printer. This tool can be installed on your computer from the Driver CD Kit CD-ROM. Note •... -
Page 121: Checking Printer Status Via E-Mail
Checking Printer Status via E-mail When connected in a network environment where sending and receiving of e-mails is possible, the printer can send an e-mail with the following report to a specified e-mail address. Only text format is available for the e-mail format. •... -
Page 122: Checking The Printer Status Via E-Mail
Item to be Item Description configured Port Status StatusMessenger Select [Enable]. Protocol Settings Machine's E-mail Select appropriate settings for sending and receiving > E-mail Address, SMTP Server e-mail. Address, SMTP Server Port Number, E-mail Send Authentication, Login Name, Password, SMTP Server Connection Status, POP3 Server Address, POP3 Server... - Page 123 Rules for Using Commands Use each command according to the following rules. • Prefix all commands with “#”, and specify the #Password command at the top of the e-mail. • Command lines without “#” are ignored. • Write one command on each line and separate each command and parameter with a space or a tab.
-
Page 124: Checking Printed
Checking Printed Pages This section explains how to check the total number of printed pages. Checking Total Printed Pages on Meter The total number of printed pages for different meters can be checked on the display of the control panel. The meter is divided according to the color modes. -
Page 125: Cleaning The Printer
Cleaning the Printer This section describes how to clean the printer in order to maintain it in good condition and print clean printouts all the time. CAUTION • Be sure to switch off and unplug the machine before accessing the interior of the machine for cleaning, maintenance, or fault clearance. -
Page 126: Adjusting The Transfer Voltage
Adjusting the Transfer Voltage When you get bad printing results such as having white spots on the printed image, spilling toner out on the printout, or a bluish printout, adjust the transfer voltage to solve these printing problems. Press the <Menu> button to display the Menu screen. Press the <... -
Page 127: Adjusting The Altitude
6.10 Adjusting the Altitude When installing the printer in a high-altitude location or a location with low air pressure, adjust the Altitude setting. The altitude can be set to 0 m, 1000 m, 2000 m, or 3000 m. Select the value that is closest to the altitude of the printer. The default is 0m. Press the <Menu>... -
Page 128: When Moving The Printer
• The machine, without the optional accessories, paper trays, consumables and paper, weighs 26 kg for DocuPrint C3210 DX and 24 kg for DocuPrint C2100. When moving the equipment, make sure that there are two or more persons carrying it. - Page 129 Remove any paper in the output tray and return the paper stopper to its original position, if it is extended. Remove any paper in the bypass tray. Keep the paper wrapped and away from humidity and dirt. Pull out the paper tray from the printer and remove any paper in the tray.
-
Page 130: A.1 Specifications
Color: Continuous print speed • DocuPrint C3210 DX 1 sided print: sheets/min , 2 sided print: pages/min 25.0 17.3 • DocuPrint C2100 1 sided print: 17.0 sheets/min , 2 sided print: 11.9 pages/min Black-and-white: • DocuPrint C3210 DX 1 sided print: sheets/min , 2 sided print:20.2 pages/min... - Page 131 • Optional: 550 sheet feeder: 550 sheets A maximum of 1250 sheets can be loaded when the Paper tray, Bypass tray and the optional paper tray are used. DocuPrint C2100 • Standard: Bypass tray: 150 sheets Paper tray: 250 sheets •...
- Page 132 , DDNS , SMTP, NetWare Bonjour (mDNS) The DocuPrint C2100 supports protocols only when the optional network expansion card is installed. Power source AC 110 V±10%, 15 A, 50/60 Hz or AC 220 - 240 V±10%, 7 A, 50/60 Hz Important * Recommended AC outlet capacity.
-
Page 133: Printable Area
Printer (Including print cartridge): DocuPrint C3210 DX 30.0kg DocuPrint C2100 27.2kg 550 sheet feeder (optional): 7.9 kg Duplex Unit (optional for the DocuPrint C2100): 1.0 kg Printable Area Top edge 4.1 mm Unprintable area Printable area Left 4.1 mm Right 4.1 mm Bottom edge 4.1 mm... -
Page 134: Optional Accessories And Consumables
Optional Accessories and Consumables Optional Accessories The main optional accessories are as follows. Contact our Customer Support Center or your dealers to order these. Product DocuPrint DocuPrint Product name Reference code C3210 DX C2100 256 MB memory EL300634 The additional memory may be necessary when you print color documents that have a large amount of data, such as complicated... -
Page 135: Consumables
Consumables This section explains how to handle the types of consumables. For details on the replacement procedure of the consumables, refer to the procedure listed in the packaging box of the consumables and “6.1 Replacing Consumables” (P. 100). Important • If you are not using the consumables recommended by our company, the performance of the machine may not be at its optimum level. -
Page 136: Life Of Consumables And Regular Replacement Parts
Life of Consumables and Regular Replacement Parts Life of Consumables Product name Lifespan Print Cartridge 3K [Black] About 3,000 pages Print Cartridge 2K [Cyan] [Magenta] [Yellow] About 2,000 pages Print Cartridge 8K [Black] About 8,000 pages Print Cartridge 6K [Cyan] [Magenta] [Yellow] About 6,000 pages Fuser unit About 100,000 pages... -
Page 137: How To Obtain Product Information
• By using the Driver CD Kit CD-ROM bundled with this printer you can also refer to our company’s web site. Click [Fuji Xerox Web Site] on the screen that is displayed when the CD-ROM is inserted. • The address (URL) of the download service page of our company is as follows: http://www.fxprinters.com/... -
Page 138: Glossary
Glossary 100BASE-TX An extension of 10BASE-T and a predominant form of FastEthernet. Its transmission speed is 100 Mbps, a great jump in speed from 10 Mbps of 10BASE-T. 10BASE-T The 10Base-T system uses a twisted-pair cable, base band transmission and operates at 10 Mbps. -
Page 139: Interface Cable
Abbreviation of dot per inch, a unit expressing the number of dots that can be printed in a width of 1 inch (about 25.4 mm). Used as a unit expressing resolution. Driver A device to spin the disk. Types of drivers available include floppy disk drive, CD-ROM drive, and hard disk drive. -
Page 140: Local Printer
A network communication method able to send data on Windows 98/Windows Me/Windows 2000/Windows XP/Windows Server 2003. For Windows 98/Windows Me, the TCP/IP Direct Print Utility (Utility software is supplied by Fuji Xerox) must be installed. For Windows 2000/Windows XP/Windows Server 2003, Port9100 can be used on the standard TCP/IP port monitor. -
Page 141: Printer Driver
Printer driver Software that converts data created by application software to data that can be interpreted by the printer. Protocol An agreed-upon format for transmitting data between multiple devices and the computer system. It is an agreed procedure to transfer information between hardware or communicate between two network computers. - Page 142 A Appendix...
-
Page 143: Index
Index < > < > < > < > buttons ..14, 79 <Eject/Set> button ....14, 79 Error History . - Page 144 Unusable Paper ..... 56 Paper is wrinkled..... 90 Usable Paper .
- Page 145 DocuPrint C3210 DX/C2100 User Guide ME3739E2-2 (Edition 1) Human Interface Design Development © Fuji Xerox Co., Ltd. Copyright 2006 by Fuji Xerox Co., Ltd.
Need help?
Do you have a question about the DocuPrint C2100 and is the answer not in the manual?
Questions and answers