
Subscribe to Our Youtube Channel
Related Manuals for Axminster AWBB


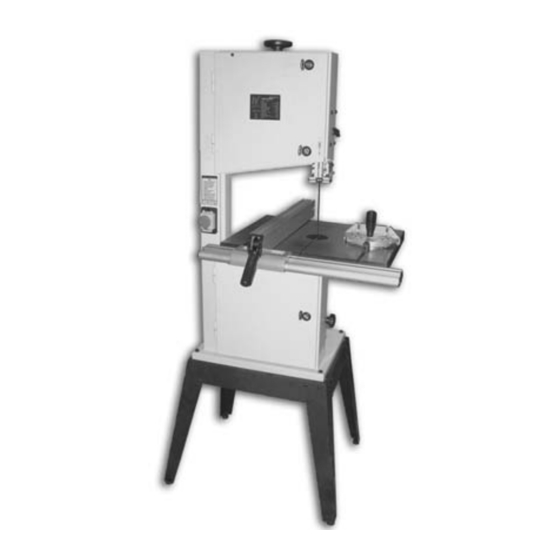
Summary of Contents for Axminster AWBB
- Page 1 AWBB Bandsaw A X M I N S T E R W H I T E 1998 Axminster Reference No:AWBB w w w. a x m i n s t e r. c o . u k...
-
Page 2: Table Of Contents
Index of Contents... Page No. Index of Contents............................2 Declaration of Conformity..………………………………………………............2 What’s in the Box........…………..................3 General Instructions for 240v Machines.....…………………………………………….... 3-4 Initial Assembly....….……..……………………………..…………..…........ 5-6-7 Specification...........................8 Identification and Parts Description..………….………………............8-10-16 Illustration and Parts Description..............…......9-11-17-18-19 Parts Breakdown........………..................12-13 Parts List 1 &... -
Page 3: What's In The Box
What’s in the Box... A X M I N S T E R W H I T E Model Number: MT343B 1 No. Bandsaw 1 No. Bandsaw blade 2240mm long 4 TPI Skip assembled in the Saw...(not tensioned) 1 No. Saw table 1 No. -
Page 4: General Instructions For 240V Machines
General Instructions for 240v Machines... A X M I N S T E R W H I T E Mains Powered Tools Primary Precautions (Continued) If it is necessary to replace the plug, it is preferable to use an ‘unbreakable’ type that will resist damage on site. -
Page 5: Initial Assembly
Initial Assembly... A X M I N S T E R W H I T E Your saw is packed in the box partially assembled. Unfortunately this is more of an exercise to ensure that the components are inserted in the correct positions than a shortening of the build time. e.g. the blade is fitted, the securing bolt for the tilt mechanism is inserted in the tilt quadrant with the washer and the locking butterfly nut threaded on to the bolt, etc.. - Page 6 W H I T E Fig 1 Fig 1a Back rail Fence rail Typ. 4 Hex bolts Fig 2a Fig 2b ‘T’ slots Guide fence Torsion rod Fig 2 Fig 2c Fig 2d Dimensioning scale Lock lever Guide fence clamp body www.axminster.co.uk...
-
Page 7: Initial Assembly 5
Initial Assembly (Continued) A X M I N S T E R W H I T E Assembling the Saw Lift the saw on to the completed floor stand, and secure using the 4 No. M8x40 bolts. ( Insert the bolts through the base of the saw, through the floor stand and fit the washers and nuts on the underside). -
Page 8: Specification
Specification... A X M I N S T E R W H I T E Axminster No. 700124 (AWBB) Motor Input 240V a.c, 50Hz, 1448 rpm, 750W Motor Output: 550W Wheel Diameter: 315mm Blade Speeds: (Off Load) 360 & 720 m/min... -
Page 9: Illustration And Parts Description
Illustration and Parts Description... A X M I N S T E R W H I T E Fig 3 Upper saw wheel (inside cover door see fig 4) Blade tensioning wheel Upper cover door latches Saw guard clamp Upper cover door Upper blade guard Main saw frame Table insert... - Page 10 Identification and Parts Description... A X M I N S T E R W H I T E Upper blade The upper blade guide height clamp is a butterfly nut and coach bolt guide height arrangement that clamp through the guide mounting leg and the main saw clamp frame.
- Page 11 Illustration and Parts Description... A X M I N S T E R Blade tensioning wheel W H I T E Upper saw wheel Fig 4 Fig 4a Upper wheel mounting assembly Saw guard clamp Tracking control Threaded rod star knob Fig 5 Lower saw wheel Idler Wheel...
-
Page 12: Parts Breakdown
Parts Breakdown... A X M I N S T E R W H I T E www.axminster.co.uk... - Page 13 Parts Breakdown... A X M I N S T E R W H I T E 0800 371822 FREEPHONE...
- Page 14 Parts List 1... A X M I N S T E R W H I T E www.axminster.co.uk...
-
Page 15: Parts List 1 & 2
Parts List 2... A X M I N S T E R W H I T E 0800 371822 FREEPHONE... - Page 16 Identification and Parts Description... A X M I N S T E R W H I T E Mitre fence The mitre fence slide can be engaged in either of the slots in the saw table, (See fig 8) and acts as an X-feed device, which will enable any angle from 0 to 45 degrees left or right to be cut with the saw.
- Page 17 Illustration and Parts Description... A X M I N S T E R W H I T E Fig 6 Saw table Tilt scale and pointer Table preset level stop Tilt Quadrant Quadrant housing Tilt mechanism clamp Fig 7 Ruler scale Guide fence Mitre Fence Fig 8...
- Page 18 Saw guard Rear bearing clamp Bolt “B” Bolt “B” Saw table insert Side guides blade Safety box Plastic safety box Holding screw Side guide Screw ‘D’ Bolt ‘C’ Rear thrust bearing Lower guard Clamping screws ‘E’ Fig 11 Fig 12 www.axminster.co.uk...
- Page 19 Illustration and Parts Description... A X M I N S T E R W H I T E Upper cover door latches Fig 13 Open Close Fig 13a 0800 371822 FREEPHONE...
-
Page 20: Setting Up The Saw
Setting Up the Saw... A X M I N S T E R W H I T E DISCONNECT THE MACHINE FROM THE MAINS SUPPLY Tensioning and tracking the blade Make sure both top and bottom blade guides are well clear of the blade. Open the front covers fully, giving good access to the top compartment of the saw (see fig 4) and good visibility into the bottom compartment (see fig 5). - Page 21 Setting Up the Saw... A X M I N S T E R W H I T E Fig 14 Setting the fence 1. Clamp down the fence by pushing the locking lever down. 2. Loosen the fence rail by undoing the four hex bolts.
-
Page 22: Operating Instructions
If the workpiece is exceptionally small, find something to use as a sacrificial carrier and mount the workpiece on it with double sided tape, or similar. 12. Remember to check the blade tension after a new blade has been ‘working’ for 30-60 mins. The blade will ‘stretch’ slightly when new. www.axminster.co.uk... -
Page 23: Changing The Saw Blade
Operating Instructions (Continued)... A X M I N S T E R W H I T E 13. Do not release the tension on the saw blade when work is complete. The blades and the main saw frame do not respond kindly to constant changes in stress and tension. Only release the tension to change the blade or if the blade is to be removed because the machine is to be ‘mothballed’... - Page 24 Axminster Reference No:AWBB A X M I N S T E R W H I T E Axminster Devon EX13 5PH UK FREEPHONE 0800 371822 www.axminster.co.uk 1998...
Need help?
Do you have a question about the AWBB and is the answer not in the manual?
Questions and answers