Table of Contents
Advertisement
Quick Links
© 2012, Moog Videolarm, Inc. All Rights Reserved
S S H 1 0 C 2 Y
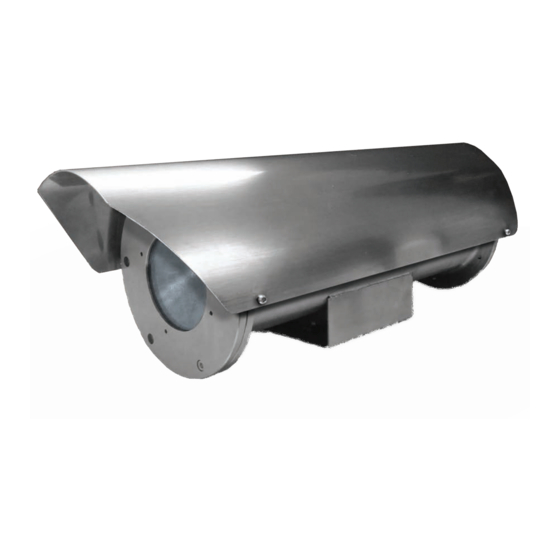
Fusion Stainless Steel Tubular Camera Housing
www.moogvideolarm.com
Installation and Operation Instructions for the following models:
SSH10C2Y Stainless steel tubular housing, 24Vac input, heater, blower and sunshield
SSH10CY
Stainless steel tubular housing, no electronics, sunshield
81-IN5491
07-13-2012
Before attempting to connect or operate this product, please read these instructions completely.
Advertisement
Table of Contents

Related Manuals for Moog Videolarm SSH10C2Y SERIES


Summary of Contents for Moog Videolarm SSH10C2Y SERIES
- Page 1 © 2012, Moog Videolarm, Inc. All Rights Reserved S S H 1 0 C 2 Y Fusion Stainless Steel Tubular Camera Housing www.moogvideolarm.com Installation and Operation Instructions for the following models: SSH10C2Y Stainless steel tubular housing, 24Vac input, heater, blower and sunshield...
-
Page 2: Important Safeguards
IMPORTANT SAFEGUARDS SAFETY PRECAUTIONS Read these instructions. Keep these instructions. CAUTION Heed all warnings RISK OF ELECTRIC SHOCK DO NOT OPEN Follow all instructions. Do not use this apparatus near water. CAUTION: TO REDUCE THE RISK OF Clean only with damp cloth. ELECTRIC SHOCK, DO NOT REMOVE COVER ( OR BACK). -
Page 3: Terms And Conditions
If Purchaser believes that the Product is defective in material or workmanship, then written notice with an explanation of the claim shall be given promptly by Purchaser to Moog Videolarm. All claims for warranty service must be made within the warranty period. -
Page 4: Electrical Specifications
Electrical Specifications SSH10C2Y Input Power: 24VAC. Power: 30W heater and blower. Frequency: 50 to 60HZ. English Potencia de entrada: 24 V CA. Potencia: 30V calentador y un ventilador. Frecuencia: 50 a 60Hz. Español Puissance d'entrée: 24VAC. Puissance: 30W chauffe et le ventilateur. Fréquence: 50 à... -
Page 5: Install Camera
Mount wall mount in desired location. Remove end cap and slide out tray. (mounting hardware not included) • Montaje de pared en el lugar deseado. • Retire la tapa y bandeja deslizable. (accesorios de montaje no incluido) • Enlever le capuchon d'extrémité et coulissant plateau. •... - Page 6 x 20 HEX BOLT Slide hex head bolt into key slot - slide forward. Attach (1) x 20 hex bolt to bottom of housing. To assist in holding the camera in position. • Deslice el perno de cabeza hexagonal en ranura de la llave - se deslizan •...
- Page 7 Add washer, lock washer and bolt to back hole, Slide out camera tray and complete wiring. tilt up and repeat in front. • Añadir lavar, arandela de seguridad y el perno de agujero • Deslice la bandeja de la cámara y cableado completo. negro, se inclinan hacia arriba y repita en el frente.
-
Page 8: Product Registration/Warranty
Should a problem arise, rest assured that Moog Videolarm stands behind its products by offering impressive 3 Year and 5 Year warranties, depending on the product purchased. See full warranty details at www.moogvideolarm.com/technical-support/warranty-plan/...
Need help?
Do you have a question about the SSH10C2Y SERIES and is the answer not in the manual?
Questions and answers