Table of Contents
Advertisement
Quick Links
USER'S MANUAL
* This User's Manual is intended for FJ-50 and FJ-40.
Thank you very much for purchasing the FJ-50/40.
•
To ensure correct and safe usage with a full understanding of this
product's performance, please be sure to read through this manual
completely and store it in a safe location.
•
Unauthorized copying or transferral, in whole or in part, of this
manual is prohibited.
•
The contents of this operation manual and the specifications of this
product are subject to change without notice.
•
The operation manual and the product have been prepared and tested
as much as possible. If you find any misprint or error, please inform
us.
•
Roland DG Corp. assumes no responsibility for any direct or indirect
loss or damage which may occur through use of this product, regard-
less of any failure to perform on the part of this product.
*
Advertisement
Table of Contents

Related Manuals for Roland FJ-50


Summary of Contents for Roland FJ-50
- Page 1 USER'S MANUAL * This User's Manual is intended for FJ-50 and FJ-40. Thank you very much for purchasing the FJ-50/40. • To ensure correct and safe usage with a full understanding of this product's performance, please be sure to read through this manual completely and store it in a safe location.
- Page 2 AVIS Cet appareil numérique de la classe A respecte toutes les exigences du Règlement sur le matériel brouilleur du Canada. ROLAND DG CORPORATION 1-6-4 Shinmiyakoda, Hamamatsu-shi, Shizuoka-ken, JAPAN 431-2103 MODEL NAME : See the MODEL given on the rating plate.
-
Page 3: Table Of Contents
IBM is a registered trademark of International Business Machines Corporation. Macintosh is a registered trademark or trademark of Apple Computer, Inc. in the USA and other countries. COLORCHOICE ® is a registered in the U.S. Patent Office. Copyright © 1998 ROLAND DG CORPORATION... -
Page 4: To Ensure Safe Use
Immediately switch off first the sub power, then the main power, unplug the power cord from the electrical outlet, and contact your authorized Roland DG Corp. dealer or service center. Do not use with a damaged power When not in use for extended... - Page 5 Do not injure or modify the electrical When unplugging the electrical power cord, nor subject it to power cord from the power outlet, excessive bends, twists, pulls, grasp the plug, not the cord. binding, or pinching, nor place any Unplugging by pulling the cord may damage it, leading to fire or electrocution.
-
Page 6: About The Labels Affixed To The Unit
Do not place hands within the space If ink contacts the eyes, flush to the front of the unit while in immediately with water. operation. Doing so may result in injury. Store ink cartridges out of the reach of children. About the Labels Affixed to the Unit These labels are affixed to the body of this product. -
Page 7: Pour Utiliser En Toute Sécurité
Le non-respect de cette consigne pourrait provoquer un incendie ou des décharges électriques. Couper immédiatement l'alimentation secondaire et ensuite l'alimentation principale. Débranchez le fil électrique et contacter votre revendeur ou votre centre de service de la société Roland DG autorisé. - Page 8 Ne pas utiliser avec une fiche ou un Débrancher le fil lorsque l'appareil fil électrique endommagé ou avec reste inutilisé pendant une longue une prise mal fixée. période. Une négligence à ce niveau pourrait Une négligence à ce niveau pourrait provoquer des décharges électriques, provoquer un une électrocution ou...
- Page 9 Le rouleau doit être placé quand la Débloquer le mécanisme d'arrêt des barre est en position adéquate. roulettes du support avant de le Une négligence à ce déplacer. niveau pourrait Sinon l'appareil pourrait se renverser et provoquer la chute du provoquer des blessures.
-
Page 10: À Propos Des Étiquettes Collées Sur L'appareil
À propos des étiquettes collées sur l'appareil Ces étiquettes sont collées à l'extérieur de l'appareil. Les dessins suivants indiquent l'endroit et le contenu des messages. Nom du modèle Étiquette des caractéristiques électriques Utiliser l'alimentation appropriée Ne pas mettre les mains dans l'espace devant l'élément quand celui-ci est en marche. -
Page 11: Introduction
1 Introduction Introduction * In this manual, sections that explain commons points for the FJ-50/40 use only illustrations of the FJ-50. Some details of the FJ-40 differ from the figure. 1-1 Checking Accessories Check the following to make sure that you received all the items that were shipped along with the unit. -
Page 12: Part Names
1 Introduction 1-2 Part Names NOTICE If you will leave the printing head being uncapped for a long time (for example, open the front cover while printing is made on the middle of platen), printing heads may get clogging and, in some case it results unrecov- erable damage to the printing head. -
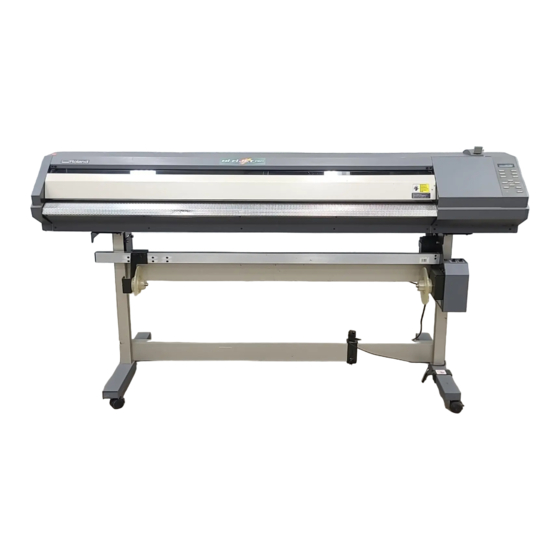
Page 13: Front View
1 Introduction Front View Front cover If the cover is opened while the printing, it will execute an emergency stop. Sheet Loading Lever Operation panel Ink cartridge ports Drain bottle Rear View Main power switch Parallel (Centronics) Connector Inside the Front Cover Carriage * When not printing, this stays inside the cover. -
Page 14: Setting Up And Connection
When using the unit while mounted on a stand, be sure to ensure a sufficient amount of installation space for the unit. The required installation spaces for each model are listed below. FJ-50: 2247 mm (88-1/2") wide, 736 mm (29") depth, and 1251 mm (49-5/16") high FJ-40: 2022 mm (79-5/8") wide, 736 mm (29") depth, and 1251 mm (49-5/16") high... -
Page 15: Connection
NOTICE Before connecting the cable, make sure the computer's power and the FJ-50/40's main power switch are switched off. Securely connect the power cord, computer I/O cable and so on so that they will not be unplugged and cause failure during operation. -
Page 16: For Macintosh
1 Introduction For Macintosh Parallel connector Secure the cable in place with the clips. Parallel card for Macintosh (optional) Parallel interface cable... -
Page 17: Basic Operation
2 Basic Operation Basic Operation 2-1 Attach the Drain Bottle The tube plug and the cap for the drain bottle will be needed if you must repackage the product. Please do not throw them away. Detach the tube plug from the tube tips protruding Pass the tube through the hole in the drain-bottle from the bottom surface of the right-hand side of the mounting cap and align with the threaded hole. -
Page 18: Installing Ink Cartridges
Do not remove any ink cartridges except when shipping the FJ-50/40. If ink runs out, replace immediately with an ink cartridge designed especially for the FJ-50/40 (see "3-1 Replacing the Ink Cartridges"). Do not attempt to refill and reuse an empty ink cartridge. - Page 19 2 Basic Operation Insert ink cartridges into the ink-cartridge ports. Insert it firmly, as far as it will go. Ink cartridge ports PIGMENT = pigment ink DYE = dye ink When inserting the cartridge, make sure that it is inserted into the correct slot for that color. PIGMENT CMYKLcLm (Pigment ink : cyan, magenta, yellow, black, light cyan, and light magenta) PIGMENT PIGMENT...
-
Page 20: Powerup
Press the [POWER] key on the operation panel. When the power is turned on for the first time, or turned on after removing the ink The POWER LED lights up The POWER LED lights up Roland FJ-50 Ver.1.00 No ink is filled. Roland FJ-50 UNKNOWN INK TYPE... -
Page 21: Loading The Material
2-4 Loading the Material Acceptable material widths Roll material must be placed at a predetermined shaft position. FJ-50 Failure to do so may 210 mm to 1350 mm (8-5/16" to 53-1/8") result in falling of the roll, leading to injury. - Page 22 2 Basic Operation Place the roll material on the shaft and fit the hole at the left-hand side all the way onto the left-hand media flange. Fit the right-hand media flange all the way into the hole on the right-hand side of the roll material, and tighten the retainer screw to secure in place.
-
Page 23: Loading Sheet Material
2 Basic Operation Loading Sheet Material Front Pass the material between the pinch rollers and the grit rollers as shown in the figure. Sheet Material Line up the right-hand side of the material with the Front guide line, and line up the front edge of the material with the reflective tape. -
Page 24: Printing Test
2 Basic Operation 2-5 Printing Test Before starting to print, carry out a printing test to check the state of the head. Problems such as missing dots may reduce the printing quality. If the test results show a problem, carry out head cleaning to restore the head to its normal state. Load a material, then close the front cover. -
Page 25: Printing
2 Basic Operation 2-6 Printing NOTICE Opening the front cover while printing is in progress causes an emergency stop. This means that printing may not be carried out correctly even if operation is resumed, due to drop-out or misalignment of the image. To pause printing for any other reason than an emergency stop, press the [PAUSE] key. -
Page 26: Stopping Printing Operations
2 Basic Operation Stopping Printing Operations Press the [PAUSE] key. Halt transmission of printing instructions from the computer. The PAUSE LED lights up Hold down the [SETUP] key for one second or longer. Any remaining data is cleared. The SETUP LED goes out If the "INK EMPTY"... -
Page 27: Setting The Printing Mode
2 Basic Operation Setting the Printing Mode Types of Printing Modes Before start to print, set the printing mode. To set the printing mode, press the [PRINT QUALITY] key and make the setting at the [PRINT QUALITY] menu. At the [PRINT QUALITY] menu, specify the printing mode and the setting for unidirectional or bidirectional printing. The following printing modes are available. -
Page 28: Printing At The Desired Location
New printing area printing area in the same way. If this setting is not made, the printing area uses the maximum value for the FJ-50/ Canceling setup cancels the printing area. Left-hand edge of the printing area Right-hand edge of the printing area... - Page 29 2 Basic Operation Specifying a location in the left-right direction (the direction of carriage movement) Press the [ ] key to move the carriage to the present Use the [ ] and [ ] keys to line up the new starting location for printing in the left-right direction.
- Page 30 2 Basic Operation Press the [ ] key to make the following screen Press the [ ] key to make the following screen appear on the display. appear on the display. Setting the right-hand edge The carriage indicates the present location of the left- hand edge of the printing area.
-
Page 31: Making Corrections For Printing
2 Basic Operation Making Corrections for Printing Feed Correction This corrects for errors in the amount of feed of the grit rollers due the type of material. Be sure to make this setting when you have replaced the material with a different type. Correcting the amount of feed improves the dot-positioning accuracy in the feed direction, which can help enhance image quality. -
Page 32: Bidirectional Correction
2 Basic Operation Bidirectional Correction * Only when the printing direction at the [PRINT QUALITY] menu has been set to [BI-DIRECTION] (bidirectional) This adjusts slippage when performing bidirectional printing. Make this adjustment when you have replaced the material with a different type or adjusted the head height. Press the [ ] key to make the following screen Press the [MENU] key and [... -
Page 33: Ending Printing Operations
2 Basic Operation 2-7 Ending Printing Operations Remove the Material If you wish to cut off the piece of the rolled material Press the [SETUP] key. Hold down for about 1 containing the printed area, press the [SHEET CUT] second. key. -
Page 34: When Not In Use
2 Basic Operation When sending a material-cutting command from the computer to separate the material automatically * When the material-cutting command has not been set to "enabled" at the computer, automatic separation of the material is not performed, even when the following setting is made. Press the [MENU] key and [ ] key to make the following screen appear on the display. -
Page 35: Power Off In Daily Operation
2 Basic Operation Power Off in Daily Operation If the SETUP LED is lighted, press the [SETUP] key. Move the sheet loading lever toward the back of the Hold down for about 1 second. unit and remove the material. Sheet loading lever The SETUP LED goes out Press the [POWER] key to switch off the power. -
Page 36: Other Functions
2 Basic Operation 2-9 Other Functions Performing Overprinting This prints the same image superimposed over the same location a number of times. When printing materials such as fabric, colors may not come out well with just a single printing pass. Overprinting can achieve darker printing results. -
Page 37: Setting The Page Margins
2 Basic Operation Setting the Page Margins This makes the setting for the margin between pages. When outputting a number of pages continuously, you can establish a margin between the pages. You can set this in a range of 0 mm to 100 mm (in 10-mm steps). This is set at 10 mm when shipped from the factory. -
Page 38: Maintenance
Do not remove any ink cartridges except when shipping the FJ-50/40. Use only the type of filled ink specified for the machine. If ink runs out, replace immediately with an ink cartridge designed especially for the FJ-50/40. Do not attempt to refill and reuse an empty ink cartridge. - Page 39 Use only the type of filled ink specified for the machine. The present ink type is displayed when the power is turned on. Press the UNKNOWN TYPE = No ink is filled. Roland FJ-50 PIGMENT CMYKLcLm Ver.1.00 = Pigment ink (cyan, magenta, yellow, black, light cyan, and light magenta)
-
Page 40: Remaining Ink
3 Maintenance 3-2 Remaining Ink You can use [INK LEFT] on the display menu to check how much ink is left after the ink cartridges have been installed. Use this information as a guide for replacing the ink cartridges. If a partially used ink cartridge is removed and reinstalled, or if a partially used ink cartridge is installed, the cartridge is taken to be unused, and the displaced amount of remaining ink is not true. - Page 41 If performing cleaning several times at the [POWERFUL] menu does not correct the drop-out problem, use the included cleaning kit. For information on how to use the cleaning kit, refer to the documentation included with the kit. If drop-out persists even after performing cleaning with the cleaning kit, consult your authorized Roland DG Corp. dealer or service center.
-
Page 42: Changing The Type Of Ink
3 Maintenance 3-4 Changing the Type of Ink When changing the type of ink in use, replace the ink. Ink replacement requires three optionally available cleaning cartridges. Press the [ ] key to make the following screen Press the [MENU] key and [ ] key to make the appear on the display. -
Page 43: How To Replace The Separating Knife
Doing so may result in injury. separating knife. Doing so may result in injury. If the separating knife, replace it with the replacement blade included with the FJ-50/40. Press the [POWER] key to switch off the power. Turn off the main power switch. -
Page 44: Cleaning
3 Maintenance 3-6 Cleaning NOTICE When performing cleaning, turn off the main power switch. * Before turning off the main power, press the [POWER] key to switch off the sub power. Never lubricate the mechanisms. Do not clean with solvents (such as benzine or thinners). Periodically clean the platen. -
Page 45: When Moving The Unit
3 Maintenance 3-7 When Moving the Unit... NOTICE When moving the unit, first carry out head washing, then secure the carriage in place. Head washing requires three optionally available cleaning cartridges. If there is material loaded, hold down the [SETUP] Press the [MENU] key and [ ] key to make the key for 1 second or longer to cancel setup, then... - Page 46 3 Maintenance Detach the power cord and the cable connecting the Remove the drain bottle. unit to the computer. Drain bottle Remove the drain-bottle cap. Attach the tube plug to the tube tips instead. Tube Drain-bottle cap Tube plug Referring to "Unpacking and Repacking" on the packing carton, secure the carriage in place and pack the unit in the carton.
-
Page 47: User's Reference
4 User's Reference User's Reference 4-1 Materials * Use genuine media for the FJ-50/40. Conditions for Usable Materials A) Maximum material thickness, including base paper (peeled-off paper) : 1.0 mm (0.039") (When head is raised) B) Maximum diameter for roll material : 180 mm (7-1/16") (surface to be printed or cut must face outward) C) Core inner diameter for roll material: 50.8 or 76.2 mm (2"... -
Page 48: Printing Area
10 mm (3/8") inward from the respective left- and right-hand edges of the material. When the printable width have been specified with the [PRINT AREA] menu, the margins are in accordance with these setting values. Max. : [FJ-50] 1320 mm (52") [FJ-40] 1066 mm (42") 51.5 mm (2-1/16") -
Page 49: Display Menus Flowchart
4-4 Display Menus Flowchart For details about each of the menus, see the "4-5 Description of Keys and Display Menus." Press the Selecting the language for screen messages MENU LANGUAGE Roland FJ-50 to select. ENGLISH Ver.1.00 Press the [ENTER] key to enable the setting. - Page 50 4 User's Reference Press the MENU INK CONTROL INK CONTROL EMPTY MODE INK CONTROL MENU SHEET TYPE FILL INK SHEET TYPE OPAQUE OPAQUE OPAQUE/CLEAR INK CONTROL MENU PUMP UP DEMO PRINT INK CONTROL Displayed only when the material HEAD WASH has been set up.
- Page 51 4 User's Reference MENU EMPTY MODE SYSTEM INFO LATER PROMPT LATER/PROMPT MENU FACTORY DEFAULT FACTORY DEFAULT NOW PROCESSING.. MENU INK LEFT CHANGE INK SET PIG.CMYKLcLm PIG. CMYKLcLm/ PIG. CMYKOrGr/ DYE CMYKLcLm ADJUST -20 to +20 (In steps of 1) • Move to the previous menu screen or the next menu screen •...
-
Page 52: Description Of Keys And Display Menus
4 User's Reference 4-5 Description of Keys and Display Menus Description of Keys Setting Default Submenu Function menu range value — — This switches on and off the sub power . When the — — power is switched on, the POWER LED lights up. —... - Page 53 4 User's Reference Setting Default Submenu Function menu range value — — This severs the material at the present position of the — — print-start line. Press this to separate the portion that has been printed from the roll. You cannot sever a piece of material while printing is in progress.
-
Page 54: Description Of Menus
4 User's Reference Description of Menus Pressing the [MENU] key enters the menu mode. Setting Default Submenu Function menu range value — This is used to select either transparent or opaque material. SHEET OPAQUE OPAQUE Select [OPAQUE] when the material loaded on the unit is not transpar- TYPE CLEAR ent. - Page 55 This sets the time that elapses before the unit enters the SLEEP mode. SLEEP NONE/15 15 min The SLEEP mode is enabled when the FJ-50/40 has been inactive for a min to specified time. (When in the SLEEP mode, the POWER LED flashes 120 min once per second.)
- Page 56 4 User's Reference Setting Default Submenu Function menu range value — This selects whether the material-cutting command is enabled or AUTO ENABLE/ ENABLE disabled. SHEET CUT DISABLE When set to [ENABLED], the material is cut automatically when the computer sends a material-cutting command. For more information, see "2-7 Ending Printing Operations -- Separat- ing the Printed Portion."...
-
Page 57: What To Do If
If the FJ-50/40 doesn't run... Is the power cord connected correctly? Connect the power cord included with the FJ-50/40 to the unit, and plug the other end securely into an electrical outlet. (See “1-3 Setting Up and Connection” .) Is the FJ-50/40 power on? Turn on the power. - Page 58 If this happens, set up the material again. When only set to [CLEAR], the printable width is set to the maximum (FJ-50: 1322 mm (52"), FJ-40: 1066 mm (42")). - When using opaque material, return the [SHEET TYPE] setting to [OPAQUE].
- Page 59 4 User's Reference Clean, attractive printing is impossible If drop-out occurs with printed images. Clean the printing heads (see "3-3 Cleaning the Printing Heads"). Is the surface of the platen dirty or scratched? Clean the platen (see “3-6 Cleaning”). Is the material dirty? Remove superficial soiling, then load the material.
- Page 60 If the material is loaded at an angle or if the left and right sides of the material are not cut straight, the location of the edges may shift as feed is carried out. This may cause the material to rub against the inner side of the FJ-50/40 or be displaced from the printing area.
- Page 61 Has the [AUTO SHEET CUT] menu item been set to [ENABLE]? If the material-cutting command has been set to "enable" with the driver, then set [AUTO SHEET CUT] on the FJ-50/40 to [ENABLE] (see "2-7 Ending Printing Operations -- Separating the Printed Portion").
-
Page 62: Messages
Take out the specified cleaning cartridge. REMOVE CL-LIQUID [KCMcmY] * made from the FJ-50/40. Check that the drain bottle is set in position when Remove the drain bottle from the FJ-50/40, DISCARD filling ink. discard the collected ink, then reinstall the drain DRAIN INK * This message appears before operations that bottle. -
Page 63: Error Messages
4 User's Reference Error Messages Error messages Meaning Action A motor error occurred. Recovery from this problem is impossible. MOTOR ERROR Use the POWER key to switch the power off and TURN OFF POWER back on again. After rectifying the cause of the error (a material jam or the like), switch on the power. -
Page 64: Specifications
360 dpi x 720 dpi 180 dpi x 720 dpi (Printing dot resolution) Error of less than ±0.3% of distance traveled, or 0.3 mm, whichever is grater (at Roland PET-film, print travel: 1 m (39-3/8")) Distance accuracy Printing heads cleaning... -
Page 65: Interface Specifications
4 User's Reference Interface Specifications Standard Bidirectional parallel interface (compliant with IEEE 1284: nibble mode) Input signals STROBE (1BIT), DATA (8BITS), SLCT IN, AUTO FEED, INIT Output signals BUSY (1BIT), ACK (1BIT), FAULT, SLCT, PERROR Level of input output signals TTL level Transmission method Asynchronous... - Page 66 R4-991005...
Need help?
Do you have a question about the FJ-50 and is the answer not in the manual?
Questions and answers