Table of Contents
Advertisement
Available languages
Available languages
Model
Modèle
Modelo
INSTRUCTION MANUAL AND SAFETY INSTRUCTIONS
Improper and unsafe use of this power tool can result in death or serious bodily injury!
This manual contains important information about product safety. Please read and understand this manual
before operating the power tool. Please keep this manual available for others before they use the power
tool.
MODE D'EMPLOI ET INSTRUCTIONS DE SECURITE
Une utilisation incorrecte et dangereuse de cet outil motorisé peut entraîner la mort ou de
sérieuses blessures corporelles!
Ce mode d'emploi contient d'importantes informations à propos de la sécurité de ce produit.
Priére de lire et d'assimiler ce mode d'emploi avant d'utiliser I'outil motorisé. Garder ce mode
d'emploi à la disponiblilité des autres utilisateurs avant qu'ils utilisent I'outil motorisé.
MANUAL DE INSTRUCCIONES E INSTRUCCIONES DE SEGURIDAD
!
La utilización inapropiada e insegura de esta herramienta eléctrica puede resultar en lesiones
serias o en la muerte!
Este manual contiene información importante sobre la seguridad del producto. Lea y comprenda
este manual antes de utilizar la herramienta eléctrica. Guarde este manual para que puedan
leerlo otras personas antes de que utilicen la herramienta eléctrica.
CW 40
WARNING
AVERTISSEMENT
ADVERTENCIA
– 1 –
Scroll saw
Scie à découper
Sierra caladora de banco
English
Hitachi Koki
Advertisement
Table of Contents

Related Manuals for Hitachi CW 40


Summary of Contents for Hitachi CW 40
- Page 1 Este manual contiene información importante sobre la seguridad del producto. Lea y comprenda este manual antes de utilizar la herramienta eléctrica. Guarde este manual para que puedan leerlo otras personas antes de que utilicen la herramienta eléctrica. Hitachi Koki – 1 –...
-
Page 2: Table Of Contents
Guide de dépannage ........Contenu de l’emballage ............Liste des piéces .......... CENTRES TECHNIQUES HITACHI AGREES La réparation est réalisée dans le cadre de cette garantie par Hitachi Koki U.S.A., Ltd. : AU CANADA AUX ETATS-UNIS 6395 Kestrel Road Mississauga, ON L5T 1Z5 3950 Steve Reynolds Blvd. -
Page 3: Product Specifications
English WARNING Some dust created by power sanding, sawing, grinding, drilling and other construction activities contains chemicals (known to the State of California) to cause cancer, birth defects or other reproductive harm. Some examples of these chemicals are: ● Lead based paints ●... -
Page 4: Power Tool Safety
English POWER TOOL SAFETY GENERAL SAFETY INSTRUCTIONS ANSI Safety standard Z87.1 Everyday eyeglasses have only impact–resistance lenses. They ARE BEFORE USING THIS POWER TOOL NOT safety glasses. NOTE: Glasses or goggles not in compliance with ANSI Z87.1 could cause serious Safety is a combination of common sense, staying alert injury. -
Page 5: Scroll Saw Safety
English SCROLL SAW SAFETY SPECIFIC SAFETY INSTRUCTIONS FOR 13. HOLD WORKPIECE FIRMLY against the table top. THIS SCROLL SAW 14. NEVER CUT MATERIAL that is too small to be held safely. 1. READ AND UNDERSTAND all safety instructions and operating procedures throughout the manual. 15. -
Page 6: Electrical Requirements And Safety
English ELECTRICAL REQUIREMENTS AND SAFETY or a #14 wire with a 15 A time-lag fuse. NOTE: When GROUNDING INSTRUCTIONS using an extension cord on a circuit with a #14 wire, the extension cord must not exceed 25 feet in length. Before IN THE EVENT OF A MALFUNCTION OR connecting the motor to the power line, make sure the BREAKDOWN, grounding provides a path of least... -
Page 7: Accessories And Attachments
English ACCESSORIES AND ATTACHMENTS RECOMMENDED ACCESSORIES WARNING WARNING ● To avoid injury, do not attempt to modify this Do not use any accessory unless you have tool or create accessories not recommended for completely read the instructions or Operator’s use with this tool. Any alteration or modification Manual for that accessory. -
Page 8: Carton Contents
English CARTON CONTENTS UNPACKING AND CHECKING CONTENTS WARNING WARNING Do not lift this saw by the arm that holds the blade, this may result in damage to the tool. ● To avoid injury, if any part is missing or damaged, do not plug the scroll saw in until the missing ITEM DESCRIPTION... -
Page 9: Know Your Scroll Saw
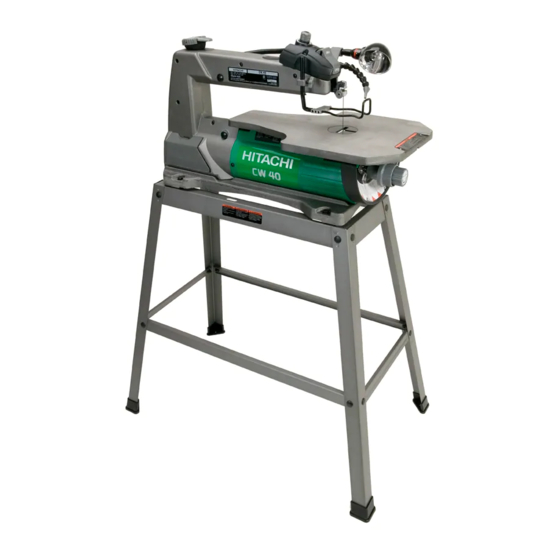
English KNOW YOUR SCROLL SAW Variable speed control knob Tension knob Quick release tension lever Blade guard foot lock knob Upper arm Blade storage Blade lock knob Sawdust blower Blade guard foot Mounting holes Stand ON (I) / OFF (O) switch Work Light Blade Worktable... -
Page 10: Glossary Of Terms
English GLOSSARY OF TERMS SCROLL SAW TERMS WOODWORKING TERMS BEVEL SCALE – Represents the degree of table angle BLADE TOOTH SET – The total width the blade will from 0° to 45° when the table is tilted for bevel cutting. cut based on the distance from the outside point of one bent tooth to the outside point of the next bent tooth BLADE GUARD FOOT –... -
Page 11: Assembly And Adjustments
English ASSEMBLY AND ADJUSTMENTS ESTIMATED ASSEMBLY TIME 15~20 MINUTES WARNING ASSEMBLE STAND (FIG. A) ● The stand is designed only for using with scroll 1. Unpack all parts and group by type and size. Refer saw. to the parts list for correct quantities. ●... - Page 12 English SAWDUST COLLECTION PORT (FIG. E) WARNING This scroll saw will accept a hose or vacuum accessory (not provided) to be connected to the port (1) on the To avoid injury, do not connect this scroll saw to the left side of base. If excessive sawdust buildup occurs power outlet until it is completely assembled and inside the base, use a wet /dry vacuum cleaner or adjusted, and you have read and understood the...
- Page 13 English PLAIN-END BLADE REMOVAL (FIG. F, G, H) PLAIN-END BLADE INSTALLATION (FIG. H, I, J) WARNING WARNING To avoid injury, do not touch the bottom of the In order to avoid uncontrollable lifting of the tension knob (1) when operating the quick release workpiece, the teeth of the blade should ALWAYS tension lever (2).
- Page 14 English PIN-END BLADE REMOVAL AND INSTALLATION PIN-END BLADE INSTALLATION ( FIG. M, N ) NOTE: Do not tighten the lock knobs when using Pin- end blades. WARNING To prevent personal injury, always turn the saw OFF WARNING (O) and disconnect the plug from the power outlet before changing blades or making adjustments.
- Page 15 English BLADE GUARD FOOT ADJUSTMENT (FIG. O, P) BLADE SELECTION (FIG. R) NOTE: User must keep constant downward pressure WARNING on workpiece when cutting. The blade guard foot is not designed to hold down the workpiece, but is rather to help prevent the workpiece from lifting up excessively.
-
Page 16: Operation
English OPERATION FIG. T REPLACING THE BULB (FIG. S) 1. Use only a 10 watt maximum bulb. Turn the light switch (1) OFF (O) and unplug the saw. 2. Remove old bulb. Place new bulb into socket. WARNING ● To prevent injury resulted from heat of the light bulb. - Page 17 English 11.This saw uses 5 in. long pin or plain end type blades. ANGLE CUTTING (FIG. U, V) 12.Blades wear faster when cutting plywood or particle board which is very abrasive. Angle cutting WARNING in hardwoods reduces blade tooth set faster due to the blade deflection.
- Page 18 English 9. When the cut is complete, move the trailing edge of RIP OR STRAIGHT LINE CUTTING (FIG. W) the workpiece beyond the blade guard foot. Turn the scroll saw OFF (O). WARNING NOTE: When cutting a narrow workpiece, use push sticks.
-
Page 19: Maintenance
English MAINTENANCE Fig. Z WARNING For your own safety, turn the switch OFF (O) and remove the plug from the power source before maintaining your saw. GENERAL An occasional coat of paste wax on the work table will allow the wood being cut to glide smoothly across the work surface. -
Page 20: Troubleshooting Guide
To avoid injury from accidental starting, always turn switch OFF (O) and unplug the tool before moving, replacing the blade or making adjustments. Consult Hitachi Authorized Service Center if for any reason the motor will not run. SYMPTOM POSSIBLE CAUSES... - Page 21 Français AVERTISSEMENT Des études effectuées en Californie ont démontré que la poussière produite par le ponçage, le sciage, le meulage, le perçage et les autres travaux de construction contient des produits chimiques pouvant causer le cancer, des anomalies congénitales et autres dommages au système reproducteur. Voici des exemples de ces produits chimiques : ●...
- Page 22 Français CONSIGNES DE SÉCURITÉ RELATIVES AUX OUTILS ÉLECTRIQUES lunettes à verres correcteurs) conformes à la norme CONSIGNES DE SÉCURITÉ GÉNÉRALES À Z87.1 de l’ANSI. Les lunettes à verres correcteurs ne RESPECTER AVANT D’UTILISER LA SCIE résistent pas aux impacts. REMARQUE Les lunettes À...
- Page 23 Français CONSIGNES DE SÉCURITÉ RELATIVES À LA SCIE À DÉCOUPER CONSIGNES DE SÉCURITÉ SPÉCIFIQUES 13.TENIR FERMEMENT LE MATÉRIAU À SCIER À CETTE SCIE À DÉCOUPER contre le dessus de la table. 1. LIRE ET BIEN COMPRENDRE toutes les consignes 14.NE JAMAIS COUPER UN MATÉRIAU trop petit que de sécurité...
- Page 24 Français CARACTÉRISTIQUES ÉLECTRIQUES ET SÉCURITÉ DIRECTIVES DE MISE À LA TERRE de cette scie à découper sur le courant électrique, s ’assurer que son interrupteur est sur la position « EN CAS DE DÉFECTUOSITÉ OU DE PANNE, la mise ARRÊT » (O) et que les caractéristiques du courant qui à...
- Page 25 Français ACCESSOIRES ACCESSOIRES RECOMMANDÉS AVERTISSEMENT AVERTISSEMENT ● Pour éviter tout risque de blessure, ne pas tenter Ne pas utiliser un accessoire avant d’avoir lu et bien de modifi er cet outil ni de fabriquer et d’utiliser compris toutes les consignes de sécurité et des accessoires non recommandés pour cet toutes les directives du Guide d’utilisation de cet outil.
- Page 26 Français CONTENU DE LA BOÎTE 1. Sortir la scie à découper de la boîte en la soulevant AVERTISSEMENT par l’arrière de son cadre supérieur. 2. Poser la scie sur une surface stable et l’inspecter ● Pour ne pas se blesser au cas où une pièce serait attentivement.
-
Page 27: Apprendre À Connaître La Scie À Découper
Français APPRENDRE À CONNAÌTRE LA SCIE À DÉCOUPER Bouton du variateur de vitesse Bouton de tension Levier de dissipation Bouton de blocage du rapide de la tension pied du protège-lame Bras supérieur Compartiment de rangement des lames Blade lock knob Souffl... -
Page 28: Glossaire Des Termes
Français GLOSSAIRE TERMES RELATIFS AUX SCIES À TERMES DE MENUISERIE DÉCOUPER AVANCE – Vitesse à laquelle on déplace le matériau à scier contre la lame. BOUTON DE BLOCAGE DE LA TABLE – Permet de bloquer solidement la table à l’angle souhaité pour BORD ARRIÈRE –... -
Page 29: Assemblage Et Réglages
Français ASSEMBLAGE ET RÉGLAGES TEMPS D’ASSEMBLAGE ESTIME A 15~20 MINUTES AVERTISSEMENT ASSEMBLAGE DU SUPPORT (FIG. A) ● Le support est conçu pour l’usage de la scie de 1. Déballer toutes les pièces et les regrouper par type rouleau. et dimension. Voir la liste des pièces pour connaître ●... - Page 30 Français ORIFICE D’ASPIRATION DE LA SCIURE (FIG. E) AVERTISSEMENT This scroll saw will accept a hose or vacuum accessory (not provided) to be connected to the port (1) on the left To avoid injury, do not connect this scroll saw to the side of base.
- Page 31 Français POSE ET DÉPOSE DES LAMES À ERGOT (FIG. F, G, POSE DES LAMES ORDINAIRES (FIG. H, I, J) AVERTISSEMENT AVERTISSEMENT Afin d’éviter le levage incontrôlable du matériau à scier, les dents de la lame doivent TOUJOURS être orientées To avoid injury, do not touch the bottom of the vers le bas.
- Page 32 Français POSE ET DÉPOSE DES LAMES À ERGOT POSE DES LAMES À ERGOT ( FIG. M, N ) REMARQUE : Si on utilise des lames à ergot, ne pas AVERTISSEMENT serrer le bouton de blocage. To prevent personal injury, always turn the saw OFF AVERTISSEMENT (O) and disconnect the plug from the power outlet before changing blades or making adjustments.
- Page 33 Français RÉGLAGE DU PIED DU PROTÈGE-LAME (FIG. O, P) CHOIX DES LAMES (FIG. R) REMARQUE : L’utilisateur doit appuyer constamment sur le matériau à scier. Le pied du protège-lame AVERTISSEMENT n’est pas conçu pour immobiliser la pièce, mais plutôt pour empêcher le matériau à scier de se lever Pour éviter tout démarrage accidentel pouvant excessivement.
-
Page 34: Utilisation
Français UTILISATION REMPLACEMENT DE L’AMPOULE (FIG. S) Fig. T 1. N’utiliser qu’une ampoule d’une puissance maximale de 10 watts. Mettre l’interrupteur d’éclairage sur la position (1) arrêt (O), puis débrancher la scie. 2. Enlever l’ampoule brûlée. La remplacer par une neuve. - Page 35 Français 11.Cette scie à découper permet d’utiliser des lames à COUPES EN BIAIS (FIG. U, V) ergot ou ordinaires de 5 pouces. 12.Les lames s’usent plus rapidement lorsque AVERTISSEMENT l’on coupe du contreplaqué ou des panneaux de particules, lesquels sont très abrasifs. Les coupes en biais effectuées dans du bois dur réduisent plus ●...
- Page 36 Français COUPES DE REFENTE OU EN LIGNE DROITE 9. La coupe terminée, déplacer le bord arrière du (FIG. W) matériau à scier au-delà du pied du protège-lame, puis ARRÊTER (O) la scie à découper. AVERTISSEMENT REMARQUE : Pour couper des pièces de bois étroites, utiliser un poussoir.
-
Page 37: Entretien
Français ENTRETIEN Fig. Z AVERTISSEMENT Par mesure de sécurité, s’assurer que l’interrupteur de la scie à découper est sur la position ARRÊT (O) et que le cordon électrique est débranché de la prise de courant avant de procéder à l‘entretien. GÉNÉRALITÉS De temps à... -
Page 38: Guide De Dépannage
à découper est sur la position ARRÊT (O) et que le cordon électrique est débranché de la prise de courant avant de déposer ou de remplacer une lame ou de procéder à des réglages. Consulter le Centre de réparation Hitachi local si le moteur ne fonctionne pas. PROBLÈMES CAUSES POSSIBLES REMÈDES... -
Page 39: Especificaciones Del Producto
Español ADVERTENCIA Cierto polvo creado al lijar, triturar, afilar, taladrar o realizar otras actividades de construcción, contiene químicos que el Estado de California reconoce como causantes de cáncer, malformaciones congénitas u otros defectos reproductivos. Algunos ejemplos de estos productos químicos son: ●... -
Page 40: Seguridad De La Herramienta Eléctrica
Español SEGURIDAD DE LAS HERRAMIENTAS gafas normales) que cumplan la norma de seguridad INSTRUCCIONES GENERALES DE ANSI Z87.1 Las gafas de uso normal tienen sólo SEGURIDAD ANTES DE UTILIZAR ESTA cristales resistentes al impacto. NO SON gafas de HERRAMIENTA ELÉCTRICA seguridad. - Page 41 Español SEGURIDA DE LA SIERRA CALADORA INSTRUCCIONES ESPECÍFICAS DE sierra. SEGURIDAD PARA ESTA SIERRA 13.SUJETE LA PIEZA A TRABAJAR FIRMEMENTE CALADORA contra la mesa. 1. LEA Y ENTIENDA todas las instrucciones de 14.NO CORTE NUNCA MATERIAL cuyas pequeñas seguridad y los procedimientos de funcionamiento dimensiones hagan difícil un manejo seguro.
-
Page 42: Seguridad En El Manejo Dela Sierra Caladora De Banco . 41 Requisitos Eléctricos Y Seguridad
Español SEGURIDAD Y REQUISITOS ELÉCTRICOS INSTRUCCIONES DE PUESTA A TIERRA un hilo de #14, el cable de extensión no debe de exceder de 25 pies de longitud de que el interruptor EN CASO DE MAL FUNCIONAMIENTO O DE AVERÍA, está apagado, en la posición OFF (O), y que la la puesta a tierra brinda a la corriente eléctrica un corriente eléctrica es de la misma tensión que la de la camino de mínima resistencia y reduce el riesgo de... -
Page 43: Accesorios
Español ACCESORIOS Y ACOPLAMIENTOS ACCESORIOS RECOMENDADOS ADVERTENCIA ADVERTENCIA ● Para evitar lesiones, no intente modifi car esta No utilice ningún accesorio hasta no haber leído herramienta ni cree accesorios no recomendados completamente las instrucciones o el Manual de para ella. Cualquier alteración o modificación usuario de dicho accesorio. -
Page 44: Contenido De La Caja
Español CONTENIDO DEL EMBALAJE 1. Extraiga la sierra caladora del embalaje levantando la DESEMBALAJE Y COMPROBACIÓN DE SU sierra por la parte trasera del bastidor superior. CONTENIDO 2. Coloque la sierra en una superfi cie fi rme y examínela meticulosamente. ADVERTENCIA ADVERTENCIA ●... -
Page 45: Conozca Su Sierra Caladora De Banco
Español FAMILIARÍCESE CON SU SIERRA CALADORA Perilla de la tensión Mando de control variable de la velocidad Palanca rápida de tensión Botón de bloqueo del pie del guardahojas Brazo superior Almacén de la hoja Pomo fijación hoja Extractor de serrín Pie del guardahojas Taladros de montaje Soporte... -
Page 46: Glosario De Términos
Español GLOSARIO DE TERMINOS TÉRMINOS DE LOS COMPONENTES DE LA TÉRMINOS DEL TRABAJO CON MADERA SIERRA ANCHO ACTIVO DE LA HOJA – El ancho total que cortará la hoja basándose en la distancia que existe REGLA DE BISELES – Representa el grado del ángulo entre el punto exterior de un diente inclinado al punto de la mesa desde 0º... -
Page 47: Montaje Y Ajustes
Español MONTAJE Y AJUSTES TIEMPO DE MONTAJE ESTIMADO 15~20 MINUTOS ADVERTENCIA ENSAMBLADO DEL PEDESTAL (FIG. A) ● El soporte está diseñado sólo para usar la sierra 1. Desempaque todas las piezas y agrúpelas según de marquetería. el tipo y el tamaño. Vea la lista de piezas para saber ●... - Page 48 Español LUMBRERA DE RECOGIDA DE SERRÍN (FIG. E) ADVERTENCIA Esta sierra de marquetería permite conectar manguera o accesorio de aspiración (no suministrado) que se Para evitar accidentes, no conecte esta sierra de conectará con la salida (1) en el lado izquierdo de la marquetería con el enchufe de toma de corriente base.
- Page 49 Español DESMONTAJE DE LA HOJA DE EXTREMO LISO MONTAJE DE LA HOJA DE EXTREMO LISO (FIG. H, I, J) (FIG. F, G, H) ADVERTENCIA ADVERTENCIA A fi n de evitar que se levante la pieza Para evitar accidentes, no tocar el fondo del pomo de trabajo, los dientes de la hoja deben mirar SIEMPRE de la tensión (1) al manejar la palanca de tensión de hacia abajo.
- Page 50 Español DESMONTAJE Y MONTAJE DE HOJAS CON 3. Incline la mesa un ángulo de 45 y bloquee el botón EXTREMO DE PASADOR de bloqueo del bisel para ver el amarre inferior de la hoja (5). (Fig. L) NOTA: Aplique una ligera presión hacia abajo en el ADVERTENCIA brazo superior cuando extraiga la hoja del amarre Para prevenir daños corporales, dé...
- Page 51 Español REGULACIÓN DEL PIE DEL GUARDAHOJAS SELECCIÓN DE LA HOJA (FIG. R) (FIG. O, P) ADVERTENCIA NOTA: El usuario debe mantener una presión constante en la pieza de trabajo durante el corte; el pie del guardahojas no se ha diseñado para sujetar la pieza Para evitar las lesiones que pudiera provocar un sino más bien como protección para evitar que ésta se arranque accidental, apague siempre la sierra...
-
Page 52: Funcionamiento
Español FUNCIONAMIENTO CAMBIO DE LA BOMBILLA (FIG. S) Fig. T 1. Use sólo una bombilla de 10 W como máximo. Apague (O) el interruptor de luz y desenchufe la sierra. 2. Quite la bombilla antigua. Coloque la bombilla nueva en su casquillo. ADVERTENCIA RECOMENDACIONES PARA CORTAR ●... - Page 53 Español 11.Esta sierra utiliza hojas de 5” (12,7 cm) de largo de CORTE EN ÁNGULO (FIG. U, V) extremo con pasador o liso. 12.Las hojas se desgastan antes cuando se corta ADVERTENCIA contrachapado o tableros de partículas, que son muy abrasivos. El corte en ángulo de maderas duras reduce el ancho activo de corte de la hoja debido a ●...
- Page 54 Español REGADO O CORTE EN LÍNEA RECTA (FIG. W) 9. Cuando se haya terminado de cortar, desplace el borde de salida de la pieza a trabajar más allá del ADVERTENCIA guardahojas. APAGUE (O) la sierra. Para evitar lesiones al comenzar de forma NOTA: Cuando corte una pieza estrecha use palitos accidental, asegúrese que el interruptor está...
-
Page 55: Mantenimiento
Español MANTENIMIENTO Fig. Z ADVERTENCIA Por su propia seguridad, APAGUE la máquina y desenchúfela antes de empezar cualquier tarea de mantenimiento. GENERALIDADES Una ligera capa de cera sobre la superfi cie de la mesa de trabajo facilitará el deslizamiento suave de la madera a cortar. -
Page 56: Guía De Solución De Problemas
Para evitar lesiones por encendidos accidentales, ponga el interruptor en la posición de APAGADO (O) y desconecte siempre el enchufe de la fuente de energía antes de realizar los ajustes. • Si por cualquier motivo el motor no funciona, póngase en contacto con el centro de reparaciones autorizado de Hitachi. PROBLEMA CAUSA DEL PROBLEMA SOLUCIÓN RECOMENDADA... -
Page 57: Parts List
English PARTS LIST 16” SCROLL SAW MODEL NO. CW 40 PARTS LIST FOR SCHEMATIC Always order by I.D. Number Parts No. I.D. Description Size QTY Parts No. I.D. Description Size 726360 04Q4 STICKER 726616 0KQX NUT M6*1.0 T=6 2 327326 08JA SPRING 726617... - Page 58 English 16” SCROLL SAW MODEL NO. CW 40 – 58 –...
- Page 59 English 16” SCROLL SAW MODEL NO. CW 40 PARTS LIST FOR STAND Parts No. I.D. NO. Description Size 327431 0J4P FLAT WASHER φ8*16-1.4 327432 0JPR HEX. HD. BOLT M8*1.25-40 726591 0KJ7 CAP HD. SQ.NECK BOLT M8*1.25-16 726621 0KRR SERRATED TOOTHED HEXAGON FLANGE NUT M8*1.25 T=7.5 327434 2LBF...
- Page 60 English Issued by Hitachi Koki Co., Ltd. Shinagawa Intercity Tower A, 15-1, Konan 2-chome, Minato-ku, Tokyo 108-6020, Japan Distributed by Hitachi Koki U.S.A., Ltd. 3950 Steve Reynolds Blvd. Norcross, GA 30093 Hitachi Koki Canada Co. 6395 Kestrel Road Mississauga ON L5T 1Z5 Code No.
Need help?
Do you have a question about the CW 40 and is the answer not in the manual?
Questions and answers
Blade replacement cw. 40
To replace the blade on a Hitachi CW-40:
1. Turn Off and Unplug – Ensure the saw is switched off and unplugged to avoid accidental starting.
2. Loosen Blade Tension – Adjust the blade tension to remove any pressure on the blade.
3. Remove the Old Blade – Carefully detach the blade from its mounting points.
4. Install the New Blade – Position the new blade correctly, ensuring it is aligned properly.
5. Adjust Blade Tension – Tighten the blade to the correct tension, avoiding overtightening.
6. Check Alignment – Ensure the blade is properly seated and straight.
7. Test the Saw – Plug in and briefly run the saw to check the installation.
Avoid applying side pressure to the blade to prevent breakage.
This answer is automatically generated