Table of Contents
Advertisement
Quick Links
Hardwire models with a 208-240Vac Input and 120Vac, 208Vac & 240Vac Outputs
Uninterruptible Power Supply Models:
FALCON
®
Electric, Inc., 5116 Azusa Canyon Rd., Irwindale, California 91706, (626) 962-7770, Fax (626) 962-7720, Email: sales@falconups.com
2011 Falcon
®
Electric Inc. All rights reserved.
All other brand names and trademarks are the property of their respective owners.
The information stated in this document is subject to change without notice. 2011-11-03
®
®
Falcon
, Falcon
Electric, FN and UPS Plus logos are registered trademarks of Falcon Electric, Inc.
OWNER'S
OPERATING
MANUAL
TM
FN Series
Parallel or N+1 Redundant 3kVA to 24kVA
FN3KRM-2, -2TX & -2TXI
FN4KRM-2, -2TX & -2TXI
FN5KRM-2, -2TX, & -2TXI
FN6KRM-2, -2TX & -2TXI
FN8KRM-2, -2TX & -2TXI
FN10KRM-2, -2TX & -2TXI
Rackmount UPS Plus
®
Advertisement
Table of Contents

Subscribe to Our Youtube Channel
Related Manuals for Falcon RACKMOUNT UPS PLUS FN3KRM-2


Summary of Contents for Falcon RACKMOUNT UPS PLUS FN3KRM-2
- Page 1 The information stated in this document is subject to change without notice. 2011-11-03 ® ® Falcon , Falcon Electric, FN and UPS Plus logos are registered trademarks of Falcon Electric, Inc. OWNER'S OPERATING MANUAL Rackmount UPS Plus FN3KRM-2, -2TX & -2TXI FN4KRM-2, -2TX &...
-
Page 2: Table Of Contents
FN Rackmount Series Parallelable and N+1 Redundant UPS Features.. FN -2TX Double-Conversion On-line UPS Block Diagram. Important Safety Instructions (READ FIRST) Chapter 1. Introduction 1.1 Manual Overview. 1.2 Brief FN Overview. Chapter 2. FN UPS Circuit Descriptions Galvanically Isolated Output. Input & Power Factor Correction Power Factor Correction. - Page 3 FN Series Parallelable and N+1 Redundant UPS Features Parallel Mode and N+1 Redundant Mode Operation True Double Conversion On-Line Sinewave Design Output Galvanic Isolation LCD Display with Advanced Monitoring Remote Emergency Power Off (REPO) Option Input Power Factor Correction Wide Input Voltage Window Precision Output Voltage Regulation Superior Brownout, Surge and Transient Protection Frequency Converter Operation...
-
Page 4: Important Safety Instructions (Read First)
IMPORTANT SAFETY INSTRUCTIONS, SAVE THESE INSTRUCTIONS RETAIN THIS USER MANUAL! This manual contains important instructions which must be followed during the installation, operation and maintenance of the FN Series UPS, battery banks transformer box and options. Please read all instructions before operating this equipment and save this manual for future reference. All of the models presented herein are designed for installation and use in a temperature-controlled environment, free of contamination. -
Page 5: Chapter 1. Introduction
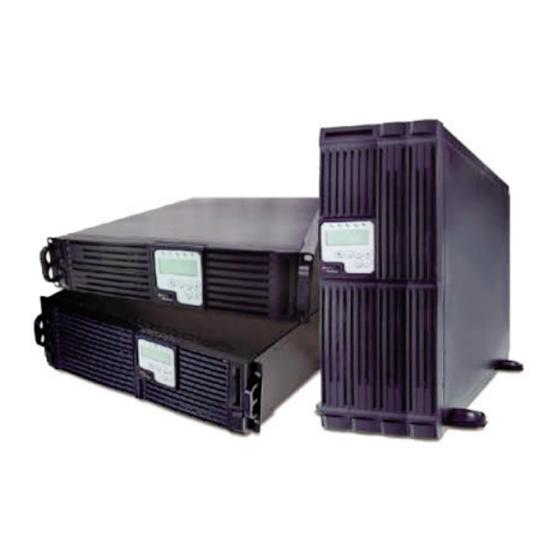
FN Rackmount Overview The Falcon FN Series UPS system consists of (1) 2U Rackmount UPS module, (1) 3U rackmount battery module and (1) 2U rackmount output isolation transformer module. An optional input isolation transformer module is also available. The modules are designed to be easily installed in a standard 19” equipment rack. -
Page 6: Galvanically Isolated Output
g. One Local Maintenance Bypass Switch. The switch is located on the transformer module rear panel and provides a manual means of placing the UPS into bypass mode to allow for servicing to be performed on the UPS and battery modules. 2.0 FN RACKMOUNT UPS CIRCUIT DESCRIPTIONS Galvanically Isolated Output The FN -2TXI output isolation transformer module provides a galvanically isolated, 120/240Vac, hardwire out-... -
Page 7: Battery Packs
32ºF to 104ºF (0ºC - 40ºC) , but battery life will be substantially reduced if con- tinuously operated at the higher temperature levels. Optional extended battery modules and external battery charger modules are available through Falcon to extend the amount of battery runtime. Internal Battery Charger The internal battery charger located inside the UPS module utilizes energy from the utility power source to continuously charge the UPS batteries. -
Page 8: Chapter 3. Unpacking The Ups And Battery Bank
Upon unpacking the UPS, transformer or battery bank, verify the following items were shipped. Should you have not received any of the items listed below, please contact Falcon Electric Customer Service at 1-800- 842-6940. -
Page 9: Chapter 4. Pre-Installation Details
4.0 PRE-INSTALLATION DETAILS Falcon Electric, Inc. is not responsible for shipping damage or for filing shipping damage claims. Visually inspect the equipment for freight damage. If any equipment has been damaged during shipment, retain the shipping pallet and packing materials for inspection by the carrier, and immediately file a claim for “shipping damage”... -
Page 10: Ups Input Power Requirements
4.2 UPS Input Power Requirements VERIFY THE PROPER UPS INPUT POWER IS AVAILABLE (for each UPS installed) FN3KRM-2TXI Input Hardwire, 208-240Vac, 50/60Hz, 20A, single-phase, 2 wire plus ground FN4KRM-2TXI Input Hardwire, 208-240Vac, 50/60Hz, 30A, single-phase, 2 wire plus ground FN5KRM-2TXI Input Hardwire, 208-240Vac, 50/60Hz, 30A, single-phase, 2 wire plus ground FN6KRM-2TXI Input Hardwire, 208-240Vac, 50/60Hz, 40A, single-phase, 2 wire plus ground... -
Page 11: Ups Output Rating Details
4.4 UPS Output Rating Details VERIFY THE LOAD TO BE CONNECTED DOES NOT EXCEED THE UPS OUTPUT RATING for the single or combined paralleled UPS units. (1) FN3KRM-2TXI Not N+1 (2) FN3KRM-2TXI Not N+1 (3) FN3KRM-2TXI Not N+1 (4) FN3KRM-2TXI Not N+1 1) FN4KRM-2TXI Not N+1... - Page 12 4.5 FN 3kVA to 6kVA Rackmount System Rear Panel Overview 4.6 FN 8kVA to 10kVA Rackmount System Rear Panel Overview...
- Page 13 4.7 3 to 6kVA Output Transformer Module Hardwire Terminal Block Wiring Details 4.8 3 to 6kVA UPS Module Hardwire Terminal Block Wiring Details...
- Page 14 4.9 8 to 10kVA UPS Module Hardwire Terminal Block Wiring Details 4.10 8 to 10kVA Output Transformer Module Hardwire Terminal Block Wiring Details...
-
Page 15: Ups & Transformer Module Communications Bus Cabling
4.11 3 to 6kVA System Installation Wiring Diagram (single rackmount UPS system) 4.12 3 to 6kVA System Installation Wiring Diagram (typical multiple parallel UPS units, 4.13 UPS & Transformer Modules Communications Bus Cabling Use one UA88385 parallel communications bus cabling kit for each UPS to be connected to the system output trans- former module or to paralleled UPS systems. - Page 17 4.14 8 to 10kVA System Installation Wiring Diagram (typical rackmount UPS system)
- Page 18 Parallel Mode Installation and Configuration Whenever FN Series UPS units are connected in parallel with the parallel communications cabling installed, the communicaitons bus termination switched located to the right side of the cable connectors must be set as follows: When convifuring paralleled units, set the termination resistor switch to the “on” position for the first and last paralleled UPS only. IF two units are paralleled set the switch to “on”...
-
Page 19: External Battery Charger Option Installation
4.15 External Battery Charger Option Installation Wiring Detail (Typical UPS unit with optional FN6KBC-5A-2 5 Amp External Battery Charger Module FN6KBC-5A-2 Battery Charger Module Terminal Block Wiring Details Battery Charger Module/UPS System Wiring Diagram... -
Page 20: Display And Controls
5.0 DISPLAY & CONTROLS The pictures below outline the various control panel, LED and LCD functions and locations. 5.1 Control Button and LCD Locations 1. LCD Display 2. N+1 Status LED 3. Utility Status Indicator LED 4. Bypass Input Status LED 5. -
Page 21: Led Display Modes
Next Page Button When the LCD display is in “Normal Mode”, repeated pressing of this button will sequence down through the input/output/battery parameters and readings. When the UPS is displaying “OFF” or “BPS”, depressing the “Next Page” and “Function” buttons at the same time will place the UPS into “Programming Mode”. -
Page 22: Lcd Display Overview
5.4 LCD Display Overview 5.5 LCD Icon Descriptions Bypass input is out of tolerance, UPS failed to transfer to bypass, or bypass input is out of tolerance when the UPS is in Economy/Green Mode. Utility loss or the utility input is out of tolerance. UPS lost inverter output and transferred to bypass. - Page 23 Er04 -- Error code 04 indicates the UPS inverter has malfunctioned. Contact Falcon Service. Er05 -- Error code 05 indicates the UPS batteries are weak or dead and must be replaced. Call Falcon Service upon receiving the message for further instructions.
-
Page 24: Chapter 6. Operation
6.0 OPERATION The following sections outline the operation and programming of the FN -2TXI UPS models. Please read and understand them completely prior to connecting any equipment to the UPS output. 6.1 How to start up the UPS with utility power present 1. - Page 25 “OK” is displayed. If the UPS fails the self-test, “FAIL” is displayed alternately with an error code. Please note the error code and contact Falcon Service. The UPS is now turned on and in on-line inverter mode. Using an AC volt meter, verify the UPS...
-
Page 26: How To Start Up The Ups Without Utility Power Present
6.2 How to start up the UPS without utility power present (Cold Start) 1. Press the “On” button for 6 seconds to awaken the UPS. The UPS will beep twice and display G below. Immediately upon G being displayed, press the “On” button for another 6 seconds. -
Page 27: How To Display Readings
6.5 How to display readings 1. The bypass input voltage is displayed immediately after the UPS and Bypass circuit breakers are turned on and has sequenced up to inverter mode as shown in I1. Depressing the “Next Page” button will change to display the utility frequency as shown in J below. The “b”... - Page 28 Depress the “Next Page” button. The arrow next to the battery icon indicates the reading is for the battery voltage. Depress the “Next Page” button. The degree C symbol indicates the reading is for the internal UPS temperature. Depressing the “Next Page” button again will return the display to reading I1.
-
Page 29: How To Display Programmed Settings
6.6 How to Display Programmed Settings 1. The UPS must be turned on and operating in on-line inverter mode prior to attempting to read the “programmed settings”. 2. Depress the “Function” button and the following first function parameter will be displayed: The first function status displayed will be the audible alarm buzzer status. - Page 30 Note: The following functions are a continuation from the previous page. These functions can only be displayed and must have their settings changed using another programming method referenced later in the manual. As the other programming method requires turning the UPS off to perform, they are accessible here as a convenient reference while the UPS is in normal online operation.
- Page 31 Fixed or constant frequency output mode: In normal mode the UPS output frequency will automatically be set to the utility frequency and is synchronized with that frequency. When set to cf50Hz mode, the UPS inverter output frequency will always be 50Hz. When set to cf60Hz mode, the UPS inverter output frequency will always be 60Hz.
-
Page 32: How To Change The Programmed Settings
6.7 How to Change the Programmed Settings Note: The UPS must be placed into Off / Bypass mode prior to attempting to change the following parameter settings. 1. To enter programming mode depress the “On” and “Next Page” buttons at the same time and hold them down until the UPS sounds two beeps. - Page 33 The next parameter displayed shows the “bypass input voltage acceptable window” setting. The voltage window can be set to “Lo” (184-260Vac) or “Hi” (195-260Vac), which is shown below. To change the settings, depress the “Previous Page/Change Setting” button. To change to the alternate setting, press the button again.
- Page 34 The following V1, V2, V3 and V4 show the operational status setting of the UPS. This function may be set to one of four modes. “Normal”: which indicates none of the other modes are set. The Economy/Green Mode: indicates the UPS will automatically transfer to bypass mode to save energy, should the output load drop below 10% of...
- Page 35 The next parameter displayed shows the UPS unit address. If only one UPS is being used, the address should be set to “d0” as shown. If multiple parallel UPS units are connected on a parallel configu- ration of 6, 12, 18 or 24kVA, or 6, 12, 18kVA N+1 operation, the units would be addressed “d0”, “d1”, “d2”...
-
Page 36: How To Use The Maintenance Bypass Switch
6.8 How to Use the Maintenance Bypass Switch Located on the Rear Panel IMPORTANT: Improper use of the internal Maintenance Bypass Switch will void the equipment warranty. The following instructions must be followed whenever this switch is used. 1. Press the”Off/Bypass” button for 5 seconds to place the UPS into bypass mode. 2. -
Page 37: Chapter 7. Communications
UPSilon software CD. The UPSilon users manual is also located on the UPSilon CD supplied with this unit. UPSilon supports most popular operating systems. Should you have special UNIX requirements, please contact Falcon Sales for information and pricing of UPSilon for UNIX. -
Page 38: Optional Remote Emergency Power Off
The supplied Falcon RS-232 interface cable pin designations are as follows: UPS Side The computer RS-232 Port settings should be set to the following: 7.3 Optional Remote Emergency Power Off (REPO) A two-pin REPO connector (green connector) is located on the UPS module rear panel. The connector is shipped with no jumper wire installed, and is a normally open interface requiring a CLOSED EPO connection to initiate EPO UPS shutdown. - Page 39 UPS summary alarm. It also provides EPO and remote UPS shutdown capability. USHA SNMP/HTTP Agent Option Card Now you can monitor and manage your Falcon Electric FN Series UPS across an Ethernet LAN, WAN, Enterprise Network or via the World Wide Web.
-
Page 40: Chapter 8. Maintenance
In order to assure the performance of the FN Series UPS, check the battery every two to three months by performing a UPS self-test. If at any time the UPS LCD panel displays the weak or defective battery icon or error code, the batteries need replacing. Contact the Falcon Electric Service Department to order replacement batteries. -
Page 41: Chapter 9. Parallel Mode Operation
UPS units. (1) parallel UPS interface kit must be purchased from Falcon for each UPS to be paralleled. The cable kit is shipped with each transformer module inside the shipping container. The interface kit contains (1) daisy chain bus cable (3076), (1) wrap around bus cable (3077), detailed installation instructions and assorted hardware. -
Page 42: Chapter 10. Environmental
Contact your local recycling or hazardous waste center for information on proper disposal of the used battery pack and batteries. The entire spent battery packs may be returned to the Falcon Service Center at the end user’s expense for recycling. Prior to returning the spent battery pack(s), please call the Falcon Service Center and obtain a Return Materials Authorization (RMA) number. -
Page 43: Chapter 11. Technical Support
Falcon with shipping damage. Falcon Electric will not assume any responsibility for shipping damage. In the event shipping damage is found, you will be notified of the damage and be instructed to file a claim with the freight carrier. -
Page 44: Warranty
Falcon with an RMA number. For defective product returned within 30 days of shipment, Falcon will pay for shipping costs to and from its service center. For defective product returned after 30 days but within 90 days of shipment, Falcon will only pay for shipping costs in sending the new or repaired product back to the end-user.
Need help?
Do you have a question about the RACKMOUNT UPS PLUS FN3KRM-2 and is the answer not in the manual?
Questions and answers