
Related Manuals for Extron electronics HSA 400


Summary of Contents for Extron electronics HSA 400
- Page 1 User’s Manual HSA 400 & HSA 402 US/Domestic HSA 400 & HSA 402 International ® Hideaway Surface Access Products 68-604-01 Rev. F 08 08 © 2008 Extron Electronics. All rights reserved.
- Page 2 Precautions Safety Instructions • English Warning This symbol is intended to alert the user of important Power sources • This equipment should be operated only from the power source indicated on the product. This equipment is intended to be used with a main operating and maintenance (servicing) instructions power system with a grounded (neutral) conductor.
-
Page 4: Table Of Contents
Interface Accessories ... A-5 Top Plate Dimensions ... A-6 HSA 400 US/domestic cut-out template ... A-7 HSA 402 US/domestic cut-out template ... A-8 HSA 400 International cut-out template ... A-9 HSA 402 International cut-out template ... A-10 Appendix B • Packaging for Shipment HSA 400/402 Series •... -
Page 5: Chapter 1 • Introduction
HSA 400/402 Series Surface Access Products Chapter One Introduction About the Hideaway Surface Access Products Features 68-604-01 Rev. F 08 08 All trademarks mentioned in this manual are the properties of their respective owners. HSA 400/402 Series • Table of Contents... -
Page 6: About The Hideaway Surface Access Products
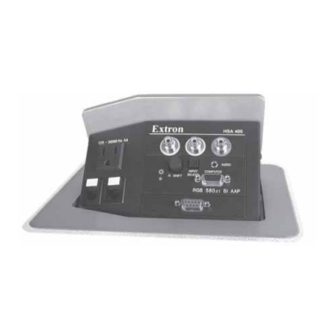
Introduction ® About the Hideaway Surface Access Products The patented Extron Hideaway HSA 400 and HSA 402 are furniture-mounted, architectural solutions for inconspicuous computer video interface connector access and control. The HSA 400 provides space for two double-space (double- height) or four single-space Extron Architectural Adapter Plates (AAPs), a standard grounded AC receptacle, and two RJ-45 (Category 6) (CAT 6) connectors (figure 1-1). -
Page 7: Chapter 2 • Installation
SYNC C WIDTH SYNC B 580 Extron podium. RGB 580xi HSA 400/402 Series Surface Access Products Chapter Two Installation Preparing the Routing Template Preparing the Table and Mounting the Enclosure Cabling and Installing the AAPs Cabling the Enclosure Routing the AAP Cables... -
Page 8: Installation Overview
Preparing the Routing Template Extron provides a metal template for each HSA model at no charge. Appendix A lists the HSA 400/402 template part numbers. Extron recommends using this template as a guide to cut the hole in the table where the HSA will be installed. -
Page 9: Preparing The Table And Mounting The Enclosure
HSA products. Once the template assembly is positioned properly, secure the assembly to the table with C-clamps (figure 2-2). HSA 400/402 Series • Installation Figure 2-2 — Cutting the opening with a router Wear safety glasses when operating the router. -
Page 10: Cabling And Installing The Aaps
(included) (figure 2-3). Power Cord 2 RJ-45 Connectors Figure 2-3 — Mounting the HSA 400 enclosure Peel any remaining protective coating from the enclosure. HSA 400/402 Series • Installation Cabling and Installing the AAPs... -
Page 11: Cabling The Enclosure
IN P D IO RGB 580xi SI AAP Figure 2-5 — Mounting an AAP device to an HSA 400 US front panel Replace the front panel in the surface mount enclosure and secure it in place with the hex head screws removed in step 2. -
Page 12: Cabling The Rj-45 Connectors
, match with Only connectors are present on the HSA 400. If necessary, on the front panel, have a qualified service person replace the connector icon by prying the old icon off of the connector plug-in with an Extron Tweeker or small screwdriver (figure 2-8) and snapping a new icon in place. -
Page 13: Routing The Aap Cables
Rear View into HSA and Clamshell Secure the AAP cables at the circled locations. Figure 2-9 — HSA 402 AAP cable routing, rear view HSA 400/402 Series • Installation 2-12 Bezels The HSA ships with RJ-45/RJ-11 connector bezel plug-ins in a variety of colors and a black, blank bezel. -
Page 14: Chapter 3 • Maintenance And Modifications
Installation, cont’d HSA 400/402 Series Surface Access Products Chapter Three Maintenance and Modifications Replacing an AAP Replacing the Bezels Removing and Replacing the Enclosure Replacing the Gas Lift Adjusting the Top Surface Level HSA 400/402 Series • Installation 2-14... -
Page 15: Replacing An Aap
HSA 400/402 Series • Maintenance and Modifications Remove the AAP(s) to be replaced from the front panel by unscrewing the nuts on the rear of the panel that fasten the plates to the faceplate (figure 3-2). -
Page 16: Replacing The Bezels
Removing and Replacing the Enclosure The procedure for replacing the gas lift requires removing the HSA 400 or HSA 402 from the table. Adjusting the top surface level may also require removal of the HSA from the table. Remove and replace the surface mount enclosure as follows: Ensure that AC power is disconnected before servicing the HSA unit. - Page 17 (figure 3-5). Lift the enclosure out of the table. IEC Power Cord 4 RJ-45 Connectors Figure 3-5 — Removing the HSA 402 from the table HSA 400/402 Series • Maintenance and Modifications HSA 402 Mounting Surface AAP Cables...
-
Page 18: Replacing The Gas Lift
Replace the gas lift as follows: Ensure that AC power is disconnected before servicing the HSA unit. When the HSA 400/402 is upside-down, the latch CAUTION may be ineffective. If the latch releases, the enclosure will tip and could damage the flanged edges. -
Page 19: Adjusting The Top Surface Level
Tighten the two latch locking screws on the underside of the surface mount enclosure. If the surface mount enclosure was removed, reinstall it. See “Removing and Replacing the Enclosure”, steps 11 through 17. HSA 400/402 Series • Maintenance and Modifications 3-10 HSA 400/402 Series Surface Access Products Latch Adjustment... -
Page 20: Specifications
Surface cutout ... 8.113 ±0.0325" W (front) x 5.925 ±0.0325" D (20.61 ±0.083 cm W x 15.05 ±0.083 cm D) HSA 400/402 Series • Reference Information Product weight ... 8.4 lbs (3.8 kg) Shipping weight ... 11 lbs (5.0 kg) Listings, certifications ... - Page 21 Specify the desired power connector and finish when ordering. The USA versions of the HSA 400 and HSA 402 are also available in brushed aluminum, polished aluminum, and brushed brass finishes. Visit the Extron web site, www.extron.com, for more part numbers.
-
Page 22: Top Plate Dimensions
Cut surface material Tilting Plate out along this line. TEMPLATE IS NOT FULL SIZE. Cut-Out Template for Extron's HSA 400 Figure A-4 — HSA 400 US/domestic cut-out template HSA 400/402 Series • Reference Information Cut-Out Radius: Top Panel 0.25" (0.6 cm) -
Page 23: Hsa 402 Us/Domestic Cut-Out Template
Cut surface material Tilting Plate out along this line. TEMPLATE IS NOT FULL SIZE. Cut-Out Template for Extron's HSA 400 Figure A-6 — HSA 400 International cut-out template HSA 400/402 Series • Reference Information Cut-Out Radius: Top Panel 0.25" (0.6 cm) -
Page 24: Hsa 402 International Cut-Out Template
TEMPLATE IS NOT FULL SIZE. Cut-Out Template for Extron's HSA 402 Figure A-7 — HSA 402 International cut-out template HSA 400/402 Series • Reference Information A-10 HSA 400/402 Series Surface Access Products Cut-Out Radius: 0.25" (0.6 cm) - Page 25 The return kit, which reduces the chances of damage during shipment, includes a sturdy shipping carton and foam cut to fit the HSA (figure B-1). Figure B-1 — HSA 400/402 return kit Package an HSA for shipment as follows: Contact the Extron S Sales &...
- Page 26 Figure B-4 — Installing protective strips Release (tilt up) the top panel. HSA 400/402 Series • Packaging for Shipment Insert the HSA and the clamshell into one of the foam shells (figure B-5). Either open end of the clamshell and the open top panel will fit into the recesses in the foam.
- Page 27 HSA and clamshell. The sides of the clamshell protrude through slots in the foam. Figure B-6 — HSA suspended in the foam HSA 400/402 Series • Packaging for Shipment Lower the foam-protected HSA into the shipping carton (figure B-7). Figure B-7 — Placing the HSA in the shipping carton...
- Page 28 (figure B-8). Vertical Foams Figure B-8 — Padding the carton with foam, HSA 400 US/domestic version only. Close the shipping carton and seal it with high quality shipping tape.
Need help?
Do you have a question about the HSA 400 and is the answer not in the manual?
Questions and answers