Table of Contents
Advertisement
Quick Links
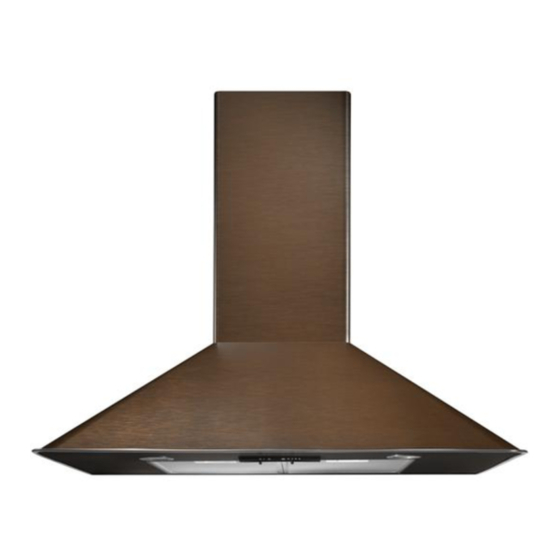
JENN-AIR _ 30"AND 36" (76.2 CM AND 91.4 CM)
WALL-MOUNT CANOPY RANGEHOOD/
HOTIE
30"ET36" (76,2 CM ET91,4 CM)
Installation Instructions a nd Use& Care Guide
For questions about features, operation/performance,
parts, accessories, or service in the U.S.A., call:
1-800-JENNAIR
(1-800-536-6247)
or visit our website at www.jennair.com.
In Canada, call: 1-800-807-6777,
or visit our website at www.jennair.ca.
Instructions d 'installation et Guide d'utilisation et d'entretien
Au Canada, pour assistance, installation ou service, composez le 1-800-807-6777
ou visitez notre site web & www.jennair.ca.
Table of Contents/Table
des matieres2
iMPORTANT: READ AND SAVE THESE INSTRUCTIONS.
FOR RESIDENTIAL
USE ONLY.
iMPORTANT
: LIRE ET CONSERVER CES iNSTRUCTiONS.
POUR UTILISATION
RESIDENTIELLE
UNIQUEMENT.
JENN-AIRo
W10134195
Advertisement
Chapters
Table of Contents

Subscribe to Our Youtube Channel
Related Manuals for Jenn-Air JXT6036ADR0


Summary of Contents for Jenn-Air JXT6036ADR0
- Page 1 JENN-AIR _ 30"AND 36" (76.2 CM AND 91.4 CM) WALL-MOUNT CANOPY RANGEHOOD/ HOTIE 30"ET36" (76,2 CM ET91,4 CM) Installation Instructions a nd Use& Care Guide For questions about features, operation/performance, parts, accessories, or service in the U.S.A., call: 1-800-JENNAIR (1-800-536-6247) or visit our website at www.jennair.com.
-
Page 2: Table Of Contents
TABLE OF CONTENTS TABLEDESMATIERES RANGE HOOD SAFETY ..............INSTALLATION REQUIREMENTS ..........Tools and Parts ................Location Requirements ..............Venting Requirements ..............Electrical Requirements ............... INSTALLATION INSTRUCTIONS ..........Prepare Location ................Install Range Hood ............... Connect Vent System ..............Make Electrical Connection ............Install Vent Covers .............. - Page 3 iMPORTANT SAFETY iNSTRUCTiONS WARNING: TO REDUCE THE RISK OF A RANGE TOP WARNING: TO REDUCE THE RISK OF FIRE, ELECTRIC GREASE FIRE: SHOCK, OR INJURY TO PERSONS, OBSERVE THE FOLLOWING: [] Never leave surface units unattended at high settings. Boilovers cause smoking and greasy spillovers that may [] Use this unit only in the manner intended by the ignite.
-
Page 4: Installation Requirements
INSTALLATION REQUIREMENTS • 8- 3.5 x 9.5 mm screws Gather the required tools and parts before starting installation. Read and follow the instructions provided with any tools listed • 2-6x70mmscrews here. • 6- 5 x 35 mm mounting screws Tools needed •... - Page 5 Cold weather installations Installation Dimensions An additional back draft damper should be installed to minimize backward cold air flow and a thermal break should be installed to minimize conduction of outside temperatures as part of the vent system. The damper should be on the cold air side of the thermal break.
- Page 6 Calculating Vent System Length & equ Observe all governing codes and ordinances. To calculate the length of the system you need, add the equivalent feet (meters) for each vent piece used in the system. Ensure that the electrical installation is adequate and in conformance with National Electrical Code, ANSl/NFPA 70 (latest Vent Piece...
- Page 7 INSTALLATION INSTRUCTIONS It is recommended that the vent system be installed before Mark centers of the 6 fastener locations through the template hood is installed. to the wall. IMPORTANT: All screws must be installed into wood. • Before making cutouts, make sure there is proper clearance within the ceiling or wall for exhaust vent.
-
Page 8: Venting Requirements
Non-Vented (recirculating) Installations Connect the deflector to the vent cover bracket using 4 - 3.5 x 9.5 sheet metal screws provided. Excessive Weight Hazard Use two or more people to move and install range hood. Failure to do so can result in back or other injury. Using 2 or more people, hang range hood on 2 mounting hooks through the rectangular cutouts on back of hood. - Page 9 For Vented Installations Only: Run 3 wires, black, white and green (14AWG), in 1/2"conduit from service panel to terminal box. Use caulking to seal 1. Fit vent system over transition piece. opening. 2. Seal connection with clamps. 3. Check that backdraft dampers work properly. For Non-vented (recirculating) Installation...
-
Page 10: Range Hood Use
7. Pull filter toward the front and insert into front channel. When using both upper and lower vent covers, push lower cover down onto hood and lift upper cover to ceiling and install with two 2.9 x 6.5 mm screws. NOTE: Upper vent cover may be reversed to hide slots. -
Page 11: Range Hood Care
RANGE HOOD CARE IMPORTANT: Clean the hood and grease filters frequently according to the following instructions. Replace grease filters before operating hood. Be sure lights are cool before cleaning the hood. Exterior Surfaces Clean the range hood with a mild detergent and soft cloth. Do not use abrasive cleanser or steel-wool pads. -
Page 12: Wiring Diagram
WIRING DIAGRAM COLOR TABLE COLOR TABLE MOTOR CONNECTIONS SPEED TO TERMINALS BLACK BLUE WriT WHITE SE1Q7A BLUE - WHITE BROWN YELLOW GREEN YELLOW/GREEN BLUE - RED GREY BLUE - BLACK ® WIRING o°w Light Cont. Brd (LCB) Fan Speed Cont. Brd (FSCB) SPEED CONTACT 8-10... -
Page 13: Assistanceor Service
1-800-688-2080 (Monday - Friday, 8:00 a.m. - User's guides, service manuals and parts information are 8:00 p.m. Eastern Time). available from Jenn-Air Brand Home Appliances, Customer Interaction Centre. NOTE: When writing or calling about a service problem, please include the following information: 1. - Page 14 YOU SPECIFIC LEGAL RIGHTS AND YOU MAY ALSO HAVE OTHER RIGHTS, WHICH VARY FROM STATE TO STATE OR PROVINCE TO PROVINCE. Outside the 50 United States and Canada, this warranty does not apply. Contact your authorized Jenn-Air dealer to determine if another warranty applies.
- Page 15 JENN-AIR _ 30"AND 36" (76.2 CM AND 91.4 CM) WALL-MOUNT CANOPY RANGEHOOD/ HOTIE 30"ET36" (76,2 CM ET91,4 CM) Installation Instructions a nd Use& Care Guide For questions about features, operation/performance, parts, accessories, or service in the U.S.A., call: 1-800-JENNAIR (1-800-536-6247) or visit our website at www.jennair.com.
-
Page 16: In The U.s.a
TABLE OF CONTENTS TABLEDESMATIERES RANGE HOOD SAFETY ..............INSTALLATION REQUIREMENTS ..........Tools and Parts ................Location Requirements ..............Venting Requirements ..............Electrical Requirements ............... INSTALLATION INSTRUCTIONS ..........Prepare Location ................Install Range Hood ............... Connect Vent System ..............Make Electrical Connection ............Install Vent Covers .............. - Page 17 iMPORTANT SAFETY iNSTRUCTiONS WARNING: TO REDUCE THE RISK OF A RANGE TOP WARNING: TO REDUCE THE RISK OF FIRE, ELECTRIC GREASE FIRE: SHOCK, OR INJURY TO PERSONS, OBSERVE THE FOLLOWING: [] Never leave surface units unattended at high settings. Boilovers cause smoking and greasy spillovers that may [] Use this unit only in the manner intended by the ignite.
- Page 18 INSTALLATION REQUIREMENTS • 8- 3.5 x 9.5 mm screws Gather the required tools and parts before starting installation. Read and follow the instructions provided with any tools listed • 2-6x70mmscrews here. • 6- 5 x 35 mm mounting screws Tools needed •...
- Page 19 Cold weather installations Installation Dimensions An additional back draft damper should be installed to minimize backward cold air flow and a thermal break should be installed to minimize conduction of outside temperatures as part of the vent system. The damper should be on the cold air side of the thermal break.
- Page 20 Calculating Vent System Length & equ Observe all governing codes and ordinances. To calculate the length of the system you need, add the equivalent feet (meters) for each vent piece used in the system. Ensure that the electrical installation is adequate and in conformance with National Electrical Code, ANSl/NFPA 70 (latest Vent Piece...
- Page 21 INSTALLATION INSTRUCTIONS It is recommended that the vent system be installed before Mark centers of the 6 fastener locations through the template hood is installed. to the wall. IMPORTANT: All screws must be installed into wood. • Before making cutouts, make sure there is proper clearance within the ceiling or wall for exhaust vent.
- Page 22 Non-Vented (recirculating) Installations Connect the deflector to the vent cover bracket using 4 - 3.5 x 9.5 sheet metal screws provided. Excessive Weight Hazard Use two or more people to move and install range hood. Failure to do so can result in back or other injury. Using 2 or more people, hang range hood on 2 mounting hooks through the rectangular cutouts on back of hood.
- Page 23 For Vented Installations Only: Run 3 wires, black, white and green (14AWG), in 1/2"conduit from service panel to terminal box. Use caulking to seal 1. Fit vent system over transition piece. opening. 2. Seal connection with clamps. 3. Check that backdraft dampers work properly. For Non-vented (recirculating) Installation...
- Page 24 7. Pull filter toward the front and insert into front channel. When using both upper and lower vent covers, push lower cover down onto hood and lift upper cover to ceiling and install with two 2.9 x 6.5 mm screws. NOTE: Upper vent cover may be reversed to hide slots.
- Page 25 RANGE HOOD CARE IMPORTANT: Clean the hood and grease filters frequently according to the following instructions. Replace grease filters before operating hood. Be sure lights are cool before cleaning the hood. Exterior Surfaces Clean the range hood with a mild detergent and soft cloth. Do not use abrasive cleanser or steel-wool pads.
- Page 26 WIRING DIAGRAM COLOR TABLE COLOR TABLE MOTOR CONNECTIONS SPEED TO TERMINALS BLACK BLUE WriT WHITE SE1Q7A BLUE - WHITE BROWN YELLOW GREEN YELLOW/GREEN BLUE - RED GREY BLUE - BLACK ® WIRING o°w Light Cont. Brd (LCB) Fan Speed Cont. Brd (FSCB) SPEED CONTACT 8-10...
- Page 27 1-800-688-2080 (Monday - Friday, 8:00 a.m. - User's guides, service manuals and parts information are 8:00 p.m. Eastern Time). available from Jenn-Air Brand Home Appliances, Customer Interaction Centre. NOTE: When writing or calling about a service problem, please include the following information: 1.
- Page 28 YOU SPECIFIC LEGAL RIGHTS AND YOU MAY ALSO HAVE OTHER RIGHTS, WHICH VARY FROM STATE TO STATE OR PROVINCE TO PROVINCE. Outside the 50 United States and Canada, this warranty does not apply. Contact your authorized Jenn-Air dealer to determine if another warranty applies.
- Page 29 JENN-AIR _ 30"AND 36" (76.2 CM AND 91.4 CM) WALL-MOUNT CANOPY RANGEHOOD/ HOTIE 30"ET36" (76,2 CM ET91,4 CM) Installation Instructions a nd Use& Care Guide For questions about features, operation/performance, parts, accessories, or service in the U.S.A., call: 1-800-JENNAIR (1-800-536-6247) or visit our website at www.jennair.com.
- Page 30 TABLE OF CONTENTS TABLEDESMATIERES RANGE HOOD SAFETY ..............INSTALLATION REQUIREMENTS ..........Tools and Parts ................Location Requirements ..............Venting Requirements ..............Electrical Requirements ............... INSTALLATION INSTRUCTIONS ..........Prepare Location ................Install Range Hood ............... Connect Vent System ..............Make Electrical Connection ............Install Vent Covers ..............
- Page 31 iMPORTANT SAFETY iNSTRUCTiONS WARNING: TO REDUCE THE RISK OF A RANGE TOP WARNING: TO REDUCE THE RISK OF FIRE, ELECTRIC GREASE FIRE: SHOCK, OR INJURY TO PERSONS, OBSERVE THE FOLLOWING: [] Never leave surface units unattended at high settings. Boilovers cause smoking and greasy spillovers that may [] Use this unit only in the manner intended by the ignite.
- Page 32 INSTALLATION REQUIREMENTS • 8- 3.5 x 9.5 mm screws Gather the required tools and parts before starting installation. Read and follow the instructions provided with any tools listed • 2-6x70mmscrews here. • 6- 5 x 35 mm mounting screws Tools needed •...
- Page 33 Cold weather installations Installation Dimensions An additional back draft damper should be installed to minimize backward cold air flow and a thermal break should be installed to minimize conduction of outside temperatures as part of the vent system. The damper should be on the cold air side of the thermal break.
- Page 34 Calculating Vent System Length & equ Observe all governing codes and ordinances. To calculate the length of the system you need, add the equivalent feet (meters) for each vent piece used in the system. Ensure that the electrical installation is adequate and in conformance with National Electrical Code, ANSl/NFPA 70 (latest Vent Piece...
- Page 35 INSTALLATION INSTRUCTIONS It is recommended that the vent system be installed before Mark centers of the 6 fastener locations through the template hood is installed. to the wall. IMPORTANT: All screws must be installed into wood. • Before making cutouts, make sure there is proper clearance within the ceiling or wall for exhaust vent.
- Page 36 Non-Vented (recirculating) Installations Connect the deflector to the vent cover bracket using 4 - 3.5 x 9.5 sheet metal screws provided. Excessive Weight Hazard Use two or more people to move and install range hood. Failure to do so can result in back or other injury. Using 2 or more people, hang range hood on 2 mounting hooks through the rectangular cutouts on back of hood.
- Page 37 For Vented Installations Only: Run 3 wires, black, white and green (14AWG), in 1/2"conduit from service panel to terminal box. Use caulking to seal 1. Fit vent system over transition piece. opening. 2. Seal connection with clamps. 3. Check that backdraft dampers work properly. For Non-vented (recirculating) Installation...
- Page 38 7. Pull filter toward the front and insert into front channel. When using both upper and lower vent covers, push lower cover down onto hood and lift upper cover to ceiling and install with two 2.9 x 6.5 mm screws. NOTE: Upper vent cover may be reversed to hide slots.
- Page 39 RANGE HOOD CARE IMPORTANT: Clean the hood and grease filters frequently according to the following instructions. Replace grease filters before operating hood. Be sure lights are cool before cleaning the hood. Exterior Surfaces Clean the range hood with a mild detergent and soft cloth. Do not use abrasive cleanser or steel-wool pads.
- Page 40 WIRING DIAGRAM COLOR TABLE COLOR TABLE MOTOR CONNECTIONS SPEED TO TERMINALS BLACK BLUE WriT WHITE SE1Q7A BLUE - WHITE BROWN YELLOW GREEN YELLOW/GREEN BLUE - RED GREY BLUE - BLACK ® WIRING o°w Light Cont. Brd (LCB) Fan Speed Cont. Brd (FSCB) SPEED CONTACT 8-10...
- Page 41 1-800-688-2080 (Monday - Friday, 8:00 a.m. - User's guides, service manuals and parts information are 8:00 p.m. Eastern Time). available from Jenn-Air Brand Home Appliances, Customer Interaction Centre. NOTE: When writing or calling about a service problem, please include the following information: 1.
- Page 42 YOU SPECIFIC LEGAL RIGHTS AND YOU MAY ALSO HAVE OTHER RIGHTS, WHICH VARY FROM STATE TO STATE OR PROVINCE TO PROVINCE. Outside the 50 United States and Canada, this warranty does not apply. Contact your authorized Jenn-Air dealer to determine if another warranty applies.
- Page 43 JENN-AIR _ 30"AND 36" (76.2 CM AND 91.4 CM) WALL-MOUNT CANOPY RANGEHOOD/ HOTIE 30"ET36" (76,2 CM ET91,4 CM) Installation Instructions a nd Use& Care Guide For questions about features, operation/performance, parts, accessories, or service in the U.S.A., call: 1-800-JENNAIR (1-800-536-6247) or visit our website at www.jennair.com.
- Page 44 TABLE OF CONTENTS TABLEDESMATIERES RANGE HOOD SAFETY ..............INSTALLATION REQUIREMENTS ..........Tools and Parts ................Location Requirements ..............Venting Requirements ..............Electrical Requirements ............... INSTALLATION INSTRUCTIONS ..........Prepare Location ................Install Range Hood ............... Connect Vent System ..............Make Electrical Connection ............Install Vent Covers ..............
- Page 45 iMPORTANT SAFETY iNSTRUCTiONS WARNING: TO REDUCE THE RISK OF A RANGE TOP WARNING: TO REDUCE THE RISK OF FIRE, ELECTRIC GREASE FIRE: SHOCK, OR INJURY TO PERSONS, OBSERVE THE FOLLOWING: [] Never leave surface units unattended at high settings. Boilovers cause smoking and greasy spillovers that may [] Use this unit only in the manner intended by the ignite.
-
Page 46: Installation Requirements
INSTALLATION REQUIREMENTS • 8- 3.5 x 9.5 mm screws Gather the required tools and parts before starting installation. Read and follow the instructions provided with any tools listed • 2-6x70mmscrews here. • 6- 5 x 35 mm mounting screws Tools needed •... - Page 47 Cold weather installations Installation Dimensions An additional back draft damper should be installed to minimize backward cold air flow and a thermal break should be installed to minimize conduction of outside temperatures as part of the vent system. The damper should be on the cold air side of the thermal break.
- Page 48 Calculating Vent System Length & equ Observe all governing codes and ordinances. To calculate the length of the system you need, add the equivalent feet (meters) for each vent piece used in the system. Ensure that the electrical installation is adequate and in conformance with National Electrical Code, ANSl/NFPA 70 (latest Vent Piece...
-
Page 49: Installation Instructions
INSTALLATION INSTRUCTIONS It is recommended that the vent system be installed before Mark centers of the 6 fastener locations through the template hood is installed. to the wall. IMPORTANT: All screws must be installed into wood. • Before making cutouts, make sure there is proper clearance within the ceiling or wall for exhaust vent. - Page 50 Non-Vented (recirculating) Installations Connect the deflector to the vent cover bracket using 4 - 3.5 x 9.5 sheet metal screws provided. Excessive Weight Hazard Use two or more people to move and install range hood. Failure to do so can result in back or other injury. Using 2 or more people, hang range hood on 2 mounting hooks through the rectangular cutouts on back of hood.
- Page 51 For Vented Installations Only: Run 3 wires, black, white and green (14AWG), in 1/2"conduit from service panel to terminal box. Use caulking to seal 1. Fit vent system over transition piece. opening. 2. Seal connection with clamps. 3. Check that backdraft dampers work properly. For Non-vented (recirculating) Installation...
-
Page 52: Range Hood Use
7. Pull filter toward the front and insert into front channel. When using both upper and lower vent covers, push lower cover down onto hood and lift upper cover to ceiling and install with two 2.9 x 6.5 mm screws. NOTE: Upper vent cover may be reversed to hide slots. -
Page 53: Range Hood Care
RANGE HOOD CARE IMPORTANT: Clean the hood and grease filters frequently according to the following instructions. Replace grease filters before operating hood. Be sure lights are cool before cleaning the hood. Exterior Surfaces Clean the range hood with a mild detergent and soft cloth. Do not use abrasive cleanser or steel-wool pads. -
Page 54: Wiring Diagram
WIRING DIAGRAM COLOR TABLE COLOR TABLE MOTOR CONNECTIONS SPEED TO TERMINALS BLACK BLUE WriT WHITE SE1Q7A BLUE - WHITE BROWN YELLOW GREEN YELLOW/GREEN BLUE - RED GREY BLUE - BLACK ® WIRING o°w Light Cont. Brd (LCB) Fan Speed Cont. Brd (FSCB) SPEED CONTACT 8-10... -
Page 55: Assistanceor Service
1-800-688-2080 (Monday - Friday, 8:00 a.m. - User's guides, service manuals and parts information are 8:00 p.m. Eastern Time). available from Jenn-Air Brand Home Appliances, Customer Interaction Centre. NOTE: When writing or calling about a service problem, please include the following information: 1. - Page 56 YOU SPECIFIC LEGAL RIGHTS AND YOU MAY ALSO HAVE OTHER RIGHTS, WHICH VARY FROM STATE TO STATE OR PROVINCE TO PROVINCE. Outside the 50 United States and Canada, this warranty does not apply. Contact your authorized Jenn-Air dealer to determine if another warranty applies.
Need help?
Do you have a question about the JXT6036ADR0 and is the answer not in the manual?
Questions and answers