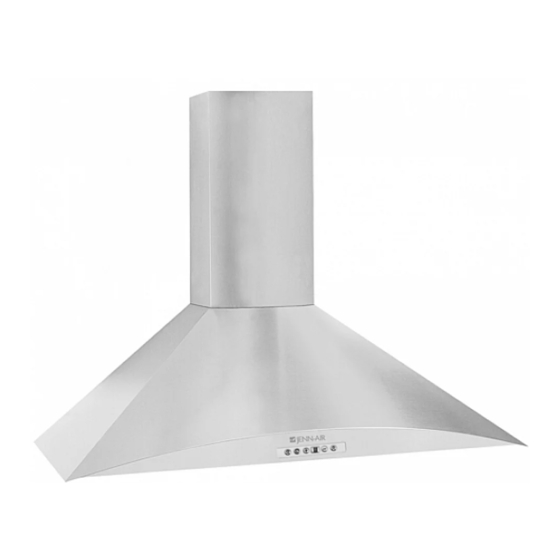
Jenn-Air JXT8836ADS Installation Manual
36"
Hide thumbs
Also See for JXT8836ADS:
- User manual (24 pages) ,
- Installation manual (24 pages) ,
- User manual (24 pages)
Advertisement
Table of Contents
RANGE
HOOD
Model
Number:
JXT8836AD$
Manufacturer
Number:
S88M90$
Size:
36"
INSTALLATION
GUIDE
TABLE OF CONTENTS
Safety
nstructions ....................................................
1
Mounting
Heights ........................
3
Ducting ....................................................................
4
Specifications
...........................................................
5
Insta Ilation ............................................................
6-7
Form No. A/04/03
Part No. US8800-0303A
_2003 Maytag Appliances Sales Co.
Litho U.S.A.
Advertisement
Table of Contents

Summary of Contents for Jenn-Air JXT8836ADS
- Page 1 RANGE HOOD Model Number: JXT8836AD$ Manufacturer Number: S88M90$ Size: 36" INSTALLATION GUIDE TABLE OF CONTENTS Safety nstructions ............ Mounting Heights ......Ducting ..............Specifications ............Insta Ilation ............Form No. A/04/03 Part No. US8800-0303A _2003 Maytag Appliances Sales Co. Litho U.S.A.
- Page 2 MODEL: JXT8836ADS Installation Theinstallation in this manual i s intended for qualifiedinstallers, s ervicetechnicians or persons with similarqualifiedbackground. DONOT attemptto installthis appliance yourself. I njurycould resultfrom installingtheunit due to lack of appropriate electrical a nd technical b ackground. All electricalwiring must be properlyinstalled,insulatedand grounded.Overlyaccumulated greasein old duct work shouldbe cleaned out or duct work shouldbe replacedif necessary to avoidthe possibilityof a greasefire.
-
Page 3: Installation
INSTALLATION MOUNTINGHEIGHTS & CLEARANCE Minimummountingheightbetween rangetop to hoodbottomshouldbe no lessthan24". Maximummountingheightshouldbe no high- er than32". It is importantto installthe hoodat the propermountingheight.Hoods mounted too low couldresultin heatdamageandfire haz- ard; whilehoodsmounted toohigh will be hard to reachand will loseperformance and efficiency. If available, also refer to range manufacturer's height clearance requirements and recom- mended hood mounting height above range. - Page 4 INSTALLATION DUCTING NEVER exhaust air or terminate duct work into spaces between walls, crawl spaces, ceiling, attics or garages. All exhaust must be ducted to the outside. UseMetal ductwork only. Fastenall connections with sheet metal screws and tape all joints w/certified Silver Tapeor DuctTape. SomeDucting Options: side wall cap ®/gravity damper...
-
Page 5: Specifications
INSTALLATION SPECIFICATIONS ELECTRICAL All Electricalworkmustby performedby qualifiedelectricianor personwithsimilar technical know how and background. Forpersonal s afety,removehousefuse or opencircuitbreakerbeforebeginning installation. Donotuseextensioncordor adapterplugwith this appliance. Follow Nationalelectricalcodesor prevailinglocal codesand ordinances. ElectricalSupply: Thisappliance requiresa 120V60Hzelectricalsupply., a ndconnected to an individual, p roperly grounded branchcircuit, protected by a 15 or 20 amperecircuitbreakeror time delayruse.Wiring mustbe 2 wire w/ground. -
Page 6: Mountingthe Rangehood
INSTALLATION MOUNTINGTHERANGEHOOD 1.Determine hood height, center, mark, level and hang hood to wall through mounting keyholes on back. 2. Install duct work and electrical. 3. Center and fasten bracket for upper telescopic duct cover onto the wall. 4. Slip upper and lower telescopic duct covers onto top of blower and screw in place. 5. -
Page 7: Ductless Conversion
INSTALLATION DUCTLESS CONVERSION Ductless conversion is intended for applications where an exhaust duct work is not possible to be installed. When converted, the hood functions as a "purifying" hood rather than an exhaust hood. Fumes and exhaust from cooking is drawn and filtered by a set of optional CarbonFilters. The air is then purified and re-circulated back within the home.


Need help?
Do you have a question about the JXT8836ADS and is the answer not in the manual?
Questions and answers