Jenn-Air JXT8836ADS Installation Manual
36"
Hide thumbs
Also See for JXT8836ADS:
- User manual (24 pages) ,
- Installation manual (7 pages) ,
- User manual (24 pages)
Advertisement
Available languages
Available languages
Quick Links
Download this manual
See also:
User Manual
INSTALLATION
Form No. A/04/03 Part No. US8800-0303A ©2003 Maytag Appliances Sales Co.
R A N G E H O O D
Model Number:
Manufacturer Number:
Size:
G U I D E
TABLE OF CONTENTS
Safety Instructions.................................................... 1
Mounting Heights.................................................... 3
Ducting....................................................................4
Specifications...........................................................5
Installation............................................................ 6-7
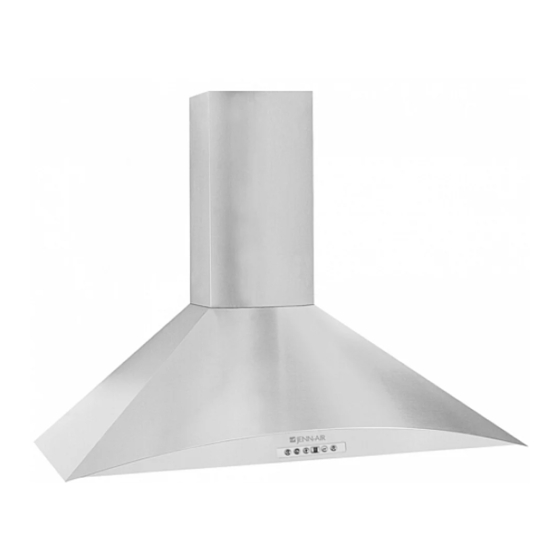
JXT8836ADS
S88M90S
36"
Litho U.S.A.
Advertisement

Subscribe to Our Youtube Channel
Related Manuals for Jenn-Air JXT8836ADS


Summary of Contents for Jenn-Air JXT8836ADS
- Page 1 R A N G E H O O D Model Number: JXT8836ADS Manufacturer Number: S88M90S Size: 36” INSTALLATION G U I D E TABLE OF CONTENTS Safety Instructions............ 1 Mounting Heights............ 3 Ducting..............4 Specifications............5 Installation............6-7 Form No. A/04/03 Part No. US8800-0303A ©2003 Maytag Appliances Sales Co. Litho U.S.A.
- Page 5 INSTALLATION DUCTING WARNING FIRE HAZARD NEVER exhaust air or terminate duct work into spaces between walls, crawl spaces, ceiling,attics or garages. All exhaust must be ducted to the outside. Use Metal ductwork only. Fasten all connections with sheet metal screws and tape all joints w/ certified Silver Tape or DuctTape. Some Ducting Options: side wall cap side wall cap...
- Page 6 INSTALLATION SPECIFICATIONS ELECTRICAL WARNING All Electrical work must by performed by qualified electrician or person with similar technical know how and background. For personal safety, remove house fuse or open circuit breaker before beginning installation. Do not use extension cord or adapter plug with this appliance. Follow National electrical codes or prevailing local codes and ordinances.
- Page 7 INSTALLATION MOUNTING THE RANGEHOOD 1.Determine hood height, center, mark, level and hang hood to wall through mounting keyholes on back. 2. Install duct work and electrical. 3. Center and fasten bracket for upper telescopic duct cover onto the wall. 4. Slip upper and lower telescopic duct covers onto top of blower and screw in place. 5.
- Page 8 INSTALLATION DUCTLESS CONVERSION Ductless conversion is intended for applications where an exhaust duct work is not possible to be installed. When converted, the hood functions as a "purifying" hood rather than an exhaust hood. Fumes and exhaust from cooking is drawn and filtered by a set of optional Carbon Filters. The air is then purified and re-circulated back within the home.
- Page 9 HOTTE DE CUISINIÈRE Numéro de modèle: JXT8836ADS Numéro du fabricant: S88M90S Dimensions: 36” INSTALLATION G U I D E TABLE DES MATIÈRES Consignes de sécurité..........1 Hauteurs de montage..........3 Canalisation............. 4 Caractéristiques techniques........5 Installation............6-7 Form No. A/04/03 Pièce No. US8800-0303A ©2003 Maytag Appliances Sales Co. Litho États-Unis...
- Page 12 INSTALLATION HAUTEURS DE MONTAGE ET DƒGAGEMENT La hauteur de montage minimale entre le dessus de la cuisini•re et le dessous de hotte doit •tre dÕ au moins 71,12 cm (28 po). La hauteur de montage maximale ne doit pas 19.68"-33.46" exc der 91,44 cm (36 po).
- Page 13 INSTALLATION CANALISATION AVERTISSEMENT DE RISQUE D’INCENDIE L’air ne doit JAMAIS être évacué et le système de conduits ne doit JAMAIS se terminer dans des espaces entre les murs, des vides sanitaires, des plafonds, des greniers ou des garages. Toutes les sorties de ven- tilation doivent être canalisées vers l’extérieur.
- Page 14 INSTALLATION CARACTÉRISTIQUES TECHNIQUES ÉLECTRICITÉ AVERTISSEMENT AVERTISSEMENT Tous les travaux électriques doivent être effectués par un électricien qualifié ou une personne possé- dant des connaissances techniques et de l’expérience similaires. Pour votre sécurité personnelle, retirez le fusible ou coupez le disjoncteur de l’alimentation électrique domestique avant de débuter l’installation.
- Page 15 INSTALLATION MONTAGE DE LA HOTTE DE CUISINIÈRE 1. Déterminez la hauteur de pose de la hotte puis centrez-la. Tracez un point de repère, mettez la hotte au niveau puis suspendez-la au mur par ses fentes piriformes arrière. 2. Installez le système de conduits et les composants électriques. 3.
- Page 16 INSTALLATION TRANSFORMATION EN SYSTÈME DE RECYCLAGE La transformation de cette unité en système de recyclage est recommandée pour des applications où il est impossible d’installer un système de conduits d’évacuation. Lors de la conversion, la hotte fonc- tionne en tant qu’élément « d’épuration » plutôt qu’élément d’évacuation. L’air vicié...
- Page 17 CAMPANA DE COCINA Número de Modelo: JXT8836ADS Número del Fabricante: S88M90S Tamaño: 36” INSTALACION G U I A CONTENIDOS Instrucciones de Seguridad........1 Altura de Montado...........3 Tubería de Extracción..........4 Especificaciones............5 Instalación............6-7 Form No. A/04/03 Part No. US8800-0303A ©2003 Maytag Appliances Sales Co. Litho U.S.A.
- Page 21 INSTALACION TUBERIA DE EXTRACCION ADVERTENCIA PELIGRO DE INCENDIO NUNCA haga escapar el aire o termine las tuberías entre espacios de la pared, sofitos, techos, áticos o garajes. Todos los escapes de aire deben ser dirigidos hacia el exterior. Use tuberías metálicas solamente. Asegure todas las conexiones con tornillos para metal laminado y selle todas las junturas con cinta adhe- siva certificada Silver Tape o DuctTape.
- Page 22 INSTALACION ESPECIFICACIONES INSTALACION ELECTRICA ADVERTENCIA Toda instalación eléctrica debe ser realizada por un electricista calificado o por una persona con conocimientos técnicos similares y con experiencia equivalentes. Para su seguridad personal, retire los fusibles del hogar o el interruptor abierto antes de comenzar la instalación.
- Page 23 INSTALACION MONTANDO LA CAMPANA DE COCINA 1. Determine hood height, center, mark, level and hang hood to wall through mounting keyholes on back. 2. Instale las tuberías y el cableado eléctrico. 3. Centre y fije el sujetador para la cubierta del conducto telescópico superior a la pared. 4.
- Page 24 INSTALACION CONVERSION SIN TUBERIA DE EXTRACCION La conversión sin tubería de extracción está hecha para situaciones en las cuales no es posible instalar una tubería de extracción de aire. Al ser convertida, la campana funciona como una campana de “purificación” en vez de una campana de extracción.
Need help?
Do you have a question about the JXT8836ADS and is the answer not in the manual?
Questions and answers