Tektronix PHASER 380 User Manual
Hide thumbs
Also See for PHASER 380:
- Service manual (346 pages) ,
- User manual (8 pages) ,
- Repacking manual (5 pages)
Table of Contents
Advertisement
Quick Links
Download this manual
See also:
Service Manual
Advertisement
Chapters
Table of Contents

Related Manuals for Tektronix PHASER 380


Summary of Contents for Tektronix PHASER 380
- Page 1 User Manual ® Phaser Color Printer First printing October 1997 070-9662-01...
- Page 3 380 Color Printer is covered by U. S. Patent No. 5,372,852. Purchase of a Tektronix Phaser 380 Color Printer provides a purchaser with a license under claims 1, 3, 20, and 22 of the '852 patent, but not a license under other claims of that patent, which cover methods of printing using inks having speciÞc properties.
- Page 4 Phaser 380 Warranty Tektronix warrants that the Phaser 380 printer will be free from defects in materials and workmanship for a period of one (1) year from the date of shipment. If this product proves defective during the warranty period, Tektronix, at its option, will either repair the defective product on-site without charge for parts and labor, or provide a replacement in exchange for the defective product.
-
Page 5: Users Safety Summary
Users safety summary CAUTION Conditions that can result in damage to the product. Terms in manual: WARNING Conditions that can result in personal injury or loss of life. Power source: Do not apply more than 250 volts RMS between the supply conductors or between either supply conductor and ground. -
Page 7: Table Of Contents
Contents Introduction Overview 1-1 Information roadmap 1-4 User Manual 1-4 Diskettes 1-4 CD-ROM 1-4 World Wide Web 1-4 Getting Set Up At a glance 2-1 Setting up the printer 2-2 What you get with your printer 2-2 Optional accessories 2-4 Touring the printer 2-6 Registering the printer 2-7 Removing the packing material 2-7... - Page 8 Using the printerÕs front panel 3-2 Using the AdobePS 4 and Microsoft drivers with Windows 95 3-4 Using the Tektronix driver for Windows 3.1 3-6 If you are using PC/NFS 3-9 Using the Adobe PostScript driver for Windows 3.1 3-10...
- Page 9 Using the Windows NT 3.51 PostScript driver 3-12 Using the Windows NT 4.0 PostScript driver 3-12 Printing from DOS 3-15 Printing from a Macintosh 3-16 Using Macintosh printer drivers 3-16 Using the printerÕs front panel 3-16 Using the Phaser 380 printer driver 3-18 Using the Apple LaserWriter 8.3.4 driver 3-18 Using the Phaser 380 GX driver 3-19 Printing from a workstation 3-20...
- Page 10 Printing transparencies 3-39 Transparency quality tips 3-40 Manual-feed printing 3-41 Duplex printing 3-44 Printer languages: PostScript, HP-GL, PCL5 3-45 Fonts 3-46 Resident typefaces (PostScript) 3-46 PrinterÕs Extended Features option 3-47 Printing: Beyond the Basics Working with color 4-2 General guidelines 4-2 TekColor corrections Ñ...
- Page 11 Caring for Your Printer Overview 5-1 Adding ink 5-2 Ink handling tips 5-3 Emptying the waste liner (A) 5-4 Replacing the maintenance tray (B) 5-7 Replacing the media tray separator pad 5-10 Cleaning the printer 5-13 Cleaning pages 5-13 Cleaning supplies 5-14 Reordering cleaning kit supplies 5-14 Using isopropyl alcohol 5-15 Identifying cleaning procedures 5-16...
- Page 12 PrinterÕs timeout 6-29 Printed colors are not what you expected 6-31 In general 6-31 Printing PANTONE Colors 6-32 Blue colors look too purple 6-32 Using the Tektronix halftone screens 6-33 Macintosh users 6-33 PC and workstation users 6-34 Phaser 380 Color Printer...
- Page 13 Selecting page sizes in Windows applications 6-35 Windows 3.1 6-35 Windows 95 6-36 Fonts printing incorrectly from Windows 6-37 Sharing the printer on a network 6-38 Driver, utility files, and front panel interactions 6-38 If the LaserWriter Utility does not work 6-39 Using the Front Panel Front panel overview 7-1 Front panel indicators 7-1...
- Page 14 Supplies, Accessories, and Expanding Your Printer Tektronix supplies: the mark of quality 8-1 Customizing your printer 8-1 Ordering printer supplies 8-2 Interface cables and adapters 8-3 Extended Features upgrade 8-4 Lower Paper Tray Assembly (recommended) 8-5 Printer Station (recommended) 8-5...
-
Page 15: Overview
92.2 to 332.5 mm (3.63 to 13.1 in.) wide to 152.4 to 471.2 mm (6 to 18.55 in.) long. For transparency printing, Tektronix offers specially formulated Letter-, A4- and Tabloid Maximum-size transparencies to provide enhanced ink adhesion, durability and superior print quality. - Page 16 Introduction In its standard conÞguration, the printer provides Configurations. 300 x 300 dots-per-inch (dpi) resolution color printing, 16 Mbytes of memory and a total of 39 fonts. Adding the Extended Features option increases print resolution and print performance, making it the choice for demanding print jobs.
- Page 17 To order ColorStix solid-ink sticks, transparencies, paper, or other supplies, refer to the supplies information sheet that is shipped with the printer and contact your local dealer or, in the United States and Canada, call Tektronix at 1-800-835-6100 . User Manual...
-
Page 18: Information Roadmap
Introduction Information roadmap Tektronix provides information on the Phaser 380 printer in several ways: User Manual The Phaser 380 Color Printer User Manual (this manual) includes information on setting up and using the printer: Hardware and software set up Selecting print features in a driver... -
Page 19: Getting Set Up
Chapter Getting Set Up At a glance Installation of your printer involves these tasks: Setting up the printer (page 2-2). Putting all the pieces together: unpacking the printer and accessories, installing the optional equipment such as the Lower Paper Tray Assembly, Printer Station and Phaser Copystation, loading the media tray(s), loading ink sticks, and installing the maintenance tray. -
Page 20: Setting Up The Printer
Warranty registration card Phaser 380 Color Printer User Manual Phaser 380 Color Printer Quick Reference Guide Tektronix Phaser 380 printer transparencies Supplies information sheet Phaser 380 printer driver software (CD-ROMs and diskettes) Optional: Two-pack of each color ColorStix ink sticks See ÒInterface cables and adaptersÓ... - Page 21 Getting Set Up C ol or St er s ri nt as er Bl ac ® In k ol or ® 0 Pr m /C 6- 15 in te k. co -0 0 w .te C ol er s or St ri nt as er ®...
-
Page 22: Optional Accessories
25% or enlarged to 200% of the originalÕs size, and you can adjust copies for color balance and lightness. A Tektronix-approved SCSI hard SCSI disk for fonts and collation. disk is available for use with the printerÕs SCSI port to increase font storage space and allow print job collation (Extended Features option required). - Page 23 Getting Set Up 9662-02 User Manual...
-
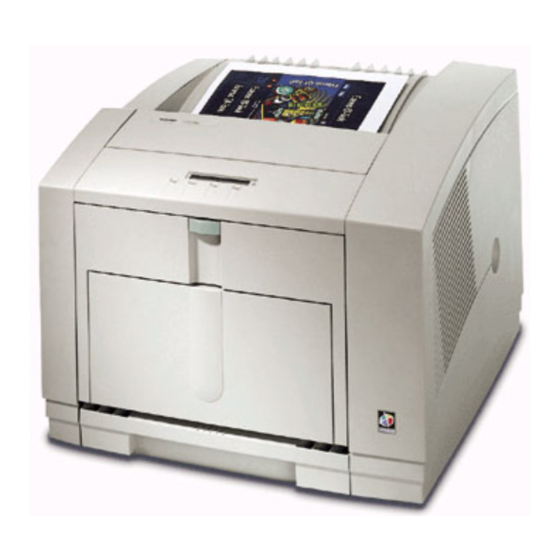
Page 24: Touring The Printer
Getting Set Up Touring the printer Use the following illustration to familiarize yourself with the printer. Front-cover release Front-panel menu display and buttons Exit cover Exit-cover release button Ink-loading bins (under top cover) Top-cover release On/Off switch and access to I/O ports Transit restraint lock Media tray Front cover... -
Page 25: Registering The Printer
(U. S. or international versions). Fill out the registration card and mail it. By registering your printer with Tektronix, you are validating the product warranty and you are ensuring that you will be sent information about upgrades, services, and accessories as they becomes available. -
Page 26: Installing The Optional Lower Paper Tray Assembly
Getting Set Up Installing the optional Lower Paper Tray Assembly A Lower Paper Tray Assembly for paper printing is available as an option. Use Tektronix order number Z380LTA. To avoid damage, let the printer cool down for at least 45 minutes Caution before you begin installing a Lower Paper Tray Assembly. - Page 27 Getting Set Up 9662-04 Install the Lower Paper Tray Assembly using these steps: Remove the paper tray from the Lower Paper Tray Assembly. To ensure proper printer operation, install the printer and Lower Note Paper Tray Assembly on a ßat surface having no more than 2 degrees of tilt.
- Page 28 Getting Set Up Place the printer on top of the Lower Paper Tray Assembly. Make sure that the left and right alignment pins Þt in the holes in the base of the printer. Plug the Lower Paper Tray Assembly cable into the printer. 9662-05 Phaser 380 Color Printer 2-10...
-
Page 29: Installing The Maintenance Tray
To avoid printing delays, always keep an extra maintenance tray available. When you reorder a replacement maintenance tray for the printer, use Tektronix order number 436-0303-00. There is a 20-minute warm-up period required after installing a new Note maintenance tray. - Page 30 Getting Set Up Remove the packing materials from the maintenance tray. Retain the plastic bag for disposal of the used maintenance tray. Install the maintenance tray by sliding it into the printer. To prevent jams at the media tray, be sure to push the maintenance tray into the printer until both sides latch Þrmly into place.
-
Page 31: Loading Ink Sticks
Refer to ÒOrdering printer suppliesÓ on page 8-2 for ordering information. Tektronix Phaser 380 ColorStix ink is formulated speciÞcally Caution for use with the Phaser 380 printer. To avoid damaging the printhead, only use Phaser 380 ColorStix solid-ink sticks. -
Page 32: Choosing Media Tray Configurations
For example, you could load Tabloid-size Cover paper in the upper tray and load Tektronix Tabloid Maximum-size Bond paper in the lower tray. With dual-tray capability, you can make printer driver selections that specify a print job by its paper size or by tray position (upper or lower) without the need to leave your computer to switch trays. -
Page 33: Loading Media Trays
Loading media trays The universal tray shipped with the printer recognizes seven media sizes: Executive, A4, Letter, Legal, Tabloid, A3 and Tektronix Tabloid Maximum. Tray-fed printing of custom media sizes ranging from 184.2 to 332.5 mm (7.25 to 13.09 in.) wide to 266.7 to 471.2 mm (10.55 to 18.55 in.) long are also supported. -
Page 34: Loading Paper In The Upper And Lower Trays
Getting Set Up Loading paper in the upper and lower trays The Lower Paper Tray Assembly accepts paper media only; it Note should not be used for printing transparencies or label stock. Prior to loading paper in a tray, fan the paper to release sheets that are stuck together. - Page 35 Getting Set Up Insert the media tray into the printer. 9662-11 User Manual 2-17...
-
Page 36: Loading Transparencies In The Media Tray
Þll line to indicate the trayÕs maximum capacity. If you are using Tektronix transparency media, you must position Note the transparency notch in the back, right corner of the tray. Jams will occur if transparencies are incorrectly loaded. - Page 37 Getting Set Up Insert the media tray into the printer. 9662-11 User Manual 2-19...
-
Page 38: Connecting The Printer
Getting Set Up Connecting the printer Printer ports The printer is shipped with parallel and SCSI port connectors available on the rear panel. In addition, the printer can support one optional PhaserShareª network card. See ÒInterface cables and adaptersÓ on page 8-3 about ordering Note cables for connecting the printer. - Page 39 Getting Set Up PhaserShare card port (optional) The printer accepts one of the following: PhaserShare Ethernet card supporting TCP/IP, Novell NetWare, EtherTalk, Telnet and FTP protocols. PhaserShare Token Ring card supporting TCP/IP, Novell NetWare, TokenTalk, Telnet and FTP protocols. PhaserShare LocalTalk/Serial card. The PhaserShare Network Cards and Software System Administrator Manual contains all the information necessary for conÞguring and using the optional network interfaces.
-
Page 40: Phasershare Network And Serial Connections
Getting Set Up PhaserShare network and serial connections Optional PhaserShare cards provide Ethernet, Token Ring, or LocalTalk/Serial connections for the printer. PhaserShare network cards offer high performance and ßexible workgroup connectivity. All data input ports and network protocols are simultaneously active. Print jobs are processed on a Þrst-come, Þrst-served basis. -
Page 41: Parallel Connection
Obtain an optional parallel cable from Tektronix (order number 012-1468-00). This cable features a 36-pin high-density parallel connector for the printer and a 25-pin DSUB connector for the computer. -
Page 42: Scsi Peripheral Devices
For printer collation. To the use the collation feature available with the printerÕs Extended Features option, youÕll need to obtain a SCSI hard disk with up to 2 Gigabytes of storage capacity. Tektronix offers a SCSI hard disk (order number Z350DSK) specially optimized for use with Tektronix printers. -
Page 43: Turning On The Printer
Getting Set Up Turning on the printer After you have connected the interface cables, you are ready to connect the power cord and turn on the printer. If you need to turn the printer off, wait until the display shows Ready or the printerÕs name before powering it down. -
Page 44: Unlocking The Transit Restraint
Getting Set Up Unlocking the transit restraint To avoid damaging the printer, always turn the printer power Caution on and off using the rear panel On/Off switch. Turn the printer power on before unlocking the transit restraint. Turn the printer power on using the rear-panel On/Off switch. The transit restraint lock is located on the right side of the printer. -
Page 45: As The Printer Warms Up
Getting Set Up As the printer warms up The Þrst time you turn your printer on, it will take about 20 minutes to warm up. The printerÕs front panel displays a percentage value to indicate its progress. The warm-up cycle is complete when the front panel displays 100%. -
Page 46: Accessing The Front Panel Menu
Getting Set Up Status messages, such as Warming Up, appear on the top line of the display. Button labels, such as Info, Clean and Menu, appear on the lower line of the display. Button labels identify a function for the corresponding button located under the label. -
Page 47: Selecting A Language For The Front Panel
Getting Set Up Selecting a language for the front panel Messages that appear in the front panel window are in English by default. To change the language to Spanish, French, German, Italian, or Japanese, follow these steps. When the printer is on and Ready or the printerÕs name appears, press the Menu button. -
Page 48: Help Pages Overview
Getting Set Up Help Pages overview The printer has several Help Pages that you can print to learn more about the printerÕs operation and conÞguration. Refer to ÒPrinter Help PagesÓ on page 7-6 for a detailed list of available Help Pages. You can print the Help Pages from the front panel;... -
Page 49: Pc/Windows Software
Getting Set Up PC/Windows software Installer overview The Phaser 380 printerÕs CD-ROM and diskettes include an installer application that automatically installs the printerÕs software onto your computerÕs hard disk. You can select a standard installation (Easy Install), or select individual items (Custom Install) from the CD-ROM or diskettes. ATM software is available on a separate CD-ROM included with Note the printerÕs Extended Features option. -
Page 50: Installing Printer Software For Window 95
Getting Set Up Installing printer software for Window 95 If you are installing from ßoppy diskettes, you may need more Note than one diskette depending on your Windows system. Keep all of the printerÕs diskettes handy during the installation, and insert each diskette when you are prompted by the installation program. - Page 51 Select your printer, and click Next: Tektronix Phaser 380 (standard printer conÞguration) Tektronix Phaser 380 Extended (Extended Features option) If you are not sure which version of the printer you have, check the printerÕs Startup Page for Extended Features: Yes or No.
-
Page 52: Installing Printer Software For Windows
Getting Set Up Installing printer software for Windows NT 4.0 If you are installing software from ßoppy diskettes, you may need more than one diskette depending on your Windows system. Keep all printer diskettes handy during the installation, and insert each diskette when you are prompted by the installation program. - Page 53 Getting Set Up Easy Installation Custom Installation The following files are copied to your 1. In the Driver Installation dialog box, select from the following options: hard disk: Drivers/PPDs (installs driver files and printer description files) QuarkXPress PDF (installs an application-specific printer QuarkXPress PDF description file, if the application is (installs an application-specific printer description file, if the...
- Page 54 (if there are multiple AppleTalk zones). type your printer’s IP address (or Host name if 5. Select your Tektronix printer and click OK. known to the network). 6. At the prompt: Do you want to capture this AppleTalk Note: The printer’s IP address may be available...
- Page 55 Select your printer, and click Next: Tektronix Phaser 380 (standard printer conÞguration) Tektronix Phaser 380 Extended (Extended Features option) If you are not sure which version of the printer you have, check the printerÕs Startup Page for Extended Features: Yes or No.
-
Page 56: Installing Printer Software For Windows
Getting Set Up Installing printer software for Windows NT 3.51 If you are installing software from ßoppy diskettes, you may need more than one diskette depending on your Windows system. Keep all printer diskettes handy during the installation, and insert each diskette when you are prompted by the installation program. - Page 57 Getting Set Up Easy Install Custom Install The following files are copied to your 1. In the Driver Installation dialog box, select from the following options: hard disk: Drivers/PPDs (installs driver files and printer description files) QuarkXPress PDF (installs an application-specific printer QuarkXPress PDF description file, if the application is (installs an application-specific printer description file, if the...
- Page 58 AppleTalk zones). Note: The printer’s IP address may be available on the 4. Select your Tektronix printer and click OK. printer’s Configuration Page. If not, ask your 5. At the prompt: Do you want to capture this network administrator.
- Page 59 Getting Set Up Select options in the PostScript Printer Setup dialog box, and click OK. Note: Enabling the Use Printer Halftoning option is recommended. In the Print Manager, from the Printer menu, select Exit. In the Installation Completed dialog box, click Finish. User Manual 2-41...
-
Page 60: Installing Printer Software For Windows 3.1
Getting Set Up Installing printer software for Windows 3.1 If you are installing software from ßoppy diskettes, you may need more than one diskette depending on your Windows system. Keep all printer diskettes handy during the installation, and insert each diskette when you are prompted by the installation program. - Page 61 Adobe Printer Driver for Windows 3.1 Tektronix Printer Driver for Windows 3.1 Note: The Tektronix Printer Driver for Windows 3.1 must be installed in the Windows directory (default Destination Directory). Do not change the Destination Directory when installing the Tektronix driver unless you are installing the driver on a network and you know the location of the Windows directory on the network drive.
- Page 62 Getting Set Up Select your printer type and click Next: Tektronix Phaser 380 Base version (printerÕs standard conÞguration) Tektronix Phaser 380 Extended version (Extended Features option) If you are not sure which version of the printer you have, check the printerÕs Startup Page for Extended Features: Yes or No.
- Page 63 If you selected Easy Installation, or if you selected If you selected the AdobePS 3 Driver for Windows 3.1 in the Tektronix Driver for Windows 3.1 in the Custom the Custom Installation, continue with the following Installation, continue with the following instructions: instructions: 1.
-
Page 64: Macintosh Software
Getting Set Up Macintosh software Installer overview The Phaser 380 printerÕs CD-ROM and diskettes include an installer application that automatically installs the printerÕs software onto your Macintosh hard disk. You can select a standard installation (Easy Install), or select individual items (Custom Install) from the CD-ROM or diskettes. ATM software is available on a separate CD-ROM included with Note the printerÕs Extended Features option. -
Page 65: Using The Macintosh Installer
Getting Set Up Using the Macintosh Installer Insert either the Phaser 380 Color Printer Installer for Mac OS Disk 1 or CD-ROM into the appropriate drive on your computer. Double-click the Phaser 380 Installer icon. Click Continue until the Easy Install window appears. Select Easy Install or Custom Install: Easy Install Custom Install... -
Page 66: Setting Up The Phaser 380 Printer Driver
Getting Set Up Setting up the Phaser 380 printer driver The Phaser 380 printer driver is a Tektronix-modiÞed version of Apple's LaserWriter 7.1.2 printer driver. Use the Phaser 380 printer driver if you are using System Software 6.0.7, or 7.0 and later. - Page 67 Getting Set Up Install the printerÕs software as described on page 2-47. Select Easy Install to automatically install all of the necessary software, or select LaserWriter 8.3.4 Driver and Printer Descriptions in the Custom Install window. Open the Chooser. Select the LaserWriter 8 driver icon. Click on the Zone your printer is in.
-
Page 68: Setting Up The Phaser 380 Gx Driver
Getting Set Up Setting up the Phaser 380 GX driver If you are using Apple Macintosh QuickDraw GX and System Software 7.5 or later, use the Phaser 380 GX driver to print to your Phaser 380 printer. The Phaser 380 GX driver works with QuickDraw GX and non-QuickDraw GX applications. - Page 69 Getting Set Up In the Connect via ÞeldÕs pop-up menu, select your printerÕs communication method: The AppleTalk option is the standard network connection. The Servers option is used to select a shared desktop printer. Click on your Phaser 380 printer in the list of printers on the right side of the Chooser.
-
Page 70: Workstation Software
For UNIX environments, Tektronix offers the optional PhaserPrintª software. PhaserPrint software includes driver-selectable printer options, and provides fast, raster Þle and screen copy printing to Tektronix color printers. The printerÕs CD-ROM contains a demonstration copy of the PhaserPrint software, and an on-line instruction guide, in the UNIXDEMO directory. -
Page 71: Printing Basics
Chapter Printing Basics Overview You can print to your printer from IBM-compatible personal computers, Macintosh computers, and workstations. Make sure your printer is set up with the appropriate interface port; refer to ÒConnecting the printerÓ on page 2-20. If you havenÕt already installed the printerÕs software, refer to ÒPC/Windows softwareÓ... -
Page 72: Printing From A Pc
Þnd them quickly, in each of these drivers. Windows 95 (AdobePS 4 driver) see page 3-4 Windows 95 (Microsoft PostScript driver) see page 3-4 Windows 3.1 (Tektronix-modified Microsoft driver) see page 3-6 Windows 3.1 (AdobePS 3 driver) see page 3-10 Windows NT 3.51 (Microsoft PostScript driver) see page 3-12 Windows NT 4.0 (Microsoft PostScript driver) - Page 73 Printing Basics Print features quick reference: Windows printer drivers Windows 3.1 drivers Windows 95 drivers Windows NT 4.0 driver Feature AdobePS 3 Tektronix driver Microsoft PostScript PostScript AdobePS 4 PostScript Print-quality modes Features tab Printers Properties Print Print Quality Setup...
-
Page 74: Using The Adobeps 4 And Microsoft Drivers With Windows 95
Printing Basics Using the AdobePS 4 and Microsoft drivers with Windows 95 To select printing options, follow these steps: From the taskbar, select Start. In the menu that appears, select Settings, then Printers. In the Printers window, click the Phaser 380 printer icon with the right mouse button, then select Properties from the menu. - Page 75 Printing Basics If you are using host color correction, you need to make selections Note in the Graphics and Device Options tabs. Refer to the on-line manuals on the printerÕs CD-ROM for more information on host color correction. Click the Device Options tab to see printer-speciÞc options. Select Printer Features, such as Color Corrections.
-
Page 76: Using The Tektronix Driver For Windows 3.1
Printing Basics Using the Tektronix driver for Windows 3.1 To select printing options, follow these steps: From the Control Panel, double-click the Printers icon. In the Printers dialog box, choose your printer from the list of installed printers. Click the Set As Default Printer button if you want to select your printer as the default. - Page 77 Printing Basics Set the Timeouts. These options regulate your computerÕs communications with its printer ports. Device Not Selected: Type a value in this text box to change the number of seconds Windows waits before notifying you that a printer is off-line. The default is 15 seconds, and is recommended. Transmission Retry: On large or multiple-page documents you may see an Alert message that the printer is no longer accepting data before the job is completely downloaded to the printer.
- Page 78 This option is only available to applications that use this Tektronix driver with Tektronix PostScript Level 2 printers, such as the Phaser 380 printer. When this box is checked, the Compress Bitmaps option is unavailable (grayed-out).
-
Page 79: If You Are Using Pc/Nfs
Printing Basics If you are using PC/NFS If you have PC/NFS software installed on your computer, you need to make the following selection in the Network Options dialog box: From the Main window, double-click the Print Manager icon. From the Options menu in the Print Manager, select Network Settings. -
Page 80: Using The Adobe Postscript Driver For Windows 3.1
Using the Adobe PostScript driver for Windows 3.1 To select printing options, follow these steps: From the Control Panel, double-click Printers. In the Printers dialog box, select the Tektronix Phaser 380 printer, then click Setup. A dialog box appears with the printerÕs name across the top. - Page 81 Printing Basics Click the Job Control tab to see job-related options. The PostScript header contains important PostScript information that must accompany each print job; it is not a banner page printed with each job. If an option is not selected, an error message is displayed on your computer screen and your job does not print.
-
Page 82: Using The Windows Nt 3.51 Postscript Driver
Printing Basics Using the Windows NT 3.51 PostScript driver If you are using Microsoft Windows NT, follow the instructions in ÒInstalling printer software for Windows NT 3.51Ó on page 2-38 to install a Windows NT PostScript driver with a Phaser 380 printer. You can select printer page sizes in the driver for Windows NT applications, however, TekColor color corrections and other PostScript Level 2 features are not supported by the Windows NT driver. - Page 83 Printing Basics Making default settings From the Properties dialog box, click the Device Settings tab. In the Device Settings sheet, locate Form To Tray Assignment. Under Form To Tray Assignment, highlight the Þrst tray. In the box that appears at the bottom of the window, select the size media you will be using in that tray.
- Page 84 Printing Basics Selecting printer options within an application: Print From the File menu, select Print; the Print dialog box appears. You can select a different printer and other settings in this dialog box. Click on the Properties button; the Printer Document Properties sheet appears.
-
Page 85: Printing From Dos
Printing Basics Click the Printer button; another Page Setup dialog box appears. You can select a different printer here. Click the Properties button; the Printer Document Properties sheet appears. Click the Advanced tab to change any printer features, including TekColor. This tab displays the same information as the Document Defaults Properties Advanced tab. -
Page 86: Printing From A Macintosh
Printing Basics Printing from a Macintosh To print from a Macintosh, you need a printer driver. Installing one of the supported drivers allows you to select printing features right from your computer. Without a supported driver, you can make some printing selections from the printerÕs front panel. - Page 87 Printing Basics Print features quick reference: Macintosh printer drivers Feature Phaser 380 driver Apple LaserWriter Phaser 380 GX driver 8.3.4 driver Print-quality modes Print Print Printing TekColor Options Printer Driver Defaults Fast Color Print Quality Print Quality Print Quality Standard Enhanced (600x300)* Color correction Print...
-
Page 88: Using The Phaser 380 Printer Driver
Printing Basics Using the Phaser 380 printer driver From the File menu, open the Page Setup dialog box. Use the Paper pop-up menu to select the printerÕs supported paper sizes. From the File menu, open the Print dialog box. In the Print dialog box, click the TekColor button to see the TekColor Options dialog box. -
Page 89: Using The Phaser 380 Gx Driver
Printing Basics Using the Phaser 380 GX driver Refer to the on-line manuals on the printerÕs CD-ROM for details Note on using the Phaser 380 GX driver. Printing with a desktop printer If you are using QuickDraw GX applications, do one of the following: Select any desktop printer in the Print dialog box. -
Page 90: Printing From A Workstation
UNIX workstations For UNIX environments, Tektronix offers the optional PhaserPrintª software. PhaserPrint software offers driver-selectable printer options and provides fast, raster Þle and screen copy printing to Tektronix color printers. PhaserPrint software is available for these workstations: Workstation Operating System SunOS 4.1.3... -
Page 91: Vms Workstations
The printerÕs CD-ROM contains a demonstration copy of PhaserPrint software and an on-line instruction guide in the UNIXDEMO directory. If you would like to purchase a licensed version of PhaserPrint software, contact your dealer, local Tektronix ofÞce, or in the United States, call 1-800-835-6100. VMS workstations To print from VMS workstations, the optional PhaserSymª... -
Page 92: Printing From Specific Applications
World Wide Web: If you have access to the Internet, you can view selected topics on the Phaser 380 printerÕs web page: http://www.tek.com/Color_Printers/userdoc/introduction.html HAL: Request a document catalog from HAL or EuroHAL, TektronixÕ automated fax systems. Refer to ÒUsing the automated fax systemsÓ on page 6-3 for instructions. Applications tips QuarkXPress To use the printer with QuarkXPress, use the installer application on the printerÕs CD-ROM or diskettes to install the PDF printer description Þle. -
Page 93: Adobe Photoshop
Printing Basics Adobe Photoshop The PhaserPrint ª software plug-in operates within the Photoshop application to improve the image data transfer time from your computer to your printer. Use the installer application on the printerÕs CD-ROM or diskettes to install the PhaserPrint software plug-in. The Þle is installed automatically with Easy Install. -
Page 94: Selecting Print Features
Printing Basics Selecting print features This printer supports several ways to select print features: Through a supported printer driver (recommended) Use these selections to override the settings on the printerÕs front panel. From the printer’s front panel Use these settings only when printing from a non-supported driver. - Page 95 Printing Basics Print features quick reference: Printer’s front panel Feature Feature Front Panel descriptions Print-quality modes Print Quality Menu page 3-26 Fast Color Standard Enhanced (600 x 300)* Color correction TekColor Correction Menu page 3-27 None Vivid Color Display SWOP Press SNAP Press Euroscale Press Commercial Press...
-
Page 96: Print Quality Modes
Printing Basics Print quality modes Using the printer drivers provided with your printer, you can select from three print quality modes: Produces the fastest full-color prints. This print-quality mode is Fast Color not available for transparency printing. Transparency prints made with this setting are printed using the Standard print-quality mode instead. -
Page 97: Color Corrections
Printing Basics Color corrections The printer provides TekColor Dynamic Correction software, which consists of the following color correction modes. Refer to ÒColor correction descriptionsÓ on page 4-6 for more information. Color correction mode Description None No correction made to colors. Used with the 600 x 300 (Enhanced) print quality mode for PANTONE Color matching. -
Page 98: All About Media
(such as Avery 5160). The size and grade of paper you select depends on your printing needs and whether you are using the paper tray or manually feeding media into the printer. Tektronix offers a Tabloid Maximum-size paper that measures 332.49 x 471.17 mm (13.09 x 18.55 in.) to accommodate printing of Tabloid/A3 full-size bleeds. -
Page 99: Media Sizes
215.90 x 355.60 mm (8.5 x 14 in.) Tabloid 279.40 x 431.80 mm (11 x 17 in.) 297 x 420 mm (11.69 x 16.54 in.) Tektronix 332.49 x 471.17 mm (13.09 x 18.55 in.) Tabloid Maximum* Custom sizes Width: 184.2 to 332.5 mm (7.25 to 13.09 in.) Length: 266.7 to 471.2 mm (10.5 to 18.55 in.) -
Page 100: Executive Letter A4
Printing Basics The following illustration shows the relative sizes of Relative media sizes. the media that the printerÕs media tray recognizes. Executive Letter Legal Tabloid Tektronix Tabloid Maximum 9662-73 Phaser 380 Color Printer 3-30... - Page 101 Printing Basics The printerÕs manual feeder recognizes seven different Manual feed sizes. Þxed media sizes: Executive, A4, Letter, Legal, Tabloid, A3 and Tabloid Maximum (for Tabloid/A3 full-size bleeds). The manual feeder also supports printing of custom media sizes, as well as printing of envelopes. The following table presents guidelines for selecting media sizes for use with the printerÕs manual feeder.
-
Page 102: Media Weight
Printing Basics Media weight The following table lists the supported weights for paper media printed from the media tray and from the manual feeder. Some thinner grades of paper may curl and cause media Note feeding problems. Always load curled paper concave- side down in the media tray. -
Page 103: Margins And Image Area
Printing Basics Margins and image area The image area is the part of the media where the printer is capable of printing. When the printer places an image on the media, the image area is always somewhat smaller than the actual media size. You may need to adjust the page margins in your application software to match the printable image area. -
Page 104: Paper And Ink Handling Tips
Printing Basics Paper and ink handling tips Keep the media supplies, trays, and ink in covered containers. Dust and dirt can be transferred to the paper, resulting in poor print quality. To avoid having the paper stick together, gently fan the media before loading it into the media tray. -
Page 105: Media Trays
Printing Basics Media trays Standard tray The printer is shipped with a universal media tray that accepts both paper and transparency media. The media tray supports media sizes ranging from 184.2 to 332.5 mm (7.25 to 13.09 in.) wide to 266.7 to 471.2 mm (10.55 to 18.55 in.) long. - Page 106 Printing Basics The media tray uses two adjustable, blue-colored Changing media sizes. guides to hold paper and transparency media in position. Each guide has two tabs that operate independently. To adjust a guide, press both tabs at the same time and slide the guide in or out to position it against the media. Tab number 1 controls the stop position of the guide at seven Þxed media sizes: Executive, A4, Letter, Legal, Tabloid, A3 and Tabloid Maximum.
-
Page 107: Lower Paper Tray
Printing Basics Lower paper tray The Lower Paper Tray Assembly, using the same universal media tray, operates identically to the printerÕs standard tray with one exception. It does not support printing of transparencies, and therefore ignores the position of the media-selector switch on the side of the media tray. The Lower Paper Tray Assembly accepts paper media only;... -
Page 108: Printing On Letterhead
Printing Basics Printing on letterhead Letterhead must be loaded face up in the media tray with the bottom edge of the page closest to the media tray handle. Set the media selector switch on the side of the printer to Paper. A label inside the media tray indicates the trayÕs maximum paper capacity, approximately 250 sheets. -
Page 109: Printing Transparencies
Printing Basics Printing transparencies Tektronix transparency media is recommended for use in this printer, as it provides optimal image quality, enhanced ink adhesion, and durability. Tektronix transparency media is available in A, A4 and Tabloid Maximum sizes. Do not use transparency media intended for ink-jet or Note thermal-wax printers. -
Page 110: Transparency Quality Tips
Printing Basics When you are printing transparencies using the standard media tray, load up to 100 transparency sheets in the tray. A label inside the media tray indicates the trayÕs maximum transparency capacity. Set the media selector switch on the side of the media tray to Transparency and install the media tray in the printer. -
Page 111: Manual-Feed Printing
Printing Basics Manual-feed printing Select Manual Feed from a supported printer driver. Click on the Print button. Go to the printer and open the manual-feed cover using the recessed Þnger tab. Adjust the guide on the inside of the manual-feed cover to match the media you are using. - Page 112 (duplex) printing, youÕll need to rotate the paper differently depending on whether you are printing portrait or landscape images. Portrait Landscape 9662-66 When you manually feed Tektronix Manual-feed transparencies: transparencies, orient the transparency notched corner closest to you with the notch on the right side. 9662-67...
- Page 113 Printing Basics When you manually feed envelopes, orient the Manual-feed envelopes: envelope with the printing side face down and the hinge of the ßap on the left side. 9662-92 After the Þrst sheet enters the printer, wait for the front panel to prompt you again before feeding the next sheet.
-
Page 114: Duplex Printing
Printing Basics Duplex printing The printer supports duplex printing from the manual-feed slot. Frequent duplexing increases the need to perform paper feed roller Note cleaning procedures. Refer to ÒIdentifying cleaning proceduresÓ on page 5-16 for more information. When you manually feed a paper sheet for second-side (duplex) printing, youÕll need to rotate the paper differently depending on whether you are printing portrait or landscape images. -
Page 115: Printer Languages: Postscript, Hp-Gl, Pcl5
The printer has default values for the HP-GL parameters, such as pen color and pen width. However, you can change these values. Refer to the printerÕs CD-ROM or TektronixÕ World Wide Web site for instructions. User Manual 3-45... -
Page 116: Fonts
Fonts For general information on fonts, you can request a document catalog from HAL or EuroHAL, TektronixÕ automated fax systems. Refer to ÒUsing the automated fax systemsÓ on page 6-3 for instructions on using HAL and EuroHAL. For instructions on downloading fonts and printing a fonts sampler, see the on-line manuals on the printerÕs CD-ROM. -
Page 117: Printerõs Extended Features Option
Printing Basics Printer’s Extended Features option If you have the printerÕs Extended Features option, ATM software and 69 fonts are included on a separate CD-ROM. ATM software helps your computer to display these fonts on screen as they will appear in your prints. Follow the instructions on the CD-ROM to install and use the fonts. - Page 118 Printing Basics Phaser 380 Color Printer 3-48...
-
Page 119: Printing: Beyond The Basics
Chapter Printing: Beyond the Basics Refer to the following topics: Working with color TekColor corrections Ñ making the best selection Using color sampler charts Methods of printing PANTONE Colors Using the Quick Collate option Previewing with Check Print Using Image Smoothing Printing Color Control Strip User Manual... -
Page 120: Working With Color
Printing: Beyond the Basics Working with color Whether you are producing color reports, memos, graphs, charts, overhead transparencies for presentations, color handouts, or design comps, there are a few things to keep in mind when using color. A large area of color looks more saturated (brighter) than a small area of the same color. - Page 121 TekColor color corrections are performed in the printer. To use ColorSync color matching on a Macintosh, or to use host color correction in Windows 95, refer to the printerÕs CD-ROM or TektronixÕ World Wide Web site for additional information. TekColor color corrections do not affect colors speciÞed in the...
-
Page 122: Deciding Which Color Correction To Use
Printing: Beyond the Basics Deciding which color correction to use Color printers and computer display screens produce color differently. Printers use the subtractive primaries CMYK (cyan, magenta, yellow, and black), and produce color when light is reßected off the paper. Computers use the additive primaries RGB (red, green, blue) with a light-emitting CRT screen. - Page 123 Raw RGB * For other ways of matching the screen’s colors, use ColorSync color matching on a Macintosh or use host color correction in Windows 95 (refer to the printer’s CD-ROM or Tektronix’ World Wide Web site for more information).
-
Page 124: Color Correction Descriptions
Printing: Beyond the Basics Color correction descriptions Turning off all color corrections If you do not want to use any TekColor color corrections, you can specify no corrections from a supported driver, with a PostScript utility Þle, from the printerÕs front panel or through PhaserLink software. Select None when you are doing the following: Using applications that do their own color adjusting Using ColorSync on a Macintosh or host color correction in... -
Page 125: Closely Match Printing Press Colors
Printing: Beyond the Basics Closely match printing press colors There are several printing press color correction options. Each press option conforms to a different printing standard. Use a press option if you are previewing work for a four-color job to be printed on a printing press. These options simulate a four-color commercial printing press, not solid spot colors, such as PANTONE Colors. -
Page 126: Printing In Gray Scale
Printing: Beyond the Basics Printing in gray scale The Monochrome option prints your color image as a monochrome gray scale (shades of gray between black and white). Use this option to print page masters for photocopying in black-and-white. Using the printer’s current color defaults The Use Printer Setting option is available only in the supported drivers. -
Page 127: Special Considerations
ColorSync color matching on a Macintosh, host color correction in Windows 95, or any other color management system (refer to the printerÕs CD-ROM or TektronixÕ World Wide Web site). If you are using an unsupported driver If you are not using one of the printer drivers shipped with the printer, or another PPD-driven driver, then use the downloadable utility Þles or the... -
Page 128: Printing And Using The Color Sampler Charts
Print from the Print from CD-ROM and Download from World Wide Web front panel diskettes Visit the Tektronix web site: See page 2-30. See “Printing the Color Sampler http://www.tek.com/Color_Printers/support/ Charts” on the CD-ROM. or use PhaserLink software to print sampler charts from your web browser. -
Page 129: Methods Of Printing Pantone Colors
Printing: Beyond the Basics Methods of printing PANTONE Colors There are two ways of working with PANTONE Colors: ÒPrinter-speciÞc PANTONE ColorsÓ on page 4-11 are process color simulations of PANTONE Spot Colors. ÒPANTONE Colors from swatch booksÓ on page 4-12 let you specify PANTONE Colors for printing on a press. -
Page 130: Pantone Colors From Swatch Books
Printing: Beyond the Basics PANTONE Colors from swatch books In some applications, you can select PANTONE Colors from a swatch book. These colors can be proofed on your Phaser 380 printer before Þnal printing on a printing press. Use the following instructions when printing proofs for these types of print jobs: Printing proofs for Þnal output on a 4-color printing press (no spot colors). -
Page 131: Using The Quick Collate Option
Extended Features option. The printer must also be connected to a 1.2-Gigabyte external SCSI hard disk before collation is possible. Tektronix offers a SCSI hard disk optimized for use with Tektronix printers; refer to ÒSCSI hard diskÓ on page 8-8 for ordering information. -
Page 132: Quick Collate And The Check Print Option
Printing: Beyond the Basics The number of pages that can be collated at one time depends on these factors: The number of hard disks attached to the printer. Complexity of the pages to be collated. According to these factors, the printer collates in sequential sets as many pages as will Þt in the available disk space. -
Page 133: Previewing With Check Print
Select Check Print in the Printer features (AdobePS 4 or Microsoft): field in the Device Options tab. Tektronix driver for Windows 3.1: Select Check Print options in the Tektronix Printer Features dialog box, available by clicking the Printer Features button in the Options dialog box. - Page 134 Printing: Beyond the Basics Check your Þrst print. At the Check Print message on the printerÕs front panel, press one of the buttons: Reprint: Reprints the Þrst page, then the printer pauses again for the duration of the selected timeout or until you press one of the buttons.
-
Page 135: Using Image Smoothing
Printing: Beyond the Basics Using Image Smoothing Image Smoothing blends the adjacent colors in an image so that color transitions are less noticeable. Image smoothing is typically used when the image being printed is at a lower resolution than the printerÕs output resolution. -
Page 136: Printing The Color Control Strip
Printing: Beyond the Basics Printing the Color Control Strip The Color Control Strip feature in supported printer drivers prints a band of colors along the bottom edge of your print job. Use this feature to check the consistency of printed colors between prints made on this printer and other printers. -
Page 137: Caring For Your Printer
Chapter Caring for Your Printer Overview The following topics will help you to care for the printer and keep it in peak operating condition: Adding ink Add ink when the ink level drops to one-half stick. The front panel displays an Ink Low message indicating when to add ink. Emptying the waste liner Empty the excess ink from the waste liner when a front panel message tells you that the waste liner is full or anytime you... -
Page 138: Adding Ink
Caring for Your Printer Adding ink Approximate time to complete: 1 minute The printer uses Phaser 380 ColorStix ¨ solid-ink sticks. The front panel displays a message telling you when the printer is low on ink, giving you time to reorder. When the printer is out of ink, it displays an Out of Ink message. -
Page 139: Ink Handling Tips
The print-quality setting and ink coverage per print affect the printerÕs ink consumption. To reorder additional ink sticks, contact your local dealer or, in the United States, call Tektronix at 1-800-835-6100 to locate a dealer near you. Printer ink sticks 016-1540-00 Phaser 380 ColorStix solid ink —... -
Page 140: Emptying The Waste Liner (A)
Caring for Your Printer Emptying the waste liner (A) Approximate time to complete: 3 minutes The waste liner (A) fits inside the maintenance tray (B) which is located behind the front cover. You should empty the waste liner when the front panel displays the following message: Waste Liner (A) Full Open Front Cover... - Page 141 Caring for Your Printer When you open the front cover, the following message appears: Waste Liner (A) Full Remove Tray (B) Grasp the maintenance tray by the front handles and lift up while sliding it out of the printer. 9662-29 You may notice an accumulation of ink, paper dust and drum ßuid on the maintenance tray blade of a used maintenance tray.
- Page 142 Make sure that the waste liner is fully seated in the maintenance tray. 9662-30 If you break a waste liner, you can obtain a replacement waste Note liner from Tektronix (order number 436-0308-00). Replace the maintenance tray in the printer. Close the front cover. Phaser 380 Color Printer...
-
Page 143: Replacing The Maintenance Tray (B)
Noises during the warm-up period are normal and are not an indication of a problem with the printer. To order a maintenance tray (Tektronix order number 436-0303-00), contact your local dealer or, in the United States, call Tektronix at 1-800-835-6100. User Manual... - Page 144 Caring for Your Printer Open the front cover. 9662-07 Some surfaces inside the printer may be hot. Be careful not to Caution touch the areas marked with this caution icon: When you open the front cover, the following message appears: Caution Hot Surfaces Install New Tray (B) Phaser 380 Color Printer...
- Page 145 Caring for Your Printer Grasp the maintenance tray by the front handle and lift up while sliding it out of the printer. 9662-29 You may notice an accumulation of ink, paper dust and drum ßuid on the maintenance tray blade of a used maintenance tray. These deposits are normal and do not affect its operation.
-
Page 146: Replacing The Media Tray Separator Pad
Caring for Your Printer Replacing the media tray separator pad Approximate time to complete: 2 minutes The printer uses a separator pad in the media tray to help separate sheets of media being drawn from the tray. If you often experience problems with the printer picking multiple sheets from the upper media tray or lower paper tray, you may need to replace the media tray separator pad. - Page 147 Caring for Your Printer Remove any media loaded in the tray and turn the tray over. 9662-85 Locate the two blue-colored tabs associated with the replaceable separator pad. Pinch the two blue tabs together to release the separator pad from the media tray and push it out from the tray. 9662-87 User Manual 5-11...
- Page 148 Caring for Your Printer Remove and discard the old separator pad. 9662-88 Install the new replacement separator pad. An alignment guide on the separator pad assembly ensures proper installation. When properly aligned, the separator pad should slide easily into Note position.
-
Page 149: Cleaning The Printer
Caring for Your Printer Cleaning the printer Periodically cleaning the printer keeps it in peak operating condition. Automatic cleaning procedures to cure many problems are available through the front panel by pressing the Clean button. Front panel messages guide you through the necessary steps to perform cleaning procedures. Cleaning pages The printer occasionally prints a cleaning page as part of a self-maintenance operation. -
Page 150: Cleaning Supplies
90% pure isopropyl alcohol (available at pharmacies). You can obtain pre-soaked alcohol wipes by ordering a separate cleaning kit from Tektronix or by ordering them in packs of 10 (Tektronix order number 006-7824-01). Reordering cleaning kit supplies To reorder the cleaning kit (Tektronix order number 016-1520-00), contact your dealer or local Tektronix ofÞce. -
Page 151: Using Isopropyl Alcohol
Caring for Your Printer Using isopropyl alcohol In general, it is best to use the purest isopropyl alcohol (99%) available to you. You can use 90% pure isopropyl alcohol, but if you do, you must wait after cleaning to make sure that printer parts are completely dry. 99% isopropyl alcohol dries quickly;... -
Page 152: Identifying Cleaning Procedures
Caring for Your Printer Identifying cleaning procedures Cleaning procedures are referenced by the type of printing problem you may be experiencing. Use the following tables to help you locate an appropriate cleaning procedure. Light stripes or missing colors Problem type Solution Missing or light-colored stripes on prints. -
Page 153: Cleaning For Light Stripes: Printhead
Caring for Your Printer Cleaning for light stripes: printhead Approximate time to complete: 3-10 minutes If your prints have 2.5 mm (1/10 in.) lengthwise stripes that are the wrong color or have missing colors, you can correct the problem by cleaning the printhead. - Page 154 Caring for Your Printer To conÞrm that the problem has been corrected, press the Test button to print a test page. Check for any missing color bars on the test page. Black Cyan Magenta Yellow 1 2 3 4 6 7 8 9 10 11 12 13 14 15 16 17 18 19 20 21 22 23 24 25 26 27 28 29 30 31 32 33 34 35 36 37 38 39 40 41 42 43 44 45 46 47 48 49 50 51 52 53 54 55 56 57 58 59 60 61 62 63 64 65 66 67 68 69 70 71 72 73 74 75 76 77 78 79 80 81 82 83 84 85 86 87 88 6 7 8 9 10 11 12 13 1 2 3 4 5 6 7 8 9 10 11 12 13 14 15 16 17 18 19 20 21 22 23 24 25 26 27 28 29 30 31 32 33 34 35 36 37 38 39 40 41 42 43 44 45 46 47 48 49 50 51 52 53 54 55 56 57 58 59 60 61 62 63 64 65 66 67 68 69 70 71 72 73 74 75 76 77 78 79 80 81 82 83 84 85 86 87 88 1 2 3 4 5 6 7 8 9 10 11 12 13 14 15 16 17 18 19 20 21 22 23 24 25 26 27 28 29 30 31 32 33 34 35 36 37 38 39 40 41 42 43 44 45 46 47 48 49 50 51 52 53 54 55 56 57 58 59 60 61 62 63 64 65 66 67 68 69 70 71 72 73 74 75 76 77 78 79 80 81 82 83 84 85 86 87 88...
- Page 155 Caring for Your Printer If one or more of the color bars are still missing, repeat the cleaning sequence. Press the Clean button once again to initiate a more aggressive cleaning sequence. When cleaning ends, the printer outputs a cleaning page that you may discard as normal ofÞce waste.
-
Page 156: Cleaning For Upper Tray Jams: Media Pick Roller
Caring for Your Printer Cleaning for upper tray jams: media pick roller Approximate time to complete: 5 minutes If you are experiencing media feeding problems including mispicks and multiple picks at the upper media tray, you can generally correct the problem by cleaning the media-pick roller with isopropyl alcohol. - Page 157 Caring for Your Printer Press the Clean button. A front panel message prompts you to install the cleaning tray in the upper media tray. Remove the upper media tray from the printer. Remove all print media from the media tray. Remove the cleaning tray from the cleaning kit and open the tray lid to reveal the cleaning tray sponge.
- Page 158 Caring for Your Printer Place the cleaning tray in the media tray so that the trayÕs sponge pad is nearest the paper trayÕs handle. Press the two tabs underneath the cleaning tray into the two square notches provided in the media tray. 9662-47 Gently insert the upper media tray with the cleaning tray into the printer.
- Page 159 Caring for Your Printer To remove paper dust, use a clean cloth or a dry brush to wipe the separator pad located inside the media tray near the paper trayÕs handle. If the separator pad appears worn or the printer is picking Note multiple sheets of media, consider replacing the separator pad.
-
Page 160: Cleaning The Upper Pick Roller Manually
Caring for Your Printer Reload media in the media tray. Replace the upper media tray in the printer. Press the Exit button to return to normal operation. Store the cleaning tray in its original packaging for later use. If media-feed problems persist, you may need to manually clean the media-pick roller by hand with an alcohol-soaked cloth. - Page 161 Caring for Your Printer Grasp the maintenance tray by the front edge and lift up while sliding it out of the printer. Place the maintenance tray on a level surface. 9662-29 Once the maintenance tray has been partially used, it leaks drum Note ßuid if tipped.
- Page 162 Caring for Your Printer Scrub the surface of the media-pick roller thoroughly. If the cloth becomes dirty, discard it and use another. 9662-76 Replace the maintenance tray in the printer. Close the front cover. Phaser 380 Color Printer 5-26...
- Page 163 Caring for Your Printer Locate the bottom of the media-pick roller according to the following illustration. 9662-62 Using an alcohol-soaked cloth, scrub the bottom surface of the pick roller thoroughly. 9662-75 Replace the upper media tray in the printer. User Manual 5-27...
-
Page 164: Cleaning For Jams And Ink Smears: Media-Feed Rollers
Caring for Your Printer Cleaning for jams and ink smears: media-feed rollers Approximate time to complete: 5 minutes If you have already performed the ÒCleaning for ink smears: internal paper pathÓ cleaning procedure but ink smear problems persist, clean the upper and lower paper feed rollers.You should clean the upper and lower media feed rollers if any of the following conditions exist: Media is consistently jamming behind the front cover or at the... - Page 165 Caring for Your Printer When the printer is on and the Ready message or the printerÕs name appears, press the Clean button. The printer displays the Þrst selection in the menu: Clean:Light Stripes <---- Clean Test Press the left arrow(<---) button until the following message appears: Clean:Feed Rollers <----...
- Page 166 Caring for Your Printer Open the front cover. 9662-07 The following message appears: Turn Upper Feed Rollers Clean Cancel Hot surfaces exist behind the upper paper-feed rollers. To avoid Caution personal injury during cleaning procedures, do not reach in behind the paper feed rollers. Phaser 380 Color Printer 5-30...
- Page 167 Caring for Your Printer There are two sets of upper media-feed rollers located above the maintenance tray. One set of rollers is rubber; the other set is white plastic. Turning the upper rubber rollers also turns the upper plastic rollers. To clean the upper rollers, wet the front and back sides of a cleaning card and place it between the upper black and white rollers at the far left side of the printer.
- Page 168 Caring for Your Printer Press the left arrow(<---) button until the following message appears: Clean:Lower Feed Rollers <---- Clean Cancel Press Clean, the following message appears: Turn Lower Feed Rollers Clean Cancel There are two sets of black, lower media-feed rollers located below the maintenance tray.
- Page 169 Caring for Your Printer After the printer turns the rollers several times, move the cleaning card to the right to continue cleaning the lower media-feed rollers. Repeat Steps 14 and 15 until all lower media-feed rollers have been cleaned. If a cleaning card becomes dirty during cleaning, discard it and use another.
-
Page 170: Cleaning For Lower Tray Jams: Paper Pick Roller
Caring for Your Printer Cleaning for lower tray jams: paper pick roller Approximate time to complete: 5 minutes If you are experiencing media feeding problems including mispicks and multiple picks at the Lower Paper Tray Assembly, you can generally correct the problem by cleaning the media-pick roller with isopropyl alcohol. - Page 171 Caring for Your Printer Press the Clean button. A front panel message prompts you to install the cleaning tray in the lower paper tray. Remove the lower paper tray from the printer. Remove all paper from the paper tray. Remove the cleaning tray from the cleaning kit and open the tray lid to reveal the cleaning tray sponge.
- Page 172 Caring for Your Printer Place the cleaning tray in the lower paper tray so that the trayÕs sponge pad is nearest the paper trayÕs handle. Press the two tabs underneath the cleaning tray into the two square notches provided in the media tray. 9662-60 Insert the paper tray with the cleaning tray into the Lower Paper Tray Assembly.
- Page 173 Caring for Your Printer Remove the cleaning tray from the paper tray. To remove paper dust, use a clean cloth or a dry brush to wipe the separator pad located inside the paper tray near the paper trayÕs handle. 9662-61 Use a clean cloth or a dry brush to wipe the cork pad located in the bottom of the media tray.
-
Page 174: Cleaning The Lower Paper-Pick Roller Manually
Caring for Your Printer The front panel re-displays the following message: Clean:Jam At Lower Tray <---- Clean Test Press the Exit button to return to normal operation. Store the cleaning tray in its original packaging for later use. If media feed problems persist, you may need to manually clean the media-pick roller by hand with an alcohol-soaked cloth. -
Page 175: Cleaning For Lower Tray Jams: Paper-Feed Rollers
Caring for Your Printer Cleaning for lower tray jams: paper-feed rollers Approximate time to complete: 5 minutes The Lower Paper Tray AssemblyÕs paper-feed rollers carry the paper from the lower paper tray up to the printerÕs feed rollers. Occasionally, paper particles become attached to the Lower Paper Tray AssemblyÕs paper feed rollers creating slick or contaminated surfaces. - Page 176 Caring for Your Printer Remove the upper media tray from the printer and the following message appears: Turn Lower Tray Rollers Clean Cancel To clean the lower paper trayÕs rubber transport rollers, wet the front and back sides of a cleaning card and place it into the slot provided on the top of the Lower Paper Tray Assembly.
-
Page 177: Cleaning For Ink Smears And Transfix Problems: Internal Paper Path
Caring for Your Printer Cleaning for ink smears and transfix problems: internal paper path Approximate time to complete: 3-20 minutes If your prints have oil stains, stray ink marks on the front or the back, or the media is wrapping around the transÞx roller inside the top cover, you can correct the problem by cleaning the printerÕs internal paper path. - Page 178 Caring for Your Printer Press the Clean button. The printer displays the following message: Clean:Ink Smears Quick Extended Press the Quick button. After a short delay during the warm-up period, the printer begins an automatic sequence of feeding 5 clean sheets of paper from the upper media tray. A front panel message indicates the number of sheets remaining to be fed.
-
Page 179: Cleaning For Ink Smears: Paper-Exit Path
Caring for Your Printer Cleaning for ink smears: paper-exit path Approximate time to complete: 10 minutes If you have already performed the ÒCleaning for ink smearsÓ cleaning procedure but problems persist, you should clean the paper-exit path. Refer also to ÒCleaning for jams and ink smears: media-feed rollersÓ on page 5-28. If you have already performed the ink smear cleaning procedures for the internal paper path and the paper feed rollers but problems persist, you should manually clean the paper exit path. - Page 180 Caring for Your Printer When the printer is on and the Ready message or the printerÕs name appears, press the Clean button. The printer displays the Þrst selection in the menu: Clean:Light Stripes <---- Clean Test Press the left arrow(<---) button until the following message appears: Clean:Feed Rollers <----...
- Page 181 Caring for Your Printer To clean the rubber exit rollers from the outside of the printer, place an alcohol-soaked cleaning cloth against the rubber rollers in the exit tray (where the prints are ejected). Start from the far left side of the printer. 9662-79 While Þrmly holding the cleaning cloth against the exit rollers, press the Clean button on the front panel to turn the exit rollers.
- Page 182 Caring for Your Printer To check the condition of the exit Þngers, Þrst open the front cover. 9662-07 Open the exit cover using the blue release button located inside the front cover at the top of the printer. 9662-42 To clean excess ink particles and drum ßuid from the blue-colored exit Þngers, gently wipe the top surface of each Þnger using a dry swab.
- Page 183 Caring for Your Printer To avoid damaging the print drum and exit Þngers, never Caution scrape excess ink with a tool or Þngernail. Use a dry swab provided with the cleaning kit. 9662-43 If ink ßakes from the exit Þngers fall into the printer, they can Note cause print quality problems.
- Page 184 Caring for Your Printer To clean the white plastic exit rollers, place and hold an alcohol-soaked cloth on top of each roller while turning the individual roller with your thumb or foreÞnger. 9662-80 To avoid damaging the print drum and exit Þngers, never Caution scrape excess ink with a tool or Þngernail.
-
Page 185: Cleaning The Maintenance Tray Blade (Optional)
Caring for Your Printer Cleaning the maintenance tray blade (optional) During normal use, you may notice an accumulation of ink, paper dust and drum ßuid on the maintenance tray blade. In most cases, build-up of deposits on the blade does not affect the operation of the maintenance tray. Cleaning of the blade is not normally necessary. - Page 186 Caring for Your Printer Grasp the maintenance tray by the front handle and lift up while sliding it out of the printer. Place the maintenance tray on a level surface. 9662-29 Once the maintenance tray has been partially used, it leaks drum Note ßuid if tipped.
- Page 187 Caring for Your Printer Using a dry, lint-free cloth, clean one end of the maintenance tray blade by lightly wiping the blade from the center and moving outward. Pay particular attention to cleaning the upper edge of the blade closest to the felt pad. Cleaning the sides of the blade is not necessary and is not recommended.
- Page 188 Caring for Your Printer Clean the other end of the blade by wiping from the center of the blade and moving outward in the opposite direction. 9662-72A Install the maintenance tray in the printer. Close the front cover and wait for the printer to warm up. Phaser 380 Color Printer 5-52...
-
Page 189: Moving Your Printer
Caring for Your Printer Moving your printer Before moving the printer, follow these three important steps as described later in detail. Turn off the printer and wait for at least 45 minutes. Remove the maintenance tray (B). Lock the transit restraint. Waiting 45 minutes before moving To avoid damaging the printer, let the printer cool down for at Caution... -
Page 190: Removing The Maintenance Tray (B)
Caring for Your Printer Removing the maintenance tray (B) Remove the maintenance tray from the printer, keeping it level. Remove, empty, and replace the waste liner if it contains large deposits of waste ink. Refer to ÒEmptying the waste liner (A)Ó on page 5-4 for detailed instructions. -
Page 191: Locking The Transit Restraint
Caring for Your Printer Locking the transit restraint Refer to the following illustration while performing these steps. When the printer displays the Ready message or the printerÕs name, power it down using the rear-panel On/Off switch. The printer places the printhead in the locking position. To avoid damaging the printerÕs internal components, always turn Caution the printer power off and lock the transit restraint before moving the... -
Page 192: Changing Line Voltage
If you move the printer to a country that uses a different line voltage, the printer automatically switches to use the new line voltage. The new location may require a different power cord; contact your local Tektronix ofÞce or dealer for details. -
Page 193: Troubleshooting
Chapter Troubleshooting If you need help If you need assistance, contact your local Tektronix dealer or sales representative or any of these listed resources: Type of service How to access Details Product Support U. S. and Canada Monday through Friday... -
Page 194: Receiving Email Update Notices
Receiving email update notices Using the World Wide Web, you can register to receive email notiÞcation of new printer drivers, accessories and upgrades for your Tektronix Phaser color printer as they become available. To subscribe to this free service, simply follow these steps: Point your browser to the Tektronix web site: http://www.tek.com/Color_Printers/support/subscribe.html... -
Page 195: Using The Automated Fax Systems
Using the automated fax systems As an alternative to other resources, and to provide up-to-date information quickly, Tektronix has set up HAL (Highly Automated Library), EuroHAL and OzHAL interactive, automated fax systems. These automated fax systems provide Macintosh, PC, and workstation users with the latest... -
Page 196: Front Panel Messages
Try turning off the printerÕs power and wait at least 15 seconds before turning the power on again. If that does not solve the problem, call your local Tektronix ofÞce for assistance or call Tektronix Service in the U.S. and Canada at 1-800-835-6100. - Page 197 Troubleshooting Front panel messages (cont'd.) Message Explanation/Action Maintenance tray (B) is empty. Open the front cover, Install New Tray (B) remove the maintenance tray and replace it with a new maintenance tray. Open the front cover, press the exit cover release Jam At Exit Tray button and remove the jammed paper.
- Page 198 Troubleshooting Front panel messages (cont'd.) Message Explanation/Action There is a paper jam at the upper media tray as Jam:Remove Upper opposed to the lower paper tray. Remove the upper Tray media tray and the jammed media. Jam:Remove Media You may need to clean the paper-pick or paper-feed rollers.
- Page 199 Troubleshooting Front panel messages (cont'd.) Message Explanation/Action Insert paper or transparency in the manual-feed slot. Waiting For Manual Feed The print job specifies paper but the printer detects Waiting For Paper that the transparency tray is installed. Load paper in the media tray and press Check that the media selector switch on the side of the tray is set for Paper.
-
Page 200: Problems And Solutions
Media feeding or jamming problems Symptom Solution Media feed or pick Use standard weight paper or Tektronix transparency problems at the upper media. Do not load the tray beyond the fill line. Paper tray tray. capacity is 250 sheets paper or 100 sheets transparency. - Page 201 Make sure that the proper page size is selected for the slot. Align paper against the left edge of the manual-feed slot. Use standard weight paper or Tektronix transparency media. Refer to “All about media” on page 3-28. Select Manual Feed and the appropriate page size in the printer driver.
- Page 202 Troubleshooting Image quality problems (cont'd.) Symptom Solution Printed image is shifted, You may have to make adjustments in the application the wrong color, or or print driver. Refer to “Printing and installation margins are not correct. problems” on page 6-12. Make sure that the paper is not curled.
- Page 203 PostScript. If you are running Windows, use the of color. Tektronix-supplied driver that was shipped with the printer’s software. Refer to “Printing from a workstation” on page 3-20 for information on drivers. Microsoft Excel users: Be sure to check the Print using color option in the print dialog box.
- Page 204 Tektronix World Wide Web site: http://www.tek.com/Color_Printers/userdoc/introduction.html Information on printing from specific applications is also available by contacting HAL, the Tektronix automated information system. Refer to “Using the automated fax systems” on page 6-3 Text prints in Courier The font you have specified is not available. The font.
- Page 205 MODE LPT1:,,P (for parallel port LPT1) MODE COM1:9600,N,8,1,P (for serial port COM1) Windows users: Double-click on the Control Panel. Double-click the Printers icon. Choose your Tektronix printer. Click the Connect button. Change the Transmission Retry to 850. Parallel port printing: If you get a timeout from the Connect dialog box, change the Ports selection from LPTX to LPTX.DOS.
- Page 206 Check to see if a print job is stuck in the print queue. Refer to “Using a PostScript error handler” on page 6-27 for details on using the Tektronix Error Handler to determine the cause of the problem. Turn the printer’s power off and wait at least 15 seconds before turning the power on again.
- Page 207 Troubleshooting Printing and installation problems (cont'd.) Symptom Solution Wakeup Cancel The printer processes a To recover, press the button or file sent via the serial or turn the printer’s power off, wait at least 15 seconds, and parallel port and the job turn the power on again.
- Page 208 Troubleshooting Operational hints (cont'd.) Hint/Symptom Solution Ink Low message Apply pressure to each row of ink sticks in the loading bin appears when ink bins to make sure they are not jammed. are full. Delayed printout. See “Printer standby modes” on page 7-8. Printer outputs two prints Printer is clearing print drum and reprinting image.
-
Page 209: All About Media Jams
Troubleshooting All about media jams Use the following guidelines to help prevent paper and transparencies from jamming inside the printer. When installing a new maintenance tray, push on both sides of the tray to latch it Þrmly into the printer. Periodically clean the printer to keep it operating in peak condition. -
Page 210: Locating Jammed Media
Troubleshooting Locating jammed media Paper jams can occur in these places: Inside the exit cover Inside the front cover At the manual-feed slot At the upper media tray and Lower Paper Tray Assembly. 9662-50 Some surfaces inside the printer may be hot. Be careful not to Caution touch the areas marked with this caution icon: Phaser 380 Color Printer... -
Page 211: Removing Jammed Media
Troubleshooting Removing jammed media To avoid ink smears inside the printer, always try to pull jammed paper or transparency media out through the top of the printer (the exit cover). If the jammed media cannot be cleared from the exit cover, open the front cover and check for jammed media. - Page 212 Troubleshooting If necessary, open the exit cover using the blue release button located inside the front cover, at the top of the printer. 9662-42 Using both hands, pull the jammed media out the top of the printer. 9662-51 If necessary, remove the media tray to locate and clear jammed media.
-
Page 213: General Things To Check For
If you've conÞgured a supported driver for your printer but your printer isn't printing, try the following suggestions. If these suggestions fail to solve the problem, use the Tektronix PostScript Level 2 error handler utility to determine what is wrong. Refer to ÒUsing a PostScript error handlerÓ on page 6-27 for information on using the error handler. -
Page 214: Windows Users (General)
Troubleshooting Windows users (general) Check to make sure that you have conÞgured the communications ports and the Handshake option correctly. Refer to ÒPrinting Help Pages from the front panelÓ on page 2-30 for information on printing a ConÞguration Page. Make sure that you are using the correct cables for your computer and printer. -
Page 215: Windows 3.1
Troubleshooting If you are using PC/NFS If you have PC/NFS (Personal Computer/Network File System) software installed on your computer, you need to make the following selection in the Network Options dialog box: From the Main window, double-click the Print Manager icon. From the Options menu in the Print Manager, select Network Settings. -
Page 216: Windows 95
Troubleshooting Windows 95 Select Start in the taskbar on your screen. In the menu that appears, select Settings. In the next menu, select Printers; the Printers window appears. Click on your printerÕs icon and select Properties from the File menu. Click the Details tab. - Page 217 Troubleshooting Check the printer’s language mode If your Þle doesnÕt print, the language on the printerÕs port you are using may have been changed. Print a copy of the printerÕs ConÞguration Page to see the language mode on each port. Refer to the on-line manual on the printerÕs CD-ROM for instructions on printing a ConÞguration Page.
-
Page 218: Postscript Printing Errors
Refer to the on-line manual on the printerÕs CD-ROM or ÒIf you need helpÓ on page 6-1 for information on TektronixÕ online services. To determine the date of the Þle you are using, do the... -
Page 219: Using A Postscript Error Handler
Troubleshooting Using a PostScript error handler The error handling utility is useful for diagnosing problems when a job doesnÕt print. This utility installs a PostScript error-handling function in the printer to help determine the cause of some PostScript printing problems. PostScript errors are printed on a page with other status information when an error occurs. -
Page 220: Fixing Timeout Problems In Windows
Troubleshooting Fixing timeout problems in Windows If print jobs are timing out and not printing, you may need to increase the timeout values in Windows and in the printer. Try one of the following procedures to change the Windows timeout. If the Windows procedure doesnÕt work for you, try the DOS procedure. -
Page 221: Windows Timeout: From Dos (And Windows 3.1)
Troubleshooting Windows timeout: From DOS (and Windows 3.1) To use this procedure, the printer must be connected directly to Note your computer, not on a network. At the DOS prompt, issue the DOS MODE command by typing the following: MODE LPT1:,,P Start Windows 3.1. - Page 222 Troubleshooting The TIMEOUTS.PS Þle affects printer operation. If the printer is Note shared on a network, using this Þle may affect the prints requested by other users. Locate the utility Þles in the PHSR380 directory on the printerÕs CD-ROM. Copy the TIMEOUT.PS Þle to your hard disk. Open the Þle using a text editor.
-
Page 223: Printed Colors Are Not What You Expected
Troubleshooting Printed colors are not what you expected In general Check the printer settings in the printer driver. Try selecting another Color Correction option. Supported printer drivers provide access to the various TekColor color corrections. Refer to ÒColor correction descriptionsÓ on page 4-6 for more information. -
Page 224: Printing Pantone Colors
If you have questions about PANTONE Color Matching, you can get information in the following places: HAL: Request a document catalog from HAL or EuroHAL, TektronixÕ automated fax systems. Refer to ÒUsing the automated fax systemsÓ on page 6-3 for instructions on using HAL and EuroHAL. -
Page 225: Using The Tektronix Halftone Screens
Troubleshooting Using the Tektronix halftone screens Tektronix halftone screens are designed for Tektronix printers, and improve print quality over application-set halftone screens. The Setscreen Off (SCRENOFF.PS) utility Þle redeÞnes some PostScript operators, such as the setscreen, setcolorscreen and sethalftone. By default, the printer prevents applications from overriding the Tektronix proprietary halftone screens. -
Page 226: Pc And Workstation Users
Troubleshooting PC and workstation users Locate the utility Þles in the PHSR380 directory on the printerÕs CD-ROM. Copy the Þles that you need to your computerÕs hard disk or use them directly from the CD-ROM. Use one of the following methods to send the SCREENON.PS or the SCRENOFF.PS Þle to the printer: PC users: Use the DOS COPY command to send the Þle to the printer. -
Page 227: Selecting Page Sizes In Windows Applications
Windows 3.1 From the Main window, open the Control Panel and double-click the Printers icon. In the Printers dialog box, select the Tektronix Phaser 380 printer in the list of printers. Click the Setup button. In the Setup dialog box, select the page size you want and click OK. -
Page 228: Windows 95
Troubleshooting Windows 95 Click the Start icon in the taskbar on your computer screen; a menu appears. Move the cursor over Settings; another menu appears. In the menu, click Printers; the Printers window appears. In the Printers window, select the Phaser 380 printer icon, then select Properties from the File menu. -
Page 229: Fonts Printing Incorrectly From Windows
Fonts printing incorrectly from Windows If fonts are printing incorrectly from Windows, make sure you installed the correct printer with either the Tektronix driver for Windows 3.1, or with the Windows 95 PostScript driver. If you have the standard version of the printer, you should have installed Tektronix Phaser 380. -
Page 230: Sharing The Printer On A Network
Troubleshooting Sharing the printer on a network Driver, utility files, and front panel interactions If your Phaser 380 printer is shared by other users on a network, using the downloadable utility Þles or the printerÕs front panel to change the printerÕs default color correction setting can affect prints made by other users. -
Page 231: If The Laserwriter Utility Does Not Work
Troubleshooting When you print from a non-supported driver, your images are printed with one of the following selections: A color correction utility Þle, if one has been downloaded to the printer. The selection on the printerÕs front panel TekColor Corrections menu. - Page 232 Troubleshooting Phaser 380 Color Printer 6-40...
-
Page 233: Using The Front Panel
Chapter Using the Front Panel Front panel overview The printerÕs front panel provides you with information about the printerÕs operation, as well as buttons for accessing printer menus. Front panel indicators The front panel also includes two indicator lights: Power (green LED) Error (red LED) Power Error... -
Page 234: Front Panel Buttons
Using the Front Panel Front panel buttons The Exit button allows you to perform these menu functions: Back up a level in the menu without making a selection. Exit the menu. Button 2, labeled Info, lets you cycle through information such as the printerÕs name, print server name, and the printerÕs IP address. -
Page 235: Two-Line Display
Using the Front Panel Two-line display The two lines of the display have the following functions: Line 1 Displays status messages such as Ready, Printing or the printerÕs name. Displays operation errors and warnings such as Out Of Ink. Displays the names of menus and parameters you can set. Line 2 Displays button labels such as <---- for previous, ---->... -
Page 236: Enabling And Disabling The Front Panel Menu
Using the Front Panel Enabling and disabling the front panel menu The printer allows a system administrator to lock the front panel menu by downloading a utility Þle. In this protected mode, you can print the pages in the Help Pages menu, but cannot modify any settings in the rest of the menu. For more information on enabling and disabling the front panel menu, refer to the printerÕs CD-ROM or the World Wide Web. -
Page 237: Front Panel Menu Map
Using the Front Panel Front panel menu map ® Phaser 380 Menu Map <--- scrolls backward through available selections ---> scrolls forward through available selections Press Menu enters the next sub-menu Menu Exit exits without making a change accepts the displayed value as the new setting Help Pages Exit <---... -
Page 238: Printer Help Pages
Using the Front Panel Printer Help Pages The printer has several Help Pages that you can print from the front panel to learn more about the printer. Menu Map The menu map provides a graphical view of the front panel menus. The menu map can be used as a convenient navigation aid for quickly determining the location of menu items. -
Page 239: Demonstration Page
Using the Front Panel Demonstration Page You can print copies of a sample demonstration page through the front panel or through the World Wide Web (refer to the PhaserShare Status Software User Manual.) RGB and CMYK Color Samplers The RGB and CMYK color samplers provide multi-page charts containing color samples and their corresponding color values based on the RGB and CMYK color models. -
Page 240: Printer Standby Modes
Using the Front Panel Printer standby modes You can change or disable Energy Star settings through the front panel (refer to ÒFront panel menu mapÓ on page 7-5) or through the World Wide Web (refer to the PhaserShare Status Software User Manual.) When the printer is idle for more than 4 hours, it goes into a Idle for 4 hours standby mode that keeps the printer ready to use yet reduces energy... -
Page 241: Selecting The Cleaning Page Source
Using the Front Panel Selecting the cleaning page source The printer picks sheets of paper from a designated media tray as part of its self-maintenance and jam recovery routines. The default cleaning page source for the printer is the upper tray. When the Lower Paper Tray Assembly is installed, you can change the source of the cleaning page to the lower tray to prevent the printer from using transparencies or letterhead loaded in the upper paper tray. - Page 242 Using the Front Panel Phaser 380 Color Printer 7-10...
-
Page 243: Supplies, Accessories, And Expanding Your Printer
Printer Tektronix supplies: the mark of quality Tektronix supplies are developed and tested as a total system Ñ printer, ink, and media. These system components work together to produce consistent, high-quality color images. For the best results, order Tektronix supplies. -
Page 244: Ordering Printer Supplies
(XX Ordering versions: -00 English, -10 French, -20 Italian, -30 German, -40 Spanish, -70 Simplified Chinese, -80 Traditional Chinese, -90 Korean) 063-2665-00 Adobe Type Manager software CD-ROM, used with Extended Features configuration * Tektronix transparency offers enhanced ink adhesion and superior print quality. Phaser 380 Color Printer... -
Page 245: Interface Cables And Adapters
Supplies, Accessories, and Expanding Your Printer Interface cables and adapters The following cables and adapters are available through Tektronix or your dealer. Contact your dealer for other cables and adapters. Printer interface cables and adapters Order number Description Connectors and cable length... -
Page 246: Extended Features Upgrade
To determine if your printer has the Extended Features option, check the printerÕs Startup Page. For information on the Startup Page, refer to ÒPrinter Help PagesÓ on page 7-6. To order the Extended Features upgrade for a Phaser 380 printer, use Tektronix order number Z380FX. Phaser 380 Color Printer... -
Page 247: Lower Paper Tray Assembly (Recommended)
Tabloid Maximum-size media from the upper tray and use the lower tray for printing on an alternate size of paper, such as Letter-size. To order an optional Lower Paper Tray Assembly, use Tektronix order number Z380LTA. Printer Station (recommended) The Printer Station is designed to safely support the weight of the Phaser 380 color printer (100 kg/200 lbs.) and the printerÕs Lower Tray Assembly... -
Page 248: Memory Upgrade
Supplies, Accessories, and Expanding Your Printer Memory upgrade In its standard conÞguration, the Phaser 380 printer has 16 Mbytes of Memory. 16 Mbytes of memory. You can upgrade the printer to 48 Mbytes or 64 Mbytes of memory to gain printing features and improve performance. The Startup Page reports how much RAM memory is installed in Note the printer. -
Page 249: Phasershare Network Cards (Recommended)
Supplies, Accessories, and Expanding Your Printer PhaserShare network cards (recommended) Tektronix PhaserShareª network cards offer high-performance network connectivity for your color printer. PhaserShare network cards can be easily installed in your printer. Order number Description Z350FP1 Adds Ethernet interface; includes support for Novell NetWare, EtherTalk, TCP/IP, Telnet and FTP. -
Page 250: Phaser Copystation
External collation disk. For printers with the Extended Features option, you can connect a 1.2-Gigabyte SCSI hard disk for multi-page job collation. Tektronix offers a SCSI hard disk (order number Z350DSK) that is optimized for use with Tektronix printers. Refer to ÒUsing the Quick Collate optionÓ... -
Page 251: Phaserprint For Unix Software
Supplies, Accessories, and Expanding Your Printer PhaserPrint for UNIX software For printing in Unix environments, Tektronix offers PhaserPrintª for UNIX software. PhaserPrint software provides fast raster Þle and screen copy printing to Tektronix color printers. PhaserPrint software also provides a graphical user interface for push-button control of Tektronix printer features. - Page 252 Supplies, Accessories, and Expanding Your Printer 8-10 Phaser 380 Color Printer...
-
Page 253: Regulatory Information And Specifications
Chapter Regulatory Information and Specifications Declaration of conformity Tektronix, Inc. Color Printing and Imaging Division P.O. Box 1000 Wilsonville, Oregon 97070-1000 U.S.A. declares, under our sole responsibility, that the product Phaser 380 printer (Z380) to which this declaration relates, is in conformity with the following standard(s) -
Page 254: Canadian Emc (Electromagnetic Compatibility) Regulatory Standards
The equipment described in this manual generates and uses radio frequency energy. If it is not installed and used properly in strict accordance with TektronixÕ instructions, it may cause interference with radio and television reception. This equipment has been tested and found to comply with the limits for a Class B veriÞed digital device, pursuant to Part 15 of the FCC Rules. -
Page 255: Material Safety Data Sheets
Tektronix and its subsidiaries operate. Tektronix, Inc. is complying with government regulations by providing Material Safety Data Sheets for our products. Color Printing and Imaging Division Tektronix, Inc. -
Page 256: Msds For Colorstix Ink Sticks
Regulatory Information and Specifications MSDS for ColorStix ink sticks Section I – Product identification Trade name and Tektronix part number: ® ColorStix Solid Ink — Black 016-1540-00 ColorStix ® Solid Ink — Cyan 016-1541-00 ColorStix ® Solid Ink — Magenta... - Page 257 RCRA: TCLP below hazardous waste levels set by EPA. CERCLA: No reportable quantity for this material. California Prop. 65: Not listed. Section XVI – Other information Original preparation date: August 23, 1994 R.C. Tektronix, Inc. P.O. Box 500 Chemical Documentation Mail stop 55-769 Beaverton, Oregon 97077...
-
Page 258: Msds For Silicone Oil
No special requirements. Section VIII – Exposure control – personal protection Exposure Guidelines: None established. Engineering Controls: None needed when used as intended in Tektronix printers. Eye Protection: None needed. Skin Protection: None should be needed. Respiratory Protection: None needed. - Page 259 TSCA: This product is listed in the Toxic Substances Control Act inventory as verified by our suppliers. OSHA: Not considered a hazardous material as defined by 29CFR1910.1200 Hazard Communication. Section XVI – Other information Original preparation date: October 21, 1994 R.C. Tektronix, Inc. P.O. Box 500 Chemical Documentation Mail stop 55-769...
-
Page 260: Specifications
Regulatory Information and Specifications Specifications Printer tilt Place the printer on a level surface with no more than 2¡ tilt in any direction. Equivalent to raising one corner of the printer approximately 16 mm (0.625 in.). Tilting the printer more than 2¡ causes drum ßuid to leak from Caution the maintenance tray resulting in damage to your printer not covered by the printerÕs warranty. -
Page 261: Safety And Emissions
Regulatory Information and Specifications Power consumption Operating power consumption: 150 to 600 Watts Meets Energy Star power conservation requirements with the Energy Star timeout set to one hour. Printer Dimensions Height: 50.7 cm (20 in.) Depth: 64.2 cm (25.3 in.) Width: 59.9 cm (23.6 in.) Weight:... - Page 262 Regulatory Information and Specifications Phaser 380 Color Printer 9-10...
- Page 263 Index CD-ROM topics banding on prints, cleaning 5-17 Color Matching blue color adjust 4-6 Help Pages and Menus buttons, front panel 7-2 Improving Print Speed Printing from DOS Printing from UNIX and VMS Workstations Printing the Color Sampler Charts cables Using Different Printer Language modes ordering 8-3 Using Fonts...
- Page 264 cleaning (contÕd) ColorStix¨ ink sticks pre-soaked cloth 5-15 adding 5-2 printdrum 5-47 order numbers 5-3 printhead 5-17 precautions 5-3 separator pad, lower tray 5-37 Commercial Press color correction separator pad, upper tray 5-23 description 4-7 supplies, illustrated 5-14 Macintosh printer driver 3-18 upper pick rollers 5-20 communication ports 3-6 upper tray jams 5-20...
- Page 265 drivers (contÕd) using Fast Color print mode 3-26 Macintosh 3-18 fax back system (HAL) 6-3 Windows 3.1 3-10 features selecting in a Windows driver 3-3 Windows 95 3-4 fonts drum ßuid Adobe Type 1 and Type 3 3-46 cleaning 5-46 listed on startup page 8-6 precaution 5-9 memory upgrade required 8-6...
- Page 266 ink smears cleaning 5-43 HAL Ñ Highly Automated Library 6-3 identifying 5-16 halftone screens, printer 6-33 media feed rollers 5-28 handling media 3-34 preventing 6-19 hard disk, SCSI installers connecting 2-24 Macintosh, using 2-47 selecting 2-24 PC, using 2-31 Help pages installing printing 2-30 ink 2-13...
- Page 267 LocalTalk/serial connection 2-22 manual feed media locking front panel menus 7-4 Macintosh printer driver 3-18 locking the transit restraint 5-55 media Lower Paper Tray Assembly handling tips 3-34 Þll label 3-35 image area 3-33 installing tray 2-8 loading curled paper 2-16 loading tray 2-16 Media Sampler kit 2-15 paper only 2-14...
- Page 268 Monochrome color correction description 4-8 packing material Macintosh printer driver 3-18 removing 2-7 moving the printer 5-56 Page Setup dialog box locking the transit restraint 5-55 Macintosh printer driver 3-18 precautions 5-54 PANTONE removing the maintenance tray 5-54 Colors, printing 6-32 paper 3-28 acceptable types 3-28 network connections...
- Page 269 paper, lower pick roller cleaning 5-34 PhaserSym parallel cable capabilities 8-9 connection 2-23 for workstations 3-21 ordering 8-3 order number 8-9 parallel port ports, see communication ports cable 2-23 PostScript connecting 2-23 errors, general 6-26 default language 3-45 PostScript Header PC utility Þles Windows 3.1 driver 3-11 CMYK.PS 4-10...
- Page 270 QuickDraw GX 2-50 printing transparencies 3-40 using quick reference selecting features, Windows 3-3 Macintosh 3-18 QuickDraw GX Windows 3.1 3-10 Tektronix printer driver 2-50 Windows 95 3-4 QuickDraw GX printer driver printer languages desktop printers default 3-45 creating 2-50 printer quality...
- Page 271 Tabloid Maximum 3-28 SCSI hard disk TekColor selecting 2-24 options 3-27 SCSI port Tektronix Bulletin Board Service (BBS) 2-52 connecting external font disk 2-24 Tektronix URL 6-2 connecting Phaser Copystation 2-24 Test button 5-18 selecting a cleaning page source 7-9...
- Page 272 trays, paper, selecting weight, paper 3-32 Macintosh printer driver 3-18 Windows 3.1 driver troubleshooting Features tab 3-10 image quality problems 6-9 Job Control tab 3-11 media feeding or jamming problems 6-8 Paper tab 3-10 network problems 6-12 PostScript header 3-11 operational hints 6-15 PostScript tab 3-10 turn on printer 2-27...
Need help?
Do you have a question about the PHASER 380 and is the answer not in the manual?
Questions and answers