Table of Contents
Advertisement
SHERWOOD INDUSTRIES IS AN ENVIRONMENTALLY RESPONSIBLE COMPANY. THIS MANUAL IS PRINTED ON RECYCLED PAPER.
PLEASE KEEP THESE INSTRUCTIONS FOR FUTURE REFERENCE
OWNER'S MANUAL
INSTALLER:
Leave this manual with the appliance.
CONSUMER:
Retain this manual for future reference.
WHAT TO DO IF YOU SMELL GAS
• Open windows/extinguish any open
flame.
• Do not try to light any appliance.
• Do not touch any electrical switch
or use any phone in your building.
• Immediately call your gas supplier
from a neighbour's phone. Follow
the gas supplier's instructions.
• If you cannot reach your gas
supplier, call the fire department.
FOR YOUR SAFETY
Do not store or use gasoline or other
flammable vapours and liquids in the
vicinity of this or any other appliance.
WARNING:
If the information in this manual is not followed exactly, a fire or explosion
may result causing property damage, personal injury or loss of life. Installation and
service must be performed by a qualified installer, service agency or the gas supplier.
Massachusetts installations (Warning): This product must be installed by a licensed
plumber or gas fitter when installed within the Commonwealth of Massachusetts. Other
Massachusetts code requirements: Flexible connector must not be longer than 36in., a shut
off valve must be installed; only direct vent sealed combustion products are approved for
bedrooms/bathrooms. A carbon monoxide detector is required in all rooms containing gas
fired direct vent appliances. The fireplace damper must be removed or welded in the open
position prior to installation of a fireplace insert.
Sonnet
B Y : S H E R W O O D I N D U S T R I E S L T D
This appliance is only for use with the type of gas
indicated on the rating plate. This appliance is
not convertible for use with other gases, unless a
certified kit is used.
50-1472
Advertisement
Table of Contents

Related Manuals for Enviro Sonnet 50-1472


Summary of Contents for Enviro Sonnet 50-1472
- Page 1 SHERWOOD INDUSTRIES IS AN ENVIRONMENTALLY RESPONSIBLE COMPANY. THIS MANUAL IS PRINTED ON RECYCLED PAPER. PLEASE KEEP THESE INSTRUCTIONS FOR FUTURE REFERENCE OWNER’S MANUAL INSTALLER: Leave this manual with the appliance. CONSUMER: Retain this manual for future reference. WHAT TO DO IF YOU SMELL GAS •...
-
Page 2: Safety Precautions
Safety Precautions FOR SAFE INSTALLATION AND OPERATION OF YOUR “ENVIRO” HEATER, PLEASE CAREFULLY READ THE FOLLOWING INFORMATION: • All ENVIRO gas-fired appliances must be installed in accordance with their instructions. Carefully read all the instructions in this manual first. Consult the building authority having jurisdiction to determine the need for a permit prior to commencing the installation. -
Page 3: Table Of Contents
Table of Contents Safety Precautions...2 Table of Contents...3 Codes And Approvals...4 Specifications...5 Rating Label Location...5 Dimensions...5 Operating Instructions...7 Lighting and Turning Off Instructions...7 Remote Handset Controls...8 Control Panel...10 Blower Speed...10 Normal Sounds During Operation...10 Adjusting Venturi Air Settings...10 Maintenance And Service...11 Cleaning The Glass...11 Cleaning The Firebox...11 Replacing The Glass...11... -
Page 4: Codes And Approvals
After the unit has gone through the first burn, turn the unit off, let the unit get cold then remove the glass door and clean it with a good gas fireplace glass cleaner, available at your local ENVIRO dealer. See “D ”... -
Page 5: Specifications
ATING ABEL OCATION The rating label is located under the control panel and is attached to a rectangular metal sheet that is chained to the fireplace. IMENSIONS (355mm) (312mm) " (44mm) " (216mm) " " (28mm) (160mm) (138mm) " (188mm) "... - Page 6 ” (569mm) 23” (583mm) Figure 2: Sonnet Adjustable Surround, Classic, and Base Shelf with Riser. Colonial - 3 Sided Height ” (528mm) Width 311⁄4” (794mm) Adjustable Surround - Small Corners Height 213⁄4” (552mm) to 24” (609mm) or max 247⁄8” (631mm) Width 317⁄8”...
-
Page 7: Operating Instructions
Operating Instructions For Your Safety, Read Safety Precautions And Lighting Instructions Before Operating WARNING: IF YOU DO NOT FOLLOW THESE INSTRUCTIONS EXACTLY A FIRE OR EXPLOSION MAY RESULT, CAUSING PROPERTY DAMAGE, PERSONAL INJURY OF LOSS OF LIFE. IGHTING AND URNING Hot while operating. -
Page 8: Remote Handset Controls
Operating Instructions The Sonnet is designed to gradually lower or raise the flame as is needed in application. It normally does not just turn on and off. This is very dependant on the size of the room the unit is located in. During the first several operational cycles the electronics go through a learning process that establishes how the system will react to the environment it is in. - Page 9 Operating Instructions TIMER MODE – (appliance must be in standby mode; pilot ignited): The Timer mode is normally programmed to have two (2) operating temperature Note: that between those periods, if the thermostat is set to a certain minimum temp (example 58°F (14.5°C)), then the unit will modulate to maintain that temp.
-
Page 10: Control Panel
Operating Instructions NOTE: The remote handset control instructions are on inside of remote’s battery cover plate (see Figure 7). ONTROL ANEL Press the larger flame to increase flame height. Press the smaller flame to decrease flame height. For fine adjustment tap the appropriate flame icon, refer to Figure 4. Can also be use to turn unit on or off. LOWER PEED The blower will come on only when the fireplace is up to temperature (approximately 20 minutes). -
Page 11: Maintenance And Service
Do not operate with the glass front removed, cracked or broken. Removal and replacement of the glass from the door must be done by a licensed or qualified service person. The glass must be purchased from an ENVIRO dealer. No substitute materials are allowed. -
Page 12: Glass Door Removal
Maintenance And Service LASS EMOVAL Figure 10: Door Release. Warning: Do not touch or attempt to remove the glass if the fireplace is not completely cold. Never operate the fireplace with the glass removed. CAUTION GLASS MAY SEPARATE FROM DOOR. LEANING AINTED URFACES... -
Page 13: Changing Remote Handset Code & Resetting Receiver
Maintenance And Service HANGING EMOTE ANDSET A code is preset for the remote handset and receiver, but can be changed if required. If one or more Sonnets are to be installed, confirm that the remote control signal codes are different for each unit.To change the code, complete the following: 1. -
Page 14: Removing Valve Cover
Maintenance And Service EMOVING ALVE OVER The valve cover can be removed to access the gas valve, the fan, wiring harness, or other components. 1. Remove the glass door as shown in the AINTENANCE AND ERVICE EMOVAL 2. Carefully remove the log set, ember material, and brick panels, refer to ECONDARY NSTALLATION... -
Page 15: Conversion Kit Installation
Maintenance And Service Kit Parts List: 1 - Orifice (Natural Gas #42 DMS or Propane #54 DMS) 1 - Conversion label Carefully inspect the orifice supplied with this conversion kit. If it has been damaged or is missing, contact your dealer, distributor or courier company to have them replaced before starting this installation. Conversion Kit Installation: 1. - Page 16 Maintenance And Service Figure 26: Setting Regulator gas type to LP. c) Set the black spring depressor according to the gas used. The black spring depressor has two (2) teeth at each end that fit in to the brass nut but only one end has a larger disc.
-
Page 17: Initial Installation
Initial Installation WARNING: Operation of this heater when not connected to a properly installed and maintained venting system can result in carbon monoxide (CO) poisoning and possible death. LEARANCES TO OMBUSTIBLES Maintain sufficient clearances for operation, service and maintenance. • A clearance of 71⁄2” (191 mm) minimum is required from the side of the unit to the sidewalls. •... -
Page 18: B-Vent Model
Initial Installation ODEL WARNING: This appliance has been designed to operate by drawing combustion air and dilution air from the room. It is also designed to draw room air for proper heat circulation from the sides of the unit. Blocking or modifying these openings in any way can create hazardous situations, either through poor venting or by overheating. -
Page 19: Converting A Direct Vent Fireplace To A B-Vent Fireplace
Initial Installation QUALIFIED INSTALLERS ONLY • Carefully clean the fireplace and flue before installing the stove. Failure to do so may result in fumes or dirt being blown into the room and may cause a fire leading to death or serious injury. •... - Page 20 Initial Installation Figure 32: Install of Intake Air Plug. 2. Install spill switch assembly. a) Use a flat head screwdriver or 1⁄4” socket to remove the nine (9) screws holding the back cover on (see Figure 46). b) Cut the tie strap from around the wires for the spill switch. c) Feed the connector end of both wires through the hole in the bottom left corner of the back panel (see Figure 33).
-
Page 21: Venting Fireplace Inserts
IREPLACE NSERTS The ENVIRO Sonnet may be installed and vented into any solid fuel fireplace that has been installed in accordance with the National, Provincial/State and local building codes and has been constructed of non-combustible materials. Before starting, refer to I... -
Page 22: Minimum Clearance
Initial Installation Minimum Clearance Clearance above the highest point where it passes through a roof surface, 3 ft (0.9 m) refer to Figure 39. Clearance above a roof ridge, any other portion of a building, or any other 24 in (0.6 m) obstruction within a horizontal distance of 10 feet (3 m), refer to Figure 39. -
Page 23: Direct Vent Vertical Vent Termination
Initial Installation QUALIFIED INSTALLERS ONLY IRECT ERTICAL For use with Sonnet Direct Vent Fireplace Insert. The Vertical Vent Cap is termination, rain cap, and a throat connector, it will ensure a tight seal, top performance, safety and efficiency. KIT COMPONENTS: Quantity Description Vertical Direct Vent Termination Cap... - Page 24 Initial Installation 6. Place a bead of high temperature silicone on the intake collar of the fireplace, slide the Ø2” (51mm) flex intake liner over the collar, secure the flex liner with three (3) sheet metal screws evenly spaced. 7. At the top of the chimney, apply a bead of Mill-Pac Black sealant to the Ø3” (76mm) pipe of the vent terminal (refer to Figure 42).
-
Page 25: Electrical Requirements
Initial Installation QUALIFIED INSTALLERS ONLY LECTRICAL EQUIREMENTS The fan will not operate if the appliance is cold. A few minutes after the appliance is lit and the fan is set to low or high, the fan will automatically turn on. The fan will automatically turn off after the appliance has cooled down. -
Page 26: Optional Fan Kit
Initial Installation PTIONAL Tools Required: ● 1⁄4” Socket or Driver or Flat Head Screwdriver Kit Contents: Quantity Description Fan Kit Assembly (includes Back Cabinet Panel, Fan, Mounting Bracket, Power Cord, Wiring Harness Temperature Sensor Fan Control; 3 Position Switch Fan Kit Installation: 1. -
Page 27: Gas Line Connection
Initial Installation QUALIFIED INSTALLERS ONLY Fan Only Replacement: 1. Unplug the power or turn off the electrical breaker for the unit. 2. Follow steps 1-4 in R EMOVING 3. The fan hangs on a grommet at either end of the mounting bracket (see Figure 47), lift the fan assembly up and off the grommets. -
Page 28: Never Use An Open Flame For Leak Testing
Initial Installation • A shut-off valve is not supplied with this unit but one should be installed. • The appliance and its shut-off valves must be disconnected from the gas supply piping system during any pressure testing where the pressure exceeds 1⁄2 psig (3.45 KPa) or the valve will be damaged. •... -
Page 29: Installation Options
Initial Installation QUALIFIED INSTALLERS ONLY DJUSTING ILOT LAME The pilot flow adjustment is pre-set to maximum at the factory and should not need to be adjusted. The pilot flame should envelope 3⁄8” to 1⁄2” (10 to 13mm) of the thermocouple (see Figure 53). However, should the need arise, follow Steps 1- below. -
Page 30: Secondary Installation
Secondary Installation & R PTIONAL HELF The Sonnet Base Shelf (15⁄8” (41 mm) high) and Base Shelf Riser (21⁄8” (54 mm) high) are black powder coated components that can be combined to create a riser with an overall height of 2 This shelf can be installed with or without the riser and can be used when the hearth in front of the unit is lower than the fireplace opening. - Page 31 Secondary Installation Note: The Adjustable Surround can only be installed onto the Colonial or Classic Surrounds, it is not intended to be installed on its own with the Sonnet unit. ASSEMBLY: 1. Line up the two (2) screw holes in the left hook bracket with the second slot in on the back of the left trim side (refer to Figure 60).
- Page 32 Secondary Installation Adjustable Surround Corner Required Height Figure 63: Marking offsets on Trim, Relates to Table 7. to cover. From this decide which size of the adjustable surround will meet your need. Refer to Table 1 for the Adjustable Surround ranges. In the Table 7 example, we want to cover an area of 25”...
- Page 33 Secondary Installation Figure 65: Installing Surround Corners, Keystone, & Covers. IMPORTANT: The trim panels or surrounds must not seal ventilation openings in the fireplace. Figure 66: Bushing Locations. INSTALLATION: Lift the trim upright in front of the fireplace with the four (4) hooks pointing towards the fireplace. Slide the hooks over their corresponding bushings (see Figures 66 &...
-
Page 34: Optional Cast Andiron & Grate
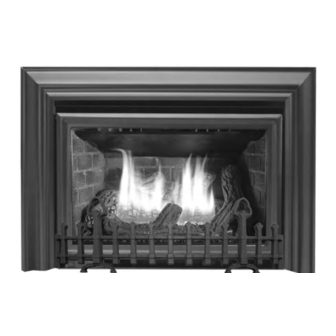
Secondary Installation PTIONAL NDIRON Hook the Andiron assembly over the two (2) bushings at either side of the bottom of the Sonnet (see Figure 68) and snap them firmly down into place. When in place it will look similar to the image on the front cover of this Sonnet Owner’s Manual. -
Page 35: Log Set And Ember Installation
Secondary Installation ET AND MBER NSTALLATION NOTE: The logs are fragile and should be handled gently. The placement of the logs is not arbitrary. If they are positioned incorrectly, the flames can be “pinched” and will not burn correctly. The burner and a few of the logs come with locator pins and ledges, which make alignment easier. - Page 36 Secondary Installation Figure 75: The center of the right log fits onto the locator pin on the back right log (see Figure 74). The front of the log is to rest on the burner and the back end of the log rests on the back brick panel.
- Page 37 Secondary Installation Figure 78. Log Set and Ember Installation. Figure 79. Sonnet complete log set-up with embers burning. NOTE: While the glass is still removed, it is recommended that the gas line be purged by lighting the pilot. When lighting the fireplace for the first time since the log set and embers have been installed/replaced, watch for ignition at ALL the burner ports.
-
Page 38: Trouble Shooting
Trouble Shooting Problem Possible Cause No transmissions; Receiver must learn new remote control code. doesn’t work. One or more of the batteries are dead. The receiver is surrounded by metal, reducing the transmission range. Receiver is malfunctioning. • Replace receiver and reprogram code, refer to Transmitter is malfunctioning. - Page 39 Trouble Shooting Possible Cause Spark will not light Air in the pilot supply line. the pilot after No spark at pilot burner repeatedly pressing the spark ignitor. Valve. Over tightened thermocouple interrupter. Receiver Pilot is lit and Receiver. control continues to spark.
- Page 40 Trouble Shooting Problem Possible Cause 3 short beeps while One or more of the motor turns. batteries are low. Pilot flame lights but Valve turned down to pilot there is no main gas flow. flow. Low inlet pressure. Valve. Flame lifting Leak in vent pipe.
-
Page 41: Parts List
Reference Part Description Number 120°F (49°C) Ceramic Fan Temperature Sensor FPI Burner Switch Domestic Power Cord (115V) Heyco Strain Relief Embers (Coal & Wool) Convection Blower 115V 12 oz. Can of Flat Black Touch Up Paint Blank Orifice Dual Bulb Door Gasket (10ft) Large Ember Nuggets Only Ceramic Wool Embers Only Sonnet Log set... -
Page 42: Option Description
Reference Part Description Number PSE Thermocouple Sonnet 300°F (149°C) Spill Switch with Wires & Bracket GV60 Gas Valve GV60 Control Box GV60 Control Box Valve Cable GV60 3 Button Switch with Cable GV60 Battery Clip GV60 Battery Cable Sonnet 2” B-Vent Intake Air Plug Sonnet 15’... -
Page 43: Parts Diagram - Components
Parts Diagram - Components... -
Page 44: Parts Diagram - Options
Parts Diagram - Options... -
Page 45: Warranty
Industries, our commitment to the highest level of quality and customer service is the most important thing we do. Each Enviro stove is built on a tradition of using only the finest materials and is backed by our Exclusive Lifetime Limited Warranty to the original purchaser. With Enviro, you’re not just buying a fireplace or stove, you’re buying a company with years of unequalled performance and quality. - Page 46 The use of such products may nullify the Limited Warranty on this stove. If unsure as to the extent of this Limited Warranty, contact your authorized Enviro dealer before installation. 10. Sherwood Industries Ltd. will not be responsible for inadequate performance caused by environmental conditions.
- Page 47 If the stove is used for commercial purposes, it is excluded from the Limited Warranty. 24. No dealer, distributor, or similar person has the authority to represent or warrant Enviro products beyond the terms contained within the Limited Warranty. Sherwood Industries Ltd. assumes no liability for such warranties or representations.
-
Page 48: Installation Data Sheet
NAME OF DEALER: _________________________________________ ADDRESS: _________________________________________ _________________________________________ _________________________________________ PHONE:___________________________________ NAME OF INSTALLER: _________________________________________ (dd/mm/yyyy) ADDRESS: (dd/mm/yyyy) _________________________________________ � B-VENT _________________________________________ � PROPANE(LPG) _________________________________________ PHONE:___________________________________ MANUFACTURED BY: SHERWOOD INDUSTRIES LTD. 6782 OLDFIELD RD. SAANICHTON, BC, CANADA V8M 2A3 www.enviro.com May 28, 2008 C-11253...
Need help?
Do you have a question about the Sonnet 50-1472 and is the answer not in the manual?
Questions and answers