Table of Contents
Advertisement
Quick Links
Advertisement
Table of Contents

Related Manuals for Craftsman 351.224360


Summary of Contents for Craftsman 351.224360
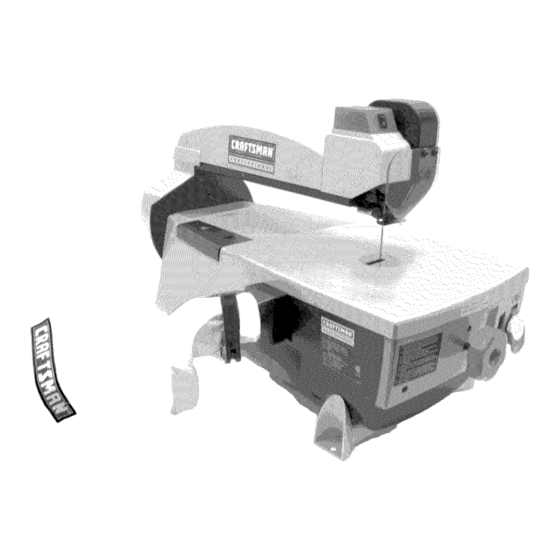
- Page 1 16" TILTING ARM SCROLL SAW WITH DUST COLLECTION Model No. 351.224360 CAUTION: Read and follow all Safety Rules and Operating Instructions before First Use of this Product. Sears, Roebuck and Co., Hoffman Estates, IL 60179 U.S.A. www.sears.com/craftsman 21975.02 Draft (07/21/04)
- Page 2 • Be alert and think clearly. Never operate power tools when tired, intoxicated or when taking medications that cause drowsiness. Warranty ........Safety Rules....... PREPARE WORK AREA FOR JOB Unpacking ........• Keep work area clean. Cluttered work areas invite Assembly.........
-
Page 3: Dust Chute
• Never stand on tool. Serious injury could occur if tool IMPORTANT: Table is coated with a protectant. To is tipped or if blade is unintentionally contacted. ensure proper fit and operation, remove coating. Coating is easily removed with mild solvents, such as •... -
Page 4: Power Source
INSTALL DUST COLLECTION Check with a qualified electrician if grounding instruc- tions are not understood or if in doubt as to whether the Dust collection system consists of a 30-micron bag and tool is properly grounded. clamp. This tool is equipped with an approved 3 conductor •... -
Page 5: Extension Cords
• Always make sure that large workpieces are com- Refer to Figures 8 - 16, pages 6-8. pletely supported. The Craftsman 16" Tilting Arm Scroll Saw features alu- • Make sure that arm tilting handle is locked before minum frame construction, built-in dust collection and a... - Page 6 • Never s tartsawwithworkpieces p ressed against t he blade. • Always stopsawbefore removing scrappieces from thetable. • Useextracaution whencuttinground workpieces andworkpieces t hathaveanirregular c ross section. OPERATING CONTROLS ADJUSTMENTS Refer to Figure 8. ON/OFF Switch The ON/OFF switch is located on the right side of the front panel of the saw.
-
Page 7: Installing And Removing
The blade/lock release lever is located on the middle Tilting The Arm right side of the arm and is used when changing Refer to Figure 12. blades. Lever rests in the "lock" position. Pushing lever The arm of the scroll saw can be tilted from 0 to 45 ° to back releases tension on the blade holders and blade the left by loosening the arm locking handle counter- can be installed or removed. - Page 8 • Use a finer (more teeth/inch) blade for thin work- pieces and hard materials. • Use a coarser (less teeth/inch) blade for thick work- Blade PinHooks pieces and softer materials. Into This Leaf o f • There should always be at least two teeth in Holder "_ contact with workpiece.
-
Page 9: Replacing Belts
KEEP SCROLL SAW IN REPAIR • Loosen set screw and remove gear (Fig. 17, Ref. D). • Loosen and remove two bolts and fork assembly • If power cord is worn or cut in any way, have it replaced. (Fig. 17, Ref. E and F). •... - Page 10 CORRECTIVE ACTION SYMPTOM POSSIBLE CAUSE(S) 1. Material not secure on table Excessive blade breakage 1. Hold workpiece firmly; make sure holddown foot is in contact with top of workpiece. 2. Blade too coarse for material 2. Use finer pitch blade 3.
- Page 11 Service Record Craftsman 16" Tilting Arm Scroll Saw with Dust Collection DATE MAINTENANCE PERFORMED REPLACEMENT PARTS REQUIRED...
- Page 12 Model 351.224360 Figure 18 - Replacement Parts Illustration for Base ll38.
- Page 13 PART NO. DESCRIPTION QTY. STD863510 5-0.8 x 10mm Pan Head Screw* 22016.00 Spacer 22017.00 Knob STD870512 5-0.8 x 12mm Socket Head Bolt* 16080.00 Switch 22018.00 Front Panel 22019.00 Dust Boot 08567.00 6-1.0 x 12mm Flat Head Screw 22021.00 Spacer 22022.00 Gear with Label 20565.00 Vari-speed Belt...
- Page 14 Model 351.224360 Figure 19 - Replacement Parts Illustration for Arm...
- Page 15 PART NO. DESCRIPTION PART NO. QTY. DESCRIPTION QTY. 22012.00 Blade Guard 5-0.8 x 12mm Socket Head Bolt* STD870512 22013.00 Cover with Switch 21992.00 Holddown Assembly Cover 21993.00 (Incl. Key Nos. 3-7 and 43) 22010.00 5-0.8 x 50mm Pan Head Screw 21994.00 Work Light Assembly STD851105...
- Page 16 Your Home iiiiiiiiiiiiiiiiii_ iiiiiiiiiiiiiiiiii iiiiiiiiiiiiiiiiii your home-of aH major brand appliances, repair-in lawn and garden equipment, or heating and cooling systems, no matter who made it, no matter who soNd it! HHHHHHHHH HHHHHHHHH For the replacement parts, accessories owner's manuals that you need to do-it-yourself. HHHHHHHHH HHHHHHHHH For Sears professional...
Need help?
Do you have a question about the 351.224360 and is the answer not in the manual?
Questions and answers