Table of Contents
Advertisement
To learn more about DELTA MACHINERY
visit our website at: www.deltamachinery.com.
For Parts, Service, Warranty or other Assistance,
please call 1-866-422-4286
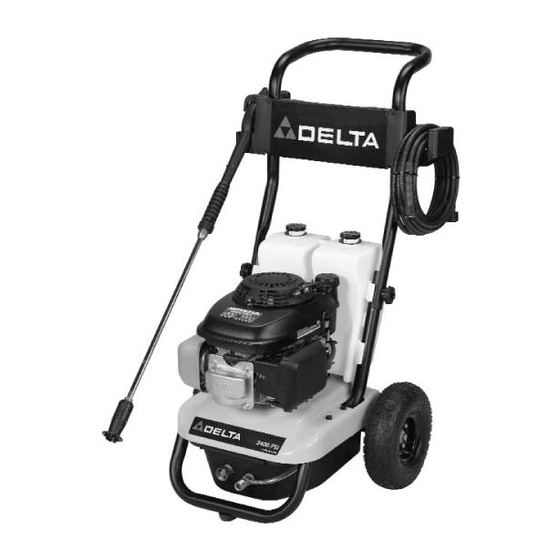
5.5 Horsepower
Pressure Washer with
5760 Cleaning Units
(Model DT2400CS)
PART NO. D27918 Rev. 1
Copyright © 2003 Delta Machinery
ESPAÑOL: PÁGINA 25
FRANÇAIS: PAGE 49
Advertisement
Table of Contents

Related Manuals for Delta DT2400CS


Summary of Contents for Delta DT2400CS
- Page 1 Pressure Washer with 5760 Cleaning Units (Model DT2400CS) PART NO. D27918 Rev. 1 Copyright © 2003 Delta Machinery To learn more about DELTA MACHINERY ESPAÑOL: PÁGINA 25 visit our website at: www.deltamachinery.com. FRANÇAIS: PAGE 49 For Parts, Service, Warranty or other Assistance,...
-
Page 2: Table Of Contents
TABLE OF CONTENTS OPERATING INSTRUCTIONS..11-17 SAFETY GUIDELINE/DEFINITIONS ..2 MAINTENANCE........17-18 CONSUMER SAFTEY INFORMATION...2 STORAGE .........19-20 IMPORTANT SAFETY INSTRUCTIONS ........3-6 TROUBLE SHOOTING GUIDE..21-22 CONSUMER GENERAL AND SERVICE WARRANTY..........24 INFORMATION .........6 SPANISH...........23-44 CARTON CONTENTS......7 ASSEMBLY INSTRUCTIONS ....8-10 SAFETY GUIDELINES - DEFINITIONS This manual contains information that is important for you to know and understand. This information relates to protecting YOUR SAFETY and PREVENTING EQUIPMENT PROBLEMS. -
Page 3: Important Safety Instructions
IMPORTANT SAFETY INSTRUCTIONS Read Operation Manual. Do not operate equipment until you have read Operation Manual for Safety, Assembly, Operation, and Maintenance Instructions. READ AND SAVE THESE INSTRUCTIONS HAZARD RISK OF EXPLOSION OR FIRE WHAT CAN HAPPEN HOW TO PREVENT IT •... - Page 4 HAZARD RISK OF INJURY OR PROPERTY DAMAGE WHEN TRANSPORTING OR STORING WHAT CAN HAPPEN HOW TO PREVENT IT • Fuel or oil can leak or spill and could • If pressure washer is equipped with a fuel result in fire or breathing hazard, serious shut-off valve, turn the valve to the off injury or death can result.
- Page 5 HAZARD RISK OF UNSAFE OPERATION WHAT CAN HAPPEN HOW TO PREVENT IT • Unsafe operation of your pressure washer • Do not use chlorine bleach or any other could lead to serious injury or death to corrosive compound. you or others. •...
-
Page 6: Consumer General And Service Information
HAZARD RISK OF INJURY FROM SPRAY WHAT CAN HAPPEN HOW TO PREVENT IT • Always wear ANSI approved Z87 safety • High velocity fluid spray can cause glasses.Wear protective clothing to protect objects to break, propelling particles at against accidental spraying. high speed. -
Page 7: Carton Contents
CARTON CONTENTS Accessories Panel Engine Manual Engine Frame, Wheel Bagged Accessories Panel Handle Assembly, and Dual Tank Cleaning System Knobs English/ Spanish/ French Operation Saddle Bolts Manual Chemical injector rinsing Nozzle Cleaning hose High Pressure Hose Bagged Parts Multi-Adjustable Spray Wand Spray Gun Engine Oil 7- ENG... -
Page 8: Assembly Instructions
ASSEMBLY INSTRUCTIONS Remove cleaning solution tanks from frame assembly. Slide tanks up and away from frame assembly. Place handle assembly onto frame and connect handle to frame. NOTE: Knobs are assembled to the outside of frame. Connect wand to gun. Tighten securely. 8- ENG D27918... - Page 9 Attach high pressure hose to gun. Tighten securely. To Assemble Accessories Panel Remove top screws on handle assembly. Loosen bottom screws on handle assembly. Remove Loosen Place grooves in accessories panel assembly onto screws and slide panel assembly into place. Screws Place screws (removed earlier) into the top holes and secure accessories panel assembly to handles.
- Page 10 Reinstall cleaning solution tanks. Tilt cleaning solution tanks toward engine, slide onto handles, and snap into place. Attach cleaning solution hose to barb fitting on control valve located at the rear of unit. barb fitting Add engine oil (supplied) to engine. Refer to Engine Owners Manual supplied by engine manufacturer for correct procedure.
-
Page 11: Operating Instructions
OPERATING INSTRUCTIONS READ THIS OPERATION MANUAL AND SAFETY RULES BEFORE OPERATING YOUR UNIT. Compare the illustrations with your unit to familiarize yourself with the location of various controls and adjustments. Save this manual for future reference. Spray High Pressure Hose Engine Dual Tank Multi-... -
Page 12: Basic Elements Of Engine
BASIC ELEMENTS OF ENGINE Refer to the engine manual for location and operation of engine controls. Choke Control: Opens and closes carburetor choke valve Throttle Control Lever: Controls engine speed. Fuel Valve Lever: Opens/closes connection between fuel tank and carburetor. Starter Grip: Pulling starter grip operates recoil starter to crank engine. - Page 13 HOW TO USE SPRAY WAND: Your pressure washer is equipped with a multi-adjustable spray wand with both high and low pressure settings. The high pressure setting is for cleaning and rinsing, the low pressure setting is for applying cleaning solutions to surfaces. When using the high pressure setting, DO NOT allow the jet- like spray to come in contact with unprotected skin, eyes, or with any pets or animals.
- Page 14 HOW TO USE THE DUAL TANK CLEANING SYSTEM NOTE: Use only soaps and cleaning solutions designed for pressure washer use. Do not use bleach. To apply cleaning solutions: Make sure cleaning solution tanks are assembled and all hoses are connected. Turn control valve knob arrow to the down (off) position as shown.
- Page 15 READ AND UNDERSTAND ALL WARNINGS BEFORE STARTING UNIT When using the high pressure setting, DO NOT allow the high pressure spray to come in contact with unprotected skin, eyes, or with any pets or animals. Serious injury can occur. Your washer operates at fluid pressures and velocities high enough to penetrate human and animal flesh, which could result in amputation or other serious injury.
- Page 16 Connect water source to pump inlet. Water NOTE: Water source must provide a minimum of 5 Source gallons per minute at 20 p.s.i. Connect high pressure hose to pump outlet. If applying a cleaning solution, see How To Use the Dual Cleaning Solution System in Operation section of this manual.
-
Page 17: Maintenance
Before reconnecting cleaning solution hose to chemical injector barb fitting make sure that any remaining cleaning solution has been completely drained from the cleaning solution hose. To rinse chemical using cleaning solution system tank Turn control valve knob arrow to the down (off) position. -
Page 18: Maintenance
Shut off the pressure washer and turn off the water supply. Disconnect spark plug wire to insure the unit will not start while performing maintenance. Pull trigger on gun handle to relieve any water pressure. Disconnect the wand from the gun. Remove the nozzle from the end of the wand with the 2mm allen wrench provided as shown. -
Page 19: Storage
STORAGE ENGINE Consult the Engine Owners Manual for the manufacturer's recommendations for storage. PUMP Drain all water from high pressure hose, coil it, and store it in cradle of the pressure washer handle. Drain all water from spray gun and spray wand by holding spray gun in a vertical position with nozzle end pointing down and squeezing trigger. - Page 20 DUAL TANK CLEANING SYSTEM Turn control valve knob to the down (off) position. Control Valve Knob Remove cleaning solution hose at chemical injector and pull through rear shroud. Place end of cleaning solution hose into a suitable container to drain cleaning solution.
-
Page 21: Trouble Shooting Guide
TROUBLE SHOOTING GUIDE CAUSE CORRECTION PROBLEM Add Fuel. No fuel. Engine will not Pressure builds up after two pulls start (see Engine Squeeze gun trigger to relieve on the recoil starter or after initial pressure. Manual for use. further engine troubleshooting) Move choke to the “Choke”... - Page 22 CAUSE CORRECTION PROBLEM See How to Use Wand paragraph Wand not in low pressure. Will not draw in the Operation Section. cleaning solution Filter clogged on chemical injector Clean filter. rinsing hose. Make sure end of chemical Screen on end of chemical injector injector rinsing hose is fully rinsing hose not in water submerged into clean water.
-
Page 23: Spanish
NOTES 23- ENG D27918... -
Page 24: Warranty
• Use reasonable care in the operation and maintenance of the product as described in the Owners Manual(s). • Deliver or ship the product to the nearest Delta Authorized Warranty Service Center. Freight costs, if any, must be paid by the purchaser.
Need help?
Do you have a question about the DT2400CS and is the answer not in the manual?
Questions and answers