Table of Contents
Advertisement
Advertisement
Table of Contents

Related Manuals for Hitachi AX-M131U


Summary of Contents for Hitachi AX-M131U
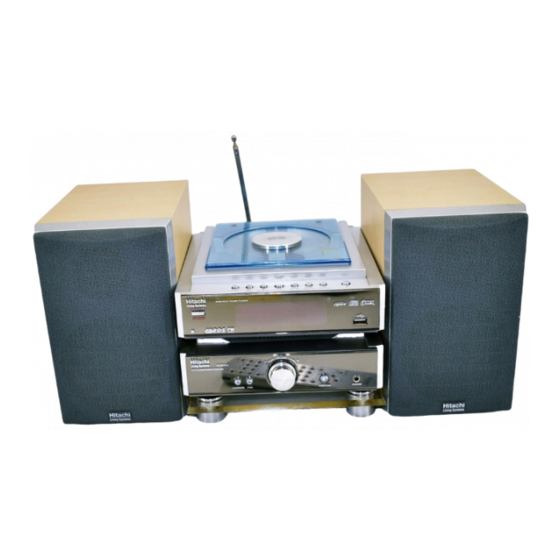
- Page 1 AX-M131U Operating Instructions...
-
Page 2: Table Of Contents
Table of Contents Important Cautions ..........................2 For your safety ............................2 Precautions ..............................2 Connections ............................3 Connecting the Antenna ..........................3 Connecting the Speakers ..........................4 Connecting Auxiliary Equipment (AUX IN) ....................4 Connecting Auxiliary Equipment (LINE OUT) ..................... 4 Connecting Control Cable ........................... -
Page 3: Important Cautions
Important Cautions Thank you for purchasing this system. Please read these operating instructions before operating the unit. The operating instructions should be retained for future reference. For your safety CAUTION This symbol indicates that dangerous voltage constituting a risk of electric RISK OF ELECTRIC SHOCK shock is present within this unit. -
Page 4: Connections
DON’T allow electrical equipment to be exposed to dripping or splashing, or objects filled with liquids, such as vases, to be placed on the equipment and don’t handle the power cord with wet hands. DON’T place hot objects or naked flame sources such as lighted candles or nightlights on, or close to equipment. -
Page 5: Connecting The Speakers
Connecting the Speakers Connect the speaker cords between the terminals as shown below. Connect the cords with a silver line to the (-) (G) terminals and cords with a gold line to the (+) (L) (R) terminals. Connecting Auxiliary Equipment (AUX IN) This unit also has one group of audio input terminals, you can use signal line to connect this unit’s audio input terminals and assistance equipment’s audio output terminals respectively, then you can hear the sound sources. -
Page 6: Control Locations
Control Locations The CD/DAB Remote Sensor Standby Button VFD Display Lens USB Port Disc Door Clock Button Program Button Memory Button Stop Button Cancel Button Channel Select Backward Play/Pause Button Select Button Channel Select Forward 10. Previous/Search Backward Button Select Down Button Tuning Backward Button 11. -
Page 7: The Remote Control
Control Cable Connector AUX Input Terminals (L&R) Line Out Terminals (L&R) Left & Right Speaker Output Terminals 10. AC Power Cord The Remote Control Standby Loudness Preset Equalizer Intro Scan Repeat Stereo/Mono Select Play/Pause Select Volume Up Previous/Search Backward Select Down Tuning Backward Volume Down 10. -
Page 8: Installation Of Batteries
Installation of Batteries 1. Remove the battery compartment cover. 2. Insert two batteries (size AAA) correctly so that the + and - polarities match the polarity diagrams in the battery compartment. * About half a year of normal operation can be expected. * When the batteries are exhausted, the remote control can no longer operate the system. -
Page 9: Preset Equalizer
Preset Equalizer You can adjust the sound reproduced simply by choosing from 5 preset equalizer. Press the preset equalizer button (P-EQ) once by once to select cyclically one of the following 5 preset equalizer: POPS JAZZ CLASSIC ROCK USER/No Display POPS Vocal sound is intensified JAZZ... - Page 10 5. When the scan is complete, a tune operation to the first service of the first ensemble in the ensemble list shall be preformed. 6. If the service database is still empty after a scan, the receiver shall display the following: NO SIGNAL Manual tune 1.
-
Page 11: Fm Radio
6. Time and Date (month day hour minute) shall display the following: MM-DD HH:MM 7. Audio type and bit rate – the audio type (Stereo, Mono) shall be right justified, and the bit rate shall be left justified. 8. If the Cancel button is pressed, the information text shall revert to Service name. Preset buttons 1. -
Page 12: Rds (Radio Data System) Reception
Presetting Stations You can preset up to 16 FM stations stations. 1. Tune in the desired station: 2. Press the memory button (MEM.), the “MEM” will flash on the display and the preset number will be displayed. 3. Press the channel select backward button (CH-), channel select forward button (CH+) on the remote control to select the preset number. -
Page 13: Cd Operation
CD Operation CD Playing 1. Repeatedly press the function button (FUNCTION) on the front of the product or press the CD function button on the remote control (under the number button). 2. Press the open/close button ( ) to open the disc door and place the disc on the disc tray (with the printed side up). -
Page 14: Playing Repeatedly
Playing Repeatedly ONE and ALL repeat play can be set by pressing the repeat button (REPEAT). First press : To repeat the same track. Second press : To repeat all tracks on a disc. Third press : To cancel the repeat playing. MP3 Disc Playing When selecting tracks the player will automatically display the directory and track number. -
Page 15: Use The Usb
Use the USB You can connect the USB flash to the USB jack at the front panel of unit. The unit will play MP3 music from the flash directly 1. Plug the USB flash into the USB jack 2. Press the USB button on remote control or press the FUNCTION button on front panel to select the USB function 3. -
Page 16: Setting The Daily On Timer
To cancel the sleep timer setting Repeatedly press the sleep button (SLEEP) on the remote control until the “00” is displayed. Turning off the system also cancels the sleep timer. Setting the Daily on Timer You can use the setting timer to make the unit automatically turn on at a certain time everyday from standby. -
Page 17: Troubleshooting
Troubleshooting If you are having a problem with your system, check this list for a possible solution before calling for service. If you cannot solve the problem from the hints given here, or the system has been physically damaged, call a qualified person, such as your dealer, for service. Symptom Possible Cause Action... -
Page 18: Specifications
Specifications System Specification Power Requirements ~ 230V/50Hz DAB Frequency Range (band III) 174.928 - 239.200 MHz Usable Sens. 95 dBm FM Frequency Range 87.5 - 108 MHz Power Consumption 100W Rated Output Power 25W × 2 ≤ 0.7% (15W x 2) Dimensions (CD) 192(W) x 67(H) x 235(D) mm (Amplifier) 192(W) x 62(H) x 242(D) mm...
Need help?
Do you have a question about the AX-M131U and is the answer not in the manual?
Questions and answers
How to adjust dimmer without remote control
I have no remote, how do I adjust dimmer