Table of Contents
Advertisement
Quick Links
Download this manual
See also:
Instruction Manual
Quick Start Guide
Quick Start Guide
This Quick Start Guide will help you correctly install and set-up your Hi-Fi.
IMPORTANT: make sure that your unit is connected together (as detailed in this Guick Start Guide ) before switching on at the mains.
If this hi-fi has been moved from a cold place to a warm place, DO NOT plug it in for 2-3 hours
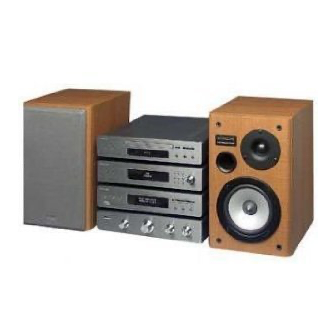
AX-M140 SYSTEM
AX-M140
DIGITAL RADIO
DAB/FM
INFO.
DI O D T SYST E M
Please read before installation
(e.g. from a cold car boot to a warm room).
REPEAT
CONFIRM
SEL
SEL
Advertisement
Table of Contents

Related Manuals for Hitachi AX-M140


Summary of Contents for Hitachi AX-M140
-
Page 1: Quick Start Guide
AX-M140 SYSTEM Quick Start Guide Quick Start Guide This Quick Start Guide will help you correctly install and set-up your Hi-Fi. REPEAT AX-M140 DIGITAL RADIO DAB/FM INFO. CONFIRM DI O D T SYST E M Please read before installation IMPORTANT: make sure that your unit is connected together (as detailed in this Guick Start Guide ) before switching on at the mains. - Page 2 INFO. CONFIRM DI O D T SYST E M AX-M140 SYSTEM M a in In s tr u ctio n b o o k DA B ( FM a e r ia l ) x 1 Video cable x 1...
- Page 4 Fitting the system connection leads IMPORTANT: The separate parts of your hi-fi MUST be connected together before the unit is plugged into the mains. Make sure that all connections are made with your hi-fi system unplugged from the mains. DVD PLAYER Position your hi-fi Stack the parts of your hi-fi as shown.
- Page 5 Connecting to a TV NOTE: Some settings might need to be made to your Hitachi AX-M140 to make it compatible with the settings on your TV Teminal board for the DVD player TV Display Settings (Video cable included) If the unit is connected to a...
-
Page 6: Connecting The Speakers
Connecting the speakers Connect the speaker leads between the terminals as shown below. IMPORTANT NOTE: Before connecting or removing mains power, please turn off the power on the unit and turn the volume to minimum or it may damage the speaker This unit has a high power output and wide dynamic range . - Page 7 Ditital audio output Connections DVD player connections Connecting to a surround sound amplifier Please note: You can only use coaxial OR optical-they cannot be used at the same time. Lead not included Lead not included With digital signal input terminal's DTS, Dolby Digital signal decode amplifier With digital signal input terminal's DTS, Dolby Digital signal decode amplifier terminal board...
-
Page 8: Aux In Connections
Aux in Connections VCR Scart Input Socket Connecting a VCR audio output to your unit VCR Output Scart socket Note: SCART lead not supplied. -
Page 9: Connecting The Antenna
Connecting the Antenna Screw the antenna (aerial) rod clockwise onto the antenna base. Screw the antenna cable into the DAB/FM antenna socket Tighten the antenna by hand or using the tool provided. (Note: Do not overtighten, this could damage the antenna or it's fittings.) Optional Position the antenna for best reception. -
Page 10: Connecting To The Mains Power
Connecting to the mains Power Insert the mains plug into a wall outlet, switch on and your system is ready for use. Caution: Be sure to unplug the power cord from the outlet when going away or when the system is not in use for an extended period of time.
Need help?
Do you have a question about the AX-M140 and is the answer not in the manual?
Questions and answers