
Related Manuals for MOTU V4HD


Summary of Contents for MOTU V4HD
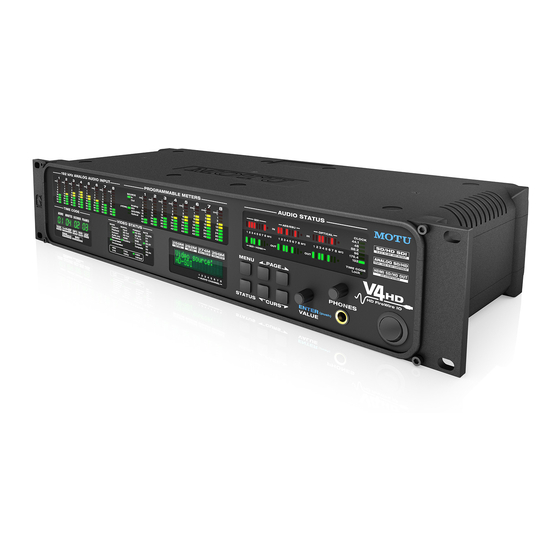
- Page 1 MOTU V4HD ™ User’s Guide for Mac OS X 1280 Massachusetts Avenue Cambridge, MA 02138 Business voice: (617) 576-2760 Business fax: (617) 576-3609 Web site: www.motu.com Tech support: www.motu.com/support...
- Page 2 The MOTU V4HD is equipped with a three-conductor cord and grounding type plug which has a grounding prong, approved by Underwriters' Laboratories and the Canadian Standards Association. This plug requires a mating three-conductor grounded type outlet as shown in Figure A below. If the outlet you are planning to use for the MOTU V4HD is of the two prong type, DO NOT REMOVE OR ALTER THE GROUNDING PRONG IN ANY MANNER.
-
Page 3: Table Of Contents
Contents Part 1: Getting Started Quick Reference: V4HD Front Panel Quick Reference: V4HD Rear Panel Quick Reference: MOTU Video Setup Quick Reference: MOTU Audio Setup About the V4HD Packing List and Mac System Requirements Installing the V4HD Hardware Installing the V4HD Mac OS X Software... - Page 4 Authorization Number on the outside of the box below the shipping address. That license agreement is a contract, and clicking “Accept” binds you and MOTU to This warranty does not apply if the equipment has been damaged by accident, all its terms and conditions.
- Page 5 Part 1 Getting Started...
-
Page 9: Quick Reference: Motu Video Setup
DVI output), and FireWire Capture (in Final Cut Pro). Indicates when the V4HD has This area of MOTU Video Console provides a signal path successfully achieved lockup to diagram (from left to right) for Playback mode or the currently selected input or, Capture/Convert mode. -
Page 11: Quick Reference: Motu Audio Setup
1x rate (either 44.1 or 48kHz). MOTU Audio Setup appears in the dock when you launch it. If the Launch MOTU Audio Setup when hardware becomes available option is checked (as shown above), the icon appears as soon as you switch on your V4HD interface. If you click... -
Page 13: About The V4Hd
About the V4HD CHAPTER OVERVIEW The V4HD provides hardware-accelerated SD-to- The V4HD is a FireWire video interface that can HD up conversion for capturing SD sources in operate in two modes: as a video capture and ProRes or DVCProHD format. It also provides playback device for a Mac or as a stand-alone video hardware-accelerated HD-to-SD down converter/distribution hub. - Page 14 The V4HD is housed in a rugged aluminum alloy HDMI monitoring — connect a large-format ■ chassis with a standard 19-inch, two-space, rack- HD plasma, reference LCD, consumer DLP or mountable form factor. Included rack mounting other flatscreen for flexible and affordable “pixel for brackets can easily be removed for convenient pixel”...
- Page 15 1 x HDMI output (4:2:2 10-bit, YCbCr or RGB) 4 x XLR analog in/out — 4-channel direct ■ ■ connection without a breakout cable Support for DVI output with HDMI-to-DVI ■ adapter (sold separately) 8 channels of AES/EBU digital in/out at sample ■...
- Page 16 INCLUDED SOFTWARE AND using Final Cut Pro or other machine control host COMPATIBILITY via standard 9-pin protocol Includes MOTU Video Setup software — ■ graphically displays HD and SD signal path and Word clock in, out and thru — continuously ■...
-
Page 17: Packing List And Mac System Requirements
Please register your V4HD today. There are two of these items are not present in your V4HD box ways to register. when you first open it, please immediately contact Visit www.motu.com/registration to register ■ your dealer or MOTU. online One V4HD with removable rack ears ■... - Page 18 P A C K I N G L I S T A N D M A C S Y S T E M R E Q U I R E M E N T S...
-
Page 19: Installing The V4Hd Hardware
Installing the V4HD Hardware CHAPTER OVERVIEW Daisy-chaining FireWire devices With the exception of ProRes HQ, FireWire A Here’s an overview for installing the V4HD: provides enough bandwidth for the V4HD to SD and HD video over FireWire ..... . 19 operate by itself. -
Page 20: Connect The V4Hd To Your Computer
case, all ports (both A and B) share the same CONNECT THE V4HD TO YOUR COMPUTER 1 Plug one end of the V4HD FireWire cable into internal FireWire bus. So plan accordingly for your FireWire resources. In addition, keep in mind that the FireWire socket on the computer as shown if you connect a FireWire A device, it can slow the below in Figure 3-1. -
Page 21: Connect Video Inputs And Outputs
CONNECT VIDEO INPUTS AND OUTPUTS S-video (Y/C) Connect any S-video source or destination, The V4HD provides a wealth of video input and including consumer or prosumer camcorders, output connectivity, from consumer analog desktop video converters, VTRs, or monitors. For formats such as S-video and composite to best results, use standard, high-quality shielded broadcast formats such as HD-SDI. - Page 22 HD out) can be independently configured for rated cables. either RGB or YPbPr operation. This setting is made in the MOTU Video Setup software. For the HDMI / DVI Output component inputs, see “Video Source menu” on The V4HD provides an HDMI output, which lets page 44.
-
Page 23: Example V4Hd Video Connections
Here is an example of the types of video devices connect them all, and then choose the desired that you can connect to the V4HD. You can mix source from the MOTU Video Setup software. SD TV (LCD or plasma) HD computer monitor... -
Page 24: Connect Audio Inputs And Outputs
CONNECT AUDIO INPUTS AND OUTPUTS For eight channels of analog input, the breakout The V4HD provides 32 channels of simultaneous cable requires a male DB25 connector on one end audio input and output (Figure 3-5), grouped in and eight female XLR connectors on the other end. four banks of eight channels each: analog, For eight channels of analog output, the breakout AES/EBU, optical and embedded (for SDI and... - Page 25 Synchronization and sample rate conversion AES/EBU digital audio I/O The V4HD provides eight channels of 24-bit When making AES/EBU digital audio transfers to AES/EBU digital audio input and output at and from the V4HD, the two devices must be standard sample rates from 44.1 kHz up to 96 kHz. synchronized with one another, or you must employ the V4HD’s sample rate conversion.
-
Page 26: Example V4Hd Audio Connections
When operating the optical ports at a 2x sample EXAMPLE V4HD AUDIO CONNECTIONS Figure 3-8 shows an example of the types of audio rate, be sure to choose either Type I or Type II operation, as explained in “ADAT Type” on connections you can make between other devices page 99. -
Page 27: Video Sync Connections
V4HD to another device, connect the disabled). V4HD LTC OUT to the time code input on the other device. See chapter 10, “MOTU SMPTE Setup” (page 87) for information about managing the V4HD’s time code features. I N S T A L L I N G T H E V 4 H D H A R D W A R E... -
Page 28: Rs-422 Machine Control
To resolve another device to the V4HD (even when Forcing a 1x word out rate When the V4HD is operating at a 2x or 4x sample video is enabled), connect the V4HD’s WORD rate, it can generate a word clock output signal that OUT jack to the word clock input on the other either matches the current system clock rate (any device (Figure 3-12). -
Page 29: Syncing Digital Audio Devices
SYNCING DIGITAL AUDIO DEVICES Master Master If you would like to transfer audio digitally between the V4HD and another device that has AES/EBU or ADAT optical digital I/O, there are three basic scenarios in which the V4HD could make a digital Slave Slave Slave... - Page 30 Resolving a digital mixer to the V4HD Camera If the V4HD is currently operating as a video interface (i.e. Audio only mode is not enabled), and you would like to connect a digital mixer via ADAT optical or AES/EBU (or both), resolve the digital Video out AES/EBU out mixer to the V4HD, either via its optical or...
- Page 31 If you choose the other device, such as a digital Sample rate conversion The V4HD is equipped with one 8-channel bank of mixer, as the clock master, resolve the V4HD to it real-time sample rate conversion that can be via word clock in, AES/EBU in or ADAT optical in, assigned to any individual input or output bank as demonstrated below in Figure 3-18.
- Page 32 Camera V4HD master clock (master) Video out Input (slaves to V4HD master clock) clock V4HD Sample Rate converter Output Video in (master*) V4HD clock source clock setting: Video Clock V4HD Sample Rate Conversion setting: ADAT optical in ADAT Optical in Video deck (slaves to V4HD SRC output clock) Figure 3-20: Clock relationships when sending audio from the V4HD...
- Page 33 The installer checks the computer to make sure it option installs dozens of Easy Setups for your satisfies the minimum system requirements for convenience. your MOTU video interface. If so, the installer proceeds with the OS X installation. Drivers are Software component Location...
-
Page 34: Installing The V4Hd Mac Os X Software
I N S T A L L I N G T H E V 4 H D M A C O S X S O F T W A R E... -
Page 35: Part 2: Video Operation
Part 2 Video Operation... -
Page 37: V4Hd Basics
V4HD will feed that signal to all Convert ■ output destinations simultaneously. Playback / Playback only ■ The settings in the MOTU Video Setup software let Audio only ■ you conveniently manage the V4HD’s many Standalone (video or audio only) routing and conversion features. - Page 38 Preview tab (Figure 6-1 on page 41, other V4HD video outputs. Convert mode serves Figure 6-26 on page 52). This causes MOTU Video as a “default” mode for the V4HD, when none of the Setup to “take over” the FireWire video signal other modes are currently engaged.
- Page 39 The Playback Only (disable inputs) option in the Setup tab in the MOTU Video Setup software (Figure 6-1 on page 41) and disable the Enable MOTU Video Setup software Setup tab Video option (Figure 6-19 on page 48). (Figure 6-19 on page 48) lets you force the V4HD to stay in playback mode.
- Page 40 V 4 H D B A S I C S...
-
Page 41: Motu Video Setup
CHAPTER MOTU Video Setup (Figure 6-1) is installed in Signal path diagram........42 your Mac’s Applications folder and provides... -
Page 42: Signal Path Diagram
SIGNAL PATH DIAGRAM In most situations, the Signal Path Diagram lets The Signal Path Diagram (Figure 6-2, Figure 6-3) you access the settings for a mode, even when the lets you view and control the V4HD’s hardware- hardware is not currently in that mode. Displaying based video conversion features and signal flow the settings for a mode doesn’t put the V4HD in settings. - Page 43 Playback settings menu according to the settings you’ve made for that The Playback Settings menu (Figure 6-2) lets you format. Whenever playback starts, the MOTU choose one of four sets of playback settings to view Video Setup software automatically switches to the in the signal path diagram.
- Page 44 Letterbox (HD to SD) Video Source menu The Video Source menu (Figure 6-3) is important Letterboxing is the standard practice of because this is where you choose the video input conforming widescreen film images such as film or from which the V4HD will convert and capture. HD to an SD video frame while preserving the Choose any SD or HD source (Figure 6-5), and the original aspect ratio.
- Page 45 Full Screen (HD to SD) SD to HD up conversion formats The Full Screen option (Figure 6-6) also preserves When an SD source is chosen from the Video the aspect ratio of the HD image but scales it Source menu (Figure 6-5), the Format Conversion proportionally to fill the full height of the SD frame menu appears in the HD signal path, as shown (Figure 6-9).
- Page 46 fill the unused portion of the frame on either side that expands to fill the HD frame (Figure 6-16). As (Figure 6-13). No cropping occurs and the full a result, the entire SD image is preserved, but it image is preserved. appears horizontally expanded.
- Page 47 The V4HD’s HDMI/DVI output can send either Pull-down insertion is supported in the following the SD or HD video signal. Use the “HDMI Output cases: Source” setting (page 51) in the Output tab to Converting any 23.976 fps HD signal to specify either SD or HD.
-
Page 48: Tabbed Settings
Most of the time, you will probably use the Genlock TABBED SETTINGS Use the tabs (Figure 6-1) to view settings for each and Format and Genlock modes discussed below, tab in the lower right area of the window. Each tab which automatically detect the incoming video is discussed in the following sections. - Page 49 ProRes sequence, capture or playback preset, or The Timecode Source menu (Figure 6-19) lets you when you specify V4HD (or MOTU) Full Raster specify which time code source you would like the for video input or output (as demonstrated in V4HD to resolve to: Sony 9-pin (via the RS-422 Figure 7-4 on page 60).
- Page 50 480i Setup also allows you to resolve the V4HD to another The 480i Setup option (Figure 6-19) lets you digital audio device via its word clock input, AES/ choose between USA (7.5%) and Japan (0.0%) for EBU input or ADAT optical input. See “Syncing NTSC composite and S-video input and output.
-
Page 51: Output
OUTPUT 576i Broadcast Legalizer The 576i Broadcast Legalizer menu (Figure 6-22, The Output tab (Figure 6-22) provides settings for Figure 6-24) controls limiting the PAL composite the V4HD video outputs. output in a similar manner as discussed above for 480i Broadcast Legalizer NTSC composite output, except that the levels for Video with highly saturated colors may result in a PAL are expressed in millivolts (mV). -
Page 52: Preview
(SD or HD) from the menu provided. If up V4HD hardware, so you won’t be able to capture or conversion or down conversion is being applied, play anything in Final Cut Pro while MOTU Video the “Format Conversion menu” on page 44 Setup is the active application. -
Page 53: Playback
Internal PLAYBACK Choose Internal (Figure 6-28) to make the V4HD The Playback tab (Figure 6-27) provides settings resolve to its own internal clock. This setting is best that apply to video playback from Final Cut Pro (as when you do not need to resolve the V4HD to opposed to capturing). -
Page 54: Convert
None/Weave options are grayed out. Clicking on these buttons option below. will not bring the MOTU Video Setup application to the front, so you can switch between fields, or between Full Frame and Single Fields modes, while Final Cut Pro is the front application. -
Page 55: Input
The Devices menu provides a shortcut for Upconversion Sharpness Adjust Upconversion Sharpness (Figure 6-29) to launching the MOTU Audio Setup application. If you have multiple MOTU video interfaces further improve the deinterlaced HD image. This connected, it also lets you choose which interface... - Page 56 M O T U V I D E O S E T U P...
-
Page 57: Final Cut Pro
3, “Installing Capture and Device Control. the V4HD Hardware” (page 19). Switch on the V4HD and run MOTU Video The V4HD supports full-raster HD capture to ■ Setup to make sure that installation has been Apple ProRes or any other similar HD codec of successful. -
Page 58: Easy Setups
■ sequence presets. The V4HD presets are identified Device Control Preset ■ by either V4HD or MOTU in their name. If you don’t see a preset for the capture or playback Video Playback ■ scenario you need, this doesn’t necessarily mean Audio Playback ■... -
Page 59: Choosing A Workflow
CHOOSING A WORKFLOW capture and decompression during playback. The V4HD supports a range of SD and HD Video streams over FireWire to and from the workflows, summarized in Figure 7-3 below. The computer as a compressed DVCPro video stream. V4HD supports every workflow via FireWire 400 Choose the sequence and capture presets that or 800, although Apple ProRes 422 HQ should be correspond with the video format, frame rate and... -
Page 60: V4Hd Hardware Settings
Audio/Video Settings windows (Figure 7-1 optimized for codecs that are similar in nature to and Figure 7-2), open the MOTU Video Setup ProRes HQ (around a 6:1 compression ratio or application (Figure 6-1 on page 41) to view the higher). -
Page 61: Log And Capture
When capturing any form of DVCPro (DVCPro25, Pro project and specified the video input you wish DVCPro50 or DVCProHD), the V4HD hardware to capture in MOTU Video Setup, you are ready to does the work of compressing the incoming log and capture video from the V4HD: (uncompressed) video stream into DVCPro. -
Page 62: Playback And Monitoring
V4HD in Playback Only described above. Final Cut Pro does the work of transcoding the video stream, and so the mode (Figure 6-19) in MOTU Video Setup. See “Playback Only (disable inputs)” on page 50. In computer’s CPU performance must be good this mode, you can either run the V4HD under its enough to handle the real-time transcoding. -
Page 63: Hardware Conversion During Capture Or Playback
codec you have chosen, core processor speeds, etc. Hardware conversion If you have a four- or eight-core machine, however, during... Final Cut Pro settings V4HD settings you should be able to play back just about any Playback Video Playback Playback Signal Path video format you wish. -
Page 64: V4Hd Audio Settings
You can verify the V4HD’s audio settings using convert 29.97 fps to 30 fps (or vice versa), 23.976 MOTU Audio Setup (Figure 8-1 on page 72). fps to 24 fps, 59.94 fps to 60 fps, etc. Conversion from NTSC to PAL (or vice versa) Choosing audio banks ■... -
Page 65: Audio Capture
This is the order in which the banks appear in MOTU Audio Setup: Figure 7-8: The top to bottom order of the audio banks listed in MOTU Figure 7-9: Clip Settings tab. Audio Setup is how they are ordered in Final Cut Pro. -
Page 66: Audio Playback
Playback tab (Figure 6-27 on 3 Choose Sequence menu> Settings. page 53) in MOTU video Setup and choose the 4 Click the Audio Outputs tab and configure the Playback Clock Source (page 53). Also check the outputs as needed. -
Page 67: Firewire 400 Bandwidth
If you see this message, try the following: 1080i60 (1280 x 1080 raster) at all 1080i frame rates listed on page 107 In MOTU Audio Setup (Figure 8-1 on page 72), ■ The V4HD can capture and play back 1080i50 at 30 choose a lower sample rate (such as 44.1 or 48... - Page 68 F I N A L C U T P R O...
-
Page 69: Part 3: Audio Operation
Part 3 Audio Operation... -
Page 71: Accessing Motu Audio Setup
Click the MOTU Audio Setup icon in the dock ■ Accessing MOTU Audio Setup ..... . . 71 Press on the MOTU Audio Setup dock icon to ■... -
Page 72: Motu Audio Setup
V4HD, you’ll see a separate tab for each interface. Figure 8-1: MOTU Audio Setup gives you access to all of the audio settings in the V4HD hardware. M O T U A U D I O S E T U P... -
Page 73: V4Hd Tab Settings
When video is disabled (see “Enable Video” on sample rate settings in your hardware and here in page 50), the ADAT optical clock source setting MOTU Audio Setup. refers to the clock provided by the V4HD’s optical input, when it is connected to an ADAT optical Operation at 4x sample rates (176.4 or 192kHz) -
Page 74: Default Stereo Input/Output
When video is disabled (see “Enable Video” on such as the word clock output from a digital mixer page 50), the MOTU FireWire Audio Driver has or a digital audio interface. the ability to resolve to other Core Audio drivers. -
Page 75: Phones
The Default Stereo Input and Default Stereo Output explained below. The options in the menu change, settings in MOTU Audio Setup (Figure 8-1 on depending on the V4HD’s current Sample Rate page 72) let you specify the stereo input and output setting (page 73). -
Page 76: Additional Audio Delay
x 4 / ÷ 4 Playback from Final Cut Pro The Additional Audio Delay option can be applied Choose one of these sample rate conversion options when the rate for the chosen digital I/O to audio being played back from Final Cut Pro to bank needs to be four times the V4HD system align it to Final Cut Pro’s video output. -
Page 77: Programmable Meters
V4HD front panel. Choices are: analog out Check this option if you would like the MOTU (analog in has its own dedicated bank of meters), Audio Setup icon to appear in the application dock... - Page 78 Figure 8-4: The Edit Channel Names window. M O T U A U D I O S E T U P...
- Page 79 CueMix FX CHAPTER OVERVIEW CueMix monitoring benefits ......80 CueMix FX provides access to the flexible audio CueMix FX installation .
-
Page 80: Cuemix Fx
CUEMIX MONITORING BENEFITS Viewing one mix at a time CueMix FX displays one mix at a time. To select CueMix FX provides several major benefits to your which mix you are viewing, choose the desired mix video post-production workflow: bus from the Mix bus menu (Figure 9-1). Double- CueMix has no buffer latency. -
Page 81: Shortcuts
Width Master mute Width spreads the left and right channels across the The master mute button (Figure 9-1) temporarily disables (silences) the mix. stereo image, depending on the knob position. Minimum value (turning the pan knob all the way Output level meter down) maintains the original stereo image: the left The Output level meter (Figure 9-1) shows you the channel goes entirely left and right goes entirely... -
Page 82: Message Center
MESSAGE CENTER Talkback / Listenback mic input Choose the audio input to which your Talkback The Message Center displays fly-over help for items and/or Listenback mic is connected, as shown in the CueMix FX window. below: SOLO LIGHT The Solo light (Figure 9-1) illuminates when any Talkback Listenback input in the current (active) mix bus is soloed... -
Page 83: File Menu
CueMix FX File menu refers to a feature that is If you would like to engage both Talkback and available in other MOTU audio interface products. Listenback at the same time, enable the Link button Therefore, this menu item is grayed out when you (Figure 9-3). -
Page 84: Devices Menu
DEVICES MENU Import Loads all configurations from a configuration If you are working with more than one MOTU file on disk. audio interface product, this menu displays all Export Saves all current configurations as a file on interfaces that are currently on line. -
Page 85: Talkback Menu
CueMix FX is not the front-most application. Phones setting in MOTU Audio Setup. However, In addition, you will not be able to control other this menu provides one extra option that is host software with the control surface at any time exclusive to CueMix FX: Follow Active Mix. - Page 86 Enabled Other HUI-compatible control surfaces Check this menu item to turn on control surface Any control surface that has the ability to emulate a operation of CueMix FX. Uncheck it to turn off HUI should be compatible with CueMix FX. Just control surface support.
-
Page 87: Motu Smpte Setup
OVERVIEW MOTU SMPTE Setup........88 MOTU SMPTE Setup gives you access to the Clock/Address. - Page 88 Figure 10-1) provides settings for The Clock/Address menu (Figure 10-1) provides synchronizing the V4HD to SMPTE time code. the same global Clock Source setting as in MOTU Status lights Audio Setup (“Clock Source” on page 73), but it...
- Page 89 Address The ‘Infinite’ freewheel setting The Infinite freewheel setting in the Freewheel The Address light glows continuously when the Address menu causes the V4HD to freewheel V4HD has successfully achieved lockup to SMPTE time code. indefinitely, until it receives readable time code again.
- Page 90 Stripe Click this button to start or stop time code. To set the start time, click directly on the SMPTE time code display in the Generator section and type in the desired start time. Or drag vertically on the numbers. Click here to edit the start time, or drag vertically...
-
Page 91: Standalone Operation
Part 4 Standalone Operation... - Page 93 Standalone Operation CHAPTER The V4HD can operate as a standalone video and Other video settings After choosing the video source above, press the audio distributor and converter. It can also operate left/right PAGE buttons to access additional video as a standalone digital audio mixer. settings, such as specifying the HD output format.
- Page 94 You can program the V4HD’s conversion settings using the front panel LCD. You can also use the Capture/Convert Signal Path settings in the MOTU Video Setup software beforehand, and then disconnect the computer. The Capture/Convert settings you make in the software are remembered and remain in effect during standalone operation.
- Page 95 Front Panel LCD Programming CHAPTER OVERVIEW Video Status......... . 96 The V4HD is the first FireWire video interface to Multi-Function LCD display .
-
Page 96: Front Panel Lcd Programming
The V4HD is connected to the computer and it is in Capture mode, i.e. it is under the control of Final Cut Pro for log and capture, or it is under control of the MOTU Video Setup software with the Preview tab selected. Playback Final Cut Pro is playing back. -
Page 97: Multi-Function Lcd Display
Use the MENU, PAGE and CURS (cursor) buttons Blinking LEDs (Figure 12-1) to navigate the menus in the LCD The Auto Detect Input Format menu in the MOTU display, as explained in the following sections. Video Setup software Setup tab (Figure 6-19 on... -
Page 98: Video Menu
value chosen will flash. Push the VALUE knob to Video Source This is the setting described in “Video Source confirm your choice; the newly chosen value will menu” on page 44. stop flashing. Auto Detect The PHONES knob This is the setting described in “Auto Detect Input The PHONES knob lets you control the volume of Format”... -
Page 99: Audio Menu
Clock Source products) or Type II (for 2x optical connection to This is the setting described in “Clock Source” on MOTU products). Turn the VALUE knob to switch page 73. between Type I and II, respectively, and then push the knob to confirm your choice. - Page 100 Navigating CueMix parameters in the LCD Mix parameters Mix parameters are settings such as channel The CueMix mixer has the following layout in the LCD display: volume (gain), pan, mute/solo, etc. To access the mix parameters for the currently displayed bank, press the left/right PAGE buttons until the Mix parameter (Figure 12-5) flashes and then turn the Mix bus...
- Page 101 Paste Bus Mix Bus level The bus level is the overall volume for the bus After you copy mix settings (explained above), Paste Bus Mix lets you paste the copied mix settings output pair. To access bus level, press the left/right PAGE buttons until you see Bus Level displayed in to another mix.
-
Page 102: V4Hd Setup Menu
V4HD SETUP MENU Main Volume Ctl (Control) The Main Volume Control setting can only be Press the MENU button repeatedly to access the changed from the V4HD front panel LCD. This lets V4HD Setup menu. This menu gives you access to you choose which audio output pairs on the V4HD several important global settings in the V4HD, as are controlled using the front panel main volume... -
Page 103: Part 5: Appendices
Part 5 Appendices... -
Page 105: Troubleshooting
V4HD’s manual genlock mode. See “Auto Detect Input Format” on page 48. I see a message in the MOTU Video Setup preview window that says “Codec Missing”. Why can’t I see a preview? If you see a Codec Missing message in the Preview frame, this means that MOTU Video Setup cannot Figure A-2: FireWire bandwidth warning. - Page 106 V4HD. Doing does not output any video. so entitles you to technical support and notices Make sure the Final Cut Pro MOTU RT Enabler is about new products and software updates. properly installed in Library\Application Support\Final Cut Pro System Support\Plugins.
-
Page 107: Video Formats
Video Formats APPENDIX VIDEO INPUT AND OUTPUT FORMATS FINAL CUT PRO VIDEO FORMATS The V4HD supports the following video input and The V4HD can play back the following video output formats: formats from Final Cut Pro: 480i29.97 (NTSC) Uncompressed 8-bit and 10-bit at 480p23.976, ■... - Page 108 A P P E N D I X B : V I D E O F O R M A T S...
-
Page 109: V4Hd Specifications
V4HD Specifications APPENDIX VIDEO I/O 2 x AES/EBU connectors — provides 4-channel ■ 1 x HD-SDI in and out (4:2:2 10-bit) on direct connection without a breakout cable ■ independent BNC connectors 8-channel HD-SDI and SD-SDI embedded ■ 1 x SD-SDI in and out (4:2:2 10-bit) on audio in/out, 24-bit at 44.1 or 48kHz ■... - Page 110 INCLUDED SOFTWARE AND Stand-alone operation — mix and monitor ■ COMPATIBILITY audio with no computer connected. Includes MOTU Video Setup software — ■ graphically displays HD and SD signal path and SYNC AND DEVICE CONTROL provides complete control of all programmable Video reference in and thru —...
-
Page 111: Db25 To Xlr Pin Outs
DB25 to XLR Pin Outs APPENDIX DB25 TO 8 FEMALE (IN) OR MALE (OUT) XLR For balanced V4HD analog input or output Panasonic/Tascam standard DB25 TO 4 FEMALE (IN) / 4 MALE (OUT) XLR For bi-directional V4HD AES/EBU digital I/O Panasonic/Tascam standard... - Page 112 DB25 TO 8 FEMALE (IN) OR MALE (OUT) XLR DB25 TO 4 FEMALE (IN) / 4 MALE (OUT) XLR For balanced V4HD analog input or output For bi-directional V4HD AES/EBU digital I/O Panasonic/Tascam standard Panasonic/Tascam standard Signal Signal Channel 8 (+) Channel 7/8 Out (+) SG (Signal Ground) SG (Signal Ground)
-
Page 113: Index
Index ÷ 2 synchronization 29, 30, 50 75, 76 ÷ 4 Analog Cables 24, 111 1080 audio breakout cables breakout 24, 25, 111 playback settings audio connectors Cadence (pull-down) 1080i29.97 connectors Camcorders 1080i50 67, 107 enable/disable connecting 67, 107 1080i60 in/out 1-8 Camera 1080PsF29.97... - Page 114 Mackie control surfaces in signal path diagram Phones menu installing drivers Factory Defaults Share surfaces with other applica- tions PCI adaptors FCP MOTU RT Enabler.txt Talkback menu Firmware update Field 1/2 options talkback settings Follow Active Mix File menu 7, 97...
- Page 115 Out LED MOTU Video Console 76, 99 Latency output format 42, 43, 46, 49 Output tab Launch MOTU Audio Setup when hard- pillar box format Playback tab ware becomes available option 41-55 pull-down insertion/removal MOTU Video Setup 11, 77...
- Page 116 Input menu sample rate conversion Output Timecode Format menu Quick reference SDI/HDMI Output menu 75, 99 video 8, 27 MOTU Audio Setup SD-SDI example System preferences MOTU Video Setup 11, 74 Timecode Output Format menu sound input/output SD-SDI System requirements...
- Page 117 lock LED standalone mode 39, 93 VITC LTC connectors summary of features generating Non-drop sync during playback resolving to 11, 72 49, 102 offset time code output options 49, 102 45, 98 output format options up conversion Source menu 49, 102 Word Clock In setting 7, 97 sync...
- Page 118 I N D E X...
Need help?
Do you have a question about the V4HD and is the answer not in the manual?
Questions and answers