Table of Contents
Advertisement
Quick Links
Advertisement
Table of Contents

Subscribe to Our Youtube Channel
Related Manuals for Baumatic BK600F


Summary of Contents for Baumatic BK600F
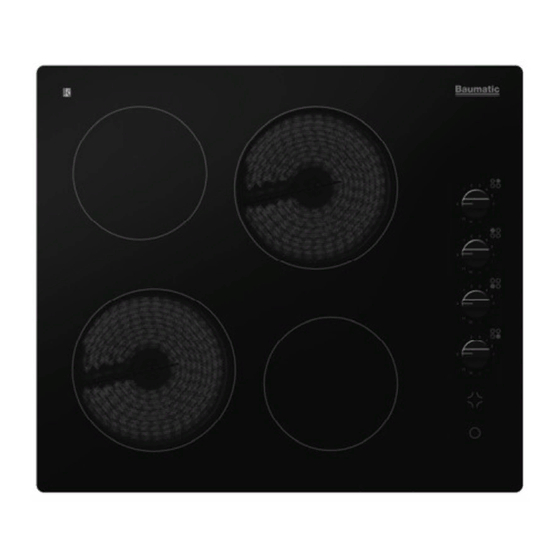
- Page 1 BK600F 60cm 4 Radiant zone frameless ceramic hob...
- Page 2 User Manual for your Baumatic BK600F 60 cm 4 Radiant zone frameless ceramic hob. NOTE : This User Instruction Manual contains important information, including safety & installation points, which will enable you to get the most out of your appliance. Please keep it in a safe place so that it is easily available for future reference;...
-
Page 3: Table Of Contents
Contents Environmental note Important safety information 5 – 8 Specifications 9 - 10 Product and aperture dimensions Product specifications Standard accessories Electrical details 9 - 10 Ceramic hob surface layout Using the ceramic hob 11 - 13 Before first use Control knobs Switching on a zone and setting a power level Residual heat indicators... -
Page 4: Environmental Note
Environmental note o The packaging materials that Baumatic uses are environmentally friendly and can be recycled. o Please discard all packaging material with due regard for the environment. -
Page 5: Important Safety Information
No modifications to the appliance are permitted by Baumatic Ltd. o You should not store or place flammable or highly flammable liquids/materials on top of or near the appliance. Items made... - Page 6 Safety o Baumatic strongly recommend that babies and young children are prevented from being near to the appliance and not allowed to touch the applian ce at any time. During and after use, all surfaces will be hot. o If it is necessary for younger family members to be in the...
- Page 7 Please see the specific section of this booklet that refers to stallation. Baumatic Ltd. declines any responsibility for injury or damage, to person or property, as a re sult of improper use or incorrect stallation of this appliance.
- Page 8 o avoid damaging your appliance The ceramic glass can be damaged by objects falling onto it. o The ceram ic glass edge can be damaged by knocks from cookware. o Cast iron and cast aluminium cookware with damaged bas may scratch the ceramic surface if they are dragged across it. o Pans should be lifted on and off the hob surface and not dragged.
-
Page 9: Specifications
pecifications Product dimensions: Aperture dimensions: Height: 55 mm Width: 580 mm Width: 560 mm epth: 510 mm Depth: 490 mm roduct specifications: o 2 x 1.70 kW radiant zones (Ø 180 mm) o 2 x 1.20 kW radiant zon es (Ø 145 mm) o Side control operation o 4 x individu al heat indicators... -
Page 10: Ceramic Hob Surface Layout
For future reference please record the following information which can be found on the rating plate and the date of purchase which can be found on your sales invoice. The rating plate of yo ur hob is located on e underneath of the appliance. Therefore it is a good idea to record this information before you install your ap pliance. -
Page 11: Using The Ceramic Hob
sing the ceramic hob Before first use IMPORTANT: You should clean the ceramic hob surface (see “Cleaning and maintenance” section). o You should switch on one cooking zone at a time, for 5 minutes at the maximum setting. This will help to eliminate any new smell that exists and evaporate any h umidity that has formed on the heating elements during transit. -
Page 12: Residual Heat Indicators
esidual heat indicators o Underneath the control k nobs there are residual heat indicators (one per cooking zone). o After switching a cooking zone on, when the temperature of the zone goes abo ve 65°C the corresponding residual heat indicator will come on. -
Page 13: Cleaning And Maintenance
o Preferably cover pans with a lid to permit cooking at a lower heat. o Always cook vegetables and potatoes, etc. in as little water to reduce cooking times. o Food or liquid that has high sugar content may damage the hob top if it comes into contact with the ceramic hob surface. -
Page 14: Cleaning Table
Cleaning table Type of deposit Remove Remove What should immediately? when the use to remove appliance the deposit? cooled down? Sugar or Ceramic hob food/liquid scraper containing sugar Tin foil or plastic Ceramic hob scraper Fat splashes Ceramic hob cleaner Metallic Ceramic hob discolouration... -
Page 15: Using A Specialist Ceramic Hob Cleaner
Using a specialist ceramic hob cleaner It is possible to purchase a specialist ceramic hob cleaner/conditioner. You should follow the instructions given by the manufacturer of the pecialist ceramic hob cleaner. You should ensure that it is suitable for use on your appl iance. -
Page 16: Unpacking The Appliance
Unpacking the appliance hen unpacking the appliance please check that the following items are contained wit hin the packaging: 1 Baumatic hob 1 Ceramic hob scraper 1 Installation and instruction manual 1 Baumatic guar antee card 4 Fixing bracket Fixing screws... - Page 17 o Carefully turn the hob upside down and place it on a cushioned mat. o Apply the sealing strip provided around the edge of the appliance. o The protective covering must be removed from both sides. o Do not leave a gap in the sealing agent or overlap the thickness. o IMPORTANT: Do not use a silicon sealant to seal the appliance against the cut-out.
-
Page 18: Electrical Connection
Electrical connection This appliance must be installed by a qualified person in accordance with the latest edition of the I.E.E. Regulations and in compliance with Baumatic’s instructions. Before connecting the appliance, make sure that the supply voltage marked on the rating plate corresponds with your mains supply voltage. - Page 19 o The cable connections must be in accordance with the diagram located on the bottom of the hob. o The brass links must be positioned as marked in the diagram above and once established ALL terminal screws must be tightened down firmly. o If when the hob is first switched on, only two of the zones work, you should recheck that the terminal screws are all fully tightened between the links.
-
Page 20: Replacing The Mains Supply Cable
* IMPORTANT: If the cooking zone does appear to be hotter than 65°C and the residual heat indicator has not come on, you should call the Baumatic Customer Care Department. o A humming sound is heard when a cooking zone is selected. -
Page 21: Installation
Or any installation other than the one specified by Baumatic Ltd. has been completed. Please refer to the conditions of guarantee that appear on the warranty card that you receive with the appliance. -
Page 22: Contact Details
Czech Republic United Kingdom Baumatic CR SPOL. S.R.O. Baumatic Ltd., 46215, Librec Baumatic Buildings, The Czech Republic 6 Bennet Road, Reading, Berkshire +4204 8357 7200 RG2 0QX United Kingdom www.baumatic.cz Sales Telephone Germany (0118) 933 6900 Baumatic GMBH Janderstrasse 9...
Need help?
Do you have a question about the BK600F and is the answer not in the manual?
Questions and answers