Table of Contents
Advertisement
Attention Symbols, Warning Symbols, and Gray Boxes
You must be aware of safety when you install and use this system. This User Guide provides various
procedures. If you do some of these procedures carelessly, you could injure or kill yourself or damage
equipment or property. Some other procedures require special attention.
The
WARNING!
You could injure or kill yourself, or
You could damage equipment or property.
The
ATTENTION!
Important instructions for using the system, or
Important instructions for maintaining the system.
The Class II Symbol alerts qualified service personnel to use only identical replacement
parts in this apparatus.
For Your Safety
Do not try to open the case of the receiver. There is risk of electrical shock, which may cause
damage to the receiver and/or personal injury or death to you. There are no user-serviceable parts
inside the receiver. Opening the receiver case or making unauthorized changes will void
the warranty.
To reduce the risk of fire or electric shock, do not expose this appliance to rain or moisture.
Important Software Notice
As with all software controlled products, unexpected behavior could arise if the user tries to perform operations in a non-
routine manner. This product, like almost any other high tech product, is subject to bugs and hence EchoStar CANNOT AND
DOES NOT GUARANTEE OR WARRANT THAT ALL FEATURES, SUCH AS PARENTAL CONTROL, WILL WORK
AS INTENDED UNDER ALL CIRCUMSTANCES. EchoStar endeavors to improve such conditions and will periodically
download improvements.
Equipment and Software Covered by this User's Guide
This User Guide covers DISH Player-DVR 512 receivers and software model DP512. This Guide may cover other devices, not listed here.
Copyright Notice
Copyright © 2010 EchoStar Technologies L.L.C., Englewood, Colorado 80112. All rights reserved.
The information in this User Guide may change without notice. We may issue revisions to tell you about such changes.
Please send comments or questions about this User Guide to: Technical Publications, EchoStar Technologies L.L.C., 100 Inverness Circle East, Englewood,
Colorado 80112.
Part Number: 176556
Printed in the United States of America.
DISH Network is a registered trademark of EchoStar Corporation. For information about DISH Network, please visit our website at www.dishnetwork.com.
We acknowledge all product names, trade names, or corporate names we mention in this User Guide to be the proprietary property of the registered owners.
symbol means that if you are not careful,
symbol means you should pay special attention to:
Advertisement
Table of Contents

Related Manuals for Dish Network 512


Summary of Contents for Dish Network 512
-
Page 1: For Your Safety
Equipment and Software Covered by this User’s Guide This User Guide covers DISH Player-DVR 512 receivers and software model DP512. This Guide may cover other devices, not listed here. Copyright Notice Copyright © 2010 EchoStar Technologies L.L.C., Englewood, Colorado 80112. All rights reserved. -
Page 2: Table Of Contents
Contents Safety Instructions... iii Chapter 1 - Introduction ... 1 Welcome! ... 1 About this Receiver ... 2 Overview ... 2 Getting Started ... 4 Quick Tour of Basic Features ... 5 Quick Tour of the Menus ... 7 Quick Tour of Digital Video Recorder Features ... 12 Quick Tour of Watching One Program While Recording Others ... - Page 3 Contents Personal Identification Numbers ...81 Using Caller ID ...81 Resetting Receiver to Factory Default Settings ...82 Changing Audio Languages for Programs ...83 Receiver Updates ...84 Control Other Devices with the Remote Control ... 85 Testing the System ...95 Chapter 4 - Reference...97 Troubleshooting Tables ...97 Device Codes ...109 Appendix ...115...
-
Page 4: Safety Instructions
Note to Satellite TV System Installer satellite TV system installer’s attention to Article 820-40 of the National Electrical Code (NEC) that provides guidelines for proper grounding and, in particular, specifies that the cable ground shall be connected to the grounding system of the building as close to the point of cable entry as practical (see the illustration). - Page 5 Safety Safety Tips • Unplug the receiver from the AC power outlet before cleaning. • Always handle the satellite receiver carefully. Excessive shock and vibration can damage the hard drive. • Do not place the receiver in an enclosure such as a cabinet without proper ventilation.
-
Page 6: Chapter 1 - Introduction
Congratulations on choosing DISH Network. You are about to experience the excitement and convenience of Direct Broadcast Satellite (DBS) service, which delivers the very best picture and sound quality. DISH Network consistently provides state-of-the-art products and satellite-delivered services — with high performance, ease of operation, and a wide variety of entertainment options. -
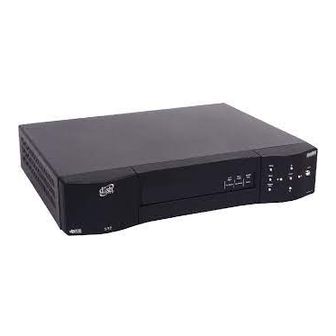
Page 7: About This Receiver
Chapter 1 Introduction About this Receiver Your DISH Network satellite receiver has features that make watching TV more exciting. Along with the integrated digital video recording (DVR) functions, you are about to discover new ways to make programming choices. Remote Controls Two remote controls coan be used with your receiver: •... -
Page 8: Fixed Images
Whenever the receiver’s TV1 output(s) are turned off using the remote control or front-panel POWER buttons, you will see the DISH Network logo moving around on your TV screen. This feature is included with your receiver to assure you that the connections between your receiver and TV(s) are not lost. -
Page 9: Getting Started
Note numbers on the 4. Call the Customer Service Center at 1-800-333-DISH (3474). A customer service representative will help you start DISH Network programming on your system and will discuss the various programming packages available. 5. Choose a package and the representative will authorize your programming. -
Page 10: Quick Tour Of Basic Features
Step 2: Finding Programs to Watch 1. Press the GUIDE button. 2. When the Program Guide DOWN ARROW to view information on other channels. Press the PAGE UP and PAGE DOWN buttons to move you quickly through the . The channels for the programming you ordered Guide should be shown in white and are available for viewing. - Page 11 Chapter 1 Introduction information screen opaque (solid). When you press the INFO button a third time, the information screen is closed. 8. Press the CANCEL button to return to watching the program. 9. Press the BROWSE (RIGHT ARROW) button to open the Browse Banner on a program you’re watching at the top, and information on two other programs at the bottom of the TV screen.
-
Page 12: Quick Tour Of The Menus
Quick Tour of the Menus This tour guides you quickly through the basic features available through . See Chapter 3, Using the System for more information Main Menu about these and other features. : The menu buttons that are grayed out indicate that while the features Note are not yet available on this system, they may become available with future software upgrades. - Page 13 Introduction 5. Press the MENU button to go back to the 6. Press the 3 button to select the provides convenient access to your DISH Network account to review your statement, pay your bill, upgrade programming, and more. 7. Press the 0 button to go back to the 8.
- Page 14 9. Press the MENU button to go back to the 10. Press the 5 button to select the . This menu allows you to apply password-protected Menu locks on programming based on rating, or even on a channel- by-channel basis. 11.
- Page 15 Chapter 1 Introduction 13. Press MENU to go back to the 14. Press the 7 button to select the Menu used to trigger automatic channel changes, reminders, or DVR recordings. 15. Press MENU to go back to the 16. Press the 8 button to open the allows you to set up your receiver to make it more convenient to use.
- Page 16 17. Press 3 to open the Favorites set up lists of your favorite channels to make finding what you want to watch easier. 18. Press MENU to go back to the 19. Press the VIEW LIVE TV button to return to watching the program in progress.
-
Page 17: Quick Tour Of Digital Video Recorder Features
The following tour gives you an overview of the DVR features of your DISH Network satellite TV receiver. For instructions on specific functions, see Chapter 3, Using the System. - Page 18 6. Press the PAUSE button and then press the BACK button to reverse the program in slow motion. Press the BACK button once to reverse the program 1/4 the speed as normal play. Press the BACK button twice to reverse at normal speed. As you press the BACK button repeatedly, the program reverses faster with each press up to its fastest speed.
- Page 19 Chapter 1 Introduction 9. Press the PAUSE button and then press the FWD button to forward the program in slow motion. When you press the FWD button once the program advances at 1/15 the speed of normal play. Press the FWD button twice to forward at 1/4 as fast as normal play.
- Page 20 15. Now, if you want to take the time, use the another program set to start in the next few minutes. : Start watching the program when it starts. Watch the program for Note a few minutes. 16. Press the BACK button to reverse the program. : Let the program reverse all the way to its start.
-
Page 21: Quick Tour Of Watching One Program While Recording Others
Chapter 1 Introduction Quick Tour of Watching One Program While Recording Others The steps below show one of many ways to watch one program while recording another. 1. Press GUIDE to open the you want to watch now. 2. Press SELECT to watch that program. 3. -
Page 22: Quick Tour Of Picture-In-Picture (Pip)
Quick Tour of Picture-in-Picture (PIP) Your DISH Network receiver allows you to watch two different programs at the same time using Picture-in-Picture (PIP). 1. Press PIP. The PIP window will open. The program in the small box will be whatever is playing on the last channel you watched on that tuner. -
Page 23: Satellite Television
Solar Interference Twice a year, the sun moves to a position behind the DISH Network satellite as it orbits the Earth. The exact time of the year that this occurs varies, depending on the location, but it is near the beginning of spring and again near the beginning of autumn. -
Page 24: Chapter 2 - Receiver Description And Installation
Chapter 2 Receiver Description and Installation Receiver Front Panel Smart Card Door Behind this door is a slot for a future smart card. No smart card is included with this receiver. Arrow Buttons You can use the ARROW buttons to change satellite channels displayed on your TV. -
Page 25: Receiver Back Panel
Chapter 2 Receiver Description and Installation Receiver Back Panel Tip: The six coaxial connections on the back of your receiver are color coded to make the The receiver connections on the back panel are arranged in three groups: connectors easy to •... -
Page 26: Remote Controls
Interactive features, or access other customer services from DISH Network. Remote Controls Remote controls give you easy access to all the features of your satellite receiver. You can set up a DISH Network four-component remote to control the output to use this feature. port is color-coded green. - Page 27 Chapter 2 Receiver Description and Installation satellite receiver and as many as three other devices. These devices can be your TV, a VCR or DVD player, and a third device (an audio system or a second TV). Types of Remote Controls Remote Control (IR silver or IR uses infrared, line-of-sight green)
-
Page 28: Low Battery Warning
Batteries The remote controls come with AAA-size batteries, which need to be installed when you first receive your system. When you replace old batteries, you should replace all of the batteries. Use batteries of the same kind, for example alkaline or lithium, and don’t mix batteries of different types or kinds. -
Page 29: Connecting The Receiver To Your Nearby Tv
2. Place the white the receiver (see the picture on the next page in the margin). Page 24 : If your optional DISH Network UHF Pro remote Attention control isn’t working very well from far away, you may be experiencing interference from objects near your receiver. To improve the remote control’s range, try any or all of the... - Page 30 3. Plug in the power cord for the receiver. 4. Turn on the receiver with the front-panel power button and make sure the green TV1 power indicator is lit. 5. Turn on the nearby TV. 6. Tune the TV to channel 3. 7.
-
Page 31: Programming The Recover Button
Chapter 2 Receiver Description and Installation Confirming IR/UHF Pro Remote Control Operation After any remote TV(s) have been connected to the receiver, do the following to make sure an IR/UHF Pro remote can control the receiver from another room: 1. Press the SAT button to put the UHF Pro remote control in SAT mode to control the satellite receiver. -
Page 32: Changing The Tv1 Output Channel
You must keep the receiver connected to an active telephone line. Otherwise, you may not be able to order pay-per-view programs, use all of the DISH Home Interactive features, or access other customer services from DISH Network. coaxial output. If you are uses. - Page 33 : If you have Digital Subscriber Line (DSL), then you may have to install a Note DSL filter between the receiver’s back panel PHONE JACK and the telephone wall jack to successfully connect with DISH Network. You can obtain such a filter from your DSL provider or local consumer-electronics parts store. Phone Line Connection Run a telephone cable with a standard RJ-11 connector from the receiver’s back...
-
Page 34: Connecting The Receiver To A Dish Antenna System
Connecting the Receiver to a Dish Antenna System : Before you can begin connecting your receiver to your dish antenna, you Note must first complete the preceding sections on connecting your TVs to the receiver. If your dish antenna system has been installed and peaked for maximum signal strength, then complete the following instructions to connect the dish antenna system to the receiver. - Page 35 Chapter 2 Receiver Description and Installation has finished testing your switch, it displays the screen. 6. Make sure that the information on the identifies your system correctly and shows all transponders for all satellites in your system. Your screen may look different from the example above, depending on the dish antenna system you are using.
-
Page 36: Optional - Connecting Vcrs To The System
Optional - Connecting VCRs to the System The diagram below provides examples of how to connect VCRs to your satellite TV system. Your particular installation may differ from these examples. Connecting a VCR to the Nearby TV 1. Connect a coaxial cable from the nearby VCR’s tuner input port. -
Page 37: Optimize Your Remote Controls
Chapter 2 Receiver Description and Installation TV distribution equipment devices may include coax panels, amplifiers or super home nodes, and are available through many companies. Optimize Your Remote Controls Change the Address When you receive your system, both remote controls and the receiver have been set to communicate on address 1. - Page 38 Attach a UHF Attenuator (for optional accessory) Stray UHF signals can block signals sent from a remote control to the receiver. Obtain a 10 dB attenuator (you can buy one from a consumer-electronics parts store). : This will help keep out stray UHF radio signals, but also cut down on Note how far away you can use the remote control from the satellite receiver.
-
Page 39: Setting Up Tv1 To Operate In Uhf Pro
Chapter 2 Receiver Description and Installation Setting Up TV1 to Operate in UHF Pro You can set your receiver to operate TV1 using an optional IR/UHF Pro remote control (sold separately) by completing the following instructions: 1. Perform the following using an existing remote control: a. -
Page 40: Setting Up Tv1 To Operate In Ir (Default)
Setting Up TV1 to Operate in IR (default) The following instructions describe how to set up TV1 to operate in IR only, which is the default. 1. Perform the following with an existing linked remote control: a. Open the TV1 UHF Pro Setup remote control. - Page 41 Chapter 2 Receiver Description and Installation Page 36...
-
Page 42: Chapter 3 - Using The System
Chapter 3 Using the System Using the Two Satellite Tuners Your DISH Network satellite receiver includes features that gives you greater flexibility in how you watch TV. These features are enabled by the receiver’s use of two satellite TV tuners. -
Page 43: Using The Remote Control
Chapter 3 Using the System 3. Press the SWAP button. The channel that was shown in the PIP window will now be shown on the full screen. 4. Press the PIP button again to enlarge the 5. Press the PIP button once more to close the Using the Remote Control The following section describes how to use the remote control with your Tip: The included... - Page 44 Power Buttons Press the POWER button to turn your satellite receiver ON or OFF. Press the TV POWER button below it to turn your TV on or off. : You must program the remote to control your TV for the TV POWER Note button to work as described.
-
Page 45: Arrow Buttons
Chapter 3 Using the System TV/Video Button If you connect the receiver using its back panel HANNEL HANNEL video signal such as cable or over-the-air TV antenna connected to the receiver’s • Change channels while watching TV - Press the UP and DOWN ARROW buttons. - Page 46 you watch a program, or when you have the , or list open. Banner Themes Help - Press the INFO button to see help information when a • appears in a menu. View Live TV Button Press the VIEW LIVE TV button to close all menus and go to watching programming.
-
Page 47: Recover Button
Chapter 3 Using the System • You can use the letters above the NUMBER PAD buttons while within the Search to watch Rudy Fremmel Presents, you press 7 three times for an R, 8 two times for a U, 3 one time for a D, and 9 three times for a Y to spell the word “Rudy”... -
Page 48: Using The Menus
once and then all four device mode buttons to flash once. 3. If you see the System Info screen. You have recovered the video image from your satellite receiver. 4. If you do not see the System Info have recovered the video image from your satellite receiver. : Press any remote control button other than the RECOVER button to Note end this procedure. - Page 49 Chapter 3 Using the System Open and Close Menus You can open the menus in either of two ways: Tip: The IR remote • control is used to control the menus and select satellite programming on a TV connected to the receiver’s TV1 outputs.
-
Page 50: Highlighting Menu Options
– Display the Browse Banner To close a menu and return to watching a program, press either the VIEW LIVE TV or CANCEL button. : If you do not do anything in a menu for several minutes, then the menu Note automatically closes. -
Page 51: Canceling A Procedure
Chapter 3 Using the System • • Highlighting a Choice in a Menu List Use the remote control ARROW buttons to move the highlight to the desired item in the list. The black arrows on the list show where you can move the highlight. -
Page 52: Using Text Fields
Using Text Fields There are several screens that require you to enter information into areas known as fields. Your receiver has two basic ways to enter the information: • Virtual Keyboard • Remote Control NUMBER PAD Using the Virtual Keyboard Use the virtual keyboard letters to type the information. -
Page 53: Changing Channels
Chapter 3 Using the System Changing Channels There are three ways to change channels: Using the Program Guide The on-screen channels and programs. You can use the see what programs are scheduled, to set up timers, and to buy pay per view programs. -
Page 54: Scrolling Through The Program Guide
Changing the Channel in the Program Guide 1. Press GUIDE to open the 2. Choose a channel using either of the following: • Use the NUMBER PAD buttons to enter the channel number. Program Guide number you just entered. • Use the ARROW buttons to move the highlight to the chosen channel. -
Page 55: Displaying Program Information
Chapter 3 Using the System Displaying Program Information The Program Banner Program Banner are watching. The receiver displays the seconds at the top of the screen every time you change the channel or press the remote control VIEW LIVE TV button. The Browse Banner You can use the programs are available without changing the program that you are watching. -
Page 56: Using The Browse Banner
Using the Browse Banner 1. Press the BROWSE (RIGHT ARROW) button to open the Browse Banner 2. Change the channel displayed on the following: • Enter the channel number for the program or event that you want, using the NUMBER PAD buttons. •... -
Page 57: Using Favorites Lists
• You cannot make any changes to the customer service at DISH Network and changing your subscription. • Each give each list a unique name, as well. When you first get your receiver, the four lists are named should not be used until you have added channels to them. - Page 58 Creating or Changing a Favorites List You can create, add channels to, and remove channels from a 1. Press MENU-8-2 on your remote control to open 2. Select the Favorites List : You cannot modify the Note 3. Select Modify List 4.
-
Page 59: Using Timers
Chapter 3 Using the System Naming a Favorites List 1. Press MENU-8-2 to open 2. Select the 3. Select the Note 4. Enter the list’s name by doing one of the following: • • • Note the same name. Note 5. - Page 60 recurring), a sports event, a Pay- Per-View movie, or anything else that is available on satellite TV. You can set any one of the following: • A one-time event timer with • An automatic event timer for a program listed with start and stop times in the Program Guide each day or each week at the same time.
-
Page 61: Using Quick Record
Chapter 3 Using the System • • Using Quick Record You can use quick record to very quickly set a one-time, one-program Event Timer 1. Select a program you want to watch. 2. Press the RECORD button. The figure below will be displayed. 3. - Page 62 – Stop Recording Manually press STOP. Note that failing to press STOP could continue recording and fill the DVR hard drive! – Extend End Time – Create a Recurring Timer described in Setting Up an Automatic Event Timer on page 57. –...
- Page 63 Chapter 3 Using the System 4. Select a 5. Select a page 55. 6. Select any applicable timer 7. Select a channel by doing one of the following: Tip: You can edit • and delete timers from any TV that is connected to one •...
- Page 64 • Info - Search for key words in program descriptions or titles. 4. Optionally, select Exact Match if you want to find exactly what you enter in your selection of either the program Title or Info, respectively. 5. Enter your search criteria. You can use the keyboard shown on the screen or you can use the letters above the NUMBER PAD buttons on the remote control while the highlight is in the 6.
-
Page 65: Maximum Number Of Event Timers
Chapter 3 Using the System When the following: 1. Select one of the timers. The 2. When the following choices: • • • 3. After making your selection on the select the 4. Select Maximum Number of Event Timers Although you can create timers for lots of your favorite programs and events, there is a limit to the number of event timers you can create, depending on your satellite receiver’s memory. - Page 66 3. Select the event timer that you want to edit. A mark appears in the box next to the event timer. 4. Select the option. You may change the Edit . To do this, select each option that you want. Channel 5.
-
Page 67: Watching One Program While Recording Another
Chapter 3 Using the System • For All Blacked-Out Programs that is blacked out in your area, when this timer operates the receiver may display only an error or password-entry screen. If you have set an Timer Event Timer Performance when the Receiver is Off If the receiver is OFF (in standby mode) at the time an Auto-Tune or DVR Event Timer is scheduled to operate, then the receiver will turn itself ON. - Page 68 7. Select a program or event that you recorded earlier (not one that is recording now), and then select Start Over 8. You should now be watching a pre-recorded program while your satellite receiver continues recording the other two programs or events. Setting Up an Automatic Event Timer 1.
-
Page 69: Using More Dvr Features
Chapter 3 Using the System Using More DVR Features Your DVR receiver’s features let you decide how to watch TV. You can pause, reverse, or skip back through a program. Then you can return to watching, fast forward, or skip ahead through the program. Also, you can record and play back programs and events with full, digital audio and video quality, without a VCR. - Page 70 On some TVs, the presence of fixed images for extended periods of time may cause them to be permanently imprinted on the screen. Consult your TV’s user guide for information on whether this is a problem for your TV, what operating/viewing restrictions may apply to you to avoid this problem, and any associated TV warranty coverage.
- Page 71 Chapter 3 Using the System Using Quick Recording Turn the receiver on and tune it to a channel with a program you want to record. : If you record a locked program or event while you have the receiver Note locked, then you’ll have to enter the password to play back that recording.
- Page 72 • If you hide adult channels and lock the receiver, then this menu doesn’t list any programs on adult channels by name. • You can use this menu to review programs or events you have recorded or scheduled to record with the DVR receiver’s recording features. menu shows you: DVR Events •...
- Page 73 Chapter 3 Using the System • Press the BACK button once to reverse the program four times as fast as normal playblack speed. Press the BACK button twice to reverse at 15 times normal speed, three times to reverse at 60 times normal speed, and four times to reverse at 300 times normal speed.
- Page 74 Play Back a Recorded Event and Record Another Event 1. Set up the DVR receiver to make a quick recording. : You can press the RECORD button or you can use any kind of Note event timer except a VCR event timer. 2.
-
Page 75: Copy Recordings To Videotape
2. Put a new or fully rewound tape into the VCR. 3. Turn the VCR power on. 4. Press the DISH Network remote control’s DVR button. 5. Select an event on the 6. Start the VCR recording onto the tape. -
Page 76: Using Themes And Search
Using Themes and Search feature of your receiver makes it easy to find Themes and Search programs to watch. This menu allows you to search for programming by themes (movies, sports, etc.) or by key words used within the program’s information. Themes You can list and choose programs by the theme of their contents, for example, just movies or just sports. - Page 77 Chapter 3 Using the System Search 1. Open the • • • 2. The 3. You can search for events two ways: • • 4. Enter the information in the space provided in one of two ways: Tip: Use Search •...
-
Page 78: Search History
5. Select Search 6. When the Search Results • Use the UP and DOWN ARROW buttons to scroll through the results. • Use the PAGE UP and PAGE DOWN buttons to scroll a page at a time. • Select Page Up Page Down 7. -
Page 79: Using Locks
Chapter 3 Using the System • • Using Locks : Locks for programming on the Note using the receiver’s How to Set Locks: A Two-Step Process 1. Create the locks that you want. 2. Then lock the receiver. When the receiver is locked, anyone who wants to access locked items must enter the password to do so. - Page 80 : If you want to unlock the receiver or any specific lock (rating, Note channel, front panel, or PPV) then use the password. 3. Select the Lock System message prompting you to enter a password to lock the system. 4. Enter and verify a password, using the NUMBER PAD buttons. The receiver displays stars (*) as you enter the digits of the password.
-
Page 81: Creating Or Changing Channel Locks
Chapter 3 Using the System 4. Select the 5. Highlight the lowest rating that you want to block. Press the SELECT button to set a lock at the highlighted rating. Note selected. For example, if you lock PG-13 rated programs, then all programs with the R, NC-17, and NR/AO ratings are also locked. - Page 82 5. Highlight the channel that you want to lock. If necessary, press the UP or DOWN ARROW button to see the channel. You can also jump to a channel by typing the channel number using the NUMBER PAD buttons. 6. Press the SELECT button to lock or unlock the highlighted channel. If the checkbox next to the channel has a checkmark, then the channel is locked.
- Page 83 Chapter 3 Using the System 4. Select the 5. If the receiver is not locked, the you must lock it to put the lock you just created into effect. Page 78 option. Lock PPV Unlock PPV...
-
Page 84: Hiding And Showing Adult Channels
Hiding and Showing Adult Channels When you hide adult channels, you keep the and the from displaying adult channels. It also keeps anyone Browse Banner from choosing such channels by using the UP or DOWN ARROW buttons or entering the channel number using the remote control NUMBER PAD buttons. 1. - Page 85 If you forget your password, you will need to call DISH Network and speak with a Customer Service Representative. If you have a Personal Identification Number (PIN), you will need to give it to the Customer Service Representative.
-
Page 86: Personal Identification Numbers
Personal Identification Numbers You can set up a Personal Identification Number (PIN) for call-in requests only. Anyone calling DISH Network’s Customer Service Center must provide this PIN to make any changes to your account. You may call the Customer Service Center at any time to set up a PIN. -
Page 87: Resetting Receiver To Factory Default Settings
Chapter 3 Using the System Turning Caller ID On and Off 1. Press MENU 6-1-2 on the DISH Network remote control. 2. From the Caller ID screen, select either or the 3. Select Resetting Receiver to Factory Default Settings : Resetting the receiver to factory-default settings discards all... -
Page 88: Changing Audio Languages For Programs
Changing Audio Languages for Programs Changing Audio Languages for Programs You may be able to change the language of some programs’ audio. An alternate language may not be available for all programs or events. Some programs, such as movies, show at the start whether an alternate language is available. An alternate language applies only to the audio portion of the program and does not change the language used in the menus displayed by the DVR receiver. -
Page 89: Receiver Updates
Chapter 3 Using the System Receiver Updates Your satellite receiver is set to turn itself off at 3:00 a.m. so that it can receive updates to the following: 1. Press the MENU 8-5 to open the 2. Highlight the 3. Use the UP and DOWN ARROW buttons to highlight the time. 4. -
Page 90: Control Other Devices With The Remote Control
Control Other Devices with the Remote Control This section describes how to use an IR (or optional IR/UHF Pro) remote control to control a TV, a VCR, or other devices. For information on how to use the remote to control the receiver, see Using the Remote Controls on page 37. You can set up both types of remote controls to control the satellite TV receiver and as many as three other IR-controlled devices each. - Page 91 Chapter 3 Using the System Set Up the Remote Control 1. Turn the device on. 2. Find the brand name of the 3. Press and hold the device 4. For AUX mode setup only: 5. Enter one of the three-digit Tip: Limited mode is not used with audio 6.
-
Page 92: Scan For Device Codes
9. Turn the device back on and try some other buttons to make sure they work. If the code works for other buttons, then stop here. 10. If the code doesn’t work, redo steps 3 through 9 with another device code from the tables. 11. -
Page 93: Check The Device Codes
Chapter 3 Using the System 6. Press the UP or DOWN 7. Press the POUND (#) button. 8. Turn the device back on and 9. Repeat this procedure until Check the Device Codes You can find out what device code you’ve set for each remote-control mode. 1. -
Page 94: Remote Control Buttons
Remote Control Buttons Control the Receiver When you get the remote, it’s already set up to control the receiver. However, you must set up the remote to control the TV before you can use the MUTE and VOLUME buttons to control TV sound. For information on the remote buttons that control the receiver, see Using the Remote Controls on page 37. - Page 95 Chapter 3 Using the System Press this button to raise (+) or lower (-) the TV sound volume. Use the UP and DOWN ARROW buttons to change channels on the TV. : These buttons do not change the channels on the TV if the remote control Note has been set to operate in limited mode.
- Page 96 Control a VCR (or a Second VCR or DVD Player) Only the buttons described here control a VCR or DVD player. Some of the buttons may not control your specific VCR or DVD player. See the user’s manual that came with your VCR or DVD player for information about its features.
- Page 97 Chapter 3 Using the System Press the RECALL button to go back to the last VCR channel you viewed. Press it again to switch between the last two VCR channels you viewed. VCR Buttons • Press the BACK button to rewind a videotape. •...
-
Page 98: Control A Tuner Or Amplifier
Control a Tuner or Amplifier Only the buttons described here control a tuner or audio amplifier. Some of the buttons described here may not control your tuner or amplifier. Please see the user’s manual that came with your tuner or amplifier for more information. AUX Mode Button You must first set up the remote to control the device. -
Page 99: Other Remote Control Features
Chapter 3 Using the System amp. Other Remote Control Features Switch Between TV and AUX Device Volume Control When you set up the remote to control a TV, the mute and volume buttons are automatically set to control the TV volume. However, if you want to use the AUX mode to control an audio amplifier or other device with a volume setting, you can set up the remote to control that device’s volume instead of TV volume. -
Page 100: Testing The System
4. Press the 0 number button. 5. Press the POUND (#) button. The TV mode button flashes three times. 6. Press the SAT mode button. 7. Press the plus (+) and minus (-) sides of the VOLUME button. The TV’s volume changes and the TV mode button flashes instead of the AUX mode button. - Page 101 Chapter 3 Using the System Notes Page 96...
-
Page 102: Chapter 4 - Reference
Chapter 4 Reference Troubleshooting Tables Use these tables if you have problems using the system before calling the Customer Service Center. Many problems arise from misunderstandings of how the system works, especially when you are just becoming familiar with it. These tables cover many problems, usually with a simple solution for each one. -
Page 103: On-Screen Messages
• Install a DSL filter between the receiver and the telephone wall jack. You can obtain the filter from your DSL provider. • Remember that the program providers specify which programs are “blacked out” for which viewers, not DISH Network™. - Page 104 Message Number Possible Reason • You may have tried to tune to a program on a channel which you 013, 014 have not bought. • You may have just plugged in the receiver, and it is acquiring the satellite signal. Or, the receiver may have temporarily lost the signal.
- Page 105 Chapter 4 Reference Message Number Possible Reason • The receiver gives you three chances to enter the correct password. If you fail to do so, the receiver “times out” and will not allow you to try again for several minutes. •...
-
Page 106: Hearing A Program
What Is Happening When you press the remote control Power button to turn the receiver ON, the receiver front panel Power light does not light up. You use a pyramid type IR extender (not a “mouse tail”), and it does not seem to work. Hearing A Program What Is Possible Reason... -
Page 107: Watching A Program
Chapter 4 Reference Using the Menus What Is Possible Reason Happening You were using a menu, The receiver has a time-out feature and it suddenly closed. that closes any menu after several minutes of no activity. This will discard any changes you have made, but otherwise does no harm to the receiver. -
Page 108: Using The Program Guide Or The Browse Banner
What Is Possible Reason Happening A “black box” fills almost • You may have turned on the all of the TV screen. Closed Captioned feature on the TV, and put that feature into Text mode. The TV screen is all blue. •... - Page 109 Chapter 4 Reference Changing Channels What Is Possible Reason Happening You enter a desired • You may have made a mistake channel number. The entering the channel number, or channel changes, but the the channel number you entered new channel is not exactly may be invalid.
-
Page 110: Using The Telephone For Voice/Data/Fax
The receiver cannot connect • Maybe the receiver is connected to to DISH Network. a DSL (Digital Subscriber Line) phone line. You pick up the telephone to • The receiver was calling the... -
Page 111: Using Event Timers
Chapter 4 Reference Using Event Timers What Is Happening Possible Reason You try to set up an event • You must enter the password timer and the receiver before you can create an event displays a message noting timer for a locked program. that the program is locked. -
Page 112: Using Dvr Features
Using DVR Features What’s What’s Wrong Happening You find you can’t • If the receiver runs out of room to auto watch part of a record a program, it starts to erase the program you’re auto oldest part of the program to make room recording. - Page 113 Chapter 4 Reference NOTES Page 108...
-
Page 114: Device Codes
Device Codes These tables contain the manufacturer codes for programming the remote to control your TV, VCR, DVD player, or audio amplifier. Every attempt has been made to include all codes. If your device brand is not listed or if the codes do not work, the remote may not control your device. In some cases, codes may operate some but not all buttons shown in this guide. -
Page 115: Vcr Codes
Optimus Optonica 521, 605, 607 Orion Osaki Panasonic 508, 509, 510, 512, 566, 644, 651, 662, 676, 685, 689, 698, 700, 716, 734, 761, 765, 780, 784, 811, 819, 820, 821, 822, 823, 867, 868, 869, 870, 871, 872, 873, 874, 875, 876,... - Page 116 Cybernex Daewoo 534, 547, 559, 588 Dimensia Dumont Electrohome Electrophonic Emerson 505, 506, 508, 509, 511, 512, 518, 534, 559, 568, 588, 590, 618, 676, 678 Finlandia Finlux 549, 556, 588 Fisher 548, 581, 584, 588, 610 Fuji Funai Garrard...
-
Page 117: Tuner/Amplifier Codes
Chapter 4 Reference TV/VCR Combo Programming for : Program combination devices the remote control in TV mode and then in VCR mode. TV/VCR Codes Broksonic Goldstar Panasonic Quasar Zenith DVD Player Codes Programming in AUX mode Press 1 before entering the DVD code. - Page 118 Tuner/Amplifier Codes Sony 639, 645, 687, 728, 729, 730, 765, 766, 769, 771, 773, 775, 776, 777, 778, 781, 782, 784, 787, 789, 793, 794, 803, 811, 812, Soundmatters Teac Technics 643, 644, 652, 768, 804, 805, 843 Toshiba Victor Yamaha 663, 730, 731, 732, 733, 823, 834, 841...
- Page 119 Chapter 4 Reference Notes Page 114...
-
Page 120: Appendix
Appendix Limited Warranty This Limited Warranty is a legal document. Keep it in a safe place. Remember to retain your Bill of Sale for warranty service! Any items returned without a copy of the Proof of Purchase will be considered out of warranty. What the Warranty Covers This warranty extends only to the original user of the equipment and is limited to the purchase price of each part. -
Page 121: Residential Customer Agreement
DISH and we will send you a copy. Para ver este Acuerdo en español por favor visite www.dishnetwork.com o llame al 1(800)333-DISH y le enviaremos una copia. DISH Network is happy to answer any questions you may have and to provide you with technical and other customer support. You may contact us 24 hours a day, any day of the year:... - Page 122 Services and/or Equipment from DISH Network (each, a "Promotion Agreement"): (i) "you" and "your" refer to you, the DISH Network subscriber; and (ii) "DISH Network," "we," "us" or "our" refer to DISH Network L.L.C. (formerly known as EchoStar Satellite L.L.C.) or, where applicable under the particular circumstances, third-party billing agents.
- Page 123 DISH Network does not extend credit to our customers, and the Late Payment Fee (as detailed in Section 2(D)) is not interest, a credit service charge or a finance charge.
- Page 124 If you are a Pre-Pay Promotion customer, we disconnect your Services for any reason, and you wish to restart such Services. $10.00 You pay DISH Network by EFT or check and payment is subsequently returned. $14.95 DISH Network sends you hardware you via regular delivery.
- Page 125 F. Attorney’s Fees/Collections. . If we use an attorney or a collection agency to collect any money you owe us or to assert any other right that we may have against you, including without limitation, any breach of any agreement you may have with DISH Network or one of our affiliates, you agree to pay the reasonable costs of such collection or other action.
- Page 126 Network at all times and must be returned to us upon our request. Smart Cards are not transferable. Your Smart Card will only work in the DISH Network receiver to which it was assigned by DISH Network. If you report to our customer service center that your Smart Card has been lost, damaged, defective or stolen, we will replace it, unless there is evidence of unauthorized tampering or modification, and a Smart Card Replacement Fee will apply.
- Page 127 6. TRANSFER OF ACCOUNT, SERVICES OR EQUIPMENT DISH Network may sell, assign or transfer your account to a third party without notifying you. You may not assign or transfer your Services without our written consent, which will not be unreasonably withheld. We may, however, refuse to allow you to assign or transfer your Services if you lease Equipment or your account has an outstanding balance.
- Page 128 H. Other. No salesperson, installer, customer service representative, authorized retailer, or other similarly situated individual is authorized to change or override this Agreement. DISH Network may, however, change this Agreement at any time and will notify you if that occurs.
-
Page 129: Staying Legal
If you experience trouble with this equipment, please contact DISH Network at 1-800-333-3474 for repair and warranty information. If the trouble is causing harm to the telephone network, the telephone company may request you remove the equipment from the network until the problem is resolved. -
Page 130: Radio Interference
Compliance Information Statement EchoStar Technologies Corporation, 94 Inverness Terrace East, Englewood CO., (303) 706-4000, declares that: This device complies with Part 15 of the FCC Rules. Operation is subject to the following two conditions: (1) this device may not cause harmful interference, and (2) this device must accept any interference received, including interference that may cause undesired operation.This equipment has been tested and found to comply with the limits for a Class B digital device, pursuant to Part 15 of the FCC Rules. - Page 131 Page 126...
-
Page 132: Index
Index Index Arrow Buttons Arrows/Select Attach a UHF Antenna Attach a UHF Attenuator 64, 69 Auto Recording 57, 63 Automatic Event Timer Back Panel Channel 3–4 Out Other Connections RCA Out Remote Antenna Satellite In S-Video Out Telephone Jack TV Antenna/Cable In TV1 Connections Batteries Installing or Changing... - Page 133 Index Hiding Adult Channels Highlighting a Choice in a Menu Highlighting Menu Options Important Information About This Receiver Installation Summary Installing Batteries Languages Changing Legal Notices Limited Warranty List of Choices in the Menus Locking and Unlocking the Receiver Locking Pay Per View Locking Receiver Front Panel 9, 74 Locks...
- Page 134 Index Radio Interference RCA Out Receiver Radio Interference Telephone Communication Recording 26, 42 Recover Button Remote Antenna Remote Control Other Features Switch Between TV and Device Volume Control Remote Control 1 Change the Address Using 2, 22, 26 Remote Control 2 Change the Address Recover Button Programming Using...
- Page 135 Index Notes Page 130...
-
Page 136: Remote Control Settings
Remote Control Address (SAT Mode) TV Code (TV Mode) VCR Code (VCR Mode) Auxiliary Code (AUX Mode) TV Channel Settings TV Channel or Input for DISH Network 176556 IR Remote Control (included) Accessory RF Remote Control Channel 3 or 4...