Table of Contents
Advertisement
Quick Links
Advertisement
Table of Contents

Related Manuals for SNBC BK-L216II


Summary of Contents for SNBC BK-L216II
- Page 1 PARTENERUL TĂU ÎN PROCESUL de digitalizare.
- Page 2 BK-L216II Manual SNBC USER MANUAL KIOSK Series Printers (BK-L216II) Compiled by: Date: Reviewed by: Date: Date: Reviewed by: Approved Date: by : Shandong New Beiyang Information Technology Co., Ltd. No.169 Huoju Road, Hi-Tech Zone Weihai city, Shandong, CHINA Tel: +86—631—5673777 Fax: +86—631—5673778...
- Page 3 Information in this document is subject to change without notice. SHANDONG NEW BEIYANG INFORMATION TECHNOLOGY CO., LTD. (hereinafter referred to as “SNBC”) reserves the right to improve products as new technology, components, software, and firmware become available. If users need further data about these products, please feel free to contact our market department or our local distributor.
- Page 4 Set the print darkness to a lower grade as long as the print quality is acceptable. This will help to keep the print head durable. Do not disassemble the printer without permission of a technician, even for repairing purpose. Keep this manual carefully in hand for usage and reference. SNBC - 3 -...
-
Page 5: Table Of Contents
4.8 Installing printer driver....................32 5 Routine maintenances ................33 5.1 Cleaning print head......................33 5.2 Cleaning sensors ......................33 5.2.1 Cleaning paper end sensor ......................33 5.2.2 Cleaning paper loading sensor....................33 5.2.3 Cleaning paper out sensor .......................34 5.2.4 Paper retract sensor.........................34 SNBC - 4 -... - Page 6 7.1.2 Problems during printing ......................41 7.1.3 Problems during paper out .......................41 7.1.4 Other problems ........................41 Appendix ....................... 42 Appendix 1 Self-test page....................42 Appendix 2 Tool software....................45 Appendix 2.1 Debugging Software ..................45 Appendix 2.2 BKMonitor program..................46 Appendix 2.3 KIOSKUtility Tool ..................46 SNBC - 5 -...
-
Page 7: General Description
Character font size (font A or font B) can be selected via a command. Printer maintenance Easy paper roll loading Easy Print head cleaning Various features and parameters can be selected by using a software tool Auto paper cutting Semi-automatic paper loading SNBC - 6 -... -
Page 8: Specifications
Support BMP bit Image download to RAM or FLASH Graphics Support direct BMP Print Paper type Continuous paper / marked paper / folded Paper Paper roll OD Max.203mm Medium Paper roll ID Optional: 25.4mm or ≥50mm Thickness 60~100 um Thermal surface Outer side SNBC - 7 -... -
Page 9: Paper Specifications
Manufacturer TF50KS-E2C Nippon Paper Industries Co., Ltd F240AC/F220-VP Mitsubishi Paper Mill Co., Ltd KF060-FEAH New OJI Paper Co., Ltd. F70NA FUJI PHOTO FILM CO., LTD FV230A1 MITSUBISHI PAPER MILL CO., LTD. Table 2.2.1 Printer recommended paper SNBC - 8 -... - Page 10 Refer to continuous and marked paper specification to decide the position relation between folding line and black mark. Notice: Please use the recommended paper or its equivalents. Using other types of paper may affect print quality and reduce the print head lifetime. Do not paste the paper to the shaft core. SNBC - 9 -...
-
Page 11: Structure And Functions
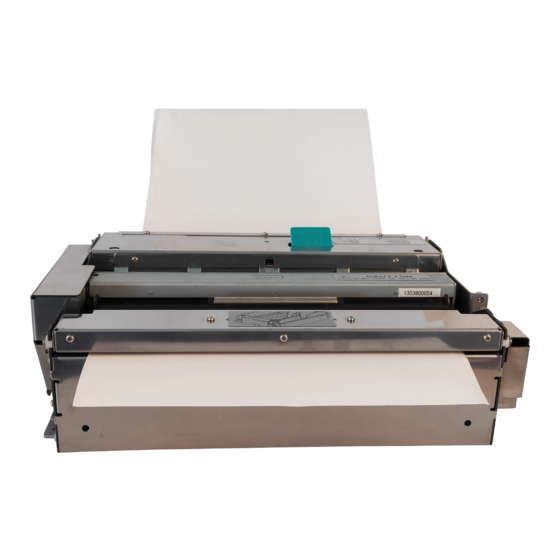
When the temperature goes up to 70 degrees, paper will discolour. So please be careful to the effect of temperature, humidity and sunlight in environment. 3. Structure and functions 3.1 Appearance Figure 3.1.1 Vertical structure Figure 3.1.2 Horizontal structure SNBC - 10 -... -
Page 12: External Dimension
7------------Paper holder (for vertical structure only) 8------------Product Label 9------------Print head cover open label 10---------- Paper feed label (for vertical structure only) 11-----------Paper feed label (for horizontal structure and without paper holder type) 12-----------Paper holder (for horizontal structure only) 3.2 External Dimension SNBC - 11 -... - Page 13 BK-L216II Manual 212*294*96.7mm) Figure3.2.1 Dimension without paper holder ( SNBC - 12 -...
- Page 14 BK-L216II Manual Figure 3.2.2 Dimension of vertical structure (237*294*263mm) SNBC - 13 -...
- Page 15 BK-L216II Manual Figure 3.2.3 Dimension of horizontal paper holder (335*294*150mm) SNBC - 14 -...
-
Page 16: Printer Mechanism
Left and right positioning parts can support the paper width from 210 to 216mm; Figure 3.3.2 Paper guide module SNBC - 15 -... -
Page 17: Presenter Module
CUT button --Press to cut paper under any circumstances (even the printer has errors); 13. Power LED (Green) –To press down “O” can turn off the power; To press down “ “ turn on the power; — 3.4 Presenter module 3.4.1 Appearance Figure 3.4.1 Presenter appearance SNBC - 16 -... -
Page 18: Presenter Parts Explanation
3.4.2 Presenter parts explanation Paper out sensor: to detect paper status PrstIn sensor(optional): to detect whether paper retracted. Caution Paper sensor may be ineffective due to the direct irradiation of sunlight, blazing light and heat source. SNBC - 17 -... -
Page 19: Paper Holder
Users can adjust the position of paper near end sensor to control the amount of remaining paper according to different paper roll diameter (see figure 3.5.1 and 3.5.2). To adjust the sensor, please loose those two fixing screws and SNBC - 18 -... -
Page 20: Interface
Figure 3.6.1 Parallel interface model Figure 3.6.2 USB interface model 1.--- Centronics (parallel interface) 2.--- RS-232 3.--- Power socket 4.--- USB interface Notice: Only one kind of interface between parallel and USB can be configured in one printer. SNBC - 19 -... -
Page 21: Installation And Suggestion
3.5.1 paper holder appearance) 4.3 Connecting the grounding wire To ensure that the printer has a nice grounding status, please follow figures below to connect the grounding wire. Figure 4.3 connecting the ground wire SNBC - 20 -... -
Page 22: Connecting The Ac Power Adapter
Connect one end of the interface cable into a relevant interface of the printer and fix them with screws or latch springs as figure 4.5, figure 4.6 and figure 4.7. Connect the other end of the interface cable to the computer. Figure 4.5.1Connecting serial interface SNBC - 21 -... -
Page 23: Loading Paper Roll
2.2 paper specification) 4.6.1 Loading process 1) Before starting to load the paper roll, please check the paper width is 210mm to 216mm and decide whether paper roll fixing block is needed according to paper width. SNBC - 22 -... - Page 24 3) Make sure that the paper winding direction is backward and then put the paper roll onto the paper holder. Figure 4.6.3 Explanation for loading paper roll Note : 1) Avoid the mistaken operation not to hurt fingers. SNBC - 23 -...
-
Page 25: Semi-Automatic Paper Loading Or Manual Paper Loading
Figure 4.6.6 Semi-automatic paper loading Notice: The paper head shall go through the horizontal positioning shaft (vertical structure doesn’t have this shaft). The paper shall go through between the up and down sliding plates of paper guide. SNBC - 24 -... -
Page 26: Installing The Printer
Keep the printer far away from water source Do not place the printer in the place exposed to vibration and impact. while operating and doing routine maintenance, we suggest reserving the space as follows(figure 4.7.1, 4..7.2, 4.7.3) SNBC - 25 -... - Page 27 BK-L216II Manual in order to guarantee printer working reliability and easy operation efficiently. Figure 4.7.1 Vertical structure SNBC - 26 -...
- Page 28 BK-L216II Manual Figure 4.7.2 Horizontal structure SNBC - 27 -...
- Page 29 Figure 4.7.4 Upper cover opening C: Paper accommodati ng space. Make sure to reserve e nough space for the PRE turning board uplifting and paper looping height (For A4 size paper, the looping height is around 100mm); SNBC - 28 -...
- Page 30 Paper retraction outlet should be reserved when the machine is fixed (as figure4.22, which is positioned with fixing hole .The hole you design should be bigger than the one in the figure). If your printer doesn’t have paper retraction function, just neglect this point. SNBC - 29 -...
- Page 31 For vertical type, Please add buffer mechanism to paper holder (as figure4.7.8). In addition, if paper feeding touches vertical critical interface (as figure4.7.3), please add paper transition roller to the paper holder in order to avoid that paper touches metal parts directly , causing paper damaged. Figure 4.7.8 Buffer explanation SNBC - 30 -...
- Page 32 If you need to use our fixing holes, Please design the size of paper out path according to above request strictly. If your paper outlet is not assembled on the printer, namely, the paper outlet can be separated with printer during SNBC - 31 -...
-
Page 33: Installing Printer Driver
WIN98/2000/XP/Server2003/Vista. The current edition of the WINDOWNS driver is V1.0. (For setup and use of the driver, please refer to the help document in the drive software package) Figure 4.8.1 WINDOWNS driver installation interface SNBC - 32 -... -
Page 34: Routine Maintenances
When any of the following case occurs, paper loading sensor should be cleaned The paper can’t back to normal printing position during semi-automatic paper loading. Print motor reverse backward for long time during semi-automatic paper loading. After printing is finished, the paper can’t return to normal printing position. SNBC - 33 -... -
Page 35: Cleaning Paper Out Sensor
Paper in the retract position out and PRESENTER still alarms. To clean paper retract sensor, follow the steps given below: Turn off the power and reverse the printer. Find paper out PRESENTER paper retract sensor according to figure 5.2.2: SNBC - 34 -... -
Page 36: Cleaning Printing Platen
Reset cutter manually in the following steps: Turn off printer power. Remove the protective board cover. Use cross screwdriver to rotate motor shaft, push cutter guider forward (or there is big gap between upper and lower blade) as figure 5.4.1. SNBC - 35 -... -
Page 37: Manual Removal Of The Jammed Paper
SPACE = +3 to +15 V: Logic "0"/ ON baud rate: 1200, 2400, 4800, 9600, 19200, 38400, 57600, 115200 bps data bit: 8 bit or 7bit Parity bit: None, even, or odd Stop bit: 1bit connector : 9 pins serial connector(female head) SNBC - 36 -... -
Page 38: Interface Linking Terminal Distribution And Signal Function
When above errors occur, information can be obtained by reading the status of correlative pins of parallel interface. 6.2.3 Parallel interface signal Pin No. Source Compatible mode nStrobe Data 0 (Least Significant Bit) Data 1 Data 2 SNBC - 37 -... - Page 39 When data transfers, the host computer should not ignore the busy signal, or else the print data may be lost. The length of parallel interface connection wire should be as short as possible if it meets use requirement. SNBC - 38 -...
-
Page 40: Time Sequence Of Data Receiving
6.3.1 Power interface This connector is used to connect the printer with external power supply Pins distribution of power connector: Signal name +24V SHELL F.G. Figure 6.3.2 Power supply pins Table 6.3.1 Power pin definition explanation SNBC - 39 -... -
Page 41: Troubleshooting And Maintenance
Close printer upper cover fully. closed. After auto paper feeding ,the Clean the paper loading sensor. Dust or wastepaper covers the paper can’t stop in the normal paper loading sensor print position Table 7.1.1 Paper feeding problem index SNBC - 40 -... -
Page 42: Problems During Printing
Make sure the communication cable is The printer doesn’t work after connected well. connected correctly. receiving commands. Interface setting is wrong. Print a self-test page and set the interface again according to information on it. Table 7.1.4 Other problems index SNBC - 41 -... -
Page 43: Appendix
:4096 bytes Interface Type1 :RS232 Baud Rate :38400bps Data Bits Stop Bits Parity :NONE Flow Control :DTR/DSR Command CR :Ignored Data Receive Error :Print ‘?’ Interface Type2 :USB_BK-L216II_1 Resident Fonts Font0(12X24) :English Font1(9X17) :English Code Pages :437,850,852 SNBC - 42 -... - Page 44 Dark Scale ----------------------------------- Print darkness Cutter ------------------------------------------ Enable/ Disable cutter PRSENTER---------------------------------- Enable/Disable PRESENTER PRSENTER Mode ------------------------- PRESENTER paper out mode Comm Interface----------------------------- Communication interface setting Rx Buffer Size ------------------------------- Data receiving buffer zone size Interface Type ------------------------------- Interface type SNBC - 43 -...
- Page 45 Interface Type2 ----------------------------- The second interface type Resident Fonts ------------------------------ Font setting Font 0(12×24) ------------------------------- Font 0 setting Font 0(9×17) --------------------------------- Font 1 setting Code Pages---------------------------------- Code page type International Character-------------------- International Character type BarCode Available ------------------------- Printable Barcode model SNBC - 44 -...
-
Page 46: Appendix 2 Tool Software
The debug software is PRINTERTEST. Its main function is to debug printers. It supports the following system platform: WINDOWS98/NT4.0/2000/XP. The flowing is the main interface figure of PRINTERTEST. (For detailed use explanation, please refer to the explain document in the tool software package) Appendix figure 2.1 PRINTERTEST interface SNBC - 45 -... -
Page 47: Appendix 2.2 Bkmonitor Program
CodePage and other usual printing functions’ demonstration etc. Supported system platforms: WINDOWS2000/XP/ Server 2003. The flowing is the main interface figure of KIOSKUtility. (For detailed use explanation, please refer to the explain document in the tool software package). Appendix figure 2.3 KIOSKUtility interface SNBC - 46 -...
Need help?
Do you have a question about the BK-L216II and is the answer not in the manual?
Questions and answers