Table of Contents
Troubleshooting

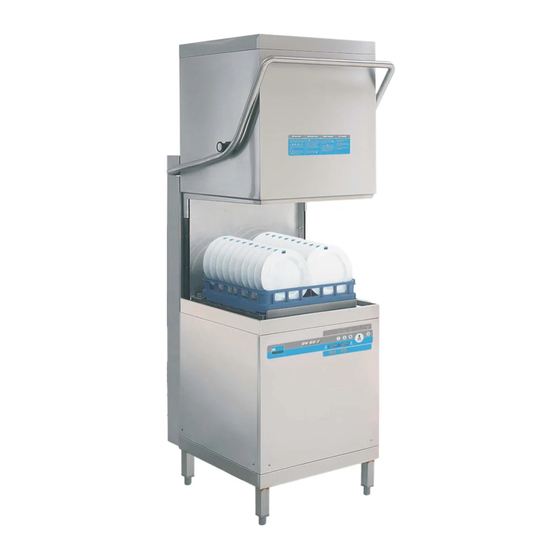
Related Manuals for Meiko DV 270 B


Summary of Contents for Meiko DV 270 B
- Page 1 Operating instructions DV 270.2 Universal warewashing machine Translation of the "Original operating instructions" Read operating instructions before using machine! 9625762 / Valid from: 2004-11 / Update: 2020-03 www.meiko-global.com...
-
Page 2: Table Of Contents
Contents Page Introduction and general information Storage Authorisation for service technicians of our service partners Description of the machine Explanation of the safety symbols used Use of the appliance for the purpose intended General safety information Operator's duty of care Basic safety measures Delivery, shipping, installation and assembly Delivery... - Page 3 16.2 Error messages and troubleshooting Maintenance 17.1 Basic safety measures during normal operation 17.2 Dosing units 17.3 Maintenance plan Dismantling and disposal 18.1 Disposal of packaging materials 18.2 Dismantling and disposal of the old device Documentation 3 / 44 9625762...
-
Page 4: Introduction And General Information
Dear Customer, We are delighted about the confidence you have shown in our products. It is very important to us that you should obtain significant use from MEIKO products and that they should make your work easier. If you follow the instructions in this document carefully, your dishwashing machine will al- ways give you total satisfaction and will have a long service life. -
Page 5: Storage
The operating instructions must always be kept within easy reach! Authorisation for service technicians of our service partners MEIKO exclusively authorises authorised service partners for commissioning, inductions, repairs, maintenance, assembly and installation of the corresponding product groups within MEIKO devices. -
Page 6: Explanation Of The Safety Symbols Used
Explanation of the safety symbols used The following safety symbols will appear throughout these operating instructions. The pur- pose of these symbols is to draw the reader’s attention to the text of the adjacent safety information. This symbol warns that there is danger to human life and health. IMPORTANT! This symbol warns that there is danger to the installation, to material or to the environment. -
Page 7: General Safety Information
General safety information Operator's duty of care The dishwashing machine has been constructed based on a risk analysis and after careful selection of the applicable harmonized standards, as well as additional technical specifi- cations. It therefore corresponds to the latest technology and is guaranteed to provide IMPORTANT! maximum safety. -
Page 8: Basic Safety Measures
Basic safety measures Danger can arise from the improper use of the machine or if it is used for purposes for which it was not intended. IMPORTANT! Parts carrying electric current as well as moving or rotating parts can cause •... - Page 9 Hood and doors MUST be closed. Open the hood very carefully during the programme cycle, as otherwise wash water could splash out. In case of automatic hood opening do not open the hood during the pro- IMPORTANT! gramme cycle! The tank heating element may still be hot after the tank has been emptied. There is there- fore the danger of burns when the machine is cleaned manually.
-
Page 10: Delivery, Shipping, Installation And Assembly
Should you suspect any damage has occurred during shipping, you should inform: • the shipping company, • and MEIKO in writing, and also send a photo of the damaged parts to MEIKO.in writing, and also send a photo of the damaged parts to MEIKO. Damaged appliances must not be commissioned. -
Page 11: Operating Conditions
Operating conditions It is taken for granted that the planning of the system, as well as installation, setting in operation and maintenance works are executed by sufficiently instructed staff and that these works are checked by responsible specialists. The indications on the name plate of the machine must correspond to the technical sheet and the local connection conditions. -
Page 12: Requirements For The Fresh Water Connection
Note to customers Dishwashing machines, bedpan rinsing units and systems are intended for fixed, electrical power supply installation as well as connection to the locally available equipotential bonding and have been equipped with a corresponding connection option. Operators may decide at their own discretion and responsibility to implement personal protection in locally available services in collaboration with a specialist electrician registered at the correspond- ing energy supplier using the following: •... -
Page 13: Emergency-Off
Please also read the chapter on “General safety instructions ". • Commissioning and instructions will be provided by technicians specially trained by Meiko. The operator may only use the installation after training has been pro- vided. The "Commissioning certificate for GiO modules" is to be observed for machines •... -
Page 14: Operating Panel
Only of automatic hood • Climbing alongside the washing machines while they are in operation is prohibited. The same applies when cleaning the washing machines. IMPORTANT! Operating panel Program start key Program is running appliance is switched on Program is running “Off”... -
Page 15: Preparation For Washing And Rinsing
Key / display Meaning Only of auto- matic hood Short cycle for lightly soiled items – Wash program I Normal program – Wash program II Intensive program – Wash program II Program start Tank drain Self-cleaning cycle Only in case of automatic hood opening: If the program start button is pressed when the hood is open and the appliance is ready for operation , the hood closes and the program starts automatically... -
Page 16: Automatic Dosing
Automatic dosing The required detergent (detergent dosing pump: option) and rinse aid is transported out of the containers into the tank, resp. boiler, via electronically controlled dosing units. The dosing is effected automatically acc. to the requirements arising during the wash process. If unsuitable products are used, the life of the dosing equipment will be significantly shortened. -
Page 17: Shutting Down The Dishwasher
7.4.2 Remove the washed items • When the light goes out, open the hood and remove the basket/baskets • Open the hood after the light has gone out. Remove the basket(s). Shutting down the dishwasher “Off” key Press the ”0“key (OFF key). The machine is switched off when all the lights are out. •... -
Page 18: Refilling With Rinse Aid
Refilling with rinse aid External container The container is located next to the appliance. • Check the level and, if necessary, replace the container by a full one. Only non-foaming acid rinse aid (pH < 7) suitable for commercial dishwashers may be used. -
Page 19: Scaling
De-scaling If the appliance was operated with hard water, the boiler and wash tank could have lime scale deposits. De-scaling of the tank interior, boiler housing, tank heating, boiler heating and wash and final rinse system then becomes necessary For de-scaling the appliance use only products suitable for industrial dishwashers. Please observe the instructions of the manufacturers of such products. - Page 20 10.1.3 Disinfection machine with A0 control The standard factory setting is A0 = 30. The tank temperature for washing is 74 °C. Tank heating is active while washing. After every second as of 65° C in the wash tank the measured tank temperature is allocated one factor (the higher the temperature, the higher the factor).
-
Page 21: Noise Level
10.1.6 Detergent dosage The detergent dosing unit (option) is designed for the automatic adding of liquid, alkaline detergent into the wash water. The detergent is transported out of the container into the wash tank by means of a hose line. The dosing unit is self-priming. The dosing is effected during each filling cycle and at the beginning of each programme cycle using timer control. -
Page 22: Tips For Self-Help In The Case Of Faults
Tips for self-help in the case of faults Fault: Remedy Machine does not fill. • No water available • Dirt trap blockedDirt trap blocked • Level switch defective • Solenoid valve defective • Hood safety switch defective Rinse water does not •... -
Page 23: Staff Training
Staff training Only trained and instructed personnel are allowed to work on the dishwashing machine. Staff responsibilities for the installation’s operation, maintenance and repair must be clearly defined. Any personnel undergoing training are only allowed to work on the dishwashing machine installation under the supervision of an experienced person. -
Page 24: Settings / Modifications / On-Site Adaptation
Settings / modifications / on-site adaptation 15.1 Using the keyboard for programming Increase value/ Decrease value/ Exit Accept / move backwards move forward modify Value field Function field Access codes for various user-levels have been defined. Once the complete code has been entered, the entered code is compared with the internal code table. -
Page 25: Code Entry
15.2 Code entry To get into the code entry mode, you should keep the key “0” pressed (for around 3 sec- onds) until you see on the display unit. By pressing the key “0” once again you can leave the programming area at any time. The digit to be modified will flash. - Page 26 15.3.1 View/modify parameters Indication this display by pressing the “accept” key. Now, the first parameter will be displayed with a value. Press the “I” key to go forwards and the “III” key to go backwards, until the parameter you require is displayed. Confirm the parameter to be modified by pressing the “accept”...
- Page 27 15.3.4 Configuration level You can find the list of configuration parameters on this level (parameter numbers 2xx). + Here you can view these and modify them. You can also call up the status of the inputs and outputs, or set the outputs for testing. On the configuration level, you will first see the display below: This corresponds to the viewing/modifying parameters.
- Page 28 15.3.6 Viewing input status Indication this display by pressing the “accept” key. by pressing the “accept” key. Press the “I” key to move forwards and the “III” key to move backwards, until you reach the input you require. Display: input set Display: input not set You can leave this level by pressing the “0”...
- Page 29 15.3.8 Viewing / modifying dosing technology level By entering code 40000 (read only) or 40044 (read / enter), the user can access the new 4th parameter level summarizing all the dosing technology parameters: P104, P105, P218, P219, P224, P225, P321, P322, P326, P327. See 15.4 for list of parameters 29 / 44 9625762...
-
Page 30: Parameter List
15.4 Parameter list Par. Configuration Use as value Unit Factory Note options range setting Wash program Parameters 1 .. 50 Allocate the wash program to the Key 1 key 1 Assignment adjustable Wash program Parameters 1 .. 50 Allocate the wash program to the Key 2 key 2 Assignment adjustable... - Page 31 Par. Configuration Use as value Unit Factory Note options range setting Activate mainte- Parameter 0 .. 3 0 = OFF nance display 1 = Operating hours 2 = Batch counter 3 = Operating hours or number of batches Operating hours Parameter 10 ..
- Page 32 Par. Configuration Use as value Unit Factory Note options range setting Fine adjustment Parameters 0,0..0.9 sec. FV 130.2 / FV 250.2 Post-rinse time Figures after the decim al point in P204 Shortage of rinse Parameters Monitoring Indication Shortage of deter- Parameters Monitoring gent...
- Page 33 Par. Configuration Use as value Unit Factory Note options range setting Desinfection tem- Parameters 0 ...900 sec. Only with disinfection machine no. perature 5 - 9 in parameter 201 33 / 44 9625762...
-
Page 34: Assignment List View Inputs / Control Outputs
15.5 Assignment list View inputs / control outputs Indication Input / output / other Conditions Left Right Hood closed none Boiler level none Leak water switch floor none not occupied none not occupied none not occupied none Hall-sensor ADT (vacuum dosing) none not occupied none... - Page 35 Boiler temperature Wash time target value Wash pressure reduction tar- Program no.: target value get value Washing Total 41-50 * For machines with the AirConcept exhaust recovery system, the total running time is extended by the time stated for vapour extraction in the technical data sheet.
-
Page 36: Trouble-Shooting
Trouble-shooting Despite being expertly designed, the machine may develop minor faults which are usually easy to eliminate. This section explains a number of possible problems and how you can deal with them yourself. Before carrying out work on the open appliance, it MUST be disconnected from the power supply. -
Page 37: Error Messages And Troubleshooting
Info No. Description Possible cause Shortage of rinse aid If the machine is ready for operation, a shortage of rinse agent will be signalled (only if there is a built-in warning sys- tem). Shortage of detergent If the machine is ready for operation, a shortage of detergent will be signalled (only if there is a built-in warning sys- tem). - Page 38 ERR.-No. Description Possible cause No change detected by the level Boost pump defective switch during emptying Booster pump plug connector loosened Start capacitor defective Plug connector loosened Boiler level switch defective No boost pump signal to - from in- put/output circuit boards Check boost pump DSP / S2 using man- ual control Following the end of post-rinse...
- Page 39 ERR.-No. Description Possible cause Temperature increase not Tank heating defective / thermal fuse reached Radiator Temperature sensor defective, incorrect installation position Tank protection defective, performance switch loose Boiler content quantity insufficient See 301 for rinsing. Level 2 not reached Ventilation valve soiled Level switch defective Plug connector loosened Tank level analysis disrupted...
-
Page 40: Maintenance
Maintenance Regular maintenance is a prerequisite for the long-term reliable and safe operation of a warewashing machine. Maintenance which is neglected or improperly carried out increases the residual risk of unforeseen damage to property and persons, for which no liability will then be assumed. -
Page 41: Maintenance Plan
17.3 Maintenance plan NOTE Maintenance work should only be conducted by authorised MEIKO personnel. Maintenance procedures 1. Pumps Check pumps for watertightness, pump rotor noise, rotation di- rection and function Check pump suction Check pump sieves correctly fitting and operating correctly Check sliding ring washer/contra-rotation ring 2. -
Page 42: Dismantling And Disposal
Maintenance procedures Protective conductor check at least once a year Measure insulation resistance at least once a year Protection conductor current measurement at least once a year 9. Detergent dosing Check dosage, adjust if necessary 10. Rinse aid dosing Check dosage, adjust if necessary 11. -
Page 43: Dismantling And Disposal Of The Old Device
18.2 Dismantling and disposal of the old device Pos : null /War nhi nweis e/WARNUNG/WARNUN G - Verletz ungsgefahr durc h Kontakt mit C hemi kalien @ 0\mod_1413539826683_6.doc x @ 260 @ @ 1 Warning Risk of injury from contact with chemicals Detergent and rinse aid result in damage to health if in contact with skin or eyes or if swallowed. - Page 44 MEIKO Maschinenbau GmbH & Co. KG Englerstraße 3 77652 Offenburg Germany www.meiko-global.com info@meiko-global.com Design and construction subject to change without prior notice! 9625762 / Valid from: 2004-11 / Update: 2020-03...
Need help?
Do you have a question about the DV 270 B and is the answer not in the manual?
Questions and answers