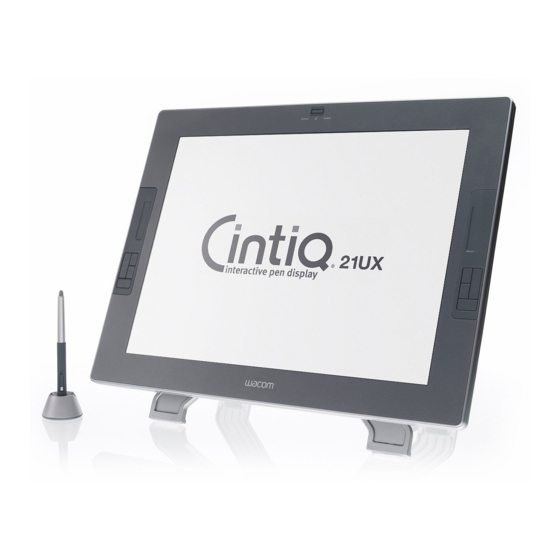
Wacom DTZ-2100D User Manual
Interactive pen display
Hide thumbs
Also See for DTZ-2100D:
- User manual (99 pages) ,
- Installation manual (76 pages) ,
- Manual (32 pages)
Table of Contents
Advertisement
Advertisement
Table of Contents
Troubleshooting

Subscribe to Our Youtube Channel
Related Manuals for Wacom DTZ-2100D


Summary of Contents for Wacom DTZ-2100D
-
Page 2: Table Of Contents
Cintiq 21UX User's Guide ENGLISH Table of Contents So that the Cintiq21UX may be Used Safely....2 Precautions........5 Component Functions . -
Page 3: So That The Cintiq21Ux May Be Used Safely
Persons other than either the store where you purchased professional service personnel should it or to the Wacom Customer Support never open the back cover of this Center for repair service. product. Unauthorized opening of the... - Page 4 Caution When using DVI Do not use organic solvents to clean ■ ■ this product. Use only a DVI video card with the product. Use of an inappropriate video When cleaning the product, never use card may lead to damage to the product. such organic solvents as alcohol.
- Page 5 So that the Cintiq21UX may be Used Safely Caution Do not place the product Be sure to fix the product to the stand ■ ■ on unstable surfaces. with screws prior to lifting. Do not place the product where it is If the stand is not attached prior to likely to totter, lean or be exposed lifting, it may fall resulting in injury and/or...
-
Page 6: Precautions
Precautions Please take the following precautions to protect the health of your eyes. ● When using the product, make sure that the room is sufficiently illuminated and be careful not to get your face too close to the screen. ● Take regular breaks when using the product over an extended period of time. Please be aware of the following regarding the LCD display. - Page 7 3 Wacom reserves the right to change the ● Wacom will not bear any responsibility for contingent damages (such as loss of configurations or specifications of the tablet...
-
Page 8: Component Functions
Component Functions Status LED Front When the pen switch is on, this will become blue. Power LED When power has been supplied to Cintiq, this will become blue. Glows orange when no video signal is detected by Cintiq. Power Switch Touch Strips See page 21. -
Page 9: Installing Cintiq21Ux On A Mount Arm
Component Functions Installing Cintiq21UX on a Mount Arm This product conforms to the Video Electronics Standard Association’s (VESA) Flat Panel Monitor Physical Mounting Interface Standard (FPMPMI). This product can be removed from the stand and mounted on such apparatuses as a VESA-standard mount arm. -
Page 10: Acessory Check
Accessory Check Serial Power Adapter Pen and Pen Stand User Guide (This booklet) Power Cable User Guide DVI-I – DVI-D Adapter / DVI-I – Analog Tablet Driver CD - ROM RGB Adapter Screws (2 Types) Stand Screws for securing the Screws for securing the stand (2) (MNE-A059) small cover (4) -
Page 11: Connecting Cintiq21Ux
Connecting Cintiq21UX Turn off both your computer and the product. Connect the DVI-I connector to your computer’s display port. Use either a DVI – DVI adapter or DVI – RGB adapter, depending on which is appropriate for your com- puter’s display port. Connect the adapter securely to your computer port. Set the DVI / analog RGB switch. - Page 12 ANALOG DIGITAL 11 ...
-
Page 13: Installing The Tablet Driver
Insert the Tablet Driver CD-ROM into your computer’s CD-ROM drive. The install menu will appear. If it doesn’t appear, open the CD-ROM and double-click on Install or Install.app. Click on Install Wacom Tablet and installation will begin. Thereafter, follow the screen instructions and continue the installation process. -
Page 14: The Cintiq21Ux Display
The Cintiq21UX Display The Auto-Adjust Function In order to ensure optimal display image quality, this product utilizes the Auto-Adjust function. When the Auto-Adjust function is operating, it may take a short time before the screen displays properly. The settings initiated by Auto-Adjust are saved in the display. If the Auto-Adjust function is operating, the horizontal and vertical positions as well as the phase and pitch of the display are adjusted automatically when the display mode is received. -
Page 15: Button Functions
The Cintiq21UX Display Open the menu screen and select the Main control → the IMAGE → the Clock options. (See pages 15 -17) Adjust the frequency so that the adjustment pattern of verti- cal stripes displays evenly. Next, select Phase. (See page Adjust the tracking so that the adjustment pattern of vertical stripes appears clearly. -
Page 16: Adjusting The Brightness And Contrast Of The Display
Adjusting the Brightness and Contrast of the Display Click on the Menu button and the main menu appears. Select the items to be adjusted and their desired settings. How to Use the Menu Screen With pushing a menu button, Main menu(P.17) will be indicated. Menu is moved with ∧ button or ∨... - Page 17 Menu Screens Main menu Main Control OSD Control Display Display Vertical Image Image Horizontal Position Color Transparency Color Time Out ● Main Control Display Menu Screen Descriptions Brightness Adjusts the brightness of the image Contrast Adjusts the contrast of the image. Backlight Increase or decreases the backlight brightness level.
- Page 18 Language Reset Returns the display parameters Allows you to the OSD menu of the current mode totheir language. factory default settings. Color Menu Screen Descriptions Temprature Enables you to adjust the pen display color temperature. Provides color tem- perature settings for 6500° and 9300° Kelvin, as well as DIRECT and CUSTOM options.
-
Page 19: How To Use Cintiq21Ux
How to Use Cintiq21UX The tablet can be mounted on the stand and used or removed from the stand and laid horizontally for use. Setting the Tablet to an Easy-to-Use Angle The tablet may be mounted on the stand and set to an easy-to-use angle. To Lower the Tablet Pull the left incline adjustment lever towards yourself and slowly lower the tablet to the desired level. -
Page 20: Mounting The Cintiq21Ux On The Stand
How to Use Cintiq21UX Mounting the Cintiq21UX on the Stand The product may be positioned vertically and secured to the stand so that it is at a convenient angle (see page 18) after full stop. Set the product on the stand so that it is in a vertical position. - Page 21 Remove the screws holding the large cover in place. Pull off the shaft bearing. stopper Remove the stopper and set it aside so that it doesn’t become lost. Remove the large cover. Put the cable through the gap on the backside of the display so that it sticks out of the top.
-
Page 22: Working With Expresskeys And Touch Strips
ExpressKeys or other functions with the Touch Strips. Using ExpressKeys The ExpressKeys have been allocated the following default settings. These settings can be easily customized in the Wacom control panel. Each side has independent settings. See Help file. See P.24 about how to open it. Windows... -
Page 23: The Grip Pen
The Grip Pen With this product, you can use the pen included as an accessory with the Intuos 3. The Parts of the Pen and Their Functions Tail Switch Second Side Switch Used in the same fashion as an eraser. W i t h o n e t o u c h o f t h e s e c o n d s i d e s w i t c h , functions that have been... -
Page 24: Basic Operations Of The Pen
The Grip Pen Basic Operations of the Pen Moving the Pointer By raising the pen a little above the screen and moving it, you can move the position of the screen pointer. Clicking and Double-clicking Clicking Tap on the screen lightly once with the tip of the pen to click. Double-clicking Tap in the same place twice quickly with the tip of the pen to double-click. -
Page 25: Using The Control Panel
*When connecting and using multiple tablets, please refer to Help file( → P.24). Displaying the Control Panel Opening the Control Panel in Windows Click on the Windows Start button, go to All Programs (P) or Programs (P), open Wacom Tablet and select Wacom Tablet Properties. Opening the Control Panel in Macintosh Open System Settings and then Wacom Tablet. -
Page 26: Synchronizing The Positions Of The Pen Tip And Pointer
Using the Control Panel Setting Item Description Tablet The currently registered tablet is displayed. When selected, a blue frame will surround the tablet and it may be modified. Tool The function icon and the currently registered pen are displayed. When either is selected, a blue frame will surround the selected item and it may be modified. -
Page 27: Supplementary Information
Supplementary Information Removing Stains If the product casing or pen becomes soiled, wipe off with a clean, soft cloth. If this fails to remove the stains, soak a clean, soft cloth with a water-diluted detergent mixture, wring thoroughly and wipe off. If the protective covering for the LCD display becomes soiled, wipe with a dry, soft cloth. -
Page 28: Troubleshooting
Troubleshooting Display Troubleshooting If One of These Messages Should Appear... Reference What to Do Message – Prior to connecting the product, if you have a monitor that you have been using, connect it and then adjust the horizontal frequency to 30–91.1 kHz and the vertical frequency to 56 –85 Hz. -
Page 29: The Pen And Side Switch Do Not Operate Correctly (For Both Windows And Macintosh)
What to Do Reference Condition P.14-17 The picture is distorted •Adjust the phase and clock. – •Verify that your computer display adapter is compatible with the product. The picture appears wavey P.30 •Verify that the graphics mode and frequency for the input signal are compatible with the product. -
Page 30: General Troubleshooting
Installing the newest version of tablet driver may When a replacement computer is resolve this problem. The newest tablet driver can be purchased or new software is used, downloaded from the Wacom homepage. the tablet cannot be used. >http://tablet.wacom.co.jp/ –... -
Page 31: Specification
Each Cintiq LCD panel is produced under very stringent quality standards. Production tech- niques cannot guarantee an absolutely perfect TFT display. Wacom does not allow any pixel to be always white or always black. The Cintiq 21UX display contains 5.76 million sub-pixels (red, green, or blue dots). -
Page 32: Obtaining Technical Support
Then review the Troubleshooting section within this manual and the online Help, your problem may be described there and you can try the solution offered. You can also check the product Frequently Asked Questions on the Wacom web site. FAQ: http://club.wacom.co.jp/wacom-en/servlet/support.user.Swusr101Sv00...
Need help?
Do you have a question about the DTZ-2100D and is the answer not in the manual?
Questions and answers