Advertisement
INTRODUCTION
READ AND SAVE THIS MANUAL.
This manual contains important safety precautions which should be read and understood before operating the product. Failure to do so could result in serious injury. This manual should remain with the product.
Specifications, descriptions and illustrations in this manual are as accurate as known at the time of publication, but are subject to change without notice.
CPE designs, builds, and supports all of our products to strict specifications and guidelines. With proper product knowledge, safe use, and regular maintenance, this product should bring years of satisfying service.
Every effort has been made to ensure the accuracy and completeness of the information in this manual at the time of publication, and we reserve the right to change, alter and/or improve the product and this document at any time without prior notice.
Since CPE highly values how our products are designed, manufactured, operated and are serviced, and also highly value your safety and the safety of others, we would like you to take the time to review this product manual and other product materials thoroughly and be fully aware and knowledgeable of the assembly, operation, dangers and maintenance of the product before use. Fully familiarize yourself, and make sure others who plan on operating the product fully familiarize themselves too, with the proper safety and operation procedures before each use. Please always exercise common sense and always err on the side of caution when operating the product to ensure no accident, property damage, or injury occurs. We want you to continue to use and be satisfied with your CPE product for years to come.
When contacting CPE about parts and/or service, you will need to supply the complete model and serial numbers of your product. Transcribe the information found on your product's nameplate label to the table below.

SAFETY DEFINITIONS
The purpose of safety symbols is to attract your attention to possible dangers. The safety symbols, and their explanations, deserve your careful attention and understanding. The safety warnings do not by themselves eliminate any danger. The instructions or warnings they give are not substitutes for proper accident prevention measures.

DANGER indicates a hazardous situation which, if not avoided, will result in death or serious injury.

indicates a hazardous situation which, if not avoided, could result in death or serious injury.

CAUTION indicates a hazardous situation which, if not avoided, could result in minor or moderate injury.
 NOTICE
indicates information considered important, but not hazard-related (e.g., messages relating to property damage or physical injury).
IMPORTANT SAFETY INSTRUCTIONS
Cancer and Reproductive Harm – www.P65Warnings.ca.gov
Do not exceed the rated capacity.
Do not use this winch for lifting or moving people or animals.
Keep yourself and others a safe distance to the side of the rope when under tension.
Never step over a rope or near a rope under load.
The wire cable may break before the motor stalls. For heavy loads at or near rated capacity, use a pulley block/snatch block to reduce the load on the wire cable.
Winch is NOT waterproof and is NOT for use underwater. DO NOT mount in a location that could have the winch submerged in water.
Do not use any vehicle to aid or help the winch pull any loads.
Do not use the winch to secure an item(s) for transport.
Disconnect the winch from power source when not in use.
Never leave an item(s) attached to the wire cable, hook, or loaded when not in use.
Do not use for overhead lifting.
Use gloves to protect hands when handling the hook or cable. Never let the cable slide through your hands.
Do not wrap the cable around any object and hook it back onto itself.
Do not install or have crank handle installed if the winch is connected to a power source.
Do not operate if cable is worn, frayed or appears damaged. Replace cable before use.
When re-spooling the cable, ensure that the cable spools in the over-wind position with the cable entering the drum from the top, not the bottom.
To re-spool correctly, and while wearing gloves, keep a slight load on the cable while pushing the remote button to retract the cable. Do not let your hands get within 12 in. (30.5 cm) of the winch while re-spooling. Turn off the winch and repeat the procedure until a few inches of cable are left before the stop bracket. Keep hands clear of the winch, cable and slight load which winch is under power.
Do not anchor or mount winch in any overhead position. Overhead use not recommended.
Do not lift any loads over people, animals, or property that cannot be damaged. Falling loads may result in property damage, injury or death.
Use only supplied or manufacturer replacement power cables. Do not connect other cables to a power source and winch, as this may damage the winch and power source.
Any support structure the winch will be mounted to must be designed to withstand any load or forces that the load and winch may apply to the structure. All mounting hardware must also be able to withstand all load weights and forces.
Duration of winching pulls should be kept as short as possible.
If the motor becomes uncomfortably hot to the touch, stop winching immediately and let it cool down for a few minutes. Do not pull for more than one minute at or near the rated load.
If the motor stalls, do not maintain power to the winch.
Utility winches are designed and made for intermittent use and should not be used in constant duty applications.
Never disengage clutch under load. Only engage or disengage clutch before connection of loads.
Do not use damaged or broken equipment.
Before each use inspect the winch and equipment for any damage to the following:
- Winch
- Wire cable
- Hook
- Battery or Remote cables
If any of the above items or any other items appear to be damaged or broken, then replace or fix before use.
Never operate a damaged or malfunctioning winch. If winch appears damaged or is malfunctioning, disconnect power source and disconnect load.
CONTROLS AND FEATURES
Read this operator's manual before operating your winch. Familiarize yourself with the location and function of the controls and features. Save this manual for future reference.
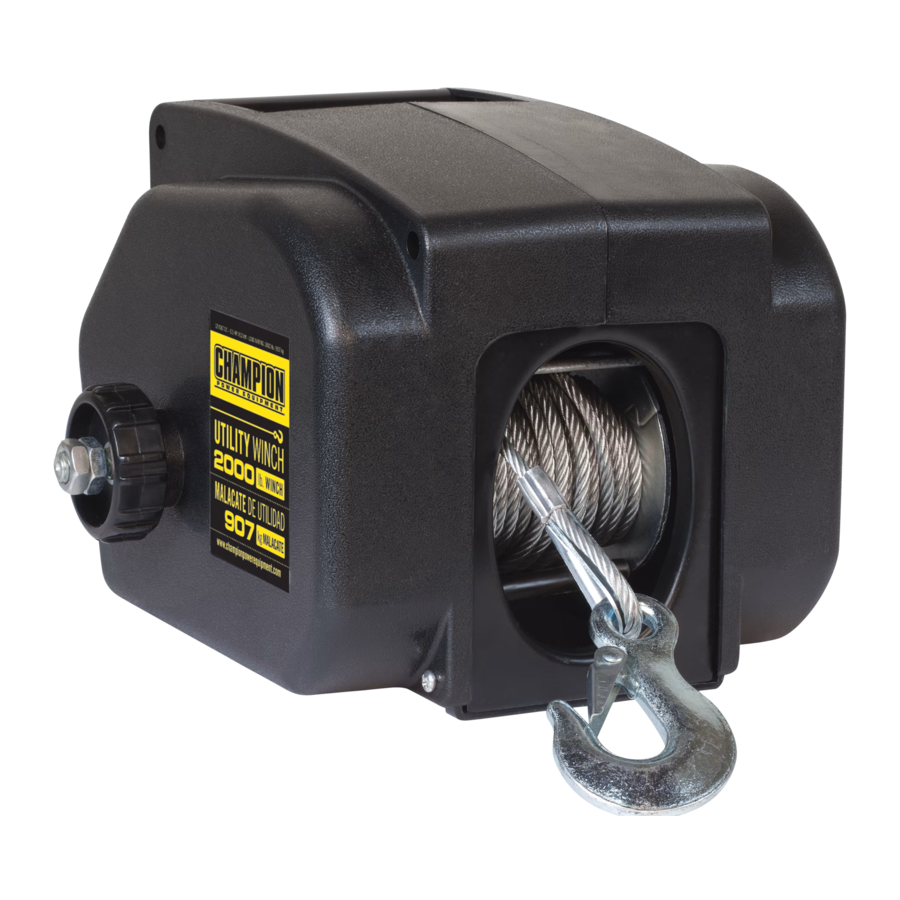
Utility Winch

- Carry Handle – Can be used to carry the winch when not mounted or in use.
- Crank Handle – Used to manually retract or extend wire cable.
- Clutch – Used to engage or disengage wire cable.
- Adapter Plate – Used to temporarily mount winch.
- Wire Cable
- Hook – Used to secure wire cable to load.
- Remote Control – Used to retract wire cable.
- Battery Cables – Used to connect the winch to 12V automotive battery.
ASSEMBLY
Contents of the Box
This CPE 2000 lb./5000 lb./6000 lb. utility winch comes with the wire cable and hook already attached. The box will also contain the remote control, battery cables, adapter plate and crank handle. Please make sure to remove all contents from the box before assembly or operation.
Utility Winch Location
When choosing an anchor (permanent or temporary) for the utility winch location please keep these safety points in mind.
- The winch area must not be accessible to children or animals. Loads may be very heavy and property damage, injury or death may occur if distractions are present.
- Make sure the winch is not installed on any support structure that is located overhead.
- The winch should be located in an area that has enough clearance on all sides of it, to avoid any accidental breaking of the wire cable.
- Do not choose an area where the winch can or will be submerged in water.
- Do not winch at any angle. Winching at any angle can damage the wire cable and winch.
Do not use the winch handle to anchor the winch at any time.
Mounting the Winch Permanently
This CPE 2000 lb./5000 lb./6000 lb. utility winch can be securely mounted to a fixed anchor point before operation. Mounting hardware is not included. Mounting hardware must be strong enough to withstand all loads and forces imposed on it and the winch. Anchor point must also be strong enough to withstand all forces imposed on it from the loads and winch.
- Find a secure and suitable anchor.
- Using the holes at the bottom of the winch frame, take a marker and mark "spot" holes on the anchor.
- Measure each hole on the winch frame and choose the correct drill bit for each one.
- Drill through all "spot" holes in the anchor.
- Secure winch to anchor through all holes using rated bolts, washers, and nuts able to withstand any loads and forces imposed on them by the loads and winch.
- Make sure all bolts and nuts are tightened.
Always double check anchor before drilling to ensure there are no hidden compartments or panels that may be damaged or cause structural damage by drilling.
NOTICE
If a mounting channel (not included) is used, make sure it is rated to take any load weight or force the winch and loads may impose on it.
NOTICE
The length of bolts needed for mounting will vary based on the thickness of the anchor used. Measure anchor accordingly.
Adapter Plate
The adapter plate can be used to temporarily mount the winch to any 2 in. (5,1 cm) ball hitch receiver.
- Align the keyslot holes on the bottom of the winch over the mounting bolts already on the adapter plate. (A)
![]()
- Place the winch onto the adapter plate, keyslot holes over the bolts and then slide the plate until the winch is secure on the bolts. (B)
![]()
- Place the adapter plate hole over any 2 in. (5.1 cm) ball hitch, making sure it is secure.


Do not use adapter plate and/or winch to tow any vehicle, boat or other object.
Before attaching winch to the adapter plate, make sure all bolts and nuts on the plate are tightened and secure.
Battery Connections
Before wiring the winch to any battery powered source, please heed these safety warnings.
Never use or connect the battery cables or winch to a damaged battery or one with signs of corrosion.
Use only a 12V automotive or equivalent battery to supply power to the winch.
When working with batteries always make sure to use eye protection, gloves and safety gear, and never lean directly over the battery.
Do not place the battery cables near any moving or rotating parts, heat, or water.
Make sure the battery cables are tied up at all times and are not left to "dangle" or hang.
Never use the winch if it does not have a safe and proper ground. Any metal that is coated or painted is not a proper ground.
Temporarily Wiring the Winch
Your utility winch can be temporarily wired to a 12V battery.
- Find a safe location for the winch so the battery cables will not be pinched, cut or damaged.
- Remove the protective plastic covering on the winch that covers the socket that houses the male ends.
- Plug in the female ends of the battery cable into the socket. (A)
- Route the battery cables from the winch location to the battery location, securing them along an anchor or frame.
- Use the Red positive (+) battery clamp and attach the clamp to the Red positive (+) terminal of the battery.
- Use the Black negative (-) battery clamp from the wire and attach the clamp to a bare metal part of the frame of the vehicle or another bare metal part not on the battery or winch, to create a secure and safe electrical ground.
Never leave the battery clamps hooked up to a live battery. Always disconnect battery clamps from battery when not in use.
Battery clamps may become hot during use. Please exercise caution when touching or removing them after they have been hooked up to a battery.
NOTICE
The female plug end of the battery cables will only fit into the socket one way. (A)

Remote Control
Your utility winch comes with a handheld wired remote control. The remote control is easy to connect. Once the winch has been connected to a battery and properly grounded, remove the plastic protective piece on the winch. Next take the male ends of the remote control cord and plug them into the female end connectors in the winch. (B) Test the remote by using the clutch to manually extend out some wire cable and then winching the wire cable in about 1 to 2 in. (2.5 to 5.1 cm).
NOTICE
The male plug end of the remote cable will only fit into the socket one way. (B)
NOTICE
The remote will only retract in the wire cable onto the spool. It will not extend out the wire cable.
OPERATION
Inspection
Before use of the utility winch, always inspect the winch, power connections, wire cable, load connections, and winch area for any possible damage or hazards. Never connect a load to or operate a winch, if it or any of it's parts appear to be worn or damaged.

Always check the wire cable for any wear, fraying or damage. Only wire cable in good condition should be used. If the wire cable appears worn, frayed or damaged, DO NOT connect any load to or use, replace immediately.

Inspect the wire cable to make sure it is spooled correctly. The wire cable should not be overlapping on itself, have space between the rolls or slack in it. If the wire cable is spooled incorrectly do not connect a load to it or use it until the wire cable has been re-spooled correctly.
NOTICE
It is highly recommended that random inspections also be done during operation.
Connecting a Load
During connection of a load and operation of the winch, the user should keep hands and fingers clear of pinch points, moving parts, the wire cable and hook. Lose clothing and jewelry should not be worn, and long hair should be tied back while connecting a load and operation. Gloves and safety goggles should be worn at all times when connecting or winching a load. The cable should never be allowed to slide through the users hands. The user should only grab the hook, using a hook strap (not included) when loading/unloading an item. Never grab the wire cable directly. Attach the load to the hook using only rated equipment, such as slings, chains or winching shackles. Connection to the hook must be completely secure to prevent any accidental disconnection. Make sure the connection device is properly seated in the base of the hook and that the safety clasp closes fully.
If the wire cable becomes kinked or twisted during operation stop use immediately.
Once a load has been properly connected, drape a blanket or jacket over the wire cable approximately 5 to 6 ft. (1.5 to 1.8 m) from the hook. In the event of a broken cable it will dampen the snap back. Make sure and do a test. Winch the load 1 to 2 in. (2.5 to 5.1 cm) and pause a moment to inspect all connections and that the equipment can handle the load.
Do not exceed rated load capacity, even while testing a load.
General Tips for Safe Operation
Your 12090 utility winch is rated at a 2000 lb. (907 kg) max standard rated pull, 5000 lb. (2,268 kg) max rated marine pull and 6000 lb. (2,722 kg) max rated rolling pull. Overloads can damage the winch, motor, wire cable, and/ or create a possible hazard for property damage, injury or death.
For loads over 1000 lb. (454 kg) standard, 2500 lb. (1,134 kg) marine, 3000 lb. (1,361 kg) rolling, the use of a snatch block/pulley system (not included) to double the wire cable line must be used. This will aid in two ways:
- reduce the number or cable layers on the drum, as well as,
- reduce the load on the wire cable by as much as 50%.
When doubling the line back to the winch, run the wire cable through the snatch block and attach the hook to a suitable anchor. Make sure the safety clasp on the hook closes before operation.
Get to know your winch before you actually need to use it. We recommend that you set up a few test runs to familiarize yourself with rigging techniques, the sounds your winch makes under various loads, the way the cable spools on the drum, etc.
Inspect the wire cable and equipment before each use. A frayed or damaged cable shall be replaced immediately. Use only manufacturer's identical replacement cable with the exact specifications.
Inspect the winch installation and bolts to ensure that all bolts are tight before each operation. Store the winch indoors and in a place that it will not be damaged.
Any winch that appears to be damaged in any way, is found to be worn, or operates abnormally MUST BE REMOVED FROM SERVICE UNTIL REPAIRED. It is recommended that the necessary repairs be made by a manufacturer's authorized repair facility.
Only attachments and/or adapters supplied by the manufacturer are to be used.
Manual Operation
If the winch is not hooked up to a battery, the wire cable can be manually retract or extend by releasing the clutch and using the hand crank. Always keep tension on the wire cable. Rotating the clutch will allow the user to access the winch cable manually. (A) Disengage the clutch by turning it counterclockwise. This will allow the user to extend out the wire cable. Use a hook strap (not included) on the hook when extending out the cable. Once the hook has been attached to the load, and the safety clasp fully closed, the hand crank can be attached to the winch. Remove the outer nut on the bolt in the center of the clutch. (B) Only remove the outer nut, leave the inner nut on the bolt. Place the hand crank on the bolt, then reinsert and tighten the outer nut onto the bolt. When manual winching is done, engage the clutch by turning it clockwise. Once the clutch has been engaged, remove the hand crank.

Do not install or have hand crank installed if the winch is connected to a power source.
Do not use the hand crank to try and assist the winch while it is operating electronically.
If hand crank is installed on the winch, do not pull wire cable out at any time.
Winching Techniques
- Take time to assess your winch area, and make sure it is free of any debris and other possible hazards and distractions.
- Take time to assess your situation and plan your winch.
- Put on safety goggles to protect your eyes, gloves to protect your hands, tie back any long hair and remove jewelry.
- Inspect winch, power cords and wire cable for excessive wear or damage.
- Double check your anchors and make sure all connections are secure.
- Attach the battery cables to a battery and properly ground the connection.
- Test the winch without a load connected. Make sure the wire cable extends and retracts properly without any problems.
- Connect desired load using only properly rated winching slings, chains or shackles.
- Once a load has been properly connected, drape a blanket or jacket over the wire cable approximately 5 to 6 ft. (1.5 to 1.8 m) from the hook. In the event of a broken cable it will dampen the snap back.
- Make sure hook clasp is closed fully.
- Clear the area. Make sure all operators and bystanders stand clear and that no one is directly above, underneath, or to the direct side of the load or wire cable.
- Begin winching. Be sure that the wire cable is winding evenly and tightly around the drum. Avoid shock loads; keep the wire cable under tension.
- The winch is meant for intermittent use. Winch for a short time and then let the motor rest if needed before restarting.
- If the winch must be stopped, with a load connected to it, support anchors should be placed until the winch is going again.
- The winching operation is complete once the load is on stable ground and/or has anchors for support placed under it.
- Disconnect the wire cable from the anchor, but still maintain tension.
- Rewind the wire cable. Make sure that any wire already on the drum has spooled tightly and neatly. If not, extend out the wire and re-spool from the point where the cable is tight.
- Keep your hands clear of the winch drum, wire cable, and hook as the cable is retracted in.
- Secure the hook and hook strap.
- Clean and inspect connections and mounting hardware for next winching operation.
Users and bystanders must keep a minimum distance of 12 in. (30.5 cm) at all times from the winch and load. If the wire cable breaks serious injury or death could occur if the broken cable "whips" around. More distance is advised as the cable length increases.
Support anchors are highly recommended if a load can not be placed on stable ground. Make sure the support anchors can withstand the full weight of the load being anchored.
Maintain at least 4 wraps (coils) of cable on the drum during operation. Operating with fewer than 4 warps of cable on the drum can cause the cable to pull off the drum.
MAINTENANCE
The owner/operator is responsible for all periodic maintenance.
Never operate a damaged or defective winch.
Improper maintenance will void your warranty.
Complete all scheduled maintenance in a timely manner.
Correct any issue before operating the winch.
NOTICE
For service or parts assistance, contact our help line at 1-877-338-0999.
Cleaning
Use a damp cloth to clean the exterior surfaces of the winch. Use a soft bristle brush to remove excess dirt and oil. Use an air compressor (25 PSI) to clear dirt and small debris from the wire cable spool and other tight places.
DO NOT spray water directly on the winch or wire cable. DO NOT wipe the wire cable with the damp cloth. Use only compressed air to clean the wire cable.
Lubrication
All moving parts within the Utility winch having been Lubricated using high temperature lithium grease at the factory. No internal lubrication is required. Lubricate cable assembly periodically using a light penetrating oil.
Cable Assembly Replacement
It is recommended that any wire cable or spool modifications be performed by a manufacturer's authorized repair facility, and that only manufacturer-supplied parts be used.
STORAGE
It is recommended the utility winch is stored indoors, in a clean dry place, free from sunlight and moisture.
- Make sure the winch is properly cleaned before storage.
- Make sure the wire rope is retracted onto the spool as much as it can be without damage.
- Make sure to tie up all cords.
- Store in a place that moisture can not damage the winch.
- Store in place that excess dust or debris can not damage the winch.
SPECIFICATIONS
Performance Specifications
Max Rated Standard Pull: 2000 lb. (907 kg)
Max Rated Marine Pull: 5000 lb. (2268 kg)
Max Rated Rolling Pull: 6000 lb. (2722 kg)
Max Boat Size: 18 ft. (5.5 m)
Motor: 0.3 Hp/ 0.2 Kw, 12V DC
Dimensions
Cable: 1/5 in. (D) x 30 ft. (L) [5.1 mm (D) x 9.1 m (L)]
Battery Cable:
20 ft. (6 m) (L) Positive Lead,
20 ft. (6 m) (L) Negative Lead
Net Weight: 22 lb. (10 kg)
Height: 7.5 in. (19.1 cm)
Width: 10 in. (25.4 cm)
Length: 9.5 in. (24.1 cm)
Line Speed and Motor Current (First Layer)
| Line Pull | LB | 0 | 500 | 1000 | 1500 | 2000 |
| KG | 0 | 227 | 454 | 680 | 907 | |
| Line Speed (12V DC) | FPM | 4.5 | 3.6 | 2.9 | 2.3 | 1.7 |
| MPM | 1.4 | 1.1 | 0.9 | 0.7 | 0.5 | |
| Max Current | A | 3 | 6 | 11 | 17 | 21 |
| Running Time* | Minutes | 1 | 1 | 1 | 1 | 1 |
| Cooling Time** | Minutes | 5 | 5 | 5 | 5 | 5 |
* If the motor becomes uncomfortably hot to the touch, stop winching immediately and let it cool down for 5 minutes. Do not pull for more than one minute at or near the rated load.
** Electric winches are designed and made for intermittent use and should not be used in constant duty applications.
Line Pull and Cable Capacity Per Layer
| Line of Cable | 1 | 2 | 3 | 4 | 5 | |
| Max Pulling Capacity per layer | LB | 2000 | 1520 | 1226 | 1027 | 884 |
| KG | 907 | 689 | 556 | 466 | 401 | |
| Cable Capacity per layer | FT | 4.7 | 10.8 | 18.4 | 27.5 | 30 |
| M | 1.4 | 3.3 | 5.6 | 8.4 | 9.1 |
TROUBLESHOOTING
| Problem | Cause | Solution |
| Motor does not turn on. | No electrical power | Make sure battery cables are connected to a live 12V automotive battery or equivalent and to the winch |
| Pinched battery cable | Check all battery cable connections and make sure nothing is resting on top of, or pinching the battery cables | |
| Defective remote control | Replace remote control | |
| Motor runs slowly or without normal power. | Insufficient current or voltage | The voltage supply is weak. Check to make sure voltage supply is 12V |
| Motor overheating. | Winch running time is too long | Allow winch to cool down |
For further technical support:
Technical Support Team
Toll Free 1-877-338-0999
support@championpowerequipment.com
Contact Information
www.championpowerequipment.com
Customer Service
Toll Free: 1-877-338-0999
info@championpowerequipment.com
Fax no.: 1-562-236-9429
Technical Service
Toll Free: 1-877-338-0999
tech@championpowerequipment.com
EMERGENCY 24 HOUR SUPPORT: 1-562-204-1188
Documents / Resources
References

Download manual
Here you can download full pdf version of manual, it may contain additional safety instructions, warranty information, FCC rules, etc.
Advertisement


Need help?
Do you have a question about the 12090 and is the answer not in the manual?
Questions and answers