Advertisement
Models
Model Specifications
| Model | Max # of Pumps | Dimensions inch (cm) | Approximate Capacity pints (liters) | Direct End Rotary Drive A = Right E = Left | ||
| A | B | Right (A) | Left (E) | |||
| MAA†#A | 1-4 | 7.59 (19.28) | 8.84 (22.45) | 6.25 (2.95) | X | |
| MAA†#E | 1-4 | 7.59 (19.28) | 8.84 (22.45) | 6.25 (2.95) | X | |
| MAB†#A | 5-8 | 11.59 (29.44) | 12.84 (32.61) | 9.25 (4.37) | X | |
| MAB†#E | 5-8 | 11.59 (29.44) | 12.84 (32.61) | 9.25 (4.37) | X | |
| MAC†#A | 9-12 | 16.59 (42.14) | 17.84 (45.31) | 13 (6.15) | X | |
| MAC†#E | 9-12 | 16.59 (42.14) | 17.84 (45.31) | 13 (6.15) | X | |
| MAD†#A | 13-16 | 20.59 (52.3) | 21.84 (55.47) | 16 (7.57) | X | |
| MAD†#E | 13-16 | 20.59 (52.3) | 21.84 (55.47) | 16 (7.57) | X | |
| MAE†#A | 17-20 | 25.29 (64.24) | 26.84 (68.17) | 19.75 (9.34) | X | |
| MAE†#E | 17-20 | 25.59 (64.24) | 26.84 (68.17) | 19.75 (9.34) | X | |
† = Pump (Pick A or B from Pump Table below).
# = Number of Pumps (Pick letter from Pump Quantity Table below)
Pump Table (†)
1000 PSI (MPa/ bar) Maximum pressure
| Part No. | Pick | Piston Size | Drops/Stroke | Cubic Inch/Stroke | CC/Stroke | Stokes/Minute | ||||
| inch (cm) | Max | Min | Max | Min | Max | Min | Max | Min | ||
| 562949 | A | 3/16 (0.47) | 6 | 0.17 | 0.0122 | 0.0003 | 0.199 | 0.005 | 60 | 3 |
| 562950 | B | 5/16 (0.79) | 12 | 0.25 | 0.0245 | 0.0005 | 0.399 | 0.008 | 60 | 3 |
NOTE: Pump displacement based on SAE30 Oil (SUS @ 100°F (37.78°C) at room temperature.
Pump Quantity (#)
| Pick Letter | Pump Quantity |
| A | 0 |
| B | 1 |
| C | 2 |
| D | 3 |
| E | 4 |
| F | 5 |
| G | 6 |
| H | 7 |
| J | 8 |
| K | 9 |
| L | 10 |
| M | 11 |
| N | 12 |
| P | 13 |
| R | 14 |
| S | 15 |
| T | 16 |
| U | 17 |
| V | 18 |
| W | 19 |
| X | 20 |
Installation
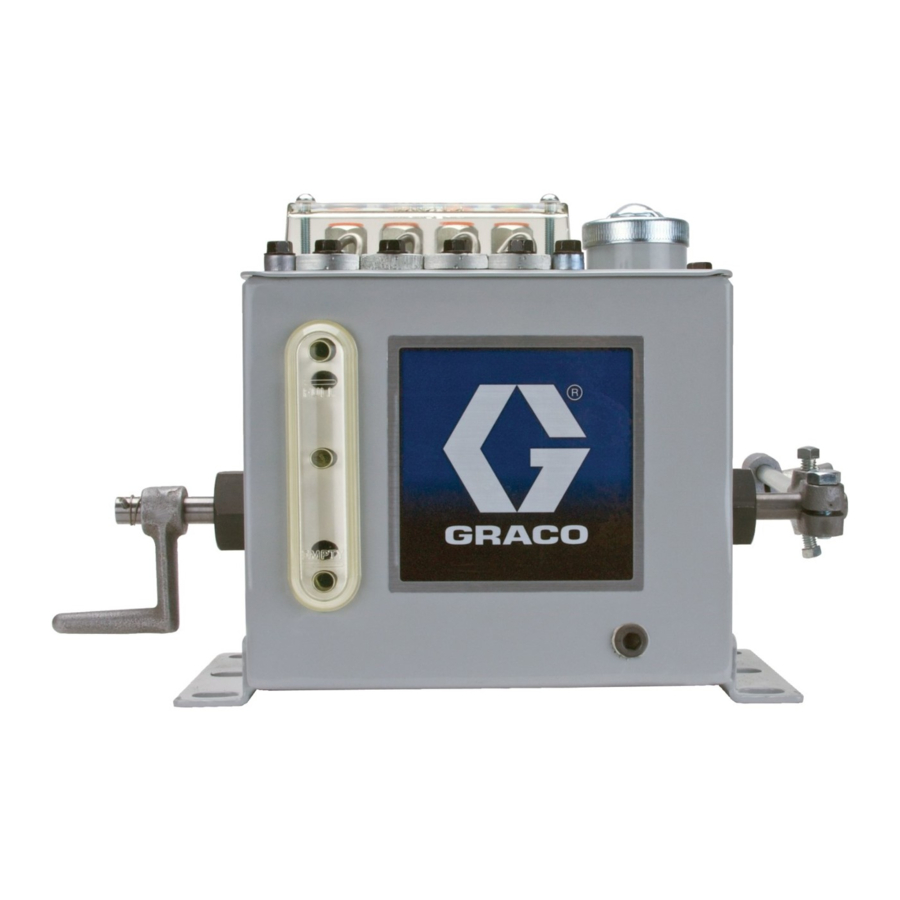
Component Identification

FIG. 1
Key:
- Sight feed cover
- Drip tube
- Feed regulator
- Pump mounting screws
- Metering plunger
- Pump crosshead
- Inlet tube
- Inlet strainer
- Sight chamber well
- Discharge plunger (shown at top of stroke)
- Reservoir
- Hand Crank
- Fill cover
- Drive shaft
- Sight glass
- Outlet Valve Metering Circuit
Installation
Grounding
 The equipment must be grounded. Grounding reduces the risk of static and electric shock by providing an escape wire for the electrical current due to static build up or in the event of a short circuit.
Installation Procedure
NOTE: Reference letters used in the following instructions refer to Parts or Component Identification.
The lubricator should be solidly mounted and aligned to connect the drive shaft to the proper stroking or rotary motion. This drive motion, through the lubricator drive, should operate the lubricator drive shaft and hand crank shaft between 3 and 60 RPM. There is one pump stroke for every revolution of the hand crank shaft, which is an extension of the drive shaft shaft.
- Select a mounting surface that will satisfy the following goals:
- Is able to support the weight of the reservoir and fluid when filled to capacity.
NOTE: When possible, mount to a surface that experiences little or no vibration. - Allows easy access to the lubricator for filling the reservoir and periodic maintenance.
- The lubricator must be grounded through the mounting bolts.
- Is able to support the weight of the reservoir and fluid when filled to capacity.
- Install reservoir (L) to the mounting surface. Use the mounting diagram to determine location to drill mounting holes.
- Install bolts through reservoir and mounting holes and tighten securely.
- Install protective guards around all drive components.
- Remove fill cap (A) and fill reservoir with new or clean, filtered fluid until it reaches the top of the reservoir gauge glass.
Start Up
NOTE: Reference letters used in the following instructions refer to Component Identification.
- For initial start-up, prime the pump by removing screw from outlet metering circuit (S) (FIG. 2) and filling the small chamber with oil. Reattach the screw, making sure the spring lines up vertically.

- Adjust the pump for maximum delivery by turning the feed regulator (C) counter- clockwise as indicated by the directional arrow (FIG. 2).
- Operate pumps at this setting and bleed lubrication lines at the terminal check valve to assure full lubrication.

Feed Rate Regulation
The proper drive shaft shaft RPM is determined from the required maximum and minimum pump feed rates.
Each pumping unit is regulated independently by means of the feed regulator (C). When a pump is correctly set to its required feed rate, the feed rate can still be increased or decreased by the feed regulator (C). In most cases due to the wide adjustment range of the pump units, there will be considerable allowance in the selection of the proper drive shaft speed.
- Turn the feed regulator (C) clockwise to DECREASE the feed.
- Turn the feed regulator (C) counter-clockwise to INCREASE the feed.
Hand Crank Operation
The hand crank (M), located on the end of the lubricator (FIG. 3) is used for starting or for momentarily increasing the lubricant supply while the lubricator is in operation. It operates all feeds at once, but does not affect feed regulation.

Refilling the Reservoir
Remove fill cap (N) and fill reservoir with new or clean, filtered fluid until it reaches the top of the reservoir sight glass (R).

Service
Pressure Relief Procedure

 Fluid under pressure can be injected through the skin and cause serious injury. To reduce the risk of injury from injection, splashing fluid or moving parts, follow the Pressure Relief Procedure whenever you:
- are instructed to relieve the pressure,
- check, clean or service any system equipment,
- Turn off power supply to the lubricator.
- Open any drain valves in the system.
- Leave the drain valve open until you are ready to pressurize the system.
- If you suspect that the pressure is not fully relieved after following the previous steps, using a rag to cover the hose end coupling or a fitting on the fluid line then slowly loosen the coupling or fitting and allow the pressure to be relieved gradually. Then loosen the part completely.
Cleaning
Clean lubricator periodically to eliminate contamination that may have occurred in the fluid.
- Stop lubricator. Follow the Pressure Relief Procedure before performing any service procedures.
- Remove all pumping units.
- Remove the discharge line connection and the pump mounting screws (D).

- Loosen the adjacent pump mounting screws (D).
- Lift out front end of pump (end with feed regulator screw), pulling it forward and upward at the same time. This will allow the yoke or crosshead to clear the drive shaft and the pump can be lifted out.

- Remove the discharge line connection and the pump mounting screws (D).
- Clean pumps and reservoir by dipping and brushing in a cleaning solvent.
- Clean all lubricant tubing and check valves thoroughly.


Reassembly
- Before replacing pump, position yoke down as far as possible.

- Install pump by inserting the back end of the pump (end without the feed regulator screw) in the reservoir first.

- Connect discharge line to pump outlet.
- Install pump mounting screws (D) and using a wrench, tighten screws securely.
- Fill reservoir and bleed lubrication lines at terminal check valve to assure full lubrication before putting equipment back into operation.


Troubleshooting
| Problem | Cause | Solution |
| Pump sight well fills and overflows into adjacent sight wells | Dirty or inoperative pump discharge valves |
|
| Erratic performance | Pump cannot bring air into sight chamber through gasket due to contamination with dirt or paint | Make sure sight glass is open to atmospheric pressure through the felt gasket between the glass and reservoir. |
| Gauge glass leakage | Sight glass and/or gasket is damaged | Drain lubricator. Check for leaks. Replace sight glass and/or gasket. |
Parts

| Ref | Part No. | Description | Qty |
| 7 | 562949 | PUMP, assembly, 0.187 diameter M25 | 1 |
| 562950 | PUMP, assembly, 0.312 diameter M25 | 1 | |
| 8 | SCREW, 1/4-20X.75 hex | 2 | |
| 9 | SCREWS (1-4 pumps) | 12 | |
| SCREWS (5-8 pumps) | 20 | ||
| SCREWS (9-12 pumps) | 30 | ||
| SCREWS (13-16 pumps) | 38 | ||
| SCREWS (17-20 pumps) | 48 | ||
| 10 | 557171 | COVER, oil, hole | 1 |
| 11 | 557149 | STRAINER, filter | 1 |
| 12 | PLUG, dry seal, 1/4 nptf | 1 | |
| 13 | 563923 | KIT, sight glass with gasket and nuts | 1 |
| 16 | 556690 | SIGHTGLASS (4 feed) (1-4 pumps) | 1 |
| 556694 | SIGHTGLASS (8 feed) (5-8 pumps) | 1 | |
| 556692 | SIGHT GLASS (6 feed) (9-12 pumps) | 2 | |
| 556694 | SIGHT GLASS (8 feed) (13-16 pumps) | 2 | |
| 556692 | SIGHT GLASS (6 feed) (17-20 pumps) | 2 | |
| 556694 | SIGHT GLASS (8 feed) (17-20 pumps) | 1 | |
| 17 | 556723 | GASKET, sight, 4 FD (1-4 pumps) | 1 |
| 556725 | GASKET, sight, 8 FD (5-8 pumps) | 1 | |
| 556724 | GASKET, sight, 6 FD (9-12 pumps) | 2 | |
| 556725 | GASKET, sight, 8 FD (13-16 pumps) | 2 | |
| 556724 | GASKET, sight, 6 FD (17-20 pumps) | 2 | |
| 556725 | GASKET, sight, 8 FD (17-20 pumps) | 1 | |
| 18 | 555744 | WASHER (1-4 pumps) | 2 |
| WASHER (5-8 pumps) | 2 | ||
| WASHER (9-12 pumps) | 4 | ||
| WASHER (13-16 pumps) | 4 | ||
| WASHER (17-20 pumps) | 6 | ||
| 19 | SCREW, #10-32 x 1.50 (1-4 pumps) | 2 | |
| SCREW, #10-32 x 1.50 (5-8 pumps) | 2 | ||
| SCREW, #10-32 x 1.50 (9-12 pumps) | 4 | ||
| SCREW, #10-32 x 1.50(13-16 pumps) | 4 | ||
| SCREW, #10-32 x 1.50(17-20 pumps) | 6 | ||
| 20 | 557035 | PLATE, sight glass | 2 |
| 21a | RIGHT SIDE direct drive rotary | 1 | |
| 21b | LEFT SIDE direct drive rotary | 1 | |
| 22 | LABEL, name, serial number | 1 | |
| 23 | LABEL, oil regulating | 1 | |
| 24 | LABEL, identification | 1 | |
| 27 | 557037 | PLATE, sight glass (1-4 pumps) | 0 |
| PLATE, sight glass (5-8 pumps) | 0 | ||
| PLATE, sight glass (9-12 pumps) | 1 | ||
| PLATE, sight glass (13-16 pumps) | 1 | ||
| PLATE, sight glass (17-20 pumps) | 2 | ||
| 31 | 557036 | PLATE, blank - For quantities see "Blank Plate Quantity" | - |
69 | 16G243 | LABEL, safety warning | 1 |
Replacement Danger and Warning labels, tags, and cards are available at no cost.
Blank Plate Quantity
Based on Number of Pumps
(Code column relates to Pump Quantity)
| Code C | # of Pumps | Code A Picks | ||||
| A | B | C | D | E | ||
| A | 0 | 4 | 8 | 12 | 16 | 20 |
| B | 1 | 3 | 7 | 11 | 15 | 19 |
| C | 2 | 2 | 6 | 10 | 14 | 18 |
| D | 3 | 1 | 5 | 9 | 13 | 17 |
| E | 4 | 0 | 4 | 8 | 12 | 16 |
| F | 5 | 3 | 7 | 11 | 15 | |
| G | 6 | 2 | 6 | 10 | 14 | |
| H | 7 | 1 | 5 | 9 | 13 | |
| J | 8 | 0 | 4 | 8 | 12 | |
| K | 9 | 3 | 7 | 11 | ||
| L | 10 | 2 | 6 | 10 | ||
| M | 11 | 1 | 5 | 9 | ||
| N | 12 | 0 | 4 | 8 | ||
| P | 13 | 3 | 7 | |||
| R | 14 | 2 | 6 | |||
| S | 15 | 1 | 5 | |||
| T | 16 | 0 | 4 | |||
| U | 17 | 3 | ||||
| V | 18 | 2 | ||||
| W | 19 | 1 | ||||
| X | 20 | 0 | ||||
Technical Data
| Maximum operating pressure♦ | 1000 psi (6.89 MPa, 68.9 bar) |
| Drive Speed | 3 to 60 RPM |
| Number of drops per stroke♦ | |
| 5/16 inch model: maximum | 12 drops |
| 5/16 inch model: minimum | 1/4 drop |
| 3/16 inch model: maximum | 6 drops |
| 3/16 inch model: minimum | 1/6 drop |
| Cubic inch per stroke♦ | |
| 5/16 inch model: maximum | 0.0245 |
| 5/16 inch model: minimum | 0.0005 |
| 3/16 inch model: maximum | 0.0122 |
| 3/16 inch model: minimum | 0.0003 |
| CC per stroke♦ | |
| 5/16 inch model: maximum | 0.399 |
| 5/16 inch model: minimum | 0.008 |
| 3/16 inch model: maximum | 0.199 |
| 3/16 inch model: minimum | 0.005 |
| Drops per pint♦ | 14.115 |
| Drops per cubic inch♦ | 490 |
| Drops per cc♦ | 30 |
| Strokes per minute♦ | |
| maximum | 60 |
| minimum | 3 |
| Viscosity*: SSU @ 100°F (37.78°C) | |
| maximum | 5000 |
| minimum | 80 |
| Operating Temperature Range | -20°F to 140°F (-28.89°C to 60°C) |
| Wetted Parts | Fluoroelastomer, gray iron, carbon steel, alloy steel, stainless steel |
| Approximate Weight (empty) | |
| Pump | 2 lbs (0.9 kg) |
| Lubricator | |
| 4 Feed Reservoir and 4 pumps | 15 lbs (7 kg) |
| 8 Feed Reservoir and 8 pumps | 29 lbs (13 kg) |
| 12 Feed Reservoir and 12 pumps | 44 lbs (20 kg) |
| 16 Feed Reservoir and 16 pumps | 59 lbs (27 kg) |
| 20 Feed Reservoir and 20 pumps | 73 lbs (33 kg) |
♦ All displacements based on SAE30 oil: SSU @ 100°F (37.78°C) at room temperature.
* Approximate viscosities = SAE 10 = 200 SSU @ 100°F (37.78°C); 600 W = 2000 SSU @ 100°F (37.78°C).
Dimensions
| No. of Feeds | Reservoir Length (A) inches (mm) | End Lugs (B) inches (mm) | Approximate Capacity pints (L) |
| 1 - 4 | 7-19/32 (192.8) | 8-27/32 (224.5) | 6-1/4 (2.9) |
| 5 - 8 | 11-19/32 (294.4) | 12-27/32 (326.1) | 9-1/4 (4.3) |
| 9 - 12 | 16-19/32 (421.4) | 17-27/32 (453.1) | 13 (6.1) |
| 13 - 16 | 20-19/32 (523) | 21-27/32 (554.7) | 16 (7.5) |
| 17 - 20 | 25-19/32 (650) | 26-27/32 (681.7) | 19-3/4 (9.3) |


The following warnings are for the setup, use, grounding, maintenance, and repair of this equipment. The exclamation point symbol alerts you to a general warning and the hazard symbols refer to procedure-specific risks. When these symbols appear in the body of this manual, refer back to these Warnings. Product-specific hazard symbols and warnings not covered in this section may appear throughout the body of this manual where applicable.
 | FIRE AND EXPLOSION HAZARD When flammable fluids are present in the work area, such as gasoline and windshield wiper fluid, be aware that flammable fumes can ignite or explode. To help prevent fire and explosion:
|
 | SKIN INJECTION HAZARD High-pressure fluid from dispensing device, hose leaks, or ruptured components will pierce skin. This may look like just a cut, but it is a serious injury that can result in amputation. Get immediate surgical treatment.
|
 | EQUIPMENT MISUSE HAZARD Misuse can cause death or serious injury.
|
 | MOVING PARTS HAZARD Moving parts can pinch, cut or amputate fingers and other body parts.
|
 | ENTANGLEMENT HAZARD Rotating parts can cause serious injury.
|
 | PERSONAL PROTECTIVE EQUIPMENT You must wear appropriate protective equipment when operating, servicing, or when in the operating area of the equipment to help protect you from serious injury, including eye injury, hearing loss, inhalation of toxic fumes, and burns. This equipment includes but is not limited to:
|
Graco Information
TO PLACE AN ORDER, contact your Graco distributor or call to identify the nearest distributor.
Phone: 612-623-6928 or
Toll Free: 1-800-533-9655,
Fax: 612-378-3590
All written and visual data contained in this document reflects the latest product information available at the time of publication.
Graco reserves the right to make changes at any time without notice.
Graco Headquarters: Minneapolis
International Offices: Belgium, China, Japan, Korea
GRACO INC. AND SUBSIDIARIES
P.O. BOX 1441
MINNEAPOLIS MN 55440-1441
USA
www.graco.com
Documents / Resources
References
Download manual
Here you can download full pdf version of manual, it may contain additional safety instructions, warranty information, FCC rules, etc.
Advertisement


Need help?
Do you have a question about the 25 and is the answer not in the manual?
Questions and answers