Graco D200 Instructions-Parts List Manual
Air-powered ram 3 inch dual post 200 liter 55 gallon 150 psi 1.0 mpa, 10 bar maximum air inlet pressure
Hide thumbs
Also See for D200:
- Instructions manual (84 pages) ,
- Repair manual (68 pages) ,
- Operation (46 pages)
Table of Contents
Advertisement
Quick Links
Instructions-Parts
Air-Powered Ram
For transferring or dispensing a non-heated bulk supply of sealants, adhesives, or other
medium to high viscosity fluids. Replaces rams for Hydra-Mate
Proportioner, 1:1 Extruders, and robotic interface rams. For professional use only.
Not for use in explosive atmospheres.
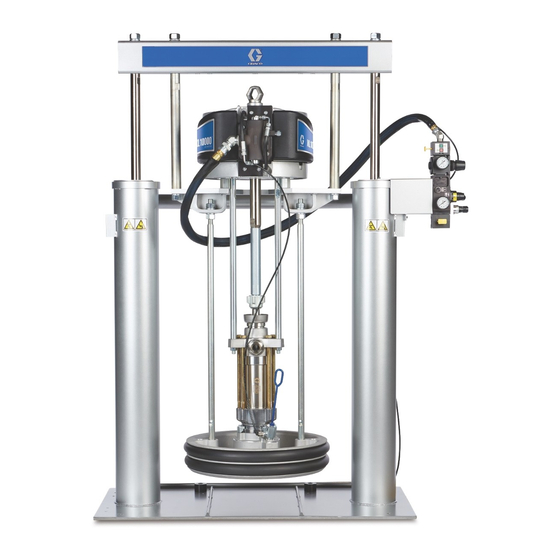
D200 3 inch dual post
200 liter (55 gallon)
150 psi (1.0 MPa, 10 bar) Maximum Air Inlet Pressure
Important Safety Instructions
Read all warnings and instructions in this manual.
Save these instructions.
See page 3 for model information and maximum working
pressure.
3A0233B
™
, Precision Dose, 8900
257435 Model Shown
r_257435_3a0233_1c
ENG
Advertisement
Table of Contents

Related Manuals for Graco D200


Summary of Contents for Graco D200
- Page 1 , Precision Dose, 8900 Proportioner, 1:1 Extruders, and robotic interface rams. For professional use only. Not for use in explosive atmospheres. D200 3 inch dual post 200 liter (55 gallon) 150 psi (1.0 MPa, 10 bar) Maximum Air Inlet Pressure...
-
Page 2: Table Of Contents
310726 1:1 Extruder, Operation D200 Rams ......6 ™ Integrated Air Controls ....7... -
Page 3: Ram Models
954419 Pump Mounting Chart This table lists the parts necessary to mount various Graco pumps on the ram. Refer to pages 11-12 for mounting instructions. See Accessories on page 24 for parts. For pump mounting and application information, contact your Graco distributor. -
Page 4: Warnings
Warnings Warnings The following warnings are for the setup, use, grounding, maintenance, and repair of this equipment. The exclama- tion point symbol alerts you to a general warning and the hazard symbol refers to procedure-specific risk. Refer back to these warnings. Additional, product-specific warnings may be found throughout the body of this manual where applicable. - Page 5 Warnings WARNING MOVING PARTS HAZARD Moving parts can pinch or amputate fingers and other body parts. • Keep clear of moving parts. • Do not operate equipment with protective guards or covers removed. • Pressurized equipment can start without warning. Before checking, moving, or servicing equipment, follow the Pressure Relief Procedure and disconnect all power sources.
-
Page 6: Component Identification
Component Identification Component Identification D200 Rams 257435 Model Shown Lift Locations . 1: Typical Installation Key: Ram Assembly Platen (see F . 3) Integrated Air Controls (see F . 2) Platen Bleed Port Blowoff Air Supply Line (see F . 12) -
Page 7: Integrated Air Controls
Component Identification Integrated Air Controls Air Line Accessories The integrated air controls include: See F . 1. • Main air slider valve (AA): turns air on and off to • Air line drain valve (H) the system. When closed, the valve relieves pres- sure downstream. -
Page 8: Platen Component Identification
Component Identification Platen Component Identification 255663 and 255664, 200 liter (55 gallon) TI10518A . 3: Platen Key: EA Plate EB Wipers EG Spacer EH Cap Screws EJ Clamps EK Bleed Handle EL Bleed Valve EM Air Assist Body Check Valve EN Wiper Plate (under wiper) EP O-ring Seal 3A0233B... -
Page 9: Installation
Insert one end of supplied ground wire into slot in lug and tighten locknut securely. Accessories are available from Graco. Make certain all Connect other end of wire to a true earth ground. See accessories are adequately sized and pressure-rated to . -
Page 10: Attach Drum Stops
Kit 255477. The kit includes 2 each of capscrews (FA), 2. Using the capscrews (FA) and lock washers (not lock washers (not shown), and drum stops (FB). shown), attach the drum stops (FB) to the ram base. ti10917a D200 and D200s Base . 6: Ram Base 3A0233B... -
Page 11: Mount Check-Mate 450, 800, 1000, And 2100 Pumps
(CN) to the plate with the screws (CL) the ram may require alternate parts. For information, and lugs (CM) included in the mounting kit. contact your Graco distributor. This installation requires Mounting Kit 222776 and 224829 which must be ordered separately. See Accessories on page 24. -
Page 12: Mount Power-Flo, Check-Mate 200, Fire-Ball 300 And Fire-Ball 400 Pumps
(CF) onto the pump intake Installing other pumps on the ram may require alter- housing. Leave the bottom seal plate (CG) and gasket nate parts. For information, contact your Graco dis- (CH) in place. See F . 10. -
Page 13: Operation
5. Lock the gun/valve trigger. platen (B). An optional drum roller kit is available for D200 and D200s rams to make it easier to load the 6. Open the fluid line drain valve and the pump bleeder drum on the base. Order Kit 255627. -
Page 14: Start And Adjust Pump
Operation 6. Remove bleed stick from platen bleed port (D). Change Drums 7. If drum has a plastic liner, pull it over edge of drum. Secure liner with tape wrapped around circumfer- ence of drum. 1. Stop the pump. a. Push in the air motor slider valve (AF) to stop the pump. -
Page 15: Maintenance
Maintenance Maintenance Remove 55 Gallon Platen Wipers 1. To replace worn or damaged wipers (EB), raise platen up out of drum. Remove drum from base. To reduce the risk of serious injury whenever you are Wipe fluid off of platen. instructed to relieve pressure, always follow the Pres- sure Relief procedure. -
Page 16: Troubleshooting
Troubleshooting Troubleshooting Problem Cause Solution Ram will not raise or lower. Closed air valve or clogged air line. Open, clear. Not enough air pressure. Increase. Worn or damaged piston. Replace. See Repair on page 17. Hand valve closed or clogged. Open, clear. -
Page 17: Repair
202a sure Relief procedure. Do not use pressurized air to 202b remove the guide sleeve or the piston. D200 3 in. Ram Piston Rods 202j Always service both cylinders at the same time. When 202k you service the piston rod always install new o-rings in the piston rod seal and ram piston. - Page 18 Repair Disassemble Ram Piston Assemble Ram Piston 1. Complete steps 1-4 from Disassemble Piston Rod 1. Install new o-rings (2h, 2c) and lubricate piston (2e) Seal and Bearing to remove the end cap from the and o-rings. piston rod. 2. Apply medium strength thread sealant. Install piston (2e), washer (2g), and nut (2f) on piston rod (2n).
- Page 19 Repair 3A0233B...
-
Page 20: Parts
Parts Parts 3 in. Ram with EPDM 55 Gallon Platen, 257452 3 in. Ram with Neoprene 55 Gallon Platen, 257453 3 in. Ram, 257461 Detail A 66, 65 02938 (9 ft) 20 See Detail A 53, 54, 55 20 (6 ft) r_257453_3a0233_1c 3A0233B... - Page 21 Parts 3 in. Ram with EPDM 55 Gallon Platen, 257452 3 in. Ram with Neoprene 55 Gallon Platen, 257453 3 in. Ram, 257461 Ref. Part No. Description Qty. 1‡ 255286 RAM, 3 in. 2‡ 255328 PISTON, assembly 3 in. ram; includes 2a-2n BEARING, ram end cap 107092 PIN, spring, straight...
- Page 22 Parts 3 in. Ram with Integrated Air Controls, 24C769 3 in. Ram with Integrated Air Controls and 55 Gallon EPDM Platen, 257435 Detail A Not included with 24C264 ti10767a Detail A ti11078a 53, 54, 55 r_257435_3a0233_4c 3A0233B...
- Page 23 Parts 3 in. Ram with Integrated Air Controls, 24C769 3 in. Ram with Integrated Air Controls and 55 Gallon EPDM Platen, 257435 Ref. Part No. Description Qty. RAM, 3 in. 255328 PISTON, assembly 3 in. ram; includes 2a-2n BEARING, ram end cap 107092 PIN, spring, straight O-RING O-RING...
-
Page 24: Accessories
Accessories Accessories 200 Liter (55 Gallon) Platen Drum Position Clamp Set for D200 Ram, 206537 Platen with EPDM Seals, 255663 (Includes two clamps) Attach to ram cylinders to center Platen with Neoprene Seals, 255664 drum in place and prevent drum from moving. -
Page 25: Platen Mounting Kit 222776
Accessories Platen Mounting Kit 222776 Platen Mounting Kit 247337 See page 11 for mounting instructions. Required for See pages 12 for mounting instructions. Required for mounting Check-Mate 450, 800, 1000, and 2100 pumps mounting Fire-Ball 425, 10:1, 50:1, and 75:1 pumps. on the ram. -
Page 26: Dimensions
Dimensions Dimensions (ram down) r_257435_3a0233_1c Ram Model in. (mm) in. (mm) in. (mm) in. (mm) in. (mm) in. (mm) D200 102.3 (2599) 64.8 (1646) 21.0 (533) 25.0 (635) 38.0 (965) 42.0 (1067) Weight Platen Size Gallons (Liters) Maximum Weight 51 (23) -
Page 27: Technical Data
Technical Data Max air input pressure (ram) / Air inlet size D200 - 3 in. dual post, 55 gal. (200 L), 30 gal. (115 L) 150 psi (1.0 MPa, 10 bar) / 3/4 npt(f) Max fluid, air working pressure, and weight For Check-Mate pump packages, see manual 312376. -
Page 28: Graco Standard Warranty
With the exception of any special, extended, or limited warranty published by Graco, Graco will, for a period of twelve months from the date of sale, repair or replace any part of the equipment determined by Graco to be defective.
Need help?
Do you have a question about the D200 and is the answer not in the manual?
Questions and answers