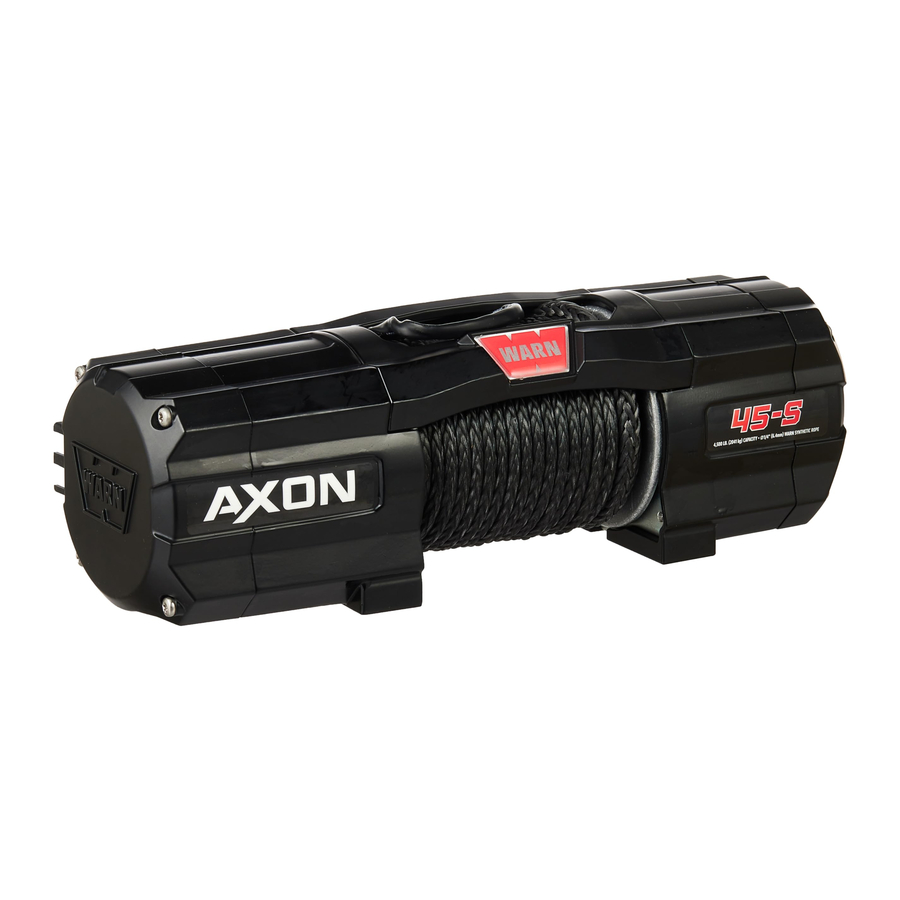
Warn VRX 25 / 35 / 45, AXON 35 / 45 / 55 / 55-S / 45-S / 35-S Manual
- Operator's manual (71 pages) ,
- Operator's manual (71 pages)
Advertisement
Introduction
This manual provides important safety information and instructions on how to operate your winch. It is important to read ALL instructions and safety information BEFORE installing and operating your winch.
As you read these instructions, you will see WARNINGS, CAUTIONS, NOTICES and NOTES. Failure to observe these instructions could lead to serious injury or death. WARNINGS are safety messages that indicate a potentially hazardous situation which, if not avoided, could result in serious injury or death. CAUTIONS are safety messages that indicate a potentially hazardous situation which, if not avoided, could result in minor or moderate injury. CAUTIONS and WARNINGS identify the hazard, indicate how to avoid the hazard, and advise of the probable consequence of not avoiding the hazard. NOTICES are messages to avoid property damage. NOTES are additional information to help you complete a procedure. PLEASE WORK SAFELY!
SAVE THIS MANUAL and other product literature for future reference and review frequently for continuing safe operation.
Instruct all users of this product to review this manual before operating this product.
Additional Product Literature Available Online:
- Basic Guide to Winching Techniques
- Provides a basic understanding of the winch and teaches basics of proper winching techniques. It is a valuable resource to help winch safely and efficiently.
- Product Specification and Performance Data
- Provides product specifications, performance data and replacement parts information.
- Other product literature specific to some products
Go to www.warn.com for additional or replacement product literature available to view/download.
KNOW YOUR WINCH
Before you begin, you should familiarize yourself with your WARN® winch and each of its components:

| Motor: | The winch motor is powered by the vehicle's battery. The motor provides power to the gear mechanism, which turns the winch drum and winds the winch rope. |
| Winch Drum: | The winch drum is the cylinder onto which the winch rope feeds. The drum is driven by the motor and drive train. Its direction can be changed using the remote control. |
| Winch Rope: | The winch rope's diameter and length are determined by the winch's load capacity and design. Wrapped around the winch drum and fed through the fairlead, the winch rope is looped at the end to accept the hook's clevis pin. Synthetic winch rope is constructed of a unique ultra high molecular weight polyethylene material and off ers tremendous tensile strength. It is coated with a high temperature urethane and equipped with a temperature resistant sleeve on the fi rst layer for added protection. The synthetic rope's high fl exibility and low weight make it much easier to handle out in the fi eld. |
| Clutch Lever: | The clutch allows the operator to manually disengage the spooling drum from the gear train, enabling the drum to rotate freely (known as "freespooling"). Engaging the clutch "locks" the winch drum back onto the gear train. |
| Contactor: | Using electrical power from the vehicle's battery, the contactor switches power to the motor, enabling the operator to change the direction of the winch drum rotation. * The AXON winch contactor is integrated with the winch motor. |
| Remote Socket (AXON winch): | The remote socket is where the operator plugs in the wired remote control in order to control the winch. |
KNOW YOUR COMPONENTS
 BEFORE YOU BEGIN, take time to fully read all instructions and safety information before installing and operating your winch.
IDENTIFY MOUNTING LOCATIONS
VRX

AXON

MOUNTING
MOUNT YOUR WINCH

Always choose a mounting location that is suffi ciently strong to withstand the maximum pulling capacity of your winch.
Always position fairlead with warning readily visible on top.
Always use class 8.8 metric (grade 5) or better hardware.
Never weld mounting bolts.
Always confi rm required bolt length to ensure proper thread engagement.
Always complete the winch installation and hook attachment before installing the wiring.
WINCH MOUNTING
VRX 25 / 35 - AXON 35

VRX 45 - AXON 45 / 55

VRX

AXON


24.5 Nm (18 ft. lbs.)
| Item | Qty | Description | ||
| A | 2 | M10 x 15 | ||
| B | 4 | M8 | ||
| C | 4 | M8 x 1.25 x 25 | ||
| D | 1 | SOLD SEPARATELY | ||
MOUNT YOUR REMOTE EQUIPMENT
- Disconnect the vehicle battery cables, negative terminal first. All work with electrical wires and cables must be completed with the battery completely disconnected from the vehicle wiring.
![]()
TO AVOID INJURY AND PROPERTY DAMAGE: Use caution if moving or repositioning the vehicle controls so as to not compromise the safe operation of the vehicle. Select a mounting position that will provide clearance for all vehicle controls. Before securing the switch cable with tie wraps, make sure that the handlebars have full range of motion.
HANDLEBAR SWITCH MOUNTING
VRX

AXON

REMOTE SOCKET MOUNTING

DASH SWITCH MOUNTING

ELECTRICAL CONNECTIONS
MOUNT YOUR CONTACTOR (VRX Winch Only)
Never mount contactor with electrical terminals touching metal objects.
Always verify area is clear of fuel lines, fuel tank, brake lines, electrical wires, etc., when drilling.
CONTACTOR MOUNTING (VRX Winch Only)

WIRING YOUR EQUIPMENT
Always remove jewelry and wear eye protection when making battery connections.
Never route electrical cables through or near moving parts.

Always insulate and protect all exposed wiring and electrical terminals.

Always place the supplied terminal boots on wires and terminals.

Never route electrical cables across sharp edges.

Never route electrical cables near parts that get hot.

Never route electrical cables over battery terminals.
VRX 25 / 35

ELECTRICAL CONNECTIONS
VRX 45

AXON 35

AXON 45/55

FIRST TIME OPERATING INSTRUCTIONS
System Check

Always connect red (+) power cable ONLY to the positive (+) terminal of the battery.
Always connect black ground (-) power cable ONLY to the negative (-) terminal of the battery.
Perform system check:
- Check fasteners and make sure they are tight and to proper torque.
- Verify all electrical wiring to all components is correct and be certain that all connections are tight.
- Verify there is no exposed/bare wiring, terminals or cable insulation damage.
- Read The Basic Guide to Winching Techniques completely before operating your winch(www.warn.com).
Once you have performed a system check, you are ready to perform "First Time Operating Instructions".
First Time Operating Instructions
In this section, we'll show you the first time operating instructions for effective basic winchi ng. For complete winch operation and techniques read the Basic Guide to Winching Techniques found online at www.warn.com.
Never use winch as a hoist or to suspend a load.

Never use winch to lift or move persons.

Remote Control:
Always keep wired remote control lead and power cord clear of the drum, rope, and rigging. Inspect for cracks, pinches, frayed wires or loose connections. Damaged components must be replaced before operation.
Never leave remote control where it can be unintentionally activated.
Never leave the winch remote control plugged in when installing, freespooling, rigging, servicing or when the winch is not being used.
The remote control provides control of the power-out (forward) or power-in (reverse) rotation of the spooling drum.
Do not leave the remote plugged into the winch when not in use. Leaving the remote plugged in, may result in accidental activation and/or battery drain.
Clutch Operation:
Never engage or disengage clutch if winch is under load, winch rope is in tension or drum is moving.
NOTICE
Always ensure the clutch is fully engaged or disengaged when operating winch.
The clutch lever is located on the winch housing opposite the motor and controls the clutch position. To prevent damage, always fully engage or fully disengage the clutch lever.
When the clutch is engaged, the gear train is coupled to the winch drum and power can be transferred from the winch motor.
When the clutch is disengaged the drum is in the freespool position and the gear train and winch rope drum are uncoupled allowing the drum to rotate freely.

Spooling Out
Never operate winch with less than 5 wraps of winch rope around the drum. Rope could come loose from the drum.
Always keep hands clear of winch rope, hook loop, hook and fairlead opening during installation, operation, and when spooling in or out.

Always wear heavy gloves when handling winch rope.

Freespooling is generally the quickest and easiest way to spool out winch rope. Before freespooling winch rope out from the winch power-out enough rope to remove any tension on the winch rope. Disengage the clutch. Then manually spool out enough winch rope for the winching operation. See The Basic Guide to Winching Techniques for more information, found online at: www.warn.com.
NOTICE
Do NOT power out more than 30ft without allowing the winch to cool for 20 minutes before powering rope back in. Instead, place the clutch in freespool and pull the rope out by hand.
Always use supplied hook strap whenever spooling winch rope in or out.

Spooling In Under Load
Never exceed winch or winch rope rated capacity.
Always know the Working Load Limit (WLL) of your rope.
Never exceed the WLL of rope or shock load this rope.
Power-in the winch rope evenly and tightly on the drum. This prevents the outer winch wraps from sinking into the inner wraps, binding, and damaging the winch rope.
Avoid shock loads when spooling by pulsing the control switch to take up winch rope slack. Shock loads can momentarily far exceed the winch and rope ratings.
Spooling In Under No Load
Never touch winch rope or hook while someone else is at the control switch, when winch rope is under load or during winching operation.
Spooling with an Assistant: Have the assistant hold the hook strap putting as much constant tension on the winch rope as possible. While keeping tension, the assistant should walk toward the winch while you operate the control switch spooling in the winch rope. Release the switch when the hook is a minimum of 6 ft. (2m) from the fairlead opening.
Spool in the remainder for storage as directed below.
Spooling Alone: Arrange the winch rope to be spooled so it will not kink or tangle when spooled. Be sure any winch rope on the drum is tightly and evenly layered. Spool enough winch rope to complete the next full layer on the drum. Tighten and straighten the layer. Repeat process until the hook is a minimum of 6 ft. (2 m) from the fairlead opening.
Spooling Remainder for Storage
When the hook is within 6 ft. (2 m) of the fairlead, disconnect the hook from the anchor or load. Hold onto the supplied hook strap and hold tension on the winch rope. Slowly powerin the winch by "pulsing" the power-in switch on the remote control until the hook is within 3 ft. (1 m) of the fairlead.
Stop winching in and attach the hook to a suitable anchor point on the vehicle.
NOTICE
Do not power the hook into the fairlead. This could cause damage to the fairlead.
Once the hook is suitably attached to the vehicle, power-in the remaining slack in the winch rope by "pulsing" the power-in switch on the remote control until there is minimal slack in the winch rope.
Overloading/Overheating
Always be aware of possible hot surfaces at winch motor, drum or rope during or after winch use.
This winch is rated for intermittent duty. When the motor approaches stall speed very rapid heat buildup occurs which may cause motor damage.
Double-line rigging (see The Basic Guide to Winching Techniques) will reduce the amperage draw and reduce heat buildup in the motor. This allows longer continual use.
Load Limiter (AXON Winches)
Never engage or disengage clutch if winch is under load, winch rope is in tension or drum is moving.
Never touch winch rope or hook while under tension or under load.
Exceeding the AXON winch capacity will cause the load limiter to trip, which interrupts the power to the motor. This prevents overheating and potential motor damage. At 50% of pulling capacity, the remote indicator turns yellow. At 75% of pulling capacity, the remote indicator turns orange. At 90% of pulling capacity the remote indicator turns red. When the pulling capacity is exceeded the load limiter will cause the remote indicator to fl ash red and the AXON motor to stop. When this occurs, release the load by spooling out. Once the load limiter has tripped, the winch cannot be spooled in until the load limiter is reset by spooling out. Do not attempt to apply the same load if the load limiter has tripped, as this can damage the winch. If the load limiter fails to reset contact an authorized service center.
If the load limiter continues to trip, perform the following actions:
- Reduce the weight of the load.
- Increase the distance of the anchor point. The maximum pulling capacity occurs from the fi rst layer of winch rope on the drum. By increasing the distance between the winch and the anchor point, it decreases the layers of winch rope on the drum, therefore increasing the pulling power.
STRETCHING WINCH ROPE
Always prestretch rope and respool under load before use.
Always inspect winch rope, hook, and slings before operating winch. Frayed, kinked or damaged winch rope must be replaced immediately. Damaged components must be replaced before operation. Protect parts from damage.
Stretching (tensioning) the winch rope is critical to ensure a long product life. Tensioning the winch rope will prevent outer layers of winch rope from pinching and deforming the inner layers.
During its first use, a new winch rope must be spooled onto its drum under a load of at least 500 lbs. (226 kgs).
Use the following instructions to properly stretch the winch rope onto the winch drum.
Always wear heavy gloves when handling winch rope.
- Choose aFLAT AND LEVEL location that is large enough to run out almost the entire length of winch rope.
- Disengage clutch.
![]()
Always keep hands clear of winch rope, hook loop, hook and fairlead opening during installation, operation, and when spooling in or out. - Grasp hook strap and spool out the winch rope to the last 5 wraps on the drum.
- Be sure to check that the winch rope is winding off of the bottom of the drum or the automatic load holding brake will not function properly.
NOTE: If the winch rope is winding off the top of the drum, you have powered the winch "out" instead of "in". Be sure you are powering in.
![]()
Always wind the winch rope on bottom (mountside) of drum.
![]()
NOTICE
For proper function of the winch brake, the winch rope must be spooled onto the drum in the specifi ed direction. *See drum rotation label located on winch. - Once the winch rope is spooled out, engage clutch.
![]()
Always ensure hook latch is closed.
![]()
![]()
Always apply load only to the center of hook.
![]()
Never apply load to hook tip or use hook that is bent or twisted. - Attach the hook end of the rope to a suitable anchor point.
![]()
Always remove any obstacle that may interfere with safe operation of the winch.
![]()
Never wrap winch rope back onto itself. Use a chain or strap on the anchor.
![]()
![]()
Always be certain the anchor you select will withstand the load and the strap or chain will not slip. - Return to your vehicle.
- Back the vehicle away from the anchor point until there is very little slack in the winch rope.
- Set the parking brake, place the vehicle in gear or park and turn the vehicle off.
![]()
Always stand clear of winch rope and load and keep others away while winching. - Exit vehicle.
![]()
Never exit the vehicle with a load on the winch rope. While standing approximately 8 ft. (2.44 m) away from the winch, power-in the winch until all of the slack is wound onto the winch drum.
![]()
Never touch winch rope or hook while someone else is at the control switch, when winch rope is under load or during winching operation.
![]()
Never let winch rope slip through your hands. - With gloves on, hold tension on the winch rope with one hand, carefully push the winch rope to the side of the drum the winch rope is attached to so there are no gaps between each coil on the drum.
- The following steps should be done using two people for proper safety. If you attempt to tension your winch rope alone be sure to always set the parking brake, place the transmission in gear or park and turn the vehicle offevery time you exit the vehicle to inspect the winch rope.
NOTICE
Use care to evenly wrap each layer to prevent damage to the rope.
![]()
Never use remote when vehicle is not in line of sight of operator. - The driver of the vehicle should operate the winch.
- Instruct your assistant to stand to the side of the vehicle and away from the winch rope.NOTE: Your assistant should signal you if the winch rope is winding correctly or incorrectly by watching it move across the fairlead as the winch rope is powered in.
- Start the vehicle and place the transmission in neutral. Then release the parking brake while applying moderate brake pedal pressure.
- Power-in the winch rope to start winching in.
- After winching in for approximately 6 ft. (2m), stop winching.
- Slowly let up off of the brake pedal and then apply the parking brake. This will ensure that there is no load on the winch rope.
- Place the transmission in park or in gear and turn the vehicle off.
- Exit the vehicle and inspect the winch to make sure that the winch rope is being evenly wound onto the winch drum and not sinking into the lower layer. If the winch rope is sinking, power-out the winch rope by pushing the power-out button on the remote control and repeat this step from the beginning with more brake pedal pressure.
- When you are convinced the winch rope is winding onto the winch drum properly, repeat steps until the vehicle is within 6 ft. (2 m) of the winch anchor. Once within 6 ft. (2 m), slowly let up off of the brake pedal and then apply the parking brake. This will ensure that there is no load on the winch rope. Then place the transmission in park or in gear and turn the vehicle off.
- Exit the vehicle. Disconnect the hook from the anchor.
- While holding onto the supplied hook strap, hold tension on the winch rope and slowly power-in the winch by "pulsing" the power-in button on your remote control until the hook is within 3 ft. (1 m) of the fairlead.
- Stop winching in and attach the hook to a suitable storage point on the vehicle.
- Once the hook is suitably attached to the vehicle, power-in the remaining slack in the winch rope by "pulsing" the power-in button on your remote control until there is minimal slack in the winch rope.
NOTICE
Do not power the hook into the fairlead. This could cause damage to the fairlead.


RIGGING
For complete rigging fundamentals, Read the Basic Guide to Winching Techniques, found online at: www.warn.com.
SYNTHETIC ROPE CARE
Synthetic Rope Care:
Cleaning:
- Use low pressure water to clean synthetic rope. Do not use any chemicals.
- Do not direct high pressure water (pressure washers, car washes, etc.) directly between the drum support and drum flange or clutch lever.
- Use low pressure water and a soapy rag or sponge to clean the winch.
- Avoid using chemicals that may damage the finish.
- Thoroughly clean salt residue from the winch as soon as possible to minimize corrosion.
Rope Inspection:
Always inspect winch rope, hook, and slings before operating winch. Frayed, kinked or damaged winch rope must be replaced immediately. Damaged components must be replaced before operation. Protect parts from damage.
When rope is first used, the outer filaments of the rope will quickly fuzz up. This is the result of these filaments breaking and this roughened surface will actually protect the fibers underneath. The condition should stabilize, not progress. If the surface roughness increases, excessive abrasion is taking place and strength is being lost.
Look closely at both the inner and outer fibers. When either is worn the rope is obviously weakened. Open the strands and look for powdered fiber—this is a sign of internal wear.
Localized discolorations could potentially represent chemical attack by anything from gear oil to battery acid. When doubt exists, replace the rope.
Rope should be replaced when:
- Rope bulk anywhere along the length is reduced by 10% or more by abrasion.
- Two or more adjacent strands are cut.
- Flat areas or lumps are found that are not eliminated by flexing rope.
- Excessive fused or melted fibers are found. Any such areas will be stiff and the rope will have a glazed appearance.
- Rope with original bulk.
![]()
- Rope displaying 25% strand volume reduction from abrasion—rope should be replaced.
![]()
- Rope strand showing full volume.
![]()
- Rope strand reduced by 25% abrasion—rope should be replaced.
![]()
- Rope exhibits fi ber-set from compression. A slight sheen is visible. This is not a permanent characteristic and can be eliminated by fl exing the rope.
![]()
- Rope displays two adjacent cut strands—rope should be replaced.
![]()
- Rope with original bulk.


FINAL ANALYSIS AND MAINTENANCE
| Check | Before first operation | After each use | Every 90 days |
| Take time to fully read the Instructions and/ or Operations Guide, and/or Basic Guide to Winching Techniques, in order to understand your winch and its operations | X | ||
| Check fasteners and make sure they are tight and to proper torque. Replace damaged fasteners. | X | X | |
| Verify wiring to all components is correct and be certain that all connections are tight. | X | X | |
| Verify there is no exposed/bare wiring, terminals or cable insulation damage (chafi ng/cutting). Cover any exposures with terminal boots. Repair or replace damaged electrical cable. | X | X | |
| Inspect winch rope, hook, heat sleeve and slings. Frayed, kinked or damaged winch rope must be replaced immediately. Damaged components must be replaced before operation. | X | X | X |
| Keep winch, rope and switch control free from contaminants. Use a clean rag or towel to remove any dirt and debris. | X | ||
| If winch is submerged in water: Power winch rope out and back in about 30 feet. Follow the "Stretching Winch Rope" procedure, in order to dry out winch. | x | x |
Take time to fully understand your winch and the winching operation by reviewing the Basic Guide to Winching Techniques found online at: www.warn.com
For further information or any questions contact:
WARN INDUSTRIES, INC.
12900 S.E. Capps Road, Clackamas
OR USA 97015-8903, 1-503-722-1200,
Customer Service: 1-800-543-9276
Dealer Locator Service: 1-800-910-1122 Or visit www.warn.com.
Don't forget to register your new product at:
www.WARN.com/register
Documents / Resources
References
Download manual
Here you can download full pdf version of manual, it may contain additional safety instructions, warranty information, FCC rules, etc.
Download Warn VRX 25 / 35 / 45, AXON 35 / 45 / 55 / 55-S / 45-S / 35-S Manual
Advertisement


Need help?
Do you have a question about the VRX 25 and is the answer not in the manual?
Questions and answers