Advertisement
Table of Contents
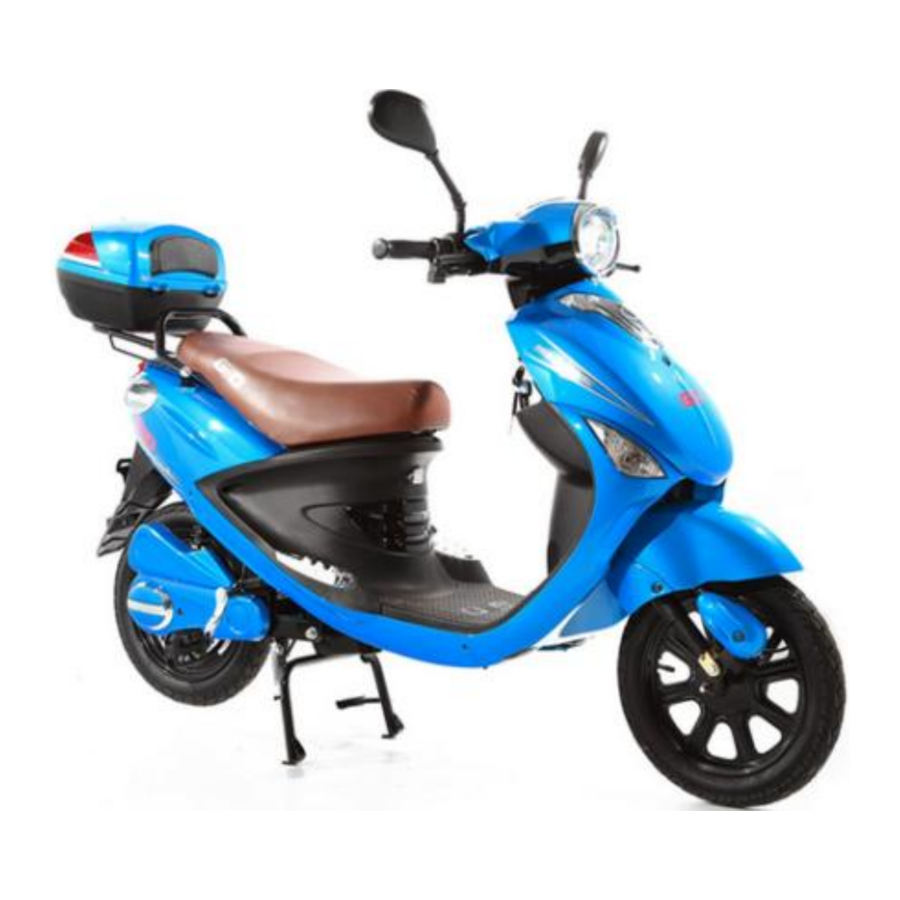
GIO ITALIA, RZR Manual
Introduction
All GIO scooters have similar assembly instructions, however some models have different assembly for the front wheel, different LCD display and battery attachment.
On the following pages you will find assembly instructions and controls description of the GIO ITALIA 500W Electric Scooter.
If any additional information needed, don't hesitate to contact GIO Customer Service Support at:
1-877-274-0480
support@giobikes.com
Tools Requirement:
- Wrench: 15mm + 14mm + 12mm + 10mm or adjustable wrench.
![]()
- Screwdrivers
![]()
- Utility knife
![]()


Accessories and hardware enclosured:

- Front wheel
- Front fork covers
- Mirrors set
- Rear trunk box
- Rain cover
- Charger
- Users manual
- Foot pegs set
- Pedal cranks set
- U-Lock + keys
- Hardware
Setting Up
- Remove the scooter from the crate and place it on a main kick stand
Tools Requirement
![]()


- Remove front wooden base support
Tools Requirement
![]()


- Cut the plastic straps that holding the front drum brake and left side brake lever
Tools Requirement
![]()


- Insert spacer on the right side of the front wheel
Tools Requirement
![]()


-
- Install front brake drum into the front wheel and install the wheel
Note! Make sure the front fork pin is installed properly on the round mount on the brake drum
Tools Requirement
![]()

- Install front brake drum into the front wheel and install the wheel
Note! Make sure the front fork pin is installed properly on the mount on the brake drum
Tools Requirement
![]()

- Install front brake drum into the front wheel and install the wheel


- Tighten up the self lock nut
Tools Requirement
![]()
![]()

![]()


- Install front fork covers
Tools Requirement
![]()


- Install front mirrors.
After adjusting the mirrors, tighten up the support nut!
Tools Requirement
![]()

![]()


- Pedals installation:
- Install both cranks (L+R) on the middle axle. Make sure, that the hole on the crank line up with spring ball on the axle
Tools Requirement
![]()
![]()
![]()
![]()
Note, pedals and cranks are designed for particular sides. Correct side stamp located on the crank/pedal.

- Screw the pedal (foot peg) into the crank. Note, Thread direction: right side - clockwise, left side – counterclockwise.
Tools Requirement
![]()


- Install both cranks (L+R) on the middle axle. Make sure, that the hole on the crank line up with spring ball on the axle


- Rear trunk installation:
Tools Requirement
![]()
- Place rubber spacers on the rear rack.

- Install the hardware and tighten up the bolts.

- Place rubber spacers on the rear rack.
-
- Open the seat compartment and connect the battery:
Tools Requirement
![]()

- Open the seat compartment and connect the battery:
Tools Requirement
![]()

- Open the seat compartment and connect the battery:
-
- Brakes adjustment:
* To adjust front / rear brakes: raise front/rear wheels, turn the wheel by hand and tighten clockwise the adjusting nut. Brakes are adjusted when you hear the pads touching the wheel drum.
Tools Requirement
![]()

- Brakes adjustment:
* To adjust front / rear brakes: raise front/rear wheels, turn the wheel by hand and tighten clockwise the adjusting nut. Brakes are adjusted when you hear the pads touching the wheel drum.
Tools Requirement
![]()

- Brakes adjustment:
-
- Controls description:

- Controls description:

- Controls description:
-
- Speedometer description:

- Speedometer description:

- Speedometer description:


- Antitheft protection system:
- Alarm: To engage the alarm - turn the switch off and remove the key. Press the horn button for a few seconds and release (beep sound sounds) – Alarm is ON. To disengage the alarm – insert the key and turn the switch off - Alarm is OFF.
- Rear wheel lock: To engage - Insert the round key into green lock (located on the left side of the rear wheel) and turn the key clockwise 360°. Turn the wheel by hand to engage the lock. To disengage – Insert the round key into green lock (located on the left side of the rear wheel) and turn the key counterclockwise 360°. Turn the wheel by hand to disengage the lock.


- Serial Number location:
Electric scooter is considered as a bicycle so no registration required, however for your own records you might want to record the serial number of the scooter. The S.N (16.1) located on the back side of the steering column. To see the S.N, remove the plastic cover (16.1) below the gloves compartment – the S.N should be visible.
![]()

![]()


After assembling the scooter, please check all nuts and screws are tighten after your first ride.
Documents / ResourcesDownload manual
Here you can download full pdf version of manual, it may contain additional safety instructions, warranty information, FCC rules, etc.
Advertisement


Need help?
Do you have a question about the ITALIA and is the answer not in the manual?
Questions and answers