Advertisement
Advertisement
Table of Contents

Related Manuals for gio Titan PRemium


Summary of Contents for gio Titan PRemium
-
Page 2: Safety Information
SAFETY INFORMATION Please note the following information to ensure rider safety and to get better use out of this GIO Titan Premium (Titan PR for short) Long Range Mobility Scooter Please read the manual prior to first use and do not permit anyone who hasn’t to operate the vehicle. -
Page 3: Riding Safety
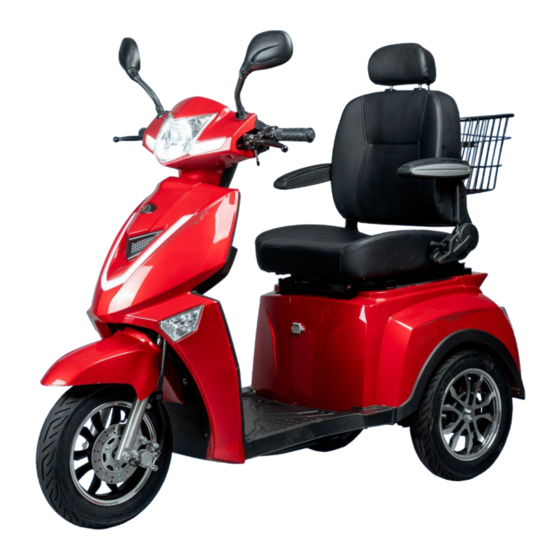
AVOID driving in conditions that may get the electric components wet AVOID driving in conditions where scooter and rider are not visible NEVER use replacement parts not approved by GIO Electric NEVER use a charger not included or approved by GIO Electric... - Page 4 OVERVIEW Congratulations on the purchase of a new GIO Electric Titan PR Long Range Mobility Scooter. It is an easy-to-operate mobility scooter designed for indoor and outdoor use. This stylish recreational mobility scooter doesn’t require any licensing, registration or insurance. (unless required locally)
- Page 5 Keys & Fobs Smart Charger Riding Poncho Security Lock Windshield Kit Step 2 - Installing the Basket First, attach the top to the basket body with the provided hardware. Once attached, locate the premade holes located in the back side of the seat and mount the basket as a whole.
- Page 6 ASSEMBLY continued… Step 3 - Installing the mirrors (If adding the optional windshield, install during windshield installation instead) Align the mirrors with the mounting points above the controls, secure them into place and cover them with black rubber sleeves. Step 4 - Turning on the breaker Each new scooter ships with the breaker in the off position.
- Page 7 Step 5 - Charging The scooter’s charge will have partially depleted over its journey and will need charging before it is ready to drive. See instructions for charging on page 14. Step 6 - (Optional Installation) Windshield The Titan PR includes the previously separate windshield kit at no extra cost.
- Page 8 ASSEMBLY continued… The windshield can now be mounted to the scooter. Locate the 2 metal mounting clips. Remove each mirror, place the mounting clip over the top of the hole the mirror slots into, extending the clip towards the driver. Reinsert each mirror through the mounting clip into its mounting hole and loosely tighten it for now.
- Page 9 Next slide one of those threaded supports into the receiving channel on the metal mounting clips just installed. Carefully flex the windshield to allow the other support to be guided into the mounting clip on the opposite side. Add the 2 remaining nuts to the ends of the threaded part of the support. Using 2 wrenches tighten the nuts towards the mounting clip to secure in place.
-
Page 10: Scooter Diagram
SCOOTER DIAGRAM Mirrors Armrests (flip up) Headlight Seat adjustment levers Front turn signal lights Basket Front wheel & fender Underseat compartment Front fork & brakes Battery & Controller (internal) Handlebar, controls, display Rear turn signal lights Ignition Rear brakes & wheels Covered charging port Motor (internal) Seat &... -
Page 11: Control Diagrams
CONTROL DIAGRAMS Rear brake lever Bag hook Parking brake pin Front brake lever Headlight level switch Twist grip throttle Turn signal switch 3-speed switch Horn button Caution/brake light switch USB power port Light control master switch Coin/cup holder Reverse/neutral/drive switch LCD screen (see below) Ignition Left turn indicator... - Page 12 OPERATING & ADJUSTING Turning the Scooter ON/OFF To turn the scooter on, insert the key and turn clockwise. To turn the scooter off, turn the key counterclockwise from the on position. The LCD screen should activate and the “Ready” light illuminate indicating the scooter is on and ready to ride.
- Page 13 The scooter features control switches next to the throttle grip that adjust driving features. The lower switch labeled RND sets the scooter into reverse, neutral or forward drive. The red switch labeled 1-3 sets the current speed setting of the forward drive when in use. Bring the scooter to a complete stop before switching between forward, neutral and reverse.
- Page 14 Remote fob and alarm system The GIO Titan PR features an alarm system that is controlled with the included fob. This fob can also be used to turn the scooter on and off remotely. To turn on the scooter, press the center power button ( ) on the ⚡...
- Page 15 The charger may become warm or emit a noise while active. If charging does not complete after 12 hours please contact GIO Technical Support. ⚠ THIS scooter will only charge and operate with the breaker in the...
- Page 16 OPERATING & ADJUSTING continued… Storage on the Scooter Each scooter comes complete with several storage options. The largest is the basket on the seat located on the back of the seat. There is a bag hook located just below the LCD screen, perfect for shopping bags or a purse. Adjacent to the bag hook is a small compartment perfect for putting coins, a drink or a cell phone in, it includes a USB power port to charge devices.
-
Page 17: Maintenance And Care
MAINTENANCE & CARE The GIO Titan PR requires minimal maintenance which can be performed by most users, a friend or family member, or a scooter technician. Visually inspect the scooter regularly for any signs of damage, especially after any collisions or accidents. - Page 18 Ensure that it is used only when protected by proper shelter that is dry. Avoid dropping the charger. Always disconnect by gripping plugs directly, do not tug on wires. Do not disassemble or attempt to repair a damaged battery or charger, contact GIO customer service to order replacement parts.
- Page 19 In the event there is decreased brake performance or the brakes feel spongy when applied please contact GIO Technical Support or seek out a local service provider qualified to maintain hydraulic brakes.
-
Page 20: Troubleshooting
Troubleshooting Issue Possible Cause Solution Battery gauge doesn’t Loose connection near the Check connections, tighten register anything power switch or battery pack. loose connections when scooter is ON Battery is completely Charge battery discharged. Scooter turns ON and Motor wire is loose or Check connections near the has battery charge disconnected... - Page 21 Charger overheating and Check or replace charger shutting off prematurely Charger doesn’t Battery or charger issue Discontinue use, contact complete charging, GIO Technical Support light stays red continuously. Charger extremely Damaged charger Discontinue use, replace hot, emits odor, charger sparks etc The tips above are meant as a basic guide.
-
Page 22: Specifications
Specifications Motor: Rear differential 48v 500w Battery: 48v 20ah lead acid Brakes: Front / Rear Hydraulic Disc Tires: 10” D3.00 Tubeless Top Speed: 15mph (24 km/h) Range per Charge: Up to 30 miles (50km) Charge Time: 8-10 hours Dimensions: 62” x 28” x 48” (157cm x 72cm x 122cm) Ground Clearance: 2.5"... -
Page 23: Warranty
Warranty The following details are applicable to all scooters sold directly to customers by GIO. If this product was purchased via an Authorized Dealer please refer to the warranty coverage provided by the dealer and contact them directly for warranty related claims or assistance.
Need help?
Do you have a question about the Titan PRemium and is the answer not in the manual?
Questions and answers