Table of Contents
Advertisement
Quick Links
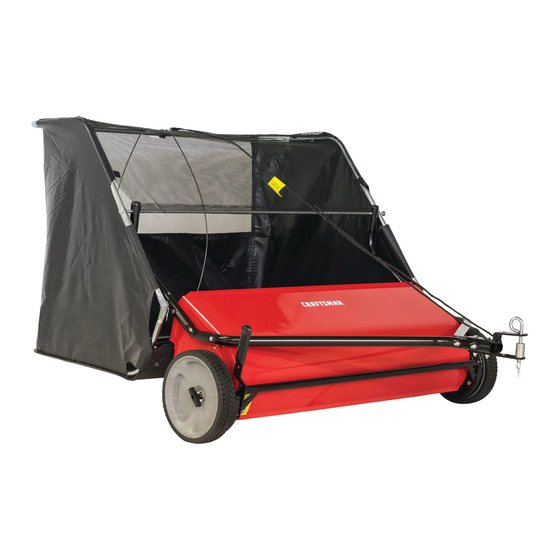
42" High Speed Lawn Sweeper
Balayeuse de pelouse haute vitesse 42 po
Barredora de césped de alta velocidad de 42"
IF YOU HAVE QUESTIONS OR COMMENTS, CONTACT US.
POUR TOUTE QUESTION OU TOUT COMMENTAIRE, NOUS CONTACTER.
SI TIENE DUDAS O COMENTARIOS, CONTÁCTENOS.
1-888-331-4569
INSTRUCTION MANUAL | GUIDE D'UTILISATION | MANUAL DE INSTRUCTIONES
WWW.CRAFTSMAN.COM
CMXGZBF7124266
Advertisement
Table of Contents

Related Manuals for Craftsman CMXGZBF7124266


Summary of Contents for Craftsman CMXGZBF7124266
- Page 1 42" High Speed Lawn Sweeper Balayeuse de pelouse haute vitesse 42 po Barredora de césped de alta velocidad de 42" CMXGZBF7124266 IF YOU HAVE QUESTIONS OR COMMENTS, CONTACT US. POUR TOUTE QUESTION OU TOUT COMMENTAIRE, NOUS CONTACTER. SI TIENE DUDAS O COMENTARIOS, CONTÁCTENOS.
-
Page 2: Safety Warnings
If you have any questions or comments about this or the capability of the towing vehicle to safely pull any product, call CRAFTSMAN toll free at: and stop with the sweeper attached. Stay off of 1-888-331-4569. -
Page 3: Carton Contents
ENglISh CARTON CONTENTS PART NO. DESCRIPTION PART NO. DESCRIPTION – – – Sweeper Housing Assembly 41751 Hopper Bag 49766BL1 Bag Arm Tube 47477 Rear Hopper Tube 46777BL3 Hitch Tube, L.H. (Left Hand) 49765BL1 Upper Hopper Tube 24192BL1 Hitch Bracket 48726 Lower Hopper Tube 23687BL1 Hitch Bracket, Bent... -
Page 4: Hardware Package Contents
ENglISh HARDWARE PACKAGE CONTENTS SHOWN FULL SIZE PART NO. DESCRIPTION PART NO. DESCRIPTION 46782 Hex Bolt, 5/16-18 x 3" Lg. 48130 Hitch Spacer, 3/4" 43224 Hex Bolt, 5/16-18 x 2-1/4" Lg. 46867 Clevis Pin, 1/4" x 1-3/4" 43084 Hex Bolt, 5/16-18 x 1-3/4" Lg. 48365 Clevis Pin, 1/4"... - Page 5 ENglISh ASSEMBLY Step 4: (Fig. 3) 1. Attach the brush assembly with the black brush retainer to the right end of the brush shaft using two hex bolts Step 1: Remove Parts From Carton (D) and nylock nuts (F). The brush retainer marked with black ink must be placed to the middle of the sweeper.
- Page 6 ENglISh Step 6: (Fig. 5 & 6) Step 9: 1. The hitch tubes are stamped with a "77L" for the left 1. Measure the height of the tractor hitch. If the tractor tube and a "76R" for the right tube. The sweeper hitch is less than 10"...
- Page 7 ENglISh ASSEMBLY Step 13: (Fig. 11) 1. Unfold the hopper bag, reverse the fold of the mesh Step 12: (Fig. 10) wind screen and then lay the bag out flat with the wind screen on top. 1. Fit the ends of the two upper hopper tubes into the ends of a rear hopper tube.
- Page 8 ENglISh Step 15: (Fig. 13) Step 18: (Fig. 16) 1. Insert the bag frame strap into the stitched sleeve at the 1. Tip the hopper onto its back to assemble the two front edge of the bag bottom. hopper support rods. Place the ends of each rod into the upper and lower rear hopper tubes, bending the rod just Fig. 13 BAG FRAME STRAP...
- Page 9 ENglISh ASSEMBLY Step 22: (Fig. 20) 1. To attach the hopper bag to the sweeper, slide the ends Step 20: (Fig. 18) of the bag arm tubes into the ends of the hitch tubes and secure with two clevis pins (J) and hairpin cotters 1.
-
Page 10: Operation
ENglISh OPERATION BRUSH HEIGHT ADJUSTED Fig. 21 APPROXIMATELY MID-WAY Attaching to a Tractor 1. Place the tractor and sweeper on a flat level surface. 2. Set the sweeper height adjustment handle to about the middle of its adjustment range. 3. Attach the sweeper hitch to the tractor hitch, arranging the 3/4"... -
Page 11: Maintenance
ENglISh OPERATION Wheel Cleaning & Lubrication • Every year, remove the wheels and clean the gear teeth Brush Height Adjustment and the teeth on the back side of the wheel. After • To adjust your sweeper brushes to the best operating cleaning, lubricate the axle, and the teeth on the gears height, loosen the wing knob and push down on the and the wheel with a light coat of grease. -
Page 12: Service And Ad Just Ments
DRIVE PINION GEAR TROUBLESHOOTING GUIDE BE SURE TO FOllOW SAFETY RUlES AND INSTRUCTIONS For assistance with your product, visit our website at www.craftsman.com for a list of service centers, or call CRAFTSMAN at 1-888-331-4569. PROBlEM CAUSE CORRECTION Wheels skid when sweeping Brushes set too low. -
Page 13: Three Year Limited Warranty
Three Year Limited Warranty CRAFTSMAN® is a registered trademark of Stanley Black & Decker, Inc., used CRAFTSMAN will repair or replace, without charge, any under license. defects due to faulty materials or workmanship for three years from the date of purchase. This warranty does not es una marca registrada de Stanley Black &... -
Page 14: Avertissements De Sécurité
Pour toute question ou remarque au sujet de cet outil a ) Lire les manuels du propriétaire du véhicule et de ou de tout autre outil CRAFTSMAN composez le la balayeuse et savoir comment faire fonctionner numéro sans frais : 1-888-331-4569. - Page 15 FRANÇAIS Étape 5 : (Fig. 4) Étape 10b : (Fig. 9) 1. Fixer l’assemblage de brosse avec le dispositif de 1. Si l’attelage du tracteur est à moins de 25,4 cm (10 retenue rouge à l’extrémité gauche de l’arbre de brosse, po) au-dessus du sol, assembler les supports de en utilisant deux boulons hexagonaux (D) et écrous fixation d’attelage comme illustré...
-
Page 16: Entretien
FRANÇAIS Étape 17 : (Fig. 15) Ajustement de hauteur de brosse • Pour ajuster les brosses de votre balayeuse à la 1. Plier les rabats du sac autour des tubes de la trémie meilleure hauteur de fonctionnement, desserrer le inférieurs et les fixer au bas du sac, en utilisant les bouton à... - Page 17 FRANÇAIS Nettoyage • Retirer l’engrenage baladeur et les rondelles de l’arbre intermédiaire. • Nettoyer le boîtier de la balayeuse avec une brosse • Nettoyer toutes les pièces. douce ou un linge. • Remplacer toutes les pièces usées. • Nettoyer les débris du sac de trémie avec une brosse ou un balai.
-
Page 18: Garantie Limitée De Trois Ans
FRANÇAIS Garantie limitée de trois ans CRAFTSMAN réparera ou remplacera sans frais tout appareil défectueux pour cause de défaut de matériau ou de main-d'œuvre sur une période d’un an à partir de la date d'achat de l'outil. Cette garantie ne couvre pas les pièces en panne pour cause d'abus ou d'usure normale de l'outil. - Page 19 ADVERTENCIA: Para reducir el riesgo de lesiones, lea siguientes puede resultar en descarga eléctrica, el manual de instrucciones. incendio y/o lesiones serias. Si tiene alguna duda o algún comentario sobre ésta u otra herramienta CRAFTSMAN, llámenos al CONSERVE TODAS LAS ADVERTENCIAS número gratuito: 1-888-331-4569. E INSTRUCCIONES PARA FUTURAS CONSULTAS ENSAMBLAJE a ) Lea los manuales del propietario del vehículo y...
- Page 20 ESPAÑOl Paso 6: (Fig. 5 y 6) Paso 12: (Fig. 10) 1. Los tubos del acople están estampados con un "77L" 1. Coloque los extremos de los dos tubos superiores de en el tubo izquierdo y un "76R" en el tubo derecho. La la tolva en los extremos de un tubo posterior de la carcasa de la barredora está...
-
Page 21: Operación
ESPAÑOl Paso 19: (Fig. 17) Velocidad de barrido • No supere 6 m.p.h. (9.6 km/h). .Pruebe a empezar 1. Deslice el extremo de la varilla pivote a través del tubo con una velocidad de 3 m.p.h. (4.8 km/h) (la tercera superior de la tolva. -
Page 22: Mantenimiento Y Ajustes
Para desmontar la rueda derecha, desenrosque CRAFTSMAN reparará o reemplazará, sin cargo, cualquier la perilla de mariposa y quite la rueda y las arandelas. defecto debido a materiales o mano de obra defectuosos Para desmontar la rueda izquierda, quite el tapacubos por un año desde la fecha de compra. -
Page 23: Registro En Línea
• PARA SU SEgURIDAD: Si registra el producto, podremos comunicarnos con usted en el caso improbable que se deba enviar una notificación de seguridad conforme a la Federal Consumer Safety Act (Ley Federal de Seguridad de Productos para el Consumidor). Registro en línea en www.craftsman.com/registration. - Page 24 ENglISh 42" High Speed Lawn Sweeper CMXGZBF7124266 25 26 28 27 22 22...
- Page 25 ENglISh ITEM PART DESCRIPTION ITEM PART DESCRIPTION 67105RD2 Housing Assembly 43182 Bolt, Hex 5/16-18 x 3/4" Lg. 68202BL3 Height Adjustment Tube Ass'y. 47810 Nut, Nylock 5/16-18 Thread 46776BL3 Hitch Tube, R.H. 27234 Retainer, Carriage Bolt 46777BL3 Hitch Tube, L.H. 42425 Bolt, Carriage 5/16-18 x 3-1/2"...
- Page 28 Stanley Black & Decker, Inc., used under license. es una marca registrada de Stanley Black & Decker, Inc., utilizada bajo licencia. est une marque déposée de Stanley Black & Decker, Inc., utilisée sous licence. © 2018 CRAFTSMAN Product Manufactured by: Producto fabricado por: Produit fabriqué...
Need help?
Do you have a question about the CMXGZBF7124266 and is the answer not in the manual?
Questions and answers