Advertisement
Owner's Manual
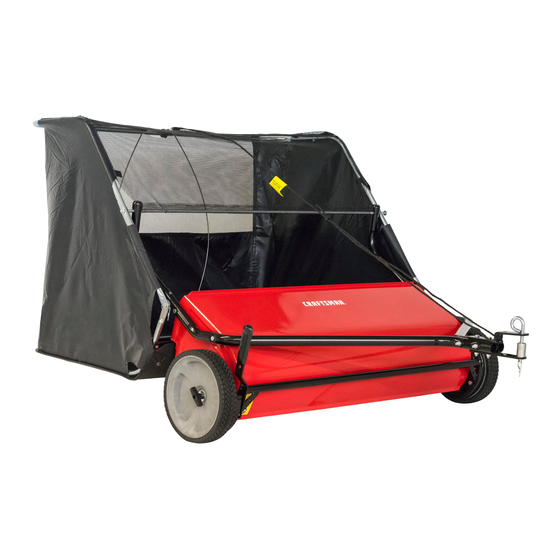
42" HIGH PERFORMANCE
LAWNSWEEPER
Model No's. 486.24222
CAUTION:
Before using this product, read this
manual and follow all Safety Rules
and Operating Instructions.
IMPORTANT:
For Missing Parts or
Assembly Questions Call 1-866-576-8388
Sears, Roebuck and Co., Hoffman Estates, IL 60179 U.S.A.
www.sears.com/craftsman
PRINTED IN U.S.A.
®
• Safety
• Assembly
• Operation
• Maintenance
• Parts
FORM NO. 49997 (12/05)
Advertisement
Table of Contents

Related Manuals for Craftsman 486.24222


Summary of Contents for Craftsman 486.24222
- Page 1 Owner's Manual ® 42" HIGH PERFORMANCE LAWNSWEEPER Model No's. 486.24222 • Safety CAUTION: Before using this product, read this • Assembly manual and follow all Safety Rules • Operation and Operating Instructions. • Maintenance • Parts IMPORTANT: For Missing Parts or Assembly Questions Call 1-866-576-8388 Sears, Roebuck and Co., Hoffman Estates, IL 60179 U.S.A.
-
Page 2: Table Of Contents
TWO YEAR FULL WARRANTY ON CRAFTSMAN LAWNSWEEPER When assembled, operated and maintained according to the supplied instructions, if this Craftsman Lawnsweeper fails due to a defect in material or workmanship within two years from the date of purchase, call 1-800-4-MY-HOME to arrange for free repair (or replacement if repair proves impossible). -
Page 3: Carton Contents
ACCESSORIES AND ATTACHMENTS These accessories were available when the unit was purchased. They are also available at most Sears retail outlets and service centers. Most Sears stores can order repair parts for you when you provide the model numbers of your tractor and sweeper The Front Mount Dethatcher, Model 486.24219 attaches to the lawn sweeper to help loosen and remove dead grass and thatch from the lawn while sweeping. - Page 4 HARDWARE PACKAGE CONTENTS SHOWN FULL SIZE NOT SHOWN FULL SIZE REF. REF. REF. QTY. QTY. QTY. DESCRIPTION DESCRIPTION DESCRIPTION REF. REF. REF. QTY. QTY. QTY. DESCRIPTION DESCRIPTION DESCRIPTION Hex Bolt, 5/16-18 x 3" Lg. Hex Bolt, 5/16-18 x 3" Lg. Hex Bolt, 5/16-18 x 3"...
- Page 5 ASSEMBLY 10" TOOLS REQUIRED FOR ASSEMBLY STEP 4 - ASSEMBLE HEIGHT ADJ. STRAP • Place the spacer bushing (I) into the hole in the height adjustment strap. Place the strap and bushing (1) Hammer between the hitch tubes, aligning them with the rear (2) 1/2"...
- Page 6 STEP 6a - ASSEMBLE HITCH BRACKETS STEP 8 - ATTACH HANDLE • If the tractor hitch is less than 10" above the ground, • Assemble the height adjustment handle to the height place the bent hitch bracket underneath the hitch adjustment tube on the front of the sweeper housing.
- Page 7 ASSEMBLY OF HOPPER BAG STEP 12 - ASSEMBLE TUBES TO BAG • Unfold the hopper bag, reverse the fold of the mesh wind screen and then lay the bag out fl at with the wind STEP 10 - ASSEMBLE UPPER TUBES screen on top.
- Page 8 STEP 13 - ATTACH BAG BOTTOM • Fold the bag fl aps around the lower hopper tubes and attach to the bag bottom using the snaps. See fi gure • Insert the bag frame strap into the stitched sleeve at the front edge of the bag bottom.
- Page 9 STEP 15 - ASSEMBLE PIVOT ROD • Assemble a vinyl cap (S) onto each bag arm tube as shown in fi gure 17. • Slide the end of the pivot rod through the upper • Assemble two palnuts (G) onto the ends of the pivot hopper tube and the hopper mount clamps on one rod using a hammer.
- Page 10 ATTACHING SWEEPER HITCH TO TRACTOR BRUSH HEIGHT ADJUSTED APPROXIMATELY MID-WAY • Place the tractor and sweeper on a fl at level surface. • Set the sweeper height adjustment handle to about the middle of its adjustment range. • Attach the sweeper hitch to the tractor hitch, arranging the 3/4"...
-
Page 11: Operation
OPERATION KNOW YOUR SWEEPER WINDSCREEN HEIGHT ADJUSTMENT HOPPER HANDLE ROPE PIVOT ROD BAG ARM TUBE KNOB HEIGHT HEIGHT ADJUSTMENT ADJUSTMENT STRAP STRAP HITCH BRACKETS HOPPER BAG Hopper Bag Collects grass clippings, leaves and debris. Hopper Rope Permits dumping of hopper bag from driver's seat. Windscreen Helps prevent collected material from being blown out of hopper bag. -
Page 12: Maintenance Schedule
MAINTENANCE CUSTOMER RESPONSIBILITIES • Read and follow the maintenance schedule and the procedures listed in the maintenance section. MAINTENANCE SCHEDULE Fill in dates as you Service Dates complete regular service. Check for loose fasteners Check for loose fasteners Check for worn or damaged parts Check for worn or damaged parts Check for worn or damaged parts Check for worn or damaged parts... -
Page 13: Service And Adjustments
SERVICE AND ADJUSTMENTS BRUSH REPLACEMENT SPROCKET, CHAIN AND PAWL SERVICE NOTE: Brush replacement should be done one brush at IMPORTANT: Do not remove both wheels at the same a time. time to avoid mixing of parts. (The R.H. and L.H. ratchet sprockets are not interchangeable.) Make notes on the •... - Page 14 PARTS REPAIR PARTS FOR MODEL 486.24222 - 42" HIGH PERFORMANCE LAWNSWEEPER...
-
Page 15: Repair Parts List
REPAIR PARTS LIST FOR MODELS 486.24222 - 42" HIGH PERFORMANCE LAWNSWEEPER REF. REF. REF. REF. PART PART PART PART QTY. QTY. QTY. QTY. DESCRIPTION DESCRIPTION DESCRIPTION DESCRIPTION REF. REF. REF. REF. PART PART PART PART QTY. QTY. QTY. QTY. DESCRIPTION... - Page 16 Get it fixed, at your home or ours! Your Home For repair – in your home – of all major brand appliances, lawn and garden equipment, or heating and cooling systems, no matter who made it, no matter who sold it! For the replacement parts, accessories and owner’s manuals that you need to do-it-yourself.
Need help?
Do you have a question about the 486.24222 and is the answer not in the manual?
Questions and answers