Chicco ACTIV3 Manual
- Manual (304 pages) ,
- Instruction manual (96 pages) ,
- Instructions for use manual (76 pages)
Advertisement
- 1 INSTRUCTIONS FOR USE
- 2 COMPONENTS
- 3 TIPS FOR CLEANING AND MAINTENANCE
- 4 CLEANING
- 5 WASHING
- 6 MAINTENANCE
- 7 FIRST ASSEMBLY OF THE CARRY COT
- 8 CARRY HANDLE
- 9 CANOPY
- 10 AERATION SYSTEM OF THE CARRY COT
- 11 FASTENING THE CARRY COT TO THE STROLLER
- 12 REMOVING THE CARRY COT FROM THE STROLLER
- 13 CLOSING THE CARRY COT
- 14 REMOVING THE LINING OF THE CARRY COT / MATTRESS
- 15 LULLAGLIDE STAND: CONNECTING THE ACTIV3 CARRY COT
- 16 LULLAGLIDE STAND: DETACHING THE ACTIV3 CARRY COT
- 17 DISCONNECTING THE ADAPTORS
- 18 Documents / Resources
INSTRUCTIONS FOR USE

READ CAREFULLY AND KEEP FOR FUTURE REFERENCE.

BEFORE USE, REMOVE AND DISPOSE OF ALL PLASTIC BAGS AND PACKAGING MATERIALS AND KEEP THEM OUT OF REACH OF CHILDREN.
Before assembling, ensure that the product and its components have not been damaged during transportation. In this case, do not use and keep out of reach of children.
This product is only suitable for a child who cannot sit up unaided.
- Indicative age of use: 0 – 5/6 months. Maximum weight of the child: 9 Kg.
Only use on a firm ground which is horizontal, level and dry.
Do not let other children play unattended near the carry cot.
- Do not use if any part of the stand is broken, torn or missing.
- Only use spare parts supplied or approved by the manufacturer.
- Do not attach any accessories to the product that have not been supplied by the manufacturer. Any unauthorised modifications made to the product will relieve the manufacturer of all responsibility.
- Always be aware of the risk of open fires and other sources of heat, such Never leave the carry cot in the vicinity of these heat sources.
- Do not add a second mattress on top of the mattress supplied or recommended by the manufacturer.
- Check the product regularly for any signs of damage or wear, especially the handle and bottom of the carry cot. Should any damage or signs of wear and tear be noticeable, do not use the product and keep out of reach of children.
- Use the CHICCO ACTIV3 carry cot with the CHICCO LULLAGLIDE stand only.
- Before lifting the carry cot to carry your baby, make sure that the handle is in the correct position for use (vertical and locked).
- In the carry cot, your child's head must never be lower than their body.
- Be careful when resting the carry cot on the floor or crossing doors with the carry cot.
- Do not leave anything in the carry cot that could pose danger of suffocation, e.g., soft toys, pillows.
- Do not place the carry cot near an-other product that could present a strangulation hazard, e.g., ropes, cords for blinds/curtains.
- Overheating can endanger the life of your child! Take into account the ambient temperature and the child's clothing and make sure your child is neither too cold nor too hot.
- Ask a health professional for advice on how to sleep safely.
Do not use the carry cot to transport your child in the car.
- The carry cot must be fitted on the stroller in the parent facing position ONLY.
- Do not leave anything inside the carry cot that might reduce its depth.
- Ensure that the carry cot is attached properly to the stroller before placing your child inside.
- Products exposed to direct sunlight will heat up; let them cool down before placing your child inside.
- The carry cot is not designed for children to sleep in for long periods of time: this product is not a substitute for a cot.
- It is recommended that the carry cot be aired out after prolonged use.
- Keep the product out of reach of children when it is not being used.
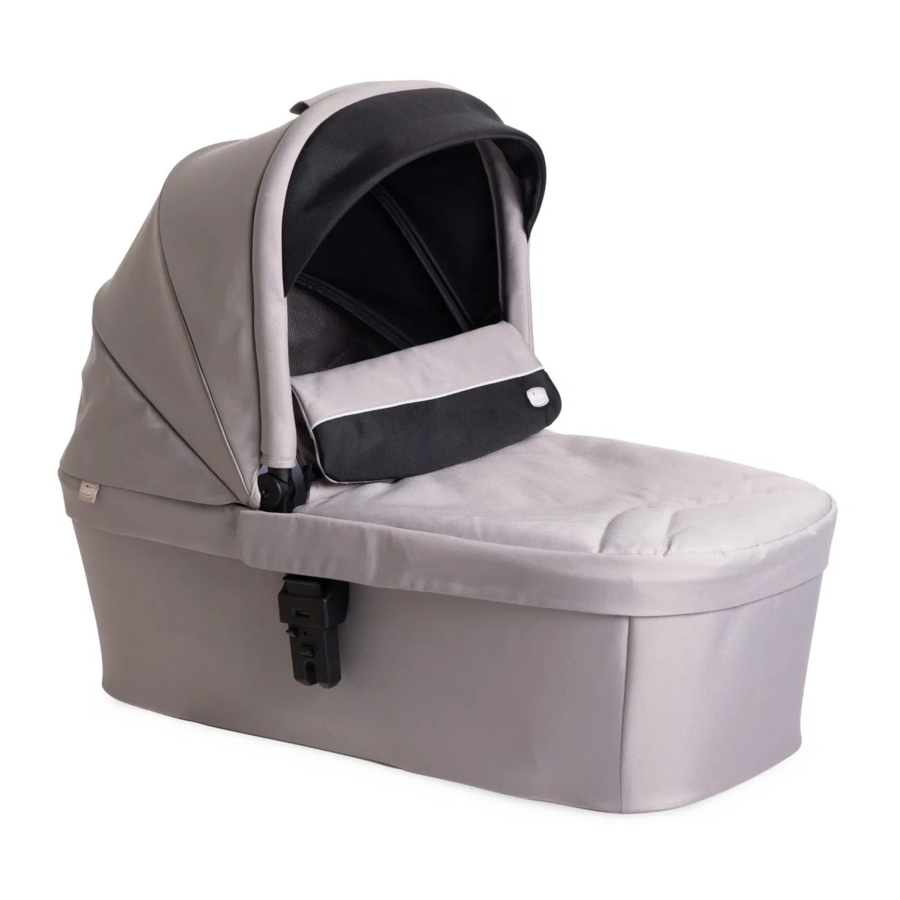
COMPONENTS
The contents of the packaging include:
- a semi-rigid carry cot with canopy
- internal lining
- a cover
- a mattress
TIPS FOR CLEANING AND MAINTENANCE
This product requires periodical maintenance. Cleaning and maintenance should only be carried out by an adult.
CLEANING
Clean non-removable fabric sections using a damp sponge and neutral soap. Periodically wipe the plastic parts clean with a soft damp cloth. To prevent the formation of rust, always dry metal parts if they have come into contact with water.
WASHING
The internal lining of the carry cot and the mattress cover are removable and washable. To carry out these operations refer to the chapter on REMOVING THE LINING OF THE carry cot / MATTRESS.
Carefully follow the washing instructions on the label. In the event that the mattress padding needs to be washed, be sure that it has dried completely before using again. The washing symbols and relative meanings are indicated below:
 Hand wash
 Do not bleach
 Do not tumble dry
 Do not iron
 Do not dry clean
MAINTENANCE
Do not submerge in water. Regularly clean plastic sections with a damp cloth and keep free of dust and sand to avoid friction. Do not leave the product exposed to the sun for a long period of time; the fabrics may discolour. Do not use solvents or abrasive products for cleaning.
FIRST ASSEMBLY OF THE CARRY COT
- To assemble the carry cot, the U-shaped rod needs to be pulled outwards until it is firmly fastened to the stops located on the plastic base (Fig. 1). Repeat this operation with the other rod.
![]()
- Insert the lining in the carry cot and fasten it in place using the zip fastener that runs around the perimeter (Fig.2).
![]()
- Place the mattress on the base of the carry cot (Fig. 3).
![]()
- Raise the carry handle (Fig. 4) to the vertical position (Fig. 4A) making sure that both of the locks on the handle's rotation joints have engaged.

- Put the cover on the carry cot and fix it into place with the designated buttons (Fig. 5).
![]()


For added protection against the wind and cold, lift the fabric flap and fix it in place using the buttons on the cover (Fig. 5A).

CARRY HANDLE
- The carry handle can be lowered. To lower it, push the buttons on the outside of the canopy junctions at the same time and push the handle downwards (Fig. 6).
![]()

CANOPY
- The carry cot includes a fabric canopy built into the frame and handle.
AERATION SYSTEM OF THE CARRY COT
- To increase the ventilation of the carry cot, open the fabric segment on the base of the canopy (Fig. 7).
![]()

FASTENING THE CARRY COT TO THE STROLLER
To attach the carry cot, the Fast In adaptors must be fitted onto the frame of the stroller (please see the section entitled "ATTACHING/ RELEASING ADAPTORS" in the stroller manual).
To make the stroller lighter when installing the carry cot, the seat can be removed. For removal refer to the SEAT REMOVAL section in the stroller manual.
- Hold the handle in transport position (vertical and locked in place) and attach the carry cot to the plastic fasteners on the sides of the stroller with the foot zone facing the handle of the stroller, ease the carry cot onto the frame until both fasteners click into position (Fig. 8).
![]()

Before use, make sure that the carry cot is properly attached by pulling it upwards. Check that the "indicators" both show the colour green.
REMOVING THE CARRY COT FROM THE STROLLER
- With the handle locked in the vertical position (carrying position) press the buttons on the sides of the plastic adaptors (Fig. 9)
![]()
and lift the carry cot off the stroller (Fig. 9A).
![]()


The fastening and releasing operations can be carried out with your child inside the carry cot; however, these operations may be more difficult to execute due to the child's weight. Pay attention when carrying out the aforementioned operations.
CLOSING THE CARRY COT
These operations must be carried out without the child in the carry cot or other children in the vicinity.
- The dimensions of the carry cot can be reduced when it is not being used. Lower the handle by pushing on the buttons at the junctions of the canopy (Fig. 6). Then carry out the operations for the rods described in the "FIRST ASSEMBLY OF THE CARRY COT" paragraph in reverse order.
REMOVING THE LINING OF THE CARRY COT / MATTRESS
- To remove the mattress cover, take the mattress out of the carry cot and remove the cover. To remove the carry cot's fabric lining use the zipper that runs around the perimeter (Fig. 2).
To fit the lining on the carry cot, follow these same steps in the reverse order.
LULLAGLIDE STAND: CONNECTING THE ACTIV3 CARRY COT
- To connect the carry cot, make sure that the stand is in a fixed position. (Fig. 13).
![]()
Before attaching the carry cot, the Mysa Fast-in adaptors will need to be connected to the Lullaglide stand. Connect the adaptors by inserting the plastic part into the lateral graft on the base (Fig. 13A).
![]()
Repeat the step on the opposite side. Once the two adaptors have been correctly assembled on each side, the stand is ready for attaching the carry cot (Fig. 13B).
![]()
To attach the carry cot, hold the handle in the carrying position (upright and locked) and place the carry cot on the adaptors (Fig. 13C components A-B);
![]()
place the carry cot on the frame until you hear the click confirming attachment for both adaptors (Fig. 13D). If present, check that the "indicators" on the plastic connectors both show the colour red. The carry cot can be attached facing in either direction.
![]()


Before use, make sure that the carry cot is properly attached by pulling it upwards.
LULLAGLIDE STAND: DETACHING THE ACTIV3 CARRY COT
- With the handle locked in the vertical position (carrying position) press the release buttons on the sides (Fig. 14)
![]()
and lift the carrying out from the structure (Fig. 14A).

The fastening and releasing operations can be carried out also with your child inside the carried out; however, the child's weight may make these operations more difficult. Pay attention when carrying out the aforementioned operations.
DISCONNECTING THE ADAPTORS
- To remove the adaptors pull on the internal lever and lift upwards (Fig. 15).
![]()

Documents / ResourcesDownload manual
Here you can download full pdf version of manual, it may contain additional safety instructions, warranty information, FCC rules, etc.
Advertisement


Need help?
Do you have a question about the ACTIV3 and is the answer not in the manual?
Questions and answers